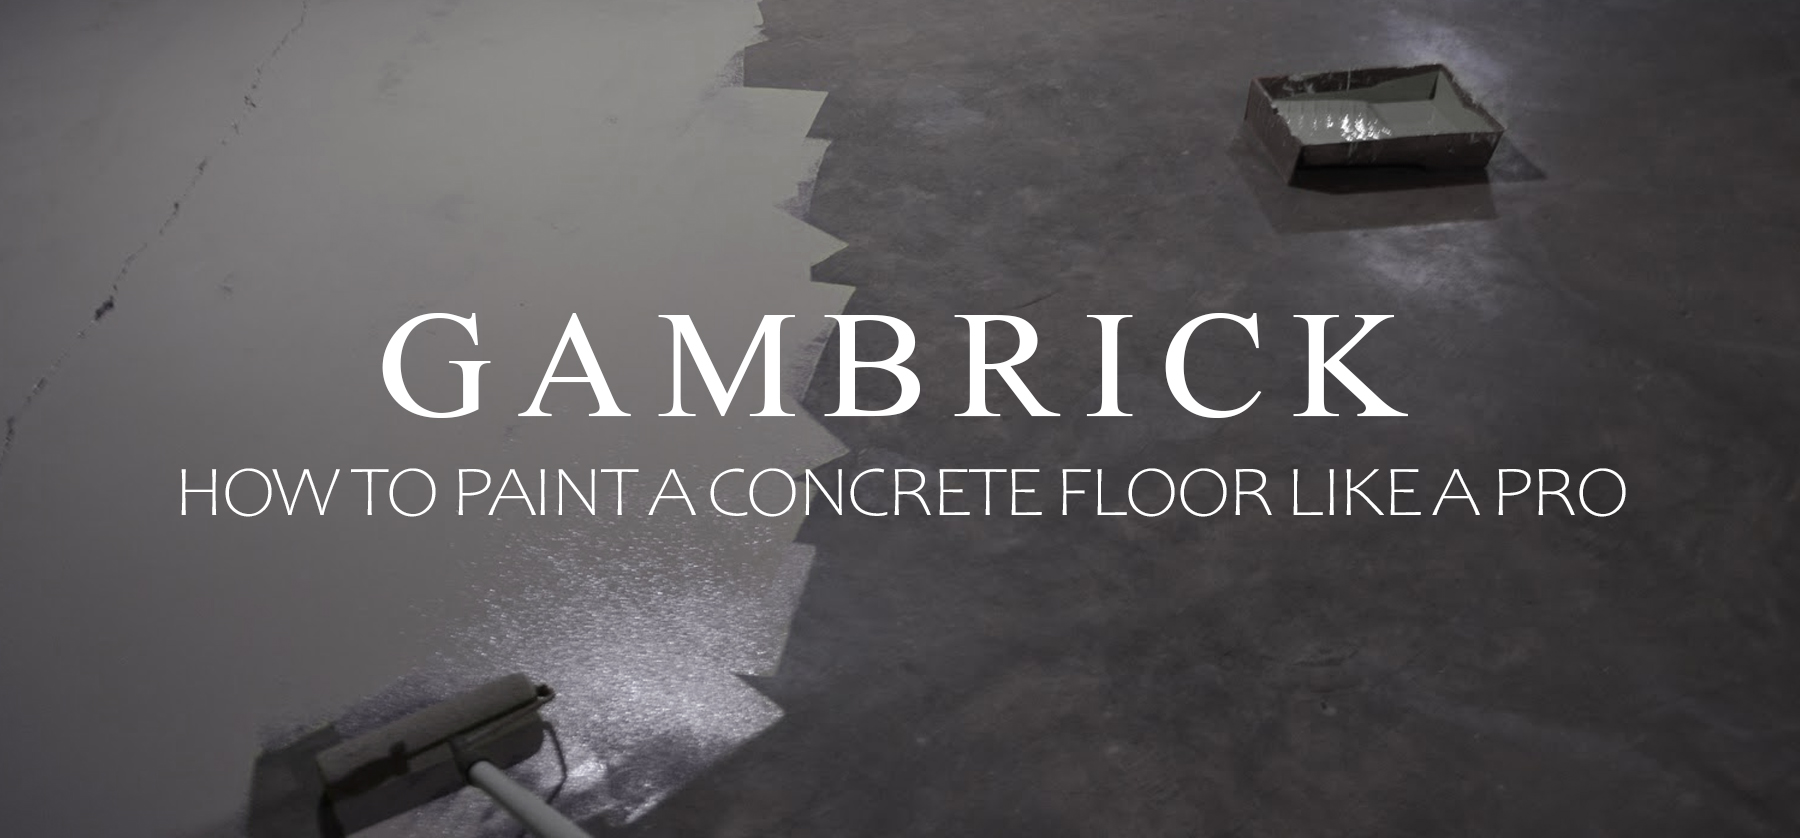
How To Paint Concrete Floors Like A Pro
If you want to paint concrete floors like a Pro the first step is preparation. The floors need to be clean and free of gunk. If you don’t prep the floors you’ll lock in whatever you paint over. This can damage the paint job and possibly the floors. Fill the cracks and gaps with new cement or an approved filler. Repair damage to the floors by cutting out damaged areas and pouring new concrete. Make sure the floors are totally dry because masonry paint only sticks to a clean dry surface. Prime the concrete floors and then apply paint with standard rollers and brushes. Once the paint has dried apply a sealer.
I’ve been a mason for over 25 years and can tell you firsthand that concrete makes a great flooring material. Here in the US they’re primarily found in garages and basements but around the world concrete floors throughout the home are very common. Concrete is extremely durable, affordable, easy to install and holds heat well, which helps with energy efficiency. For some, concrete floors are a beautiful look, but for others, the dull gray of a concrete slab isn’t very appealing. That’s where a fresh coat of paint can help.
When painting concrete floors, use cheap nylon brushes because they’ll get chewed up by the concrete gritty texture, and use thick nap rollers that can penetrate into the concrete’s pores.
Masonry paints are designed specifically for concrete and come in a wide variety of colors. They make it easy to turn an old concrete floor into an attractive surface.
Painting Tools Required
- Wire Brush. Great for cleaning gunk off concrete.
- Vacuum. For cleaning the concrete.
- Paint Scraper. Very important for prep work.
- Paintbrush. For cutting in the edges.
- Paint Roller. Used for large areas.
- Paint Tray & Liner. I recommend using throw away pan liners to keep your paint tray clean.
- Putty Knife. An all around useful painting tool.
- Sticks. Used to stir the paint, primer and sealer prior to application.
- Concrete Crack Sealant. Used to fill small cracks and gaps.
- Paint, Primer & Sealer.
- Painter’s Tape. Used to mask off areas you don’t want paint.
- Pole. A pole comes in handy for scraping and applying paint.
- Utility Knife. Always cut the edge of the painters tape before removal.
Choosing The Best Roller For Painting Concrete Floors
The best paint rollers for painting concrete floors have at least a 1/2 to 1 inch thick nap and are between 4 to 18 inches long. Nap is the thickness of the roller cover that gets covered in paint. Different thicknesses work better on different surface types. In general you should always use a thicker nap for a rougher surface.
Concrete is a very rough and porous material that comes in different types. Some is very dense and smooth while other types are rougher and gritty. Before you select a paint roller you should examine the concrete carefully and determine how rough it is. Thicker nap rollers hold more paint which helps get it into all the concrete’s cracks and crevices. But if your concrete is smooth you can use a roller with a smaller nap.
Paint roller frames come in two common sizes, 4 inches and 9 inches. Another option is a paint roller with a larger frame, or yoke. These are commonly 18 inches in width and are primarily for commercial use. They cost more, but you can get your walls painted in a lot less time.
Paint rollers are a great way to quickly apply paint to large areas while also achieving thorough and even coverage. But not all rollers are created equal.
Using a roller with the right size nap for your wall is very important if you want good coverage. But you also need a roller that’s good quality and can withstand repeatedly rolling over the gritty texture of concrete.
To learn more about choosing the best roller for painting concrete, check out our post The Best Paint Rollers For Concrete.
The Best Paint For Concrete Floors
There are lots of good concrete floor paints available on the market but here are a few I recommend. Always make sure to use a floor paint that’s specifically designer for concrete floors.
- Drylok Concrete Floor Paint. It works great for concrete basement floors. A latex-based paint that’s durable enough for high traffic areas. You don’t need a primer coat and you can paint over previously painted floors. Drylok paint dries fast with low odor and cleans up with soap and water. Available in various colors and white base for custom tinting.
- Rust-Oleum’s Epoxy Shield Basement Floor Coating Kit. A two-part water-based epoxy paint that applies in one coat with no primer needed. The kit includes two cans, one quart activator and one gallon base paint, with decorative chips for texture.
- Kilz Concrete & Garage Floor Paint. A one-part interior/exterior water-based floor paint. Suitable for high traffic areas like sidewalks and garage floors, it applies in one coat to concrete, masonry, stone and brick. Dries to touch in two hours. Re-coat in four hours.
Although these paints all say no primer coat is needed, I still use one. I think the finished floor always comes better when it’s primed first. The primer fills in small gaps and cracks and creates a smooth surface for the paint to adhere too.
How To Prepare The Concrete Floors For Painting
The first and possibly most important step to paint concrete floors is preparation. If you don’t properly prep the floors, you’ll lock in whatever you paint over. This can not only be unattractive but also harmful to the paint and floors.
Gunk, cracks, dirt and other imperfections that you didn’t fix before you painted will remain under the paint and will still be visible. You’ll see their texture under the paint and the floors won’t look smooth.You’ll also lock in whatever you painted which may eventually damage the paint and floors.
Masonry paint is specifically designed for use on concrete. But it only sticks to a clean, dry surface. That’s why you need the surface to be as smooth and clean as possible before you start painting.
All your repair work needs to be done prior to painting too. This can include filling gaps and cracks with cement or fillers and making repairs. There’s no sense painting over damaged or cracked floors.
If the floor has been painted before, you may want to remove old paint with a wire brush or a side grinder before painting. If the prior coat was applied correctly you probably won;t have to remove it. But if it’s peeling, bubbling or chipping then it may be a good idea.
If you don’t properly prep the floors you’ll lock in dirt, the paint may not stick properly, damage may get worse over time and the floors won’t look as good as they should.
Scrape Off The Gunk
Concrete floors in the garage and basement are notorious for gunk. Stuck on paint, oils, glue, caulk, residue grime are all commonly found wherever work tends to happen. Most people don’t clean a concrete floors as well as a finished one when spills happen which eventually results in built up gunk.
Scraping away anything that’s built up on the concrete floor is very important prior to painting. If you don’t, all that gunk will get trapped in by the paint.
Scraping concrete floors isn’t that hard to do. Generally most substances will come right off with a little force. Use a scraper that attaches to an extension pole so you don’t have to get down on your hands and knees.
Use a heavy-duty scraper with a high-carbon steel blade. Carbon steel is strong enough to scrape up just about anything.
Thread a standard extension pole into the scraper handle just like you would a paint roller. Most scraper blades are bent at just the right angle for you to scrape standing comfortably without bending over. Once the tool is secured to the pole start scraping.
If you come across something that just won’t come off try using a cleaning solvent. Let the cleaner soak onto the gunk for awhile and then scrape again. Cleaners can help loosen the grip that stubborn gunk has on the concrete floor.
You can also try banging the gunk with a hammer. Sometimes a good whack will jog the substance loose. Just don’t hit the concrete itself or you could make a mark.
Fill In The Cracks
Once all the gunk is scraped off and cleaned up, start filling the cracks. It’s best to paint a clean and smooth concrete floor that’s free of cracks.
Fill large cracks with cement. You can mix it yourself and apply the cement with a small putty knife or buy cement in a tube. Both methods work great. Just make sure that the new cement is flush with the top of the concrete floor.
For smaller cracks you can use caulk. Make sure to buy something that’s approved for use on concrete.
Grout is another material that works great at filling cracks in concrete. It sets hard and can also be painted.
All concrete fillers adhere best to clean surfaces. Scrape away any crumbling concrete using a wire brush prior to filling the crack. When your all done vacuum the area of dust and small concrete particles.
Once the crack is filled I like to smooth the surface with a putty knife. Make sure the surface is flush with the top of the concrete floor. After the filler dries, sand the crack lightly with 100-grit sandpaper. This final sanding step will make the surface really smooth. If you do it right you won’t be able to see the crack after it’s been primed and painted.
When you paint concrete floors make sure not to rush the prep work. It makes a big difference in the final appearance of the floor.
Make Big Repairs
Any damage areas of the floor more extensive than a crack should be repaired prior to painting.
In most cases the damaged sections of concrete floor will need to be cut out and replaced. For this you’ll need a saw that’s strong enough to cut concrete and a masonry blade.
Always use a good blade that’s designed for concrete.
- For small sections of concrete I like to use a grinding wheel.
- With medium sized areas of concrete I use a circular saw with a 7 1/4 inch concrete blade.
- If I have to cut out larger areas of concrete floor I opt for a full size concrete saw. These are expensive to buy but you can rent them at just about any Home Depot.
Whenever you cut concrete make sure you use safety gear and wear a mask. You don’t want to breathe in concrete dust or get it in your eyes.
Wet the concrete as you cut it. This helps the blade stay cool and cuts down on dust. Most concrete saws have a tap for a hose that sprays water as you cut. But for grinders and circular saws you’ll have to spray the water on yourself.
Once the damaged concrete is cut out you can remove and replace it. I won’t get too much into how to pour the new floor, just make sure to make the new floor level with the old.
When the new concrete is poured and hardened, sand down the edges a little. You want a really nice and smooth transition from the old concrete to the new.
As long as the floor transitions are level and smooth you shouldn’t see the repaired area once the concrete floors are primed and painted.
Clean The Concrete Floors Prior To Painting
If your concrete floors are in a garage or work area, it may be a good idea to use a de-greaser. If you paint over grease spots you can’t see it can cause your paint to peel.
Concrete de-greasing products are usually applied to damp concrete. Make sure you wear the proper protective gear which usually includes gloves, a mask and goggles.
Dampen the floor with as you clean with a spray bottle, pump sprayer, mop or hose.
- Always follow the instructions carefully when using a de-greaser. Scrub the solution into the damp concrete floor with a stiff bristle push broom. Then hose off the solution.
- Remove stubborn rust spots by applying a rust removal solution designed specifically for use on masonry. Scrub the stain with a wire brush. The brush can be held in your hand or attached to an extension pole so you don’t have to get down on your hands and knees while you’re scrubbing.
- A pump sprayer, mop, spray bottle or hose can be used to wet the floors. Saturate the concrete with water, then apply the cleaning solution and scrub.
- Keep a wet/dry vacuum handy to remove excess liquid.
- You may have to wet and scrub the floor more than once to get it completely clean.
- Deep down stains may not come out entirely which is OK. Just make sure to get as much of the surface level stuff as you can.
Once your happy with how clean the floors are, let them dry completely. A fan, heat or simply opening the windows can help speed up the drying process.
Mask Off Areas You Don’t Want Paint
It’s very important to mask off areas where you don’t want paint. Since your painting concrete floors this will probably be the base trim.
When your painting floors masking is easy. All you really need is some wide painters tape. I prefer using Frog tape. But the standard blue painters tape works fine too.
Install masking tape along the bottom of all your base trim and doors. Also mask off baseboard heaters and any pipes that go down to the floor. Basically anywhere you don’t want paint should be masked.
I recommend using 1 1/2inch – 2 inch wide tape.
How To Paint Concrete Floors: Cutting In
When painting a concrete floor, the first paint step is called cutting in. This is done after all your repairs are made, cracks are filled,cleaning is done and areas are taped off. Prep work is done and it’s time to start painting those concrete floors.
- Before you start painting or priming, open a few windows for ventilation and be sure to stir the paint, primer or sealer with a paint stick.
- Pour a medium amount of paint into a small container or cup you can hold in one hand. Paint the edge of the floor along the perimeter of the whole room and around all poles, columns, pipes, etc. Use a 2-1/2-in. angled paintbrush.
- The process of using a brush to paint edges that you can’t reach with a roller is called cutting in.
- Paint far enough from the edges so that a roller can fit. Generally 3-4 inches is enough.
Using A Roller
Once the edges are all cut in you’ll use a roller for the large areas.
- Before you start painting or priming, open a few windows for ventilation and be sure to stir the paint, primer or sealer with a paint stick.
- Start in the corner of the room farthest from the door. Work your way out as you paint in small sections. Be sure not to paint yourself in a corner.
- Fill the roller tray a little over half-full with paint. Too much paint in the tray may spill over.
- Roll paint on the floor evenly in thin coats. Several thin coats is always best.
- Always leave a wet edge as you paint. If you let an edge dry before rolling over it you may be able to see the line.
Prime The Floors Prior To Painting
Priming concrete floors before you paint helps ensure that your new paint will stick and look smooth. You don’t have to do it.Masonry paint can technically be applied directly onto concrete, however the finished floor will look better it’s primed first.
Primer is thick. It coats the concrete and fills in all the tiny cracks. It creates a nice clean surface for paint to stick to. Just about any painted surface benefits from primer. Wood, walls, metal, cars, boats, plastics and concrete should all be primed before painting.
Choose a primer that’s compatible with both concrete and masonry paint. Most concrete floors are painted with epoxy paint. It’s a great choice for floors because it’s durable and can take a lot of abuse when compared to latex paints.
Apply your primer with a paint roller and brush in thin even coats. I like to use at least two coats.
Use a paintbrush to apply the primer around floor posts and at the edges of the floor. Then, once you’ve cut in around the edges, apply the rest with a roller.
Remember to start rolling on the opposite side of the door so you don’t paint yourself into a corner. Work in narrow sections about 2 feet wide.
When applying the primer and paint, try to keep a “wet edge.” Don’t let the section you’ve just painted dry out before you roll the next one. This helps prevent visible roller marks on the finished floor.
Dry The Floors Before You prime
Moisture will prevent the primer and paint from adhering to the concrete. Always make sure the concrete floors are completely dry before you prime or paint them or else you’ll lock in moisture. This can eventually lead to bubbles or peeling.
A great way to tell if the concrete floor is totally dry is with plastic. Place a small piece of kitchen plastic wrap onto the floor and seal the edges with tape. Wait overnight and check the plastic in the morning. If moisture has condensed on the underside of the plastic then the concrete is still holding water.Let it dry another 24 hours and repeat the test.
When no condensation is on your plastic, your ready for primer or paint.
Paint The Concrete Floors
Once the primer has fully dried it’s time to paint the floors.
If the primed floors have sat a while before being painted, vacuum them off. Dust and pollen can settle on the floors which makes it harder for the paint to stick.
Use the same basic method you used for primer with paint. Cut in all the edges with a brush and then roll the larger areas. You can re-use all the same tape too.
Epoxy floor paint typically comes in two parts. You’ll need to mix the parts together according to the instructions on the label before you paint the floor. It’s very easy to do and comes measured for you.
If you use a one part floor paint, stir it really well before painting the floors.
I like to use at least two coats of paint on my concrete floors.
Many floor paints can also have texture added into the paint or applied after the floors are painted. If your using a textured concrete floor paint, follow the directions carefully and apply the texture as and when needed.
Seal The Painted Concrete Floors
If you want your concrete floor paint to last for years and look it’s best, use a good quality sealer.
Once the concrete floor paint dries you can apply the sealer. make sure the floors are totally dry and clean before you apply any sealer. If the painted floors have sat a while, give them a quick vacuum to clean off any dust or pollen from the surface.
Choose a sealant that’s no only for use on concrete floors but also compatible with the type of paint you used. For example, if you used epoxy paint make sure to use a sealer that’s designed for epoxy.
Always follow the manufacturer’s instructions for ventilation, temperature, humidity and safety. Wear recommended safety gear as needed.
Floor temperature is very important so make sure you read the instructions and check your floors. It’s common for sealant jobs to be ruined by not paying attention to the cure temperature. The sealer can flake and peel right off if it doesn’t adhere to the painted surface properly.
Use the same application method you used to apply the primer and paint. Cut in the edges with a brush and then roll the large areas. You can even use the same tape.
Let the sealed floor dry completely before walking on it. And make sure to seal your way out of the room. Always start on the opposite side of the room from the door.
As with paint and primer, apply sealer in small areas and keep a wet edge. Sealing over a dry section of sealer can leave a visible edge.
Sealants add a beautiful finish, provide a durable protective coating, and prevent color fading so your floors will look like new for much longer.
Cleanup Tips
Sooner or later every floor painting project will need a bit of cleaning.
- Most concrete primers, sealants, and paints can be cleaned up with just soap and water. Keep a bucket handy to soak your paint brushes and rollers before they dry and harden.
- You can typically reuse the same roller cover for priming and painting concrete floors if you clean it between uses.
- Throw out disposable pan liners but save the pan for future use.
- Clean spills right away before they soak in and dry on flat surfaces.
- When the sealant, primer or paint dries completely, use a sharp utility blade to cut along the edge of the painter’s tape before pulling it off. Cutting makes it easier to pull off, leaving a crisp, clean edge. It also prevents pulling paint with it.
- Wash your roller and paintbrush with hot water and dish soap immediately after you’ve finished.
Double Check Supplies Before You Start
Always double check all your supplies before you start a paint job. The worst thing is running out of material half way through a job. You’ll risk having a coat dry out which may result in visible brush or roller marks.
Make sure you aren’t forgetting anything essential before you get started. If you buy the proper cleaning supplies and throw away covers, your pans can be re-used again and again.
Use a painters kit when possible. They typically include everything you need and cost less.
Most concrete floor paint supplies are the same as what you’d use to paint walls, furniture, ceilings and other objects. Buy quality supplies and keep them clean so you can re-use them again and again.
Concrete Floor Colors
Choosing the right color for your concrete floors is a challenge. Most paints come in white base which you can tiny however you like. This means the color options are just about endless.
What I recommend is bringing a color sample with you to the paint store. It can be really hard choosing a color from swatches and stock colors hardly ever look right. Just about every paint store can color match any color with a laser.
A color sample can be taken from just about anything. Even a photograph can work. Find an example pic online or a color you like somewhere else and have a match paint made. This is always how I get my best results.
Don’t forget about the textures. Textures can be added to the paint prior to painting or applied to the wet paint as it dries. Either way you use them, textures can add a second layer of color to the floor paint.
Painting Concrete Floors Is Easy & Cheap
Painting your concrete floors is easy and cheap.The typical project takes about a day or two but is only about a half days work The reason it takes a few days in total is due to dry times.
The typical cost to paint a garage or basement concrete floor is between $50 – $300 plus supplies.
A big part of the cost is supplies. If you have all the supplies you need, like rollers, pans, brushes and poles, then you can save on the supply cost.
Another big factor is major repair work. Of course this would be in addition to paint costs and would depend on the amount of repairs needed.
Most concrete garage and basement floor paint jobs fall in the $50 – $300 range for primer, cement caulk and paint.
Painting a concrete floor is very easy to do and makes a great DIY project. Just make sure you have good ventilation. Concrete paints and primers can really smell. Follow the directions carefully and use protective gear when needed.
I’ve had great results painting concrete floors and recommend doing it, especially when using additional textures. Textures are a great look for garage floors and keep them from getting slippery.
Summary: How To Paint Concrete Floors Like A Pro
If you want to paint concrete floors like a Pro the first step is preparation. The floors need to be clean and free of gunk. If you don’t prep the floors you’ll lock in whatever you paint over. This can damage the paint job and possibly the floors. Fill the cracks and gaps with new cement or an approved filler. Repair damage to the floors by cutting out damaged areas and pouring new concrete. Make sure the floors are totally dry because masonry paint only sticks to a clean dry surface. Prime the concrete floors and then apply paint with standard rollers and brushes. Once the paint has dried apply a sealer.
I’ve been a mason for over 25 years and can tell you firsthand that concrete makes a great flooring material. Here in the US they’re primarily found in garages and basements but around the world concrete floors throughout the home are very common. Concrete is extremely durable, affordable, easy to install and holds heat well, which helps with energy efficiency. For some, concrete floors are a beautiful look, but for others, the dull gray of a concrete slab isn’t very appealing. That’s where a fresh coat of paint can help.
When painting concrete floors, use cheap nylon brushes because they’ll get chewed up by the concrete gritty texture, and use thick nap rollers that can penetrate into the concrete’s pores.
Masonry paints are designed specifically for concrete and come in a wide variety of colors. They make it easy to turn an old concrete floor into an attractive surface.
If you have any questions or comments about painting concrete floors email any time.

John Mazzuca | About | More Posts |
Custom Home Builder
John Mazzuca is a custom home designer and builder at Gambrick with over 25 years experience in the construction industry. John has designed, built and/or remodeled hundreds of homes, small buildings, and commercial projects. He writes about business, real estate, home building, and household electronics. His work has been featured in Fox Business, Better Homes & Garden, House Beautiful, and more.