How To Use Self Leveling Concrete Like A Pro
I’ve been a mason for over 25 years and can tell you firsthand, one of the best ways to level a floor is self leveling concrete. It’s easy to use and fairly cheap compared with other floor leveling options. You can buy it in bags at just about any home improvement store for around $25-$50 per 40 lb bag. Just mix 4 quarts of water per bag in a 5 gallon bucket with a strong drill and paddle bit. Pour it onto the floor wherever you need leveling. A typical 40 lb bag covers 40 sq.ft. at 1/8″ thickness or 20 sq.ft. at 1/4″ thickness. Set time is around 10 minutes at 70 F.
For larger leveling jobs you can buy self leveling concrete by the pallet. Calculate the square footage of the floor your leveling and the the average depth it’s out of level before ordering your concrete.
If your floor has low spots and high areas to level, you can use self leveler along with resurfacing to get the floor completely level. You can also use some DIY concrete crack fillers to repair small cracks before applying the leveler.
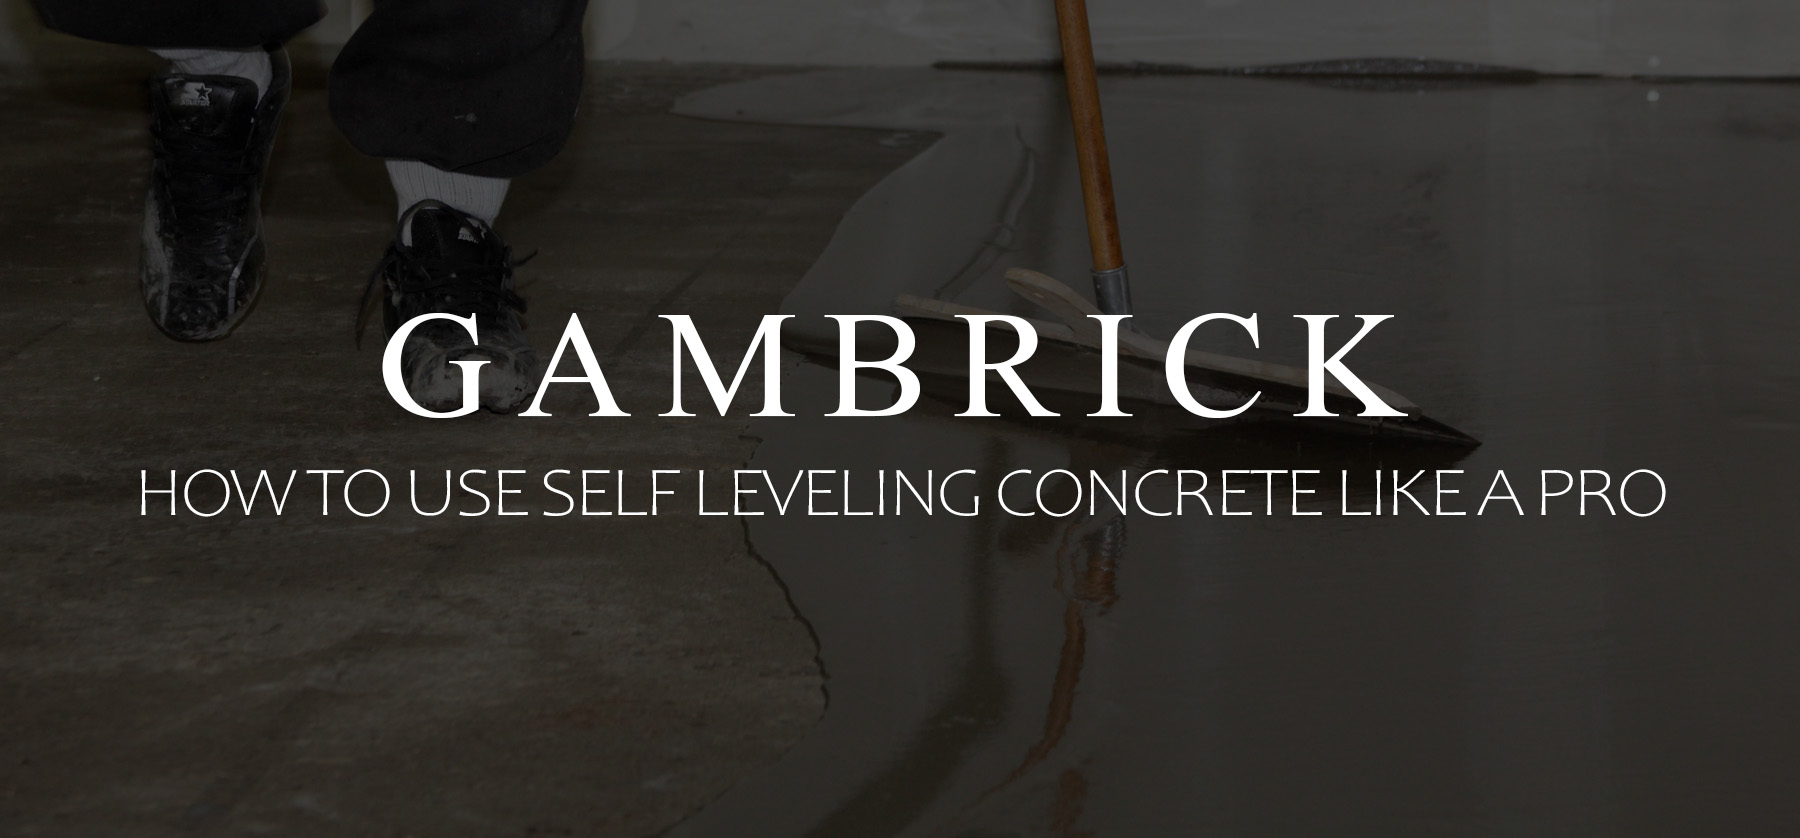
Once leveler is poured on the floor, a pole squeegee is used to spread it around the floor. Just push the floor leveler around and allow it to settle into all the uneven spaces.
Consistency is very important when you use a floor leveler so you have to get the water level just right or it will be weak and prone to cracking. It also sets up very fast, in some cases in around 10 minutes, so work quickly once you mix it.
Advantages
There are lots of advantages to using self leveling concrete over other methods to level a floor. And it’s not just a great DIY option. As a builder, we use floor levelers all the time when remodeling older homes. It’s a great and affordable way to level a floor without doing more extensive and expensive repairs which sometimes aren’t needed. However when structural damage is found that should always be repaired first before doing the cosmetic work.
- Creates a smooth hard and level surface when dry which makes it perfect for laying finished flooring on.
- Can be poured on top of any non flexible surface which makes it very versatile. If your remodeling an older home self leveling concrete can be a real life saver.
- Very easy to use. Even amateurs can level just about any floor with it.
- Dries harder and stronger than most other cement and concrete products which makes it a great choice for structural areas.
- Unlikely to cause allergic reactions. Regular concrete can cause a chromium allergy in workers which sometimes results in occupational asthma.
- More resistant to mold growth in wet conditions than regular concrete.
- Dries extremely fast which means less wasted time waiting for the floors to dry.
- Very cheap when compared to more expensive floor leveling options.
- Less labor intensive than concrete because it’s light weight and self leveling.
- Strong when laid thin. Concrete typically needs to be a few inches thick but self leveler can be as thin as 1/16 inch.
- Crack resistant even when poured in thin layers.
- Can be feathered into other surfaces. You don’t have to use leveler over the entire floor. Use it just where the low spots are.
Disadvantages
While there are a lot of advantages to using self leveling concrete, every product has its drawbacks and flaws.
- It dries fast. In some cases you’ve only got 10-20 minutes to pour and spread until the leveler starts to harden.
- It’s only a surface level fix and not a structural floor repair. For example, if you level off a concrete slab it’ll look great when done, but the slab may keep sinking if you didn’t fix the cause. This would also ruin the new leveler coat and finished flooring. Leveler doesn’t actually fix the reason why your floor is not level.
- It’s very sticky and can ruin any cloth it touches. Splashes will harden on surfaces and should be removed immediately. Can stain some surfaces if not cleaned off right away.
- It’s not expensive compared to other floor leveling options but it’s a lot more than traditional cement or concrete. $20-$40 bucks a bag for 20-40 sq.ft. of coverage is OK but for large areas that can really add up. Contrast that with cement or concrete which is only around $6 for an 80 pound bag.
Types Of Self Leveling Concrete
There are two different types of self leveling concrete: acrylic based and water based. They’re very similar and accomplish the same basic thing but in slightly different ways. This article is written about water based levelers because that’s most likely what you’ll be using. We almost never use acrylic levelers except in very specific situations where the architect or engineer calls for it.
Water Based Self Leveling Compound
Water based self leveling compound uses regular water instead of an acrylic liquid. The result is a surface with a consistency more like normal concrete. It dries very fast, in some cases in as little as 10-20 minutes.
This is the standard floor leveler you can buy in bags at just about any home improvement store. All the advise, information, tips and tricks throughout the article assume your working with a standard water based floor leveler.
Acrylic Self Leveling Compound
Acrylic self leveling compound is made by mixing acrylic liquid polymer and cement powder. The result is a floor that’s slightly more elastic than regular concrete and is resistant to scratches and abrasions. It takes longer to dry than water based self leveling concrete.
This is a specialty product that’s not typically used in residential work. Use it when you need a little more flexibility or a faster dry time.
How To Mix Self Leveling Concrete
A very important part of using self leveling concrete is mixing it properly. It’s a polymer modified concrete that’s highly viscous and does almost all the work for you. But it has to have the correct consistency in order to do it’s job. If it’s too thick it won’t self level like it should. And if it’s too thin, it’ll seep through small gaps in the floor and won’t harden strong. The proper consistency is like a syrup. Thin enough to spread around but not so thin that it’s watery.
Mix each 40 lb bag with 4 quarts of clean water. First, put the water in a 5 gallon mixing bucket. Then slowly add a bag of self mixing concrete while mixing. Mix with a paddle bit powered by a 1/2” heavy duty drill (min. 650 rpm). Mix thoroughly for approximately 2 to 3 minutes to obtain a lump free consistency.
Do not over water. If colored foam appears while mixing the leveler or the sand aggregate settles while pouring the mix onto the floor, you’ve added too much water.
Once you pour it onto the floor there’s no way to correct over watering the mix. You’ll have to clean it up and start again. However, if you see that the consistency is too watery while mixing, simply add more dry mix until it’s right.
How To Use Self Leveling Concrete
One of the best things about self leveling concrete is that you can level a floor all all by yourself. The product levels itself, so you don’t have to worry about making any height adjustments or using a level. The product does all that for you. But that doesn’t mean there isn’t work for you to do. There’s a simple step by step process you should follow which we’ll detail below.
Prep & Clean The Floors
Floor preparation is very important. Floor leveler sets quickly so everything has to be ready once you mix the compound.
All subfloors should be sound, solid, thoroughly clean and free of oil, wax, grease, asphalt, tar, paint, patching compounds, curing compounds and any contaminant that might act as a bond breaker. Contaminants should be removed by mechanical means, such as grinding or similar method.
DO NOT ACID ETCH OR USE SOLVENTS. All subfloors must be thoroughly dry and a minimum of 50° F prior to priming and installation.
Concrete must be sound, solid, and mechanically prepared to obtain a porous surface. Prime your concrete subfloor if your leveler does not contain primer.
The first thing you need to do is inspect and possibly support the floor. Floor leveler is a cosmetic solution not a structural fix. If the reason why your floor is sagging isn’t fixed, floor leveler will just cover the problem up. If the sagging continues, the leveler and new floor will crack. Fix any structural issues you find prior to using the leveler.
Next you’ll prepare the surface. Clear off debris and fill large gaps and holes. Self leveler will fill in small to medium sized gaps but will seep through the big ones.
Make sure the floor isn’t being exposed to moisture. Constantly high moisture levels can degrade the leveling compound over time.
Vacuum or sweep the entire floor to remove dirt. You don’t have to scrub the floor until it’s spotless but get it as clean as you can.
Although some self leveling concrete mixes includes a primer, the majority don’t. In most cases the floors will need to be primed. But not all surfaces need primer. We use it primarily when leveling masonry floors. Check your product’s instructions to see what primer they recommend.
Mix
Once the floor is inspected, supported, cleaned and primed, it’s time to mix your cement. Use a 5 gallon bucket. Pour in 4 quarts of water per 40 lb bag of leveling cement. Add water into the bucket first, then pour in powder slowly as you mix.
Mix the product until it’s highly viscous and lump free. It should look like syrup or thick paint. Use a cement mixing paddle powered by a strong drill. Keep mixing until right before you’re ready to pour. As soon as you stop mixing the cement will start to set.
Pour & Level
Pour the mixture onto the floor at an even pace. Work fast because the compound sets up quickly, but don’t rush. If your only filling a few low spots then pour compound right into the problem areas. Fill them up until the leveler is level with the rest of the floor. You don’t have to pour over the entire floor just to fill a small bowl or a low corner.
However if you’ve got issues all over the floor then plan on covering everything with leveler. Pour and work your way across the floor slowly covering everything with a thin coat. Work towards the exit door so you have a way out of the room when your all done. Don’t pour yourself into a corner with no way to get out. When your done pouring, the entire floor should be covered with a thin coat of leveler.
While the liquid should naturally spread out in an even way and self level, typically we help it a bit with a pole squeegee. Use the squeegee to push product around the floor where you need it.
Once the entire floor is covered just leave it alone. Your job is to prep, mix, pour and spread. The compound does all the floor leveling work for you.
Clean up any drips and splashes on the walls as soon as you can. They’ll be harder to clean later and will probably stain. Clean your tools thoroughly too. Self leveling cement dries fast and very hard.
The leveler should reach its initial set in about 10-20 minutes and then fully harden in a few hours. In that time don’t walk on or put anything onto the floors. Just leave them alone and let them dry. Air flow helps the floors dry faster but isn’t necessary.
When Do I Need To Level The Floor?
I recommend leveling any floor that’s not currently level.
Most people will level a floor before they install new flooring like tile, carpet, linoleum, etc. if there are bowls or dips in the middle of the floor. Low spots are a safety hazard and very ugly. They can also cause squeaks in wood floors. But what about if the entire floor is flat but also pitched. You can have a floor that’s not level but is still flat.
In this case I still recommend using a leveler to even things out. In my opinion every interior floor should be level. It’s not as big an issue if the entire floor is pitched in one direction, but it’s still not correct.
Where Can I Buy Leveler And How Much Will It Cost?
You can buy bags of floor leveler at just about any hardware store. It’s very easy to find. Most bags are 40 lbs which cover approximately 20-40 sq.ft. depending on how thick you pour it and how large the low spots are. You won’t need to pour it very thick over areas that are fairly level. Generally we use 1/4 – 1/8 of an inch over the entire surface plus whatever we need to fill large dips.
At just 1/8 inch of thickness, 40 pounds of concrete leveler should cover about 40 square feet of flooring. Before you start work, you should measure the space you plan to level to figure out how much you’ll need. You should also look at how big the dips are. Buy a bag or two more than you think you’ll need just in case.
A 40 pound bag of leveler can cost between $25 and $50 dollars. It usually comes dry so you’ll also need a bucket to mix it in and the mixing equipment. I use a strong drill with a paddle bit and a 5 gallon bucket.
Remember that these products use cement as a base, which means that both in dry and wet forms they’re caustic. Before working with them, I make sure to wear rubber gloves, goggles and a mask if I’m mixing indoors.
Precautions
As with any cement or concrete product there are a few precautions you should take.
- Wear Goggles. Always keep cement and concrete products out of your eyes. Self leveler can easily splash while you mix or pour. And you don’t want the dry mix in your eyes either so be careful when you handle it.
- Wear Gloves. Concrete and cement products can be harmful to the skin too. I recommend always wearing gloves. If any product gets on your skin, wash it off right away.
- Wear A Mask. Inhaling concrete dust isn’t great for the lungs. I always wear a mask whenever I do concrete work and recommend you do too. I also try to always work in well ventilated areas.
- Temperature. Using self leveler is best in temperatures between 65 and 80 degrees Fahrenheit. Don’t use leveler when it’s too cold because the water inside can freeze and weaken the cement.
- Indoors Only. Self leveling concrete should not be used outdoors.
FAQ
Here’s a list of some of the most commonly asked questions we get asked about self leveling concrete floors.
How Thick Can You Pour Self Leveling Concrete?
The thickness depends on the product you use. But standard thicknesses are between ⅛ inch and 1 inch. However, there are mixes that can be poured as thin as 1/16 inch and as thick as 5 inches.
How Much Does A 40 Lb Bag Of Self Leveler Cover?
A 40lb. bag of standard self leveling concrete should cover around 40 square feet at 1/8 inch thickness or 20 square feet at 1/4 inch.
How Does Self Leveling Concrete Work?
Self leveling concrete is highly viscous with the consistency of syrup, so it doesn’t need to be spread with a trowel.However we do use a squeegee on most jobs to help spread it faster. Pour some syrup onto a dish and let it sit, the syrup will eventually level itself with nothing but it’s own weight and gravity. Self leveler works in the same way.
The formula is designed to dry quickly after pouring and to set stronger than standard concrete. That’s why it’s important to work quickly and why we use a squeegee.
Do I Need To Prime Concrete Floors Before Leveling?
Most self leveling concrete manufacturers advise priming concrete floors before applying the leveler. Some brands will come with a primer included in the mix, so check the instructions for whatever brand you buy.
Priming helps the leveler adhere to the concrete. If you don’t use it, the leveler can crack or moisture can build up between the leveler and concrete.
Can You Use Two Layers Of Self Leveler?
Yes, you can use multiple layers on top of one another. Just make sure the first layer is fully dry and hard before adding a second. Also use a primer just like you would any other concrete floor unless your new leveler has primer built in.
Can You Take Up Leveler If You Mess Up?
Yes, you can demo floor leveler just like you would any other form of cement or concrete. But it’s not easy work. Especially if you’ve poured it on top of concrete. You can also sand down leveler with a concrete or cement sander. If for some reason the leveler has a high spot you can sand it down. This happens sometimes if your not skilled with the squeegee or squeegee too late in the process. With some mixes you only have about 10 minutes of work time so any squeegee work has to be done right at the start.
Tips
Self leveling concrete is great for leveling off old floors without doing significant repairs or spending a fortune. And it’s very easy to use, so almost all home DIYers should be able to work with it.
- The key to doing it right is the mix. Make sure you always use the right amount of water. Too much and too little are both bad. It has to have the correct consistency to flow around the room and self level by itself. But it can’t be too runny or it’ll be weak and seep through small cracks. Think pancake syrup.
- Work quickly. Once you stop mixing start pouring. Some mixtures can start to set in as little as 10 minutes.
- Take your time prepping the floors prior to mixing. There won’t be any time to do it later. Get off all the debris, big gunk and dirt. They don’t have to be spotless but generally clean.
- Prime your concrete floors prior to leveling if the leveler doesn’t have primer built in. Don’t skip this step. The new cement can crack or you could have moisture problems if the leveler doesn’t adhere properly to the concrete.
- Don’t forget to support the floors. Floor leveler is a cosmetic fix, not a structural one. Leveler won’t fix the reason why your floors are not level, they’ll just cover the problem up.
Summary: How To Use Self Leveling Concrete Like A Pro
I’ve been a mason for over 25 years and can tell you firsthand, one of the best ways to level a floor is self leveling concrete. It’s easy to use and fairly cheap compared with other floor leveling options. You can buy it in bags at just about any home improvement store for around $25-$50 per 40 lb bag. Just mix 4 quarts of water per bag in a 5 gallon bucket with a strong drill and paddle bit. Pour it onto the floor wherever you need leveling. A typical 40 lb bag covers 40 sq.ft. at 1/8″ thickness or 20 sq.ft. at 1/4″ thickness. Set time is around 10 minutes at 70 F.
For larger leveling jobs you can buy self leveling concrete by the pallet. Calculate the square footage of the floor your leveling and the the average depth it’s out of level before ordering your concrete.
If your floor has low spots and high areas to level, you can use self leveler along with resurfacing to get the floor completely level. You can also use some DIY concrete crack fillers to repair small cracks before applying the leveler.
Once leveler is poured on the floor, a pole squeegee is used to spread it around the floor. Just push the floor leveler around and allow it to settle into all the uneven spaces.
Consistency is very important when you use a floor leveler so you have to get the water level just right or it will be weak and prone to cracking. It also sets up very fast, in some cases in around 10 minutes, so work quickly once you mix it.
If you have any questions email or leave a comment below.

John Mazzuca | About | More Posts |
Custom Home Builder
John Mazzuca is a custom home designer and builder at Gambrick with over 25 years experience in the construction industry. John has designed, built and/or remodeled hundreds of homes, small buildings, and commercial projects. He writes about business, real estate, home building, and household electronics. His work has been featured in Fox Business, Better Homes & Garden, House Beautiful, and more.