How To Clean Grout
You’ve invested a lot of time and money creating your dream master bathroom. Painstakingly designing every inch. You’ve selected the most beautiful Carrara marble, the perfect soaking tub and and some truly elegant cabinetry. But what good is any of it when that bright white grout is ruined by stains. There’s no way around it, if you want a beautiful bathroom or kitchen, then you’ve got the keep the grout clean. Especially when dealing with today’s trend of white and gray everywhere. Knowing how to clean grout is a must.
The secret to clean looking tile floors, walls and counters? Clean grout. Tile resists dirt and stains and is easy to clean. However grout is porous, which means is absorbs dirt and spills. In other words, it stains easily. No matter how often you wash your tile, it’s not really clean unless you pay special attention to the grout. Those tight, little lines of rough, porous material are sponges for stains. And once your grout has discolored, it can make the entire surface look filthy. You’ll find many suggestions for homemade tile grout cleaner, but most of them aren’t strong enough to tackle the challenges of cleaning grout.
Ahead we’ll go over the best and worst ways to clean grout and tell you what we thick really works.
Why Does Grout Get Dirty?
Grout lines not only look great but also perform an important function by filling in the spaces between tiles. This helps keep tiles firmly in place and creates a water tight surface, preventing surface water from penetrating the sub floor or walls. Grout also gives tiled surfaces a finished look. If you’ve ever seen tiles before grout is installed you’ll know that they just don’t look the same as after the grouts been done. Choosing the perfect grout texture as well as color is just as important as selecting the tiles themselves.
While grout will never be the star of the show, it’s definitely a very important part of the presentation. It’s only when grout fails, becoming stained, cracked, or falling out, that people really take notice of how important clean, well maintained grout really is.
Grout comes in many different types but the three most common are un-sanded, sanded and epoxy. Grout is usually made of Portland cement, an aggregate and water which means it’s a rough and incredibly porous material, like a big sponge, which means it’ll absorb any grease, grime, oils or spills it comes into contact with. The characteristics that make grout such a fantastic material for finishing tile are also what makes it such a perfect spot for dirt, mold and mildew build up. Because of the rough texture of grout, dirt and other contaminants easily find a home in the many pores and ridges of the grout. Another huge problems are liquids. Since grout is so porous, liquids can seep deep into the grout and easily stain it. This is most evident with tile flooring and shower walls that deal with moisture on a regular basis.
Seal Your Tiles Regularly
Sealers fill the grout’s pores, preventing grime, dirt and mold from setting into the porous material. How often you need to seal grout depends on how high traffic a tiled area is, but aim for at least once a year. And for some higher risk areas of the home like bathrooms, twice a year should be your goal. Just be sure to wait at least 24 hours between deep scrubbing and applying the sealer to make sure the grout is completely dry.
Remember that prevention is the best way to keep grout looking like new.

Simple Soap And Water Grout Cleaning
When cleaning grout it’s always a good idea to begin with the mildest cleaning solution. Especially if your surrounding tile is a soft, delicate stone like marble. Keep in mind that whatever cleaner you use on the grout, and whatever cleaning method, will also effect the tile. Highly caustic or acidic cleaners, like bleach or vinegar, can damage tile finishes if not handled properly so save those methods for last. You might be surprised how clean you can get your grout with just some hot soapy water and a brush.
With that said, if grout is badly stained, there are some very effective cleaning solutions that we’ll go over later.
Supplies You’ll Need
- Stiff bristle brush
- Baking soda
- Hydrogen peroxide
- Dish soap
Step 1. Prep the area
Begin by spraying the grout with hot soapy water and scrubbing with a stiff bristle brush. A toothbrush works perfect for this. Scrubbing will remove any dirt or grime on the surface. Follow the grout line as you spray and scrub in a circular and side to side motion.
Step 2. Mix the cleaning solution
Make a paste of two parts baking soda to one part hydrogen peroxide. If you’re working in an area where grout is exposed to grease (i.e. the kitchen), add in a few drops of dish soap, it’s great at breaking up grease.
Step 3. Apply the solution
Spoon the paste onto the grout and allow it to sit for around 10 to 15 minutes. Giving the cleaner time to seep into the pores will result in cleaner and brighter looking grout.
Step 4. Start scrubbing
Using a brush, scrub the grout lines to lift up any dirt trapped in the pores.
Step 5. Rinse the tile
After scrubbing, mix a few drops of dish detergent in with some hot water and use a sponge or cloth to rinse the tile and wipe up the remaining grout cleaner.
Keep it clean: The best way to preserve all of your hard work is by applying a grout sealer. Sealers fill the pores of the grout, keeping dirt and grime out. Before applying the sealer, wait at least 24 hours to make sure the grout is completely dry. How often your grout needs to be resealed will depend both on the sealer you choose and how much use the area gets.
Pro Tip: Drying the tile after every shower can help prevent mold and soap scum buildup. This helps keep shower tile looking fresh and clean.

Home Made Grout Cleanser DIY
Common household products can be used to tackle dirty grout. We’ll show you some proven cleaning methods, plus tips for reducing grime over time. With just a little time and effort, your grout can look as good as new.
What You Need
- Wet cloth
- Baking soda
- Water, vinegar, or hydrogen peroxide
- Mixing bowl
- Grout brush or old toothbrush
- Grout sealer
Step 1: Prep the Area
Begin by wiping down the tile with a wet cloth. Remove any visible dust, dirt, or general grime. If there are any buildups or stains, take the time to clean those, too.
Step 2: Mix Cleaning Solution
The solution you choose to use for cleaning grout depends on the state of your tile grout. For general dirtiness, mix two parts baking soda with one part water. For stained or discolored grout, mix two parts baking soda with one part vinegar. And if you have coarse or fragile tiles, mix two parts baking soda with one part hydrogen peroxide. If desired, you can also use a commercial grout cleaner.
Step 3: Apply Solution
Use a grout brush or old toothbrush to apply the paste to the grout lines. If you’re using the vinegar solution, apply a small amount of paste to an inconspicuous area to make sure the acidic vinegar doesn’t stain the tile.
Step 4: Scrub and Seal Grout
Let paste sit on grout for a few minutes, then scrub all of the grout lines. Rinse clean with water. Let grout dry for 24 hours, then apply a sealer to preserve your hard work.
Pro Tip: To get twice the scrubbing power, use an old electric toothbrush to apply the grout.

DIY Baking Soda Grout Cleaner
Even after mopping, tile floors with dirty grout will still look gross. Fortunately, you can easily clean grout using simple household products like baking soda and water.
What You Need
- Wet cloth
- Baking soda
- Water
- Mixing bowl
- Grout brush or old toothbrush
- Grout sealer
Step 1: Prep the Area
Begin by wiping down the tile with a wet cloth. Remove any visible dust, dirt, or general grime. If there are any buildups or stains, take the time to clean those, too.
Step 2: Mix Cleaning Solution
Make a paste of baking soda and water. Mix 3 parts baking soda to 1 part water and stir together to form a thick paste. This versatile cleaner will work with all colors of grout although the acid in vinegar can potentially damage some softer stones. Try the vinegar on a small area first or a test material if you have one.
Make a 1:1 solution of white vinegar and water in a spray bottle. Mix equal parts vinegar and water in a spray bottle. Use clear white vinegar not red wine or apple cider.
Step 3: Apply Solution
Apply the paste to the grout lines with your finger. Although the baking soda isn’t harmful, wearing rubber gloves can help prevent scratches or irritated skin from the abrasive grout and baking soda.
Step 4: Spray The Baking Soda Paste With Vinegar
Spray the baking soda paste you applied with the vinegar solution. You should immediately see bubbling which lets you know the natural cleaning process has begun.
- Do not use vinegar if your tile is made of natural stone.
Wait for the solution to stop bubbling. The bubbling action is a chemical reaction between the baking soda and vinegar. The reaction generally lasts a few minutes. After the bubbling has stopped the chemical cleaning action is done.
Step 5: Scrub
Scrub the grout lines with a brush. Use a nylon bristled scrub brush, or a toothbrush, to scrub along each grout line. Pay close attention to corners and edges to make these areas clean as well.
Step 6: Wash The Floors
Mop the floor with plain water. Use a mop and plain water to remove the baking soda and vinegar residues. Rinse your mop and change the water often during the cleaning process so you do not continue to spread the residue around the floor.

DIY Cleaning Grout with Oxygenated Bleach
Try cleaning with a DIY oxygenated bleach solution for tougher grout stains. It’s harsher than other home made solutions but much less so than store bought cleansers.
Supplies You’ll Need
- Stiff bristle brush
- Baking soda
- Hydrogen peroxide
- Dish soap
Step 1. Prep the area
Begin by spraying the grout with hot soapy water and scrubbing with a stiff bristle brush. A toothbrush works perfect for this. Scrubbing will remove any dirt or grime on the surface. Follow the grout line as you spray and scrub in a circular and side to side motion.
Step 2. Mix the cleaning solution
Dissolve 2 tablespoons of oxygenated bleach into 2 cups of warm water. Make the solution immediately prior to use for best results. Mix thoroughly to ensure that the oxygen in the bleach is fully activated. The bleach may damage colored grout, but is gentle enough for all tile types.
Pour the oxygen bleach solution onto the grout. Once your test comes back safe, pour enough bleach solution to fully cover the grout lines. Clean one section of the floor at a time to avoid having a completely wet floor.
Step 3. Apply the solution
Test a hidden corner of the grout or a test piece before cleaning the entire floor. Some types tile or grout may be discolored by oxygen bleach. Apply a small amount of the bleach solution to a discrete section of the grout to test.
Step 4. Start scrubbing
Use a nylon bristle brush to scrub the oxygen bleach solution into the grout lines. Allow the oxygen bleach solution to sit on the grout for several minutes for optimum results.
- Scrub the grout with the brush back and forth.
- Be sure to scrub in corners and around the floor’s edges as dirt and grime tends to accumulate here.
Dip the brush into the oxygenated bleach powder to increase cleaning power. If you find a stain that is darker or more noticeable, a stronger solution of oxygen bleach can be made by dipping your wet brush directly into the oxygen bleach powder.
- NOTE Pour a small amount of the powder into a separate container to avoid mixing water into your main container of oxygen bleach powder.
Step 5. Rinse the tile
After scrubbing, mix a few drops of dish detergent in with some hot water and use a sponge or cloth to rinse the tile and wipe up the remaining grout cleaner.
Keep it clean: The best way to preserve all of your hard work is by applying a grout sealer. Sealers fill the pores of the grout, keeping dirt and grime out. Before applying the sealer, wait at least 24 hours to make sure the grout is completely dry. How often your grout needs to be resealed will depend both on the sealer you choose and how much use the area gets.
Pro Tip: Drying the tile after every shower can help prevent mold and soap scum buildup. This helps keep shower tile looking fresh and clean.

Commercial Grout Cleaners At Home Depot
Commercial grout cleaners are available at your local Home Depot and work great for cleaning grout lines. Although it’s important to keep in mind these cleaners contain harsh chemicals and acids so make sure if you use them to read the direction and follow all the safety requirements. They’re are a variety of cleansers on the market that range in strength. Generally the stronger the cleaner the more hazardous it can be because the chemicals and acids are stronger.
The following are 2 really good grout cleaners both sold at Home Depot. They’re both great at cleaning grout but as with any store bought cleaner be careful.
Note: We always recommend home made cleaners, simple soap and water or steam cleaners for cleaning grout. We’d recommend only using a store bought cleaner for stains that don’t come out by other means. Use these as a last resort.
Attack Stubborn Grout Stains
If your grout still looks dirty after you’ve tried everything else, grab a store bought cleaner. Pick one that’s pH neutral if you can. Then grab that stiff brush again and give it another scrub. Elbow grease is so important when cleaning grout. It can be a real pain scrubbing all those little grout lines. A store bought cleaner can make quick work of stubborn stains, but know that you might go through more than one bottle to clean an entire room.
After scrubbing, use a damp sponge or microfiber cloth to remove any remaining grout cleaner. Make sure you’re using a clean cloth and fresh water. If the sponge is dirty or you’re using dingy mop water to rinse, the grout will soak it up and become discolored again.
Pro Tip: We suggest doing a quick test in a small, inconspicuous area or on a sample material if you have one. Wait a few minutes to make sure you don’t discolor or damage anything before moving on to the rest of the grout lines.
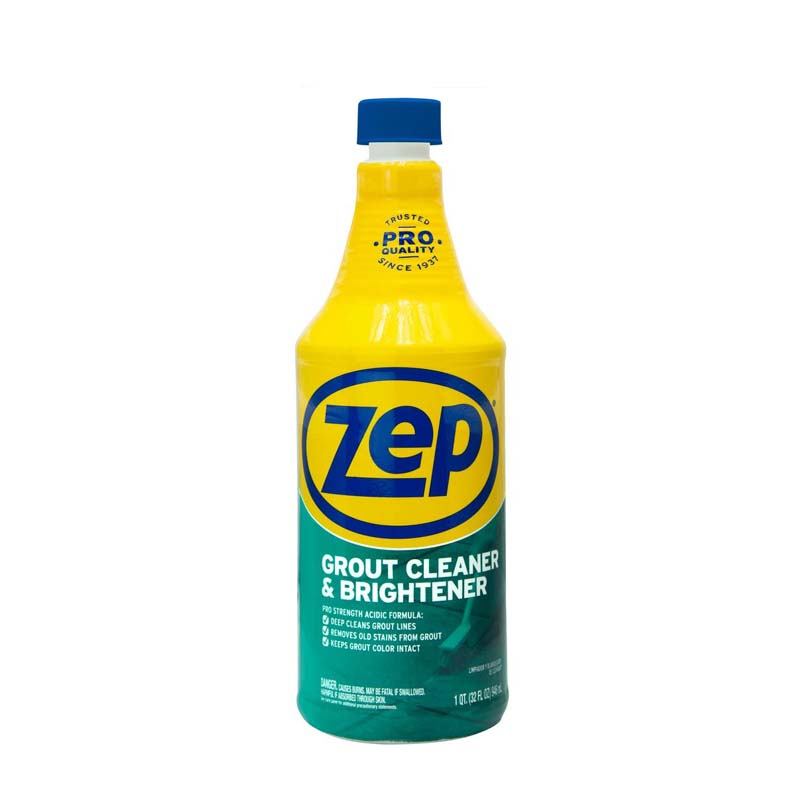
Zep Grout Cleaner & Brightener
Zep Grout Cleaner & Brightener, 32 oz: $6.97
- Pro strength Acidic formula
- Deep cleans grout lines
- Removes old stains from the grout
- Keeps grout color intact
- For use on: White or colored grout lines on tile floors
- Not for use on: Marble, terrazzo, travertine, natural stone, chrome, stainless steel, brass, or Corian
Deep cleaning grout is a tough job, even for Pros. The strong acids can lift deep stains. This professional strength acidic formula quickly restores stained grout lines on tile floors without the need for heavy scrubbing.
- New look, same great Zep formula!
- Safe for use on colored floor grout
- Highly rated as a high quality grout cleaner
Warnings:
Danger: Hazard statements: Causes severe skin burns and eye damage.
Precautionary statements: Prevention: Wash skin thoroughly after handling. Wear protective gloves/ protective clothing/ eye protection/ face protection.
Response: IF SWALLOWED: Rinse mouth. Do NOT induce vomiting. IF ON SKIN (or hair): Take off immediately all contaminated clothing. Rinse skin with water/shower. IF INHALED: Remove person to fresh air and keep comfortable for breathing. Immediately call a POISON CENTER/doctor. IF IN EYES: Rinse cautiously with water for several minutes. Remove contact lenses, if present and easy to do. Continue rinsing. Immediately call a POISON CENTER/doctor. Wash contaminated clothing before reuse.
Disposal: Dispose of contents/container in accordance with local regulation.
Instructions: Quickly restores stained grout lines on floors. Cleans with little or no scrubbing.
Product Review
Zep grout cleaner and brightener is a great product for cleaning grout and definitely does it’s job well, however because of the chemicals it uses, the health risks are serious. As with any store bought cleaner be careful, read the directions and take safety precautions.
Because of the chemicals and acids this product uses it can stain stainless steel appliance.
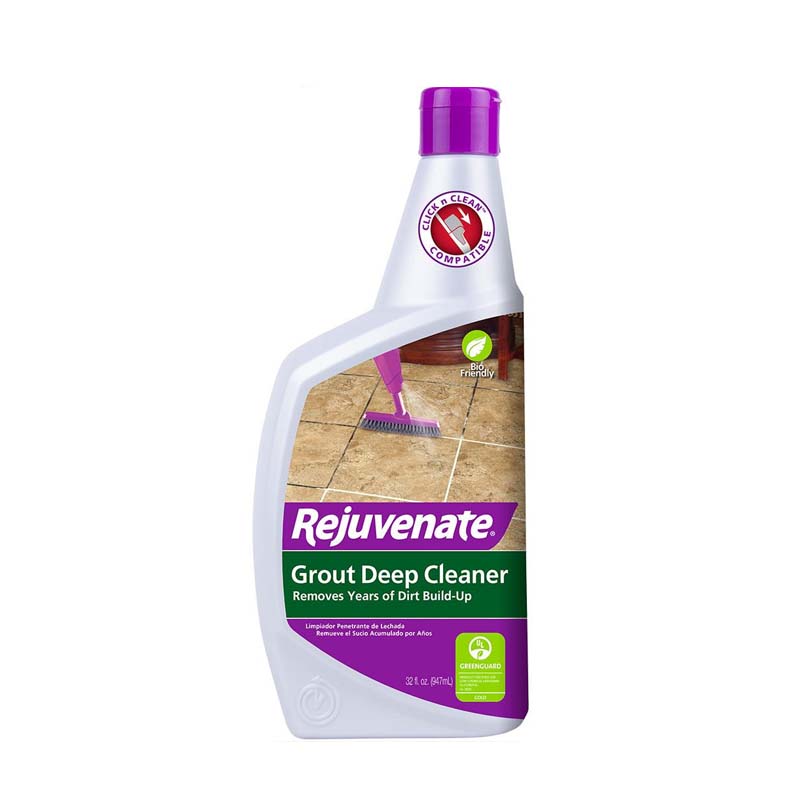
Magic Grout Cleaner
Rejuvenate Tile & Grout Cleaner, 32 oz: $10.97
- Technically-advanced cleaner removes years of embedded grime
- Bio-friendly; cleans without harsh chemicals or acid
- Safely restores your grout’s original color
The Rejuvenate 32 oz. Grout Deep Cleaner is the most technologically advanced grout cleaner available. It removes years of deep embedded dirt and restores your original grout color without any harsh chemicals. It’s Bio-Friendly, safe for the environment, odorless and acid free. Give your tile floor and grout the deep clean it deserves.
- Removes even the most stubborn dirt and grime from your tile and grout
- Reveals your grouts original color
- Earth friendly
- Safe for all tile and grout
- Acid free, non-toxic grout cleaner
- Whitens and brightens grout, removing stains
Warnings:
This chemical is considered hazardous by the 2012 OSHA Hazard Communication Standard (29 CFR 1910.1200)
Product Review
Rejuvenate tile and grout cleaner is another great product for cleaning grout but because of the chemicals it uses the health risks are also quite serious. We’ve used it and it works really well, just make sure to wear gloves, don’t breath in the fumes, and keep it off your skin. Definitely don’t get any in your eyes.
Keep this off of stainless steel finishes as it may stain and check before using it on soft stones like marble.

Using a Grout-Cleaning Machine
Steam cleaners use pressurized steam to clean tile and grout. Make sure to read the instructions carefully before adding cleansers or other types of cleaning additives including soap into the water to avoid damaging the machine. Follow the manufacturer’s instructions for filling and starting the machine carefully. Once you start cleaning simply move the steam cleaner’s wand slowly over the floor the same way you would use a vacuum cleaner on carpet. Pay special attention to high traffic areas. Let the floor dry completely before walking on it.
Periodic steam cleanings along with proper sealing will substantially increase the lifespan of your grout. A steam cleaning can sanitize grout, especially in humid areas that might develop mold such as in a bathroom or shower. A steam cleaner can also use specialized chemicals for different areas of the house. You might not need the same cleaner for kitchen grout as you do for bathroom grout.
While there are several things you can do day to day to keep your grout clean, over time grout can still accumulate grime and dirt just because of heavy use. In this case, a steam cleaning with re-sealing is the best solution to make your grout sparkling clean again.
This is what we generally recommend to clients and what we do ourselves on our own construction projects. We generally steer clear of using harsh chemical cleaners and opt more for home made remedies and using steam to clean all of our grout.
How can I prevent my grout from becoming so dirty?
Since areas with grout such as tiled floors in bathrooms and kitchens are such high traffic areas, it’s near impossible to completely remove or prevent dirty floors forever. Eventually something stronger than simple soap and water may be needed. However, there are some cleaning techniques you can use to touch up your grout and prevent build up.
- Clean high traffic surfaces regularly by vacuuming up loose dirt and contaminants.
- Reduce the amount of detergent you use in water when cleaning the floor. Excess detergent will actually leave behind a residue which attracts dirt, defeating the purpose of cleaning.
- Mop regularly with water. You don’t always need detergent or a cleaning solution. A cleaning with water once weekly will handle most of the dirt in grout and on tile floors.
- Don’t use dirty water. Colored liquids can seep deep within grout and stain the grout. Dirty water falls under that category. Make sure to change your mop water regularly so that you’re not applying dirty water to your grouted surfaces.
Other Grout Cleaning Tips and Tricks:
For lightly stained grout: To clean stained grout, use a strong bleach solution (3/4 cup bleach to 1 gallon water), and scrub with a small brush or toothbrush. Don’t scrub too hard, though; you might damage the grout. Wear safety goggles to prevent the bleach from splattering in your eyes, and keep the work area ventilated. Or try a foaming grout cleaner that might need to soak for several minutes to be effective.
For deeply stained grout: If grout is deeply stained and discolored, replace it. Tile stores sell and sometimes rent tools for removing grout. Run the tool along the grout, taking care not to scratch the surrounding tile. Clean the space between the tiles with a strong bleach solution, then apply new grout and seal it. Do not spill bleach on porcelain because the solution might cause pitting or yellow or pink stains.
For new tile and grout: Because grout is so porous and prone to collecting grime, start your grout-cleaning regimen with prevention. If you recently installed new grout or renewed existing grout in a tile floor, keep that new grout looking its best by using a grout sealer 10–14 days after the grout cures.
Keep Tiles Clean
For most types of tile, including porcelain and ceramic, warm water and dish soap works best. Diluted vinegar is a common recommendation, but remember that vinegar is very acidic. If the solution’s too strong it can weaken and even damage some grout. And vinegar can even etch stone tiles, especially soft stone like marble. Try spraying the solution of water and dish soap, then wipe with a damp microfiber or cloth.
If you do try a vinegar solution don’t use too much. A little goes a long way. Start with a very mild mixture and add more if needed. Once your done cleaning, rinse and make sure to dry everything thoroughly. You don’t want to leave vinegar sitting on the tiles for too long.
Use Steam to Scrub Bathroom Tiles
In the bathroom, you’re probably dealing not only with surface dirt and debris, but also soap scum residue, mold, mildew and bacteria buildup which can be harder to remove. Try this simple trick. Squirt the tiles with surface cleaner then turn on a hot shower with the door closed until steam builds. Wait 20 minutes and then wipe everything clean with a soft cloth. The hot steam will help the cleansers penetrate the porous grout.
Scrub the Grout Lines
How grimy the grout gets may come down to what it’s made of. Traditional grout is a mixture of sand and cement, though more modern options include latex and other polymers to help boost their stain resistance. No matter what stains you’re facing, water, soap and patience will be your two best tools. Start by spraying the grout with hot soapy water and scrubbing with a stiff bristle brush or a grout brush. If you have a steam cleaner on hand, that’s especially effective. Apply steam directly to the grout, then use your brush to scrub in a circular motion. Blot any moisture away with a rag. Once the grout dries it may look good as new.
Heat helps cleansers penetrate into the grout’s pores lifting out set in stains.
Why Does Water Work So Well For Cleaning Grout?
Water has a neutral pH, at 7, which is particularly gentle and safe for cleaning grout. That’s less true for highly acidic cleaners such as vinegar, with a pH around 2 and highly alkaline cleaners such as bleach, with a pH around 12, so you want to use them very sparingly. Steam works best for cleaning grout which is just hot extremely hot water. You generally won’t need much more than that.
Kill Mold
Hot, humid, dark bathrooms with limited circulation are the perfect environments for mold spores to grow. While bleach does effectively kill mold on non-porous surfaces, like tiles and countertops, it’s not as effective on porous surfaces like grout. Try a good mold and mildew stain remover if you have growth.
Once the molds gone make a habit of opening a window or running the bathroom fan after showers. And try drying the tiles or shower door after use. Lowering the room’s humidity will help prevent future mold growth.
Make Adjustments
With your tile, if you notice certain areas are particularly dirty. Say, in the mud room, near the laundry basket or in a particular area of the bathroom. Make some adjustments to prevent future issues. Consider putting down a rug to better protect those areas from dirt and debris build up or make sweeping and mopping a more frequent habit. Keep mold prone areas of the bathroom dry and add in some ventilation once in a while.
Remember prevention is a much better solution for keeping grout clean than any store bought cleanser.
Shower Maintenance
In the bathroom, you’ll prevent major grout cleanings if you keep a towel near the shower to quickly wipe down the tiles after you turn off the water. You may never have to deep clean because there’s nothing building up on the grout. Tell your family to open a window or run the exhaust fan for 10 to 20 minutes after a shower as well, to quickly pull humidity and moisture from the room and help prohibit mold growth on the grout. The idea is to keep things dry since mold and mildew grow in damp humid areas.
Try Peroxide
Pour on some hydrogen peroxide.
Moderate stains may require you to use hydrogen peroxide, which is available in most drug stores. You can use the product straight, or apply a paste made from baking soda and hydrogen peroxide.
Can I Use Chlorine Bleach To Clean Grout?
Use chlorine bleach sparingly on grout.
Chlorine bleach, and commercial cleansers containing chlorine bleach, can be used sparingly in extreme cases to clean grout. One of my go to products, when all else fails, is Clorox bleach mixed with water in a spray bottle. Before you apply, wash and dry the tiles, make sure to get any traces of vinegar off the tiles if you’ve used a vinegar solution in the past. Traces of vinegar mixed with bleach will emit a highly toxic chlorine gas into the surrounding air.
Don’t make cleaning grout with bleach a regular thing. Long term use of caustic cleaners, like bleach, will erode grout. These products should be used on a limited basis.
Can I Sand Away Grout Stains?
Yes. Sanding away stains is an option.
You can use sandpaper to remove surface layer stains from grout. Fold the sandpaper and work the creased edge back and forth along the grout line. You’ll sand away any stains along with a thin top layer or grout. Don’t sand too deep though or you’ll have to re-grout the area. Rinse thoroughly with hot water when you’re done.
Conclusion
There are plenty of natural DIY home made ways to clean grout that really work. Start with soap and water and if that fails slowly move on to harsher cleansers. Steam cleaning works best in our opinion and store bought cleansers should be used as a last resort. When in doubt, hire a professional.
Once you’re done cleaning, let the grout air dry for 24 hours, then put on a silicone based grout sealer to resist future stains and dirt. You’ll need to reapply the sealer every year or two as needed. Remember prevention is key. It’ll keep your grout looking new far longer than any caustic store bought cleanser will.
Knowing how to clean and maintain grout will improve the look and extend the life of your tile.