Problems With Brick Homes
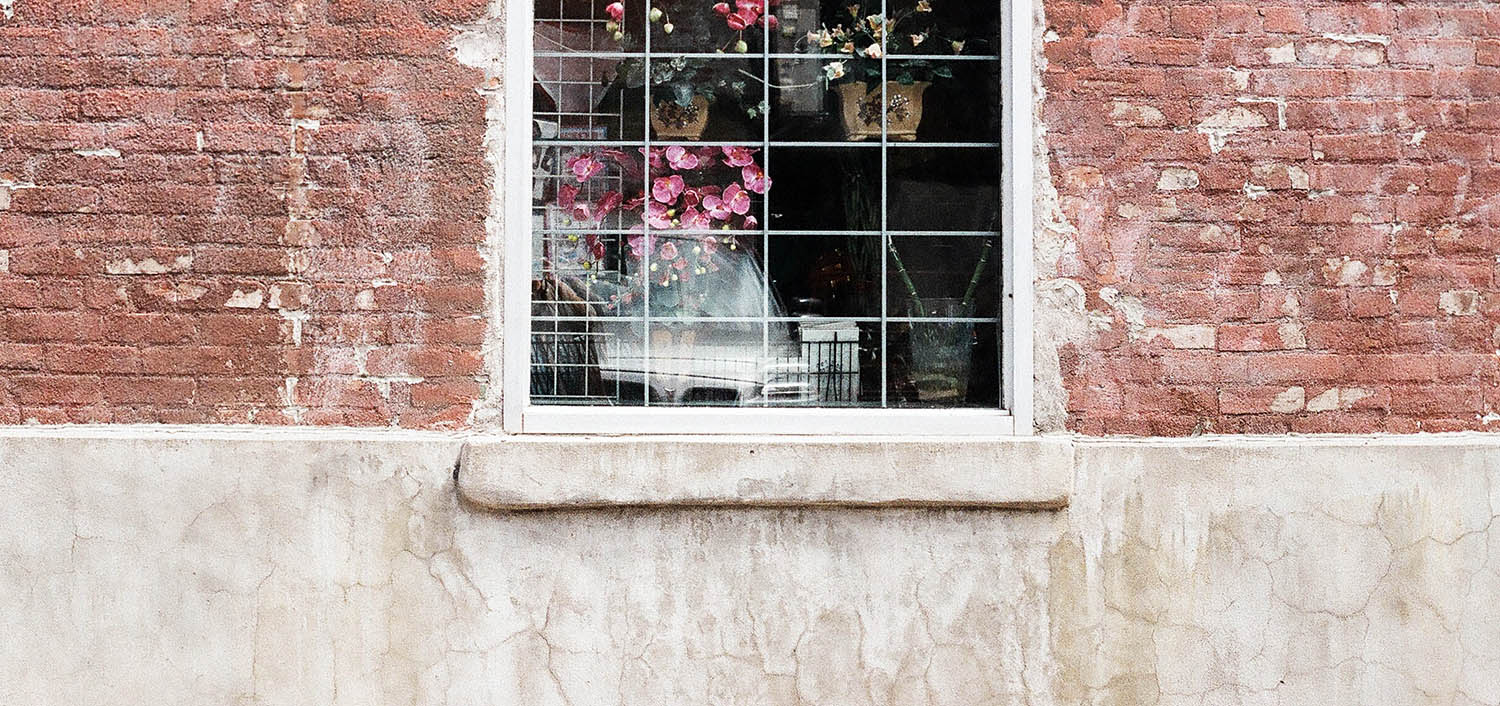
Brick homes have a timeless appeal that’s not going out of style any time soon. They’ve been around for generations and are still being built to this day. But there are quite a few common problems with brick homes you should be aware of before investing your hard earned money in one.
Brick is a fantastic siding and all around building material that’s been used on homes and buildings in one form or another for thousands of years. Brick construction helped develop the ancient world on just about every continent from Asia to South America. Eventually the modern red brick your used to seeing on homes was invented. A mix of clay and other natural materials with some coloring thrown in is shaped and kiln fired into a very strong building material. Stacked with cement mortar they create a super strong wall or siding. And even after generations they’re still considered a beautiful look that brings a high ROI. But they’re not perfect and come with a list of common problems.
This article is all about the common problems with brick homes and what you can do about them. We’ll also discuss some of the pros and cons of brick and ways to prevent issues in the future.
Installation Problems
Brick isn’t like other types of siding or building materials. Each individual brick is stacked by hand using cement mortar. Row after row, bricks are stacked one at a time with matching joint spacing. Even a residential home can have thousands of individual bricks stacked two or even three stories tall. Each row has to be level with matching joint spacing. The joints all have to be tooled and each row has to be level. Good brick work isn’t easy to do and that’s why problems due to poor installation are so common.
By far the most common problems with brick homes are caused by improper installation. It’s a technical job that requires a skilled bricklayer, not a typical mason or DIY pro.
Common problems with brick houses aren’t just about looks, although that’s a big issue in and of itself. But rather it’s about preventing future damage or repairing problems that are already existing. The number one cause of damage to a wood framed house is water. And since brick is a porous masonry product it absorbs moisture like a sponge. That water soaked brick sits right up against your wood framed house so if your bricks aren’t installed correctly or you don’t have a good water mitigation system then you’ll eventually have rot, mold and mildew eating into your house.
The good news is that all of these issues are preventable and most are fixable if you know how.
Mortar Repairs
Bricks are an extremely durable building material but the mortar used inside the joints, which is referred to as pointing, can become an issue.
Any type of brick building is only as good as the mortar that’s used to build them with. If the mortar fails then so will the bricks. Mortar used to build most brick homes doesn’t come out of a bag. Masons mix a combination of sand, lime and cement in a ratio appropriate for the type of job they’re doing. If the ratio is off then your mortar can have big problems down the road.
Mortar is used not only when the bricks are stacked but also after the walls are built. It’s squeezed into the the joints with a mortar bag and then tooled.
The most common result of improperly mixed mortar is deterioration. If the mix is off then your mortar will become soft and brittle. Some other causes of mortar deterioration include moisture penetration, wind erosion, or bricks that have been coated with paint or sealants that don’t allow moisture to escape. Only approved paints or sealants should be used on brick.
Brick Repointing
The way to fix deteriorated brick mortar is a method called repointing.
Repointing involves gouging out the old mortar wherever you find damage and installed new. It’s a time consuming process that requires some skill. The major issue with repointing your brick is matching the color. Your new mortar color will be hard to match perfectly with the old which means you’ll have to repoint the entire house if you want to hide the repairs. An experienced bricklayer can add coloring and additives into the new mortar which will more closely match the color. If done right you can save thousands of dollars in labor and material costs.
Make sure you use the same type of mortar as the old stuff too. This way when the new mortar starts to age it’ll blend in with the old.
Repointing should only be done by a qualified mason that’s experienced with this type of work. It usually costs around $2 to $5 per square foot depending on site conditions. If the bricks are all low and easy to get to then it’s more affordable. But if they’re high up and scaffolding has to be built then things can get expensive.
Improper Brick Mortar
Using the wrong type of mortar is a very common issue. A lot of contractors don’t even know there are different types of mortars let alone knowing which type to use, when and why. That’s why it’s so important to hire a professional brick layer whenever you work with brick. They’ll know which mortar is right for your job and how to mix it.
Common mortar types for bricks include Types N, S, and M.
- Type N is almost exclusively used for above grade brick walls unless another type is specified by the designer. We use type N for installing the bricks and filling all the joints.
- Type S is stronger and stickier than N which makes it better for thin brick veneer. We use Type S for a lot of our repair work.
- Type M is used for below grade work. We generally don’t use this for filling joints unless the specific job calls for it. For example when restoring very old buildings, over 100 years old generally, we need mortar mixes that are a bit softer to blend in with the old material.
Using the wrong mortar type is a very common cause of joint failure.
So why does mortar type matter. When mortar fails it causes cracks. Those cracks lead to water issues and structural failures. Water can seep into the cracks and get behind the brick and possibly even into the house.
The most common type of damage to masonry and wood framed homes is water so it’s imperative that you do everything possible to keep water out.
Bad Brick Joints
Brick joints are another one of the most common problems with brick homes. There can be thousands of joints on an all brick home and any one of them can cause a potential problem in the future. Each joint has to be filled with mortar during and after installation and then tooled into the correct shape. So there are two main issues here.
- If enough mortar isn’t used when your building the walls or if you use the wrong type then joints can be weakened or compromised.
- Improper filling of the brick joints after the bricks are installed can create voids which can eventually crack. They typically crack because the fill is too thin which means it’s weak. A joint should be completely filled solid without voids.
- Properly tooling the brick joint is also important not only for looks but also to help prevent water infiltration.
There are a few types of tools used to shape brick veneer joints. The three most common are the V-joint, concave, and weather joints. These three types provide the most weather resistance and are the ones we recommend and use on all of our brick jobs.
Bad brick joints are pretty easy to spot when your inspecting a brick home. Look for uneven joints. If the brick was done by a pro then all the joints will look uniform. You won’t be able to see voids during a home inspection but if all the tooling was done correctly it’s a safe bet they filled the gaps correctly too.
Another way to spot joint issues are cracks. If you see cracking then there’s a good chance you have voids too.
Bad joints are a sure fire way to spot an unprofessional installation.
No Air Gap
Air flow behind a brick wall is essential for dealing with moisture. Water is by far the number one cause of damage to both a wood framed home and a brick wall. That’s why it’s so important to have a strategy for dealing with it. We keep at least a 1 inch gap between the back of the bricks and the exterior wall sheathing.
It’s important to leave some open holes that go right through the wall at the top and bottom of the brick. These small holes allow for fresh air circulation. If you don’t have the holes air won’t be able to circulate properly which means your bricks won’t dry as well.
At the very bottom of the wall a plastic or metal flashing collects water as it runs down the brick and drains out through small weep holes. Weep holes should be spaced at approximately 32″ or every fourth brick. Also include weep holes and flashing above all your doors and windows to protect them from water.
The air gap behind a brick wall accomplishes two main things.
- Air flow helps dry moisture soaked into the brick. Bricks are porous and absorb moisture like a sponge. The face side of the brick has plenty of air to help dry it out but the back side doesn’t. The gap allows air flow on both sides of the brick which drys it evenly.
- Moisture soaked into the brick will drain out both sides, the face side and the back side. You don’t want water touching the house so an air gap gives water a place to safely drain.
By including an air gap you can help avoid one of the top problems with brick homes which is water.
No Vapor Barrier
A vapor barrier is another essential component of a brick home. It helps prevent any water that gets behind the bricks from damaging your home.
Every wood framed home, no matter what type of siding you install, should have a good vapor barrier. This is also called the house wrap. In the old days it was made out of tar paper but modern homes use materials like Tyvek or Blueskin. House wrap mixed with flashing and a variety of tapes provide a good seal and a barrier against water damage.
The entire exterior of the home should be wrapped tight with your house wrap. All your wrap seams should be taped along with all the window and door flanges. You should also seal any vent penetrations through the walls. Anywhere light or air can pass through will also allow in water. You also need to install all the appropriate flashing wherever needed.
Start the process at the bottom of your home where the sheathing meets the foundation and then work your way up. Overlap your paper and taping so that water runs down the wrap and never behind. By overlapping and taping your seams you prevent water from getting behind the wrap.
By including both a vapor barrier and an air gap behind your brick walls you’ll help prevent water damage like rot, mold and mildew as well as deterioration of the bricks and mortar.
No Expansion Joints
This is another example of poor installation being one of the leading problems with brick homes.
Real brick walls have some amount of expansion during the first few years a wall is built. They’re also subject to some short term expansion and contraction due to exposure from the elements. Most bricks are designed so that an annual temperature differential of 100° F will allow for an expansion of approximately 5/8-inch in a 100′ long wall. To allow for this natural expansion and contraction you need expansion joints. They help prevent cracks and eventual water damage.
Keep in mind that expansion joints are for very long walls. Not all brick homes will need an expansion joint. A brick home with short wall spans probably won’t need them. Even large homes typically have architectural details that break up the walls into smaller sections which eliminates the need for expansion joints. However, if you have a home or building with long span brick walls then you should probably include them.
Expansion joints should be filled with a closed cell backer rod and then sealed with an approved sealant. Under no circumstances should expansion joints be filled with mortar or wood.
Expansion joints located near window or door openings can cause structural problems so it’s important to position them correctly.
An expansion joint is often referred to as a control joint. These same joists are included in most large scale masonry projects even if they’re on the ground. For example, concrete patios have control joints cut into them. Without these joints concrete can easily crack. The same is true with brick homes.
Brick walls are such a stiff way of building that any movement at all can create cracks in the brick or mortar joints.
No Brick Wall Ties
Missing brick wall ties are another one of the common problems with brick houses.
Brick wall ties have been used on brick homes since the 1800s. The ties used today are made of corrugated galvanized steel strips approximately 6-9/16 x 7/8″. One end of the tie is nailed through the sheathing into a stud, and the other end goes into the mortar joint. The ties help anchor a brick wall to the house which gives it a lot of extra strength.
Brick wall ties perform a few primary functions:
- They provide a connection between the home and brick siding
- They transfer some of the lateral loads from the brick to the house frame which strengthens the wall
- In some cases they permit a small degree of in plane movement
- They help prevent differential movement
You can’t see the brick ties once the wall is done, but there are signs you can look for if they were installed incorrectly or left out when the brick walls were built. If a brick wall moves even a little when you push on it or you see cracks in strange places it’s a sign of missing or failed ties.
You can repair a wall with missing ties by using a product such as Simpson Heli-Tie.
When your building a new brick veneer wall, pay attention to proper spacing, fastening and alignment of the ties. Brick ties have to be installed properly if you want them to perform well over time.
Flashing Problems
Flashing problems are one of the more common issues we find with brick homes and another potential cause of water damage. Bad, missing or improperly installed flashing can all lead to major water damage. Flashing protects a home from water penetration in ways and areas that vapor barriers don’t. Water protection is a combined effort and flashing plays a big role.
Flashing is a thin waterproof material that keeps water from getting into places it doesn’t belong. Typically flashing is metal but it comes in other forms. It provides an additional layer of protection around areas most prone to water penetration like windows, doors, skylights, vents and chimneys. This is in addition to other protective elements like a vapor barrier, membranes, sealant tapes and caulk. Proper flashing behind brick walls is very important.
Flashing isn’t expensive or hard to install but for some reason it’s commonly overlooked. This is mainly due to ignorance of how important flashing is in terms of water mitigation and how damaging water can be to a home.
Flashing is a gray area when it comes to brick homes. Typically a siding company installs the wall flashing and vapor barrier but in this case your siding will be installed by a brick layer or mason. They’re typically not trained in how to properly install flashing so as a builder it’s our job to make sure they know where and how we want all of our flashing installed.
Make sure all of your flashing is installed prior to laying any brick.
Flashing that’s properly installed will last as long as the brick walls will.
Make sure to use a good quality flashing that won’t degrade. Buying cheap flashing isn’t an area to save money.
Most Common Flashing Problems
Missing, poor quality or improperly installed flashing used on brick homes is a big problem and leads to all sorts of water issues. There are a variety of causes so we thought we’d list the most common.
- Improper installation. If the flashing is good quality and in the right place but isn’t installed correctly then it won’t stop water like it should. Make sure you double check all the window, door, vent, deck and chimney flashing because these are the most common problem areas. Proper flashing details and bends are critical to prevent moisture intrusion.
- Missing flashing. This is unfortunately more common than you might think. Especially around the knee walls and at roof and side wall junctions. Check the kick out flashing at the base of your brick walls because it’s an important part of diverting water away from the house.
- Lack of end damns. Installing end damns on your flashing is an important part of the system too so don’t overlook it. The lack of end dams in all horizontal flashing can cause water seepage into the walls.
- Poor quality. Bad flashing is another problem we find. Assuming you do everything right, if your flashing deteriorates in 5-10 years then it won’t do much to stop water from damaging your house.
Most builders have seen water stains on framing in attics next to chimneys and around windows, doors and vents. Bad or missing flashing is almost always the cause. It’s easily preventable when your building a new home but expensive to do later so make sure to do it right the first time.
Red brick veneer with an improperly sloped flat window sill.
Improperly Sloped Window Sills
Pretty much every brick home has window sills, which is why this is such a common problem. If the sill isn’t pitched down and away from the house then water can collect or drain towards the house. Since water damage is such a huge problem for brick homes it’s very important to pitch your sills properly.
All your windows sills must be sloped slightly downward for proper drainage away from the window. This is true no matter what siding material you use but especially brick. Since bricks are such a porous material, if water doesn’t drain out immediately it can pool and absorb into the brick. From there moisture can pass right through the bricks and into the wall.
Window sills look nice but their primary function is to channel water away from the house and to cap the brick wall below the windows. We recommend around a 15-degree slope for all your window sills. It doesn’t take much slope, just make sure they’re not level or back pitched.
properly sloped window sills aren’t just about rain water. If you live in a cold climate, snow can pile up on the sill and freeze. In a really cold winter you could have frozen snow and ice packed on the sill for a months. As snow and ice melts you need that pitch to force water away from the house.
If your sills aren’t pitched right then water can seep into the house or against the sheathing. This can cause major house damage in the long run.
Cracked brick veneer joints due to a failed metal lintel.
Bad Lintel Installation
Bad lintels are among the most common problems with brick homes.
Lintels are L-shaped steel supports or concrete beams that sit on top of openings in a brick wall. Bricks are stacked on top of the lintel so they need to be very strong. Think of lintels as a support beam for bricks. Lintels are sized according to the span and amount of weight that sits on top of them.
- A complete lack of lintels. Bricks can not span an opening by themselves without something to support them.
- Undersized lintels. If a lintel is too small or too weak to support the weight of the brick stacked on top then they could eventually fail.
- Improperly supported lintels. If the lintels aren’t supported well enough to hold the weight they support then they may fail.
- The lack of proper lintel painting. This only applies to metal lintels. Metal has to be properly protected or it’ll eventually rust and fail.
Lintels are required above even the smallest openings in brick walls. Small windows, pet doors, vents, foundation doors, etc. all require a lintel.
How To Spot Bad Lintels
The effects of an undersized lintel is easy to spot. When a lintel fails to support the brick above it you’ll get cracked bricks and sagging walls. For brick walls to stay strong they need a solid foundation to sit on and lintels are a big part of the system.
Lintels should be supported at least 4 inches on each side or the lintel can fail. Even if the lintel itself is the right size it still needs to be properly supported at both ends. If the supports holding up the lintel fail then the lintel will fail and so will all the bricks above it.
Metal lintels come from the factory with a red primer that prevents corrosion during shipping and installation. However this coating is not intended to withstand the elements once the lintel is installed. Without additional coating the lintel will rust and fail. We paint our lintels with a special metal paint before installing them and then again once they’re installed. The second coat is too make sure any dings or scratches that happen during installation are sealed.
- When you buy a brick home make sure your not missing any lintels and inspect them all carefully for damage, cracks, sagging or rust.
- If your building a new brick home make sure all your lintels are are the correct size and are all well supported at least 4″ on each side.
Luckily lintels aren’t that hard to fix if they get damaged but make sure to deal with any damage you find right away. Once the bricks on top of the lintel start cracking and sagging a small problem can quickly become a major issue. Especially once water starts seeping into those cracks.
Spalling damage and Efflorescence on brick veneer.
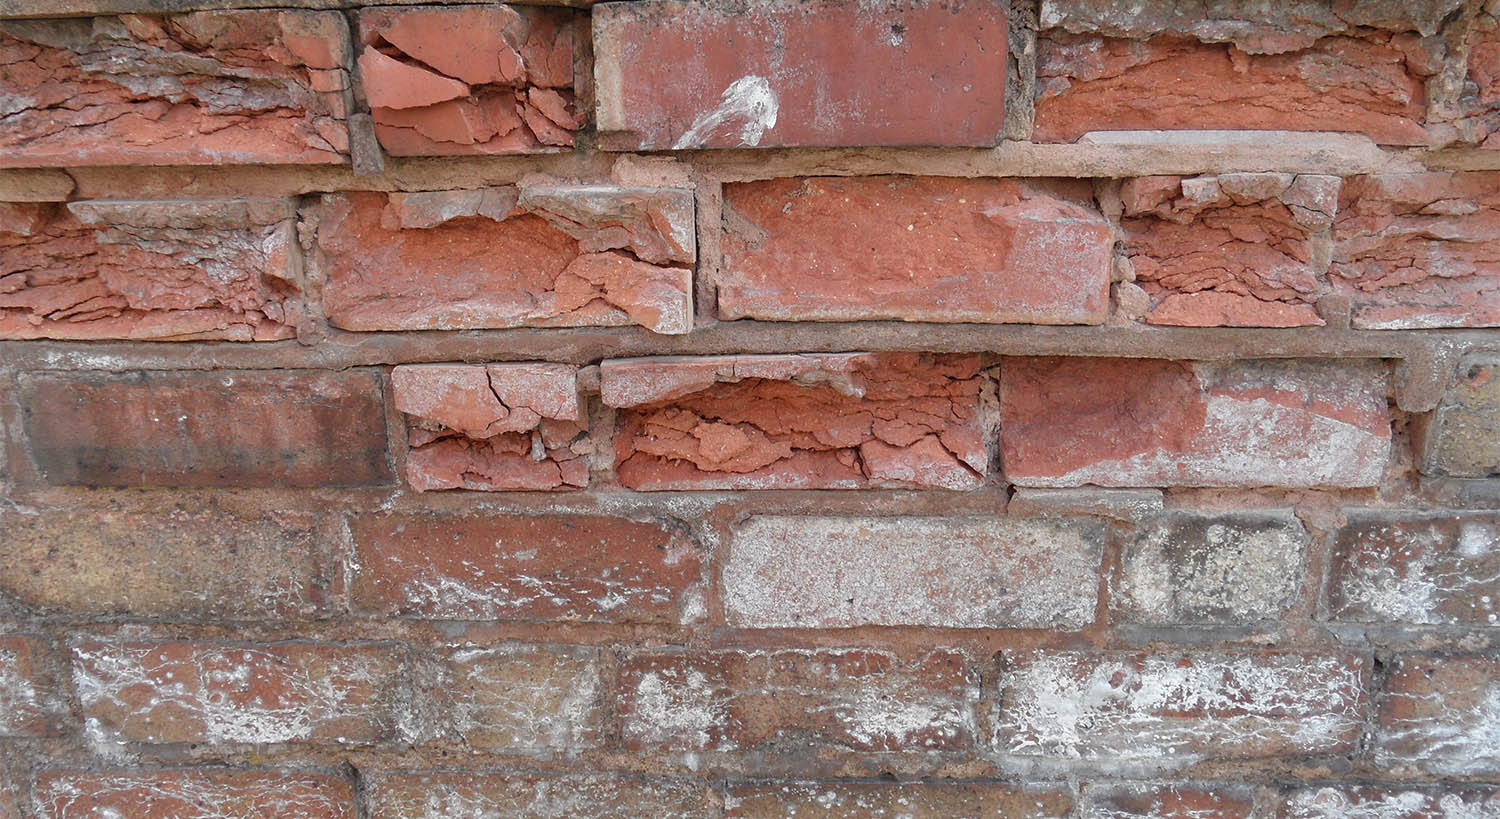
Spalling
Another one of the common problems with brick homes is called spalling. You can see it on the upper bricks in the example photo shown above.
Although spalling is a common problem with brick homes, the good news is that it’s preventable. Brick spalling is the exfoliation or flaking of the outer surface of the brick. There are a few causes of spalling that we’ll list below:
- Water absorption and exposure to freeze thaw cycles
- Using the wrong mortar type
- Sandblasting your brick
- Improper cleaning techniques or cleaners
- Deterioration of the brick wall’s anchoring system
- Using poor quality brick
Minor spalling is mostly a cosmetic issue however excess amounts can cause structural problems with the wall.
Removal and replacement of the damaged bricks is the only way we know of that fixes the problem. It’s not that hard to remove some bricks and cement in new ones. The issue with replacing bricks is matching them. Finding bricks that match your old one’s perfectly isn’t easy and in some cases it’s impossible. And you’ll have the same problem when you replace the mortar.
If you can’t find matching bricks and mortar or the spalling is excessive you may have to replace all of the brick.
All bricks are porous and absorb water but cheap bricks are excessive. Because they’re not as dense as more expensive bricks water soaks into them faster and in greater amounts. When you buy or build a brick home make sure your bricks are good quality. Bricks can last for centuries if they’re made correctly while poor quality brick can fail in a decade or two.
Efflorescence
Efflorescence is a white, powdery deposit of salt left on the brick’s surface after water evaporates. It’s a common a problem that’s effected brick homes and buildings for years. You can see it on the lower bricks in the example photo shown above.
In order for efflorescence to occur, there needs to be moisture that dissolves and transports salt onto the brick’s surface. When you use a really dense brick there’s less chance of efflorescence because water runs off the brick’s surface before it has a chance to absorb and then dissolve. It’s more of a problem with cheaper bricks that are more porous.
When salt water in the brick evaporates it leaves the salt behind. When humidity is low, water can evaporate before reaching the surface leaving salt deposits inside the brick where it’s unseen. However when humidity is high, any water evaporation will be much slower which creates a higher chance for efflorescence to form.
Efflorescence tends to increase after a very wet winter and decreases in the spring. By summer it generally disappears altogether. Unfortunately, this cycle can recur every year.
Salts are carried to the surface of the brick by moisture and capillary action. The amount of salt deposited varies depending on climate, humidity and how porous the brick veneer is.
Brick veneer efflorescence has been studied for a long time. The studies all seem to agree that efflorescence originates from more than one source, and may be made up of more than one compound.
The good news is simple cleaning is usually enough to deal with the salt deposits and you can all but avoid it by using good quality bricks.
Erosion
Brick erosion or excessive wear are some more common problems with brick homes that you should be aware of and look out for.
Some older brick houses and buildings were built with bricks that were very soft. Bricks are fired in a kiln, and early kilns were not able to control the firing process as well as they are today. Sub standard materials and kilns can also cause soft and brittle bricks. This is even the case with modern brick homes that use sub standard bricks to save money. That’s why we always recommend an inspection of the bricks whenever you buy or build a brick home. Stay away from any soft bricks or mortar.
Brick erosion and wear can also be caused by bricks that were formed from clay that is not dense enough to hold up over time. Again, this is the case with cheap bricks. You can easily spot them because they’re more porous and less dense than a good quality brick.
Brick erosion can also occur if your brick’s were treated with an abrasive cleaning technique such as sand blasting or high pressure washing. Acids and other harsh cleansers can also cause erosion. Even soft bricks are harder on the outside than on the inside. This hard exterior layer is like a protective layer for the brick. Sandblasting, acids and high pressure washing can damage this hard outer layer making internal brick damage and erosion possible.
These cleaning techniques are so damaging to bricks and mortar that both practices are banned in all preservation best practices guidelines. If your house or building is listed on the National Register of Historic Places, it is sometime illegal to use an abrasive blasting technique on the exterior of any historic building.
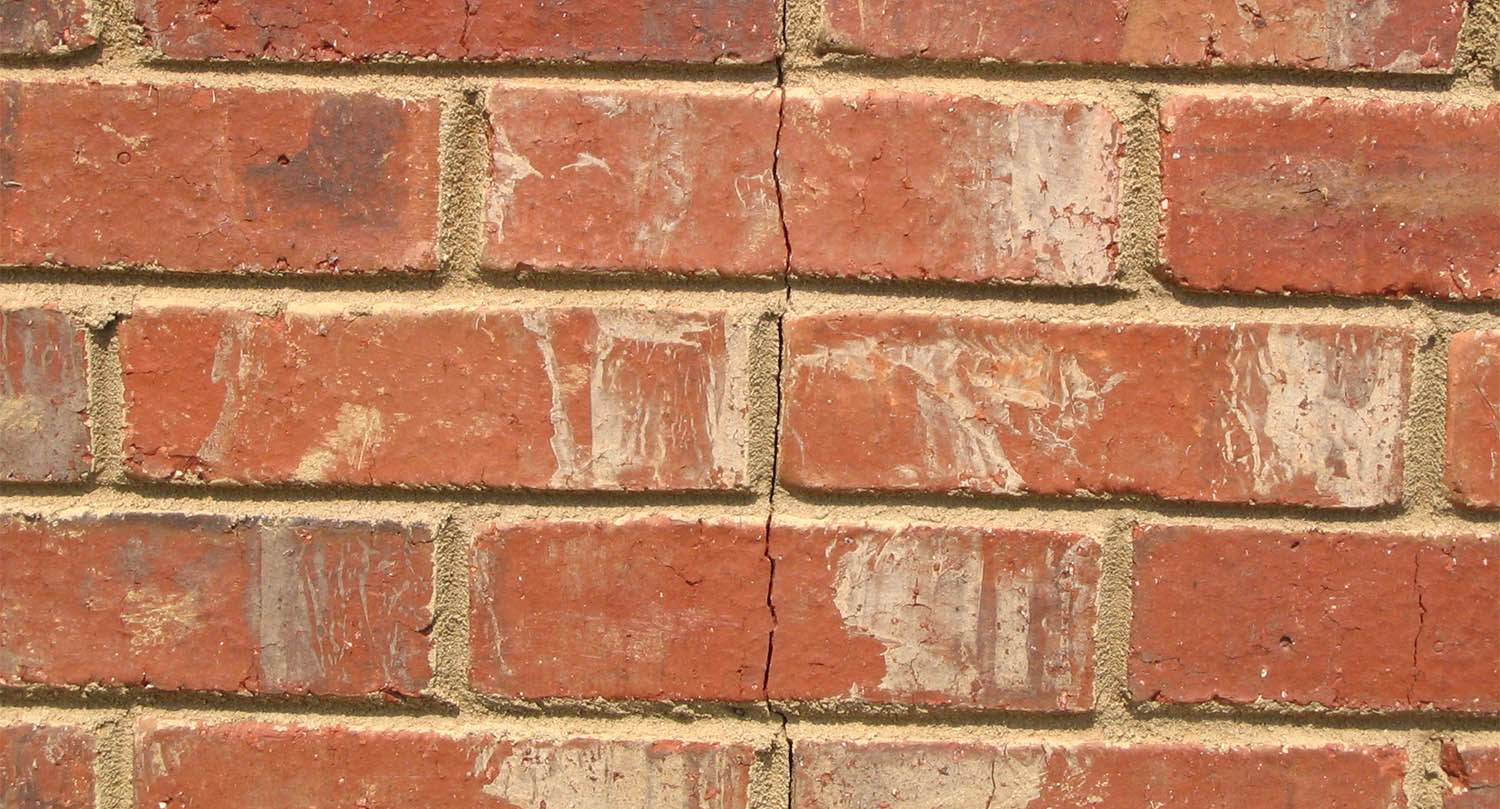
Stair Cracks
If you see cracks in the mortar between your bricks that look like stair steps these are called stair cracks. These mortar cracks are primarily caused by foundation settling or upward pressure.
When stair step cracks happen, they generally don’t get any worse. Many homes go through a settling process once and then it stops. Sometimes this is due to the building materials used and other times it’s the soil. But whatever the reason, after the initial settling, homes generally don’t move much up or down.
If no other moisture, settling or structural problems occur, you can repair cracked mortar joints by repointing them. But if stair cracks do get worse, you’ll have to address the structural foundation problems before you do any repointing. Fixing the mortar joints won’t do a thing about the actual problem which is generally a settling or cracked foundation. You should contact a structural engineer and a qualified mason right away and conduct a foundation inspection of the area.
We’d also recommend a soil bore to see what’s going on below the house. A lot of homeowners in Florida discovered huge sink hole voids beneath their homes by noticing stair cracks in the foundation. They could be an early sign of something much worse.
Poorly Painted Bricks
Another one of the common problems with brick homes is a bad paint job.
Exterior brick walls can be painted. However the type of paint you use is crucial for not only looks but also the health of your brick walls. If the paint doesn’t have the proper permeability rating (ability to breathe), it will trap moisture inside the bricks. As we’ve already discussed a number of times throughout this article, water is the leading cause of problems with brick homes. The last thing you want to do is trap in moisture, especially if there isn’t a good vapor barrier and air gap behind the brick. If the moisture can’t drain out of the brick’s face then it’ll have no choice but to drain towards the house.
Another common issue with sealed in moisture is bubbling. Moisture locked inside the brick will try to get out through the paints surface which can cause a bubbled look. That’s why whenever you do any exterior painting it has to be completely dry. When you paint something that’s holding water you’ll eventually see bubbles in your paint. Those bubbles are actually water inside the brick forcing it’s way out through the paint. Since it can’t get out through the paint bubbles form instead. To avoid this paint brick only when it’s totally dry and use an approved paint.
Keep in mind that brick is generally a low maintenance siding material, however, when you paint it that all changes. Anything painted will eventually need to be re-painted to preserve the look.
Poor brick veneer repair job done with bricks that don’t match.
Bad Repair Jobs
Hiring a professional to repair your brick is just as important as it is when you install it. Poor brick repairs are some of the most common problems with brick homes that we find.
Repairing a brick home takes just as much skill as when you build the walls. That’s probably why most brick repairs we see are poorly done. From tuck pointing to replacing broken bricks, the lack of craftsmanship is apparent. It’s not as simple as just ripping out an old brick and cementing in a new one. A quality repair job should blend in with the surrounding bricks. Check out the example picture shown above. it’s painfully clear which bricks were repaired and which were original
And it’s not all about how the wall looks. Poorly repaired bricks and mortar joints can result in cracks, voids and eventual water penetration.
Larger areas requiring brick replacement should include through wall reinforcement using a product like Simpson’s Heli-Tie. The ties secure the new brick sections to the building and not just to the rest of the brick wall. These ties add a lot of strength and help stabilize the wall.
Aside from the structural repair issues there are also cosmetic ones. Every effort should be made to match the replaced brick and mortar to the old. If you don’t use matching brick and mortar then the new work will stand out like a sore thumb.
Make sure to also tool your mortar joints in the exact same way as the old joints. Even if you match the brick and mortar color, if the joint design doesn’t match you’ll be able to see the difference right away.
Improperly Cleaned Bricks
Brick is an extremely low maintenance siding. However some cleaning should periodically be done.
When it’s time to clean your bricks you should only do it with cleaning materials that are safe to use on brick. Damage caused to brick due to improper cleaning methods is another one of the most common problems with brick homes. Cleaning your brick in the wrong way or with the wrong cleaners can actually damage your brick more than nature can. Especially if your brick is old and brittle.
The most common problems we see are with power washers and the use of acid washes. If performed improperly, both methods can result in the weakening or complete removal of the hardened outer surface of your brick. The consequences can be softer bricks that can’t withstanding moisture penetration. This can eventually result in spalling.
Pressure washers turned up to high can cause damage to brittle or cracked brick and mortar. Generally we recommend cleaning brick with pressure no greater than a standard garden hose. If the pressure is too high to put your hand into then it’s too much for the brick.
If your scrubbing your brick with a brush make sure to use a soft or medium bristle and don’t apply too much pressure. You could damage brittle or cracked areas very easily by scrubbing at them too hard with a stiff brush.
Acid washes also react differently to different types of mortar. That’s why we generally stay away from them unless we know exactly what type of brick and mortar were used to build the wall. It’s much safer to use simple soap and water solutions and low amounts of pressure.
How To Keep Your Brick Veneer Clean
While most brick homes are low maintenance and last for generations, regular cleanings are important if you want them looking their best.
No matter what shade, style or size brick you’ve got, if your bricks and mortar are dirty or have green mold growing all over them, you’ll have to eventually clean them.
Brick and mortar both suffer from some of the same issues when it comes to cleaning. They’re both porous and prone to collecting dirt which leads to issues with mold growth. Especially on the sides of the house that don’t get much sun. Below, we’ll give you some links to our favorite cleaning products.
Brick And Mortar Cleaning Tips
- Clean your brick home. Spray its surface with a regular garden hose fitted with a spray nozzle. A pressure washer isn’t recommended unless you turn the power way down. High water pressure can damage older brick and mortar joints. If the water pressure is uncomfortable to put your hand into then it’s set too high.
- Remove efflorescence. Chalk like stains that develop on brick exposed to high levels of moisture and humidity with full strength white vinegar. Spray the stains, wait 10 to 15 minutes, and then rinse with plain water from the hose.
- Use a good quality brick and mortar cleaner. They do a great job of cleaning the bricks and are easy to use. Just be sure to read the directions carefully.
- Scrub. Use a soft brush to clean areas of the brick. It’s important and easy to do. Hard scrubbing can damage brittle brick or mortar so scrub gently.
Our Top Brick And Mortar Cleaning Products
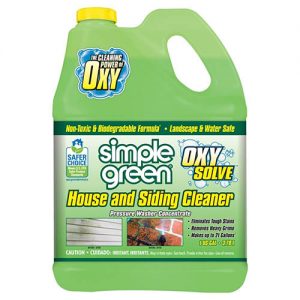
Simple Green Oxy Solve Pressure Washer Cleaner – Removes Stains from Mold & Mildew on Vinyl, Aluminum, Wood, Brick & Stucco
A really good pressure washer cleaner that works great for both brick and mortar.

Hydro Jet Power Washer – 39” Extendable Flexible Deep High Pressure Washing Wand, Garden Water Hose Sprayer Nozzle Tips
If you don’t have a power washer this is the next best thing. All you need is a hose.
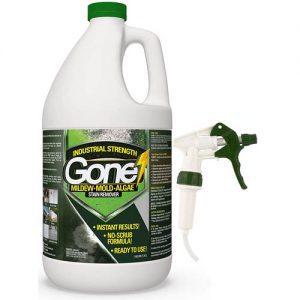
EcoClean Solutions Mold, Mildew & Algae Remover | No-Scrub Stain Remover | Instant Results for All Surfaces
A stronger cleaner that works well on brick and comes with a splay nozzle. Does not require pressure.

Scrub Brush with Adjustable Long Handle-47.3″ Great For Cleaning Brick & Mortar In Hard To Reach Places
A good cleaning brush with long extension handle will come in handy for cleaning hard to reach areas.
Brick Work Is Expensive Due To High Labor Costs
Although the bricks themselves are fairly cheap it’s still an expensive material to work with because of the high labor costs involved.
High labor costs are one of the more common problems with brick homes because of all the issues those prices lead to. Because quality brick work is so expensive, many people try to save money by skimping on skilled labor, good quality bricks or the proper water barriers. Doing any of these things generally ends badly.
Brick is generally more expensive than other home siding products, such as vinyl siding, fiber cement, stucco, metal or wood. Especially as you install the bricks higher on the house. Scaffolding needs to be built and ways of delivering the bricks and mortar to those high heights needs to be worked out. Not to mention hiring skilled brick layers. It’s a lot harder to do than just nailing lengths of vinyl siding to a wall.
When it comes to building brick homes, use only top quality bricks. You can buy less expensive bricks that are more porous but they’re not as good for exterior use. Extremely porous bricks can eventually lead to water penetrations and cracking when water gets inside the bricks and freezes. A good quality, dense brick is what you should use for the exterior of a home. If your buying a home with brick make sure you inspect the bricks to make sure they’re good quality and dense.
Even if the brick is old, a good quality old brick will generally last longer than a poor quality new one.
Brick Veneer Has Color Limitations
One of the common problems with brick homes are color limitations.
Bricks do come in a variety of colors but choices are limited when compared to siding or stucco. Especially when compared with wood or fiber cement siding that’s painted as these types have thousands of color options. A brick’s color depends on it’s composition and the temperature at which they were made. Once a brick’s been created the color is baked in and can never be changed unless you paint them.
Because bricks come from a mix of clay and shale, your color options are limited. Some color is added into the mix during production but generally speaking most of your choices will be an earthy shade of red, brown, white or gray.
Painting brick is always an option but brick paint is a lot more expensive than what you’d use on fiber cement or wood siding. The paint needs to breathe which gives water soaked into the brick a way out. If your brick paint doesn’t breathe then you’ll end up with bubbled, cracked or peeling paint.
Pro Tip: If your painting brick make sure it’s super dry. Summer is the best time of year for painting brick and ideally the humidity should be low. Even if your using a paint that’s approved for brick and breathes properly it’s still not a good idea to paint a water soaked brick. The paint may not adhere correctly which means you’ll get flaking or peeling. And you could get bubbles if the amount of water overwhelms the permeability of the paint.
A shifting foundation can cause cracked bricks.
Brick Veneer Foundation Issues
This is an issue that seriously effects the stability of a brick home. It’s one of the most serious problems with brick homes we see.
Because brick homes are so solid, any movement in the foundation can cause cracks throughout the brick. This is why it’s crucial to build a brick home on a super stable foundation. For most homes this isn’t a problem, but in some areas with bad, sandy or shifting soil, it can be an issue.
Brick homes are not designed to withstand movement. That’s not to say that a shifting home or settling foundation is a good thing for any type of siding, you just won’t see it as much or possibly at all. Vinyl siding is designed to have some flex to it so generally you don’t even notice if the foundation moves a little. You’ll notice the cracked foundation but you won’t see that crack run up the wall.
Wood is also by nature a flexible material. However other stiff siding types like fiber cement, metal or stucco will have similar cracking issues like brick.
Ensure that your brick home’s foundation is built on solid ground. Reduce the risk of foundation movement by installing gutters and downspouts that direct water away from the home and prevent pooling around the foundation. As water collects around a foundation it creates voids in the soil that eventually undermine and crack the footing. That cracks spreads up the foundation wall and right through the brick.
Water is not only the number one cause of damage to a wood frame home but also to it’s foundation. Make sure you prevent it by diverting water away from the house as much as possible.
Remodeling Is More Difficult With Brick. And More Expensive
If you plan on remodeling the exterior of a brick home then expect to pay more than with other forms of siding. This is mainly due to how hard it’ll be to match the brick and mortar. Additions and remodeling work should appear totally natural as if they were always there from the start. As the home gets older prices for quality brick work will continue to climb.
Common Factors That Make Brick Remodeling More Expensive
- Brick. It’s made from a mixture of shale and clay with some color added in. It’ll be hard to find a new brick that perfectly matches the old.And it just gets harder as the brick ages.
- Mortar. Matching the mortar color is a challenge too because as it ages mortar gets darker. Even if you clean it, the old mortar still won’t look as bright as new.
- Installation. Another issue will be blending the new brick into the old. You’ll most likely have to cut some of the old brick out and weave the new into the old. A good brick layer can do it but it’s harder and more time consuming than installing some siding. And since the new brick and mortar will be right up against the old it really has to match.
A skilled and experienced bricklayer can generally handle mixing a custom batch of mortar to color match your old stuff. But finding the right brick isn’t easy. If you’ve got a brick home built in the last 5 or 10 years it shouldn’t be a problem. But what if your home is 50 years old. Finding new bricks to match won’t be easy and may be impossible. Manufacturers make new brick that looks old so if your lucky there’s something on the market that’ll work.
Keep in mind that all this is a challenge but it’s not impossible. We weave old brick into new all the time. Just be prepared to do some additional design work on top of the site work which all costs time and money.
Climate
Brick and mortar walls are a very stiff building method and therefore don’t have much flex to them. One of the worst things for brick homes is movement.
All climates experience some changes in temperature, but some regions have much more intense swings in temperatures or seasonal changes than others.Generally speaking brick and mortar is fine with natural temperature and seasonal swings. Here in New Jersey we get super cold winters and hot humid summers. And we’ve got lots of brick homes that do just fine Brick has no trouble dealing with these types of temperature swings.
Brick also does a good job in dealing with hurricane winds, snow storms and floods. And impact damage isn’t a big deal with brick. If you use a high quality dense brick then it would take a big impact to damage it.
Where brick homes don’t hold up is in regions where earthquakes and shifting soils are common. Any shift in the home can potentially crack the brick which leads to water penetration and then major damage.
Areas of the Country that regularly see earthquakes can still use brick. In these cases homes are designed and built differently to allow for the movement. In California for example, homes are built on top of foundations that actually move a little with the movement of the quake. The brick sits on top of the foundation so they can move too. This ability to give a little with the quake prevents them from cracking. It’s the same basic principle that let’s 100 story high rise building sway a little in high winds. If a home or building can give a little then it won’t break.
Summary: Problems With Brick Homes
Brick homes have a timeless appeal that’s not going out of style any time soon. They’ve been around for generations and are still being built to this day. But there are quite a few common problems with brick homes you should be aware of before investing your hard earned money in one.
Brick is a fantastic siding and all around building material that’s been used on homes and buildings in one form or another for thousands of years. Brick construction helped develop the ancient world on just about every continent from Asia to South America. Eventually the modern red brick your used to seeing on homes was invented. A mix of clay and other natural materials with some coloring thrown in is shaped and kiln fired into a very strong building material. Stacked with cement mortar they create a super strong wall or siding. And even after generations they’re still considered a beautiful look that brings a high ROI. But they’re not perfect and come with a list of common problems.
I hope some of the information throughout this page helps you understand the common problems with brick homes and what you can do about them.
If you have any questions or comments e-mail us any time. We’d love to hear from you.