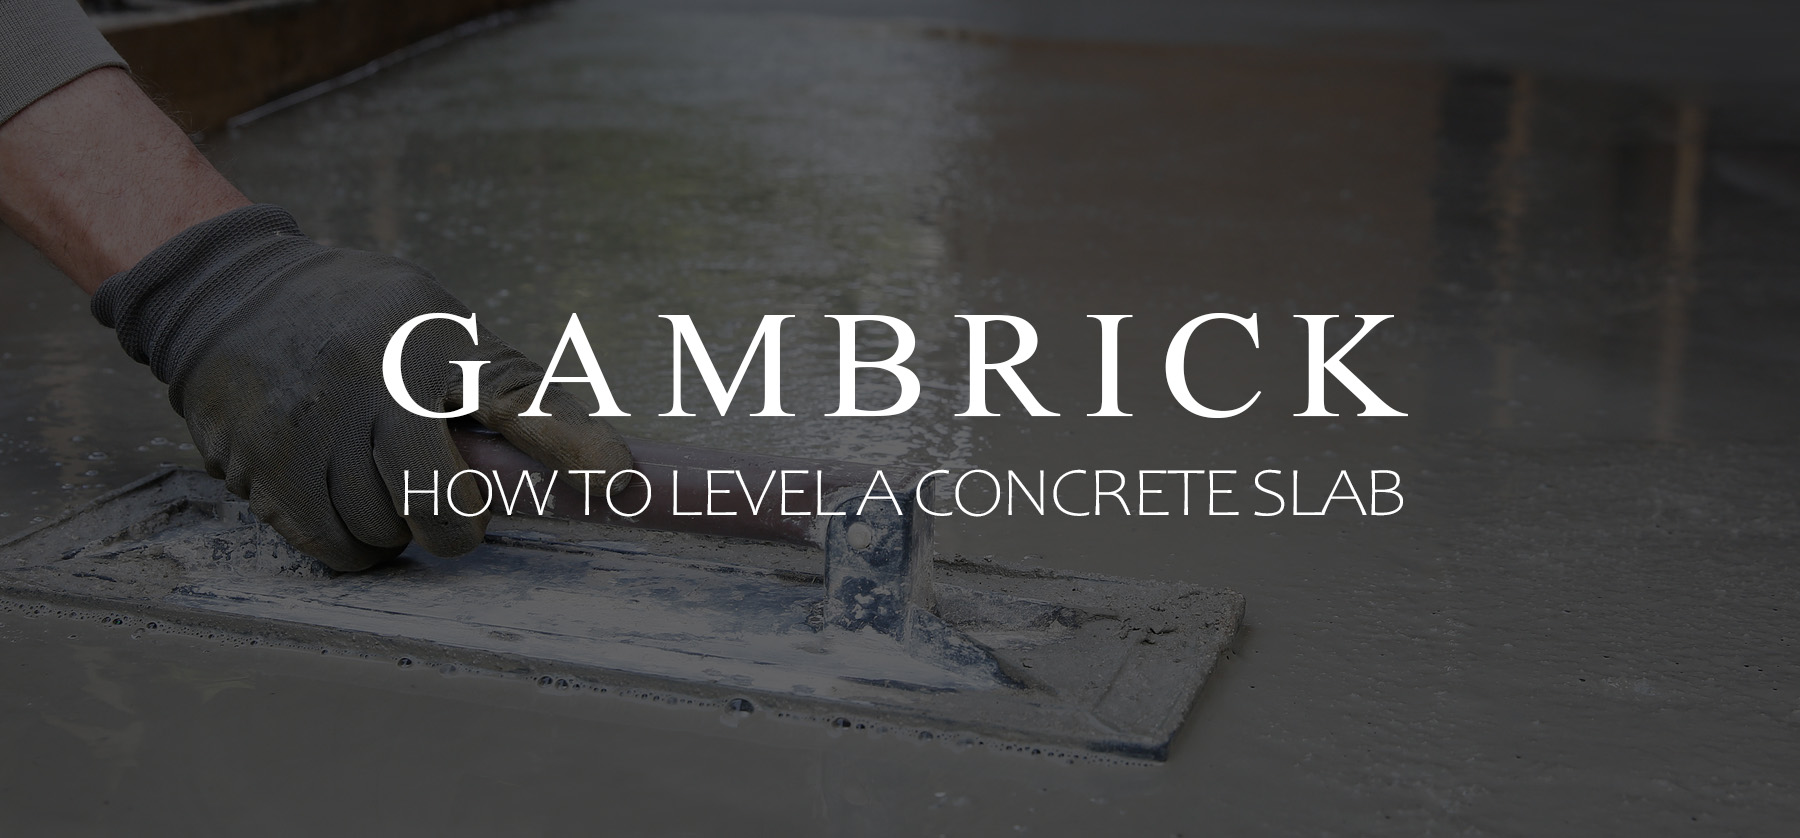
How To Level A Concrete Slab
When you pour a fresh concrete slab, it’s important to make it level. Slabs are considered concrete flatwork because they’re poured to create a flat surface. The first step is preparation. Build your forms and check to make sure they’re level around the entire perimeter of the slab. If the slab touches other concrete walls, use a laser or chalk line to mark where level is. An easy way to do it is to string a line from one side of the slab to the other by attaching to the forms. I also pound stakes into the ground every 6′-8′ feet throughout the slab. I make sure the top of the stake is level with the forms and my wall marks.
Slabs should be poured atop concrete footings if they’re structural or need more strength.
Some slabs are built atop footings and some are poured at the same time as the footings. When a slab and footings are poured at the same time, it’s called a monolithic slab.
Concrete is a semi-liquid that’s pushed and troweled to make it level. Work the concrete as you pour it. Remove ground stakes as you go. If your forms, stakes and wall marks are all level, your concrete slab will be too.
Leveling an existing concrete floor that’s uneven is a different process
- Use a leveling compound to raise the low spots up to the high spots. A great option for leveling interior slabs.
- Lift the slab with a jack. A good option for leveling outdoor slabs.
- Grind the concrete. Works on interior or exterior slabs.
No matter which floor leveling option you choose, make sure to invest in leveling tools like string, stakes, a long level, poles, or a laser.
The Best Way To Level A Concrete Floor
The best way to level a sloped, irregular or uneven concrete floor is with a leveling compound.
Concrete is one of the most widely used building materials throughout the world. It’s very strong, durable, versatile and fairly cheap. But it does have a few drawbacks. In areas where moisture accumulates depressions can form. These should be fixed right away so they don’t get deeper or create structural cracks. Concrete floors can also sag when the sub-base beneath settles. And concrete can crack.
No matter the cause, when a concrete slab starts to become uneven you can fix it with a leveling compound. This is critical if you plan on installing finished flooring over the concrete because you’ll need a smooth and level surface. But it’s even more important if your using the concrete slab as your finished floor.
Luckily, leveling a concrete floor with a leveling compound is very easy to do.
Concrete Leveler is a liquid you spread around the floor with a squeegee. It fills in low spots and self levels which makes install very easy. Use it just in the low spots or cover the entire slab to create a new, level surface.
Floor levelers set quickly and cure with very high strength. I am usually walking on the new floor in a few hours and installing flooring the next day. And they work both indoors and out.
Make sure to use a bonding agent on the existing concrete slab first. It’s a crucial step because the bonding agent makes the leveler stick to the concrete. Without it, the leveler will chip, flake and crack.
Keep reading and I’ll go through the process of using a leveler step by step.
1. Preparation
Before you level a concrete slab, you have to prep it. If your concrete floor is interior, this means preparing the room too.
Remove everything that sits on top of the slab. This means furniture, patio sets, planters, and moldings. For interior concrete floor leveling, I also remove the doors. Leveling the floor usually raises it’s height which means I need to adjust the doors and trim too.
Thoroughly clean the surface of the concrete. Remove all dirt, dust, pollen, grime, oils, grease, etc. Substances on the concrete can prevent the leveler from sticking.
Next remove chipped paint, flaking concrete or peeling adhesive. Pay attention to anything that looks like a grease or oil stain. Oily substances prevent the leveler from bonding to the concrete.
If you want the concrete surface really clean, shot-blast it lightly. The process will remove dirt that you can’t clean off by hand. Most people don’t own shot-blasting equipment but you can rent the unit for a few hours. Sand-blasting works really well too.
Clean the floor again after the shot-blasting or sand-blasting is complete.
Note: If you have large structural cracks or slab damage, repair them before you level the floor. Floor leveling is cosmetic, not structural. Big problems with the slab should be fixed before you level the surface.
2. Planning
First, you need to assess the condition of the concrete’s surface.
Mark how high you want the finished floor height to be and then level out from there. I extend string lines from my mark to every side of the slab. Once all my lines are set, I can see the areas that need leveling.
Once your marks are in place, you can see all the areas that need leveling and figure out how much Concrete Leveler you’re going to need.
Finished floors with thick padding or thin-set are more forgiving than a hard surface. Carpeting, some vinyl planks or engineered wood and tile have either padding or thin-set. Minor imperfections can be leveled out by the flooring so you don’t have to be as perfect with your leveler. But for solid wood planks you need a very level floor.
The type of flooring you’ll be installing effects how much of the floor you’ll need to level.
- If your using thick padding or thin-set you can repair just the uneven areas.
- If your using hardwood or leaving the surface exposed, the entire surface should be perfectly leveled.
Make sure to have enough Concrete Leveler on hand to cover the entire floor no matter which method you choose. At 1/2 inch thickness, a 50-pound bag of Concrete Leveler will cover 12 – 15 square feet. For 1/4 inch thick coverage, the same size bag would cover between 24 and 30 square feet. I wouldn’t go any thinner than 1/4 inch.
You’ll also need enough bonding agent to cover all the areas you’ll be leveling.
3. Primer
After you’ve prepped and marked the surface, apply the concrete bonding agent. This may also be referred to as a primer depending on the brand you use.
Primers seal the surface of the existing concrete by filling in all the tiny pores and dimples that can cause bubbles later. They also enhance the adhesion between the leveling compound and concrete. Without a bonding agent, the leveler won’t stick to the concrete floor properly. This means it’ll eventually chip, flake or crack.
Apply primer with a soft-bristle push broom. Spread the liquid evenly across the surface without creating puddles. Go slowly so the primer can penetrate into the concrete’s pores.
About one quart of primer can usually cover between 50 and 100 square feet.But it depends largely on the condition of the floor. If you have lots of large dimples, cracks, pits, etc. You’ll need more primer.
Allow the primer to dry for at least 3-4 hours.
4. Leveler
Once the primer has dried, it’s time to apply the Concrete Leveler.
Floor leveler comes as a powder that activates when you mix it with water. In a bucket or mixing bin, combine the powder with the correct amount of water and then start mixing. One 50-pound bag of Leveler requires four and a half to five quarts of water. Adjust the water level based on the amount of powder you use.
Mix the two compounds thoroughly with a drill mounted paddle mixer, a spade or hoe. When properly mixed, floor leveler is watery and spreads across a floor with ease. Because it’s so thin, it self levels once you stop working it.
At around 70 degrees Fahrenheit, Concrete Leveler has about a 15-minute flow life and remains workable for about 30 minutes. That’s not that long for a large room so be prepared and work fast.
Using a long handled squeegee, push and pull the Concrete Leveler across the concrete floor. Work leveler around the edges and corners first. Work in sections as you walk yourself off the slab.
The squeegee spreads compound around the slab, but gravity does most of the work. Once you stop pushing the compound, it will level itself.
A smooth surface will eventually form. Within four hours, the leveler will usually set up hard enough to be walked upon.
If you’re installing a new floor over the newly leveled surface, you can often start the same day. Although I recommend waiting at least a day. Even though the leveler will be hard enough to walk on, it won’t be fully cured in just a few hours.
- Tile: You can usually begin installation within four – six hours.
- Carpeting: Wait 16 hours before starting work.
- Wood: I wait a full 24 hours before install.
If you’re using the leveler as the finished surface, you can polish and seal it once it’s cured. I usually start 24 hours after install.
How To Level A Concrete Slab With A Grinder
If you have an uneven concrete slab, you could repair it with a leveling compound. But sometimes grinding it is a better option.
I like using a grinder because it doesn’t raise the height of the finished floor. Most of the time when I level a concrete floor using a leveling compound, I go over the entire floor 1/4 to 1/2 inch. This means raising all the moldings and adjusting doors. But grinding the floor down is different because you can take off much less than a 1/4 inch. In some cases, I can make a floor perfectly level by grinding just a 1/16 of an inch off. That amount is hardly noticeable.
Powerful grinding equipment can be rented at most rental centers. Here are a few of its uses:
- Smoothing out cracks or high spots.
- Leveling ridges before you install flooring.
- Grinding down excess thin-set or other hard coatings like glues.
- Remove a sealed or painted surface to accept new paint, sealants, adhesive, thin-set or epoxy.
Ahead we’ll discuss how to grind down a concrete floor and what type of machine and bits you’ll need.
Prepare The Surface
Unlike when leveling a concrete floor with compound, you don’t have to clean the surface first. The first step when using a grinder is preparation.
Place a long 6 to8 foot level on the floor to find high spots. You’ll see them because the level won;t be able to sit flat on the floor. When it hits a high spot the level will rock back and forth on the spot. Use chalk or a marker to mark the high spots that need grinding down.
Mark the high spots center and then find where the spot meets flat concrete. Create a circle around the spot where you’ll be grinding down.
Once the spots are all ground down, clean the area with a shop vac. Then re-check the floor with your level. Repeat as needed until the entire floor is level.
I like to use a string from one end of the room to the other in a variety of spots. Make sure the string is very tight. Measure down from the top of the string to the floor in different spots. In areas where the measurements are less than they should be, the floor is high. But if the measurements are too high, the floor is too low and needs compound.
You can do the same type of measuring with a laser level. But I prefer the string.
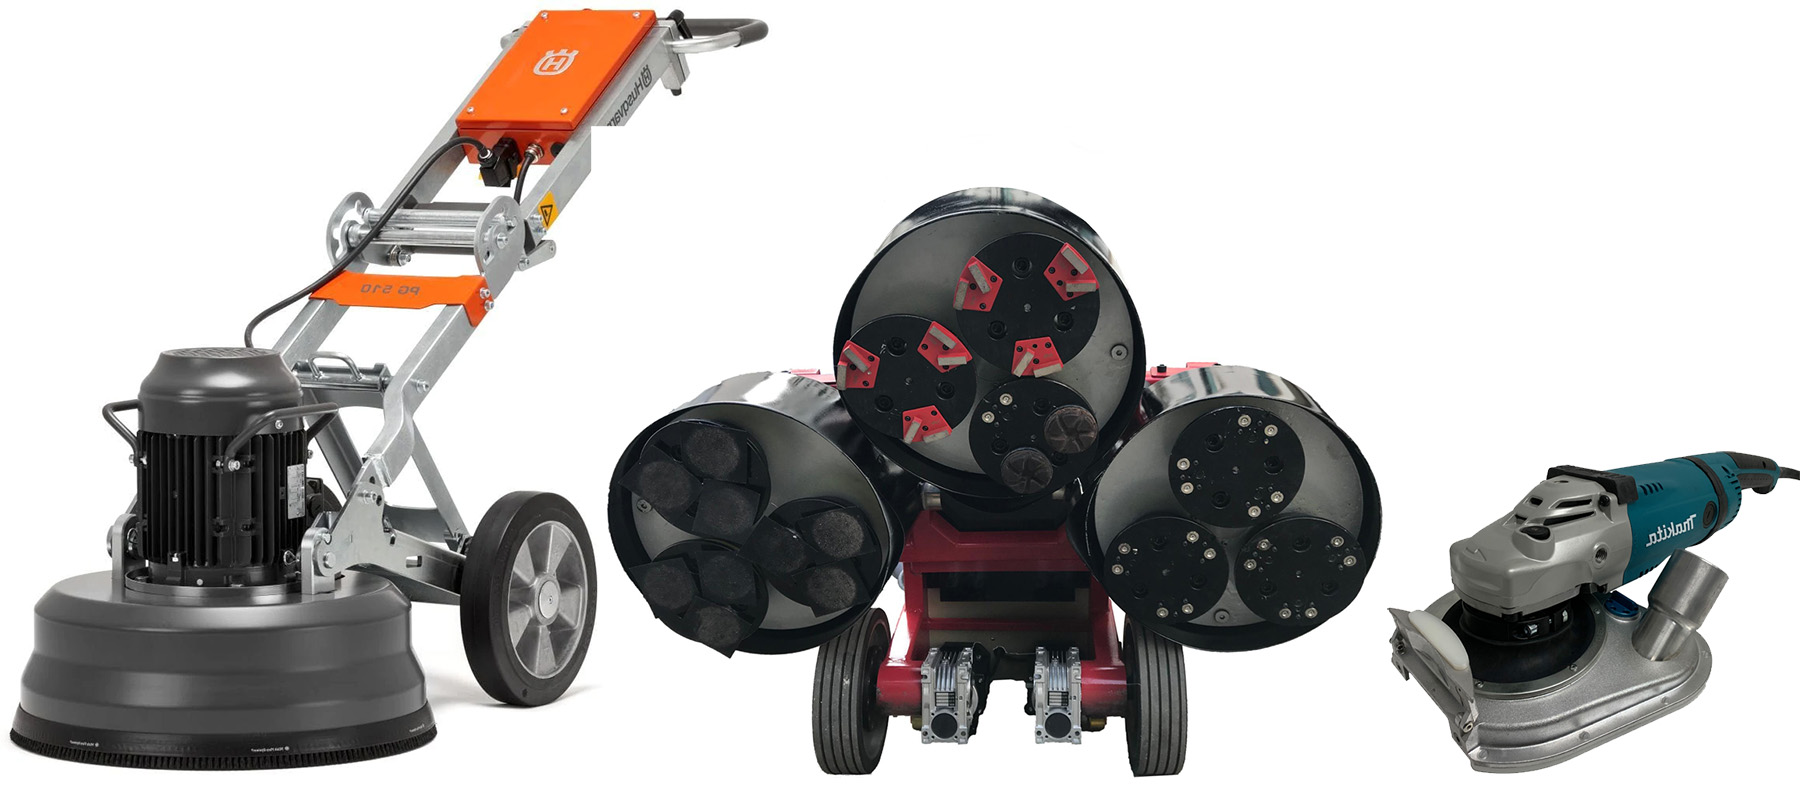
Grinder Size
As with most construction projects, you need the right tool for the job. Floor grinders come in a variety of sizes and the biggest isn’t always the best.
- If you have a medium to large size concrete floor that needs grinding down, rent a walk-behind floor grinder. They cost about $100 to $150 per day. A full size machine can level a large room in a just few hours.
- For smaller floors, rent an angle grinder. They usually cost less than $50 per day. Equip it with a diamond grinding wheel. Hand held grinders are better for leveling a few high spots or hard to reach areas near walls.
- Some rooms may require both a full size unit and a hand held grinder. Pay attention to the areas near the corners of interior rooms. Large machines have a tough time getting into tight spaces.
Make sure to have a plan for all the dust. Some machines come with a vacuum attachment that can suck up most of it. But dust will still get into the room. Seal doorways and vents so dust doesn’t make it’s way throughout your home. And make sure the wear safety equipment like goggles and a mask.
If you’ll be grinding right up to a wall, make sure to cover the wall and molding with a dust shroud.
Depending on where you rent the machine, a diamond grinding wheel may be included with the rental fee. But some places make you buy one separately. I recommend shopping around for the best deal because large grinding wheels can cost $150 a piece.
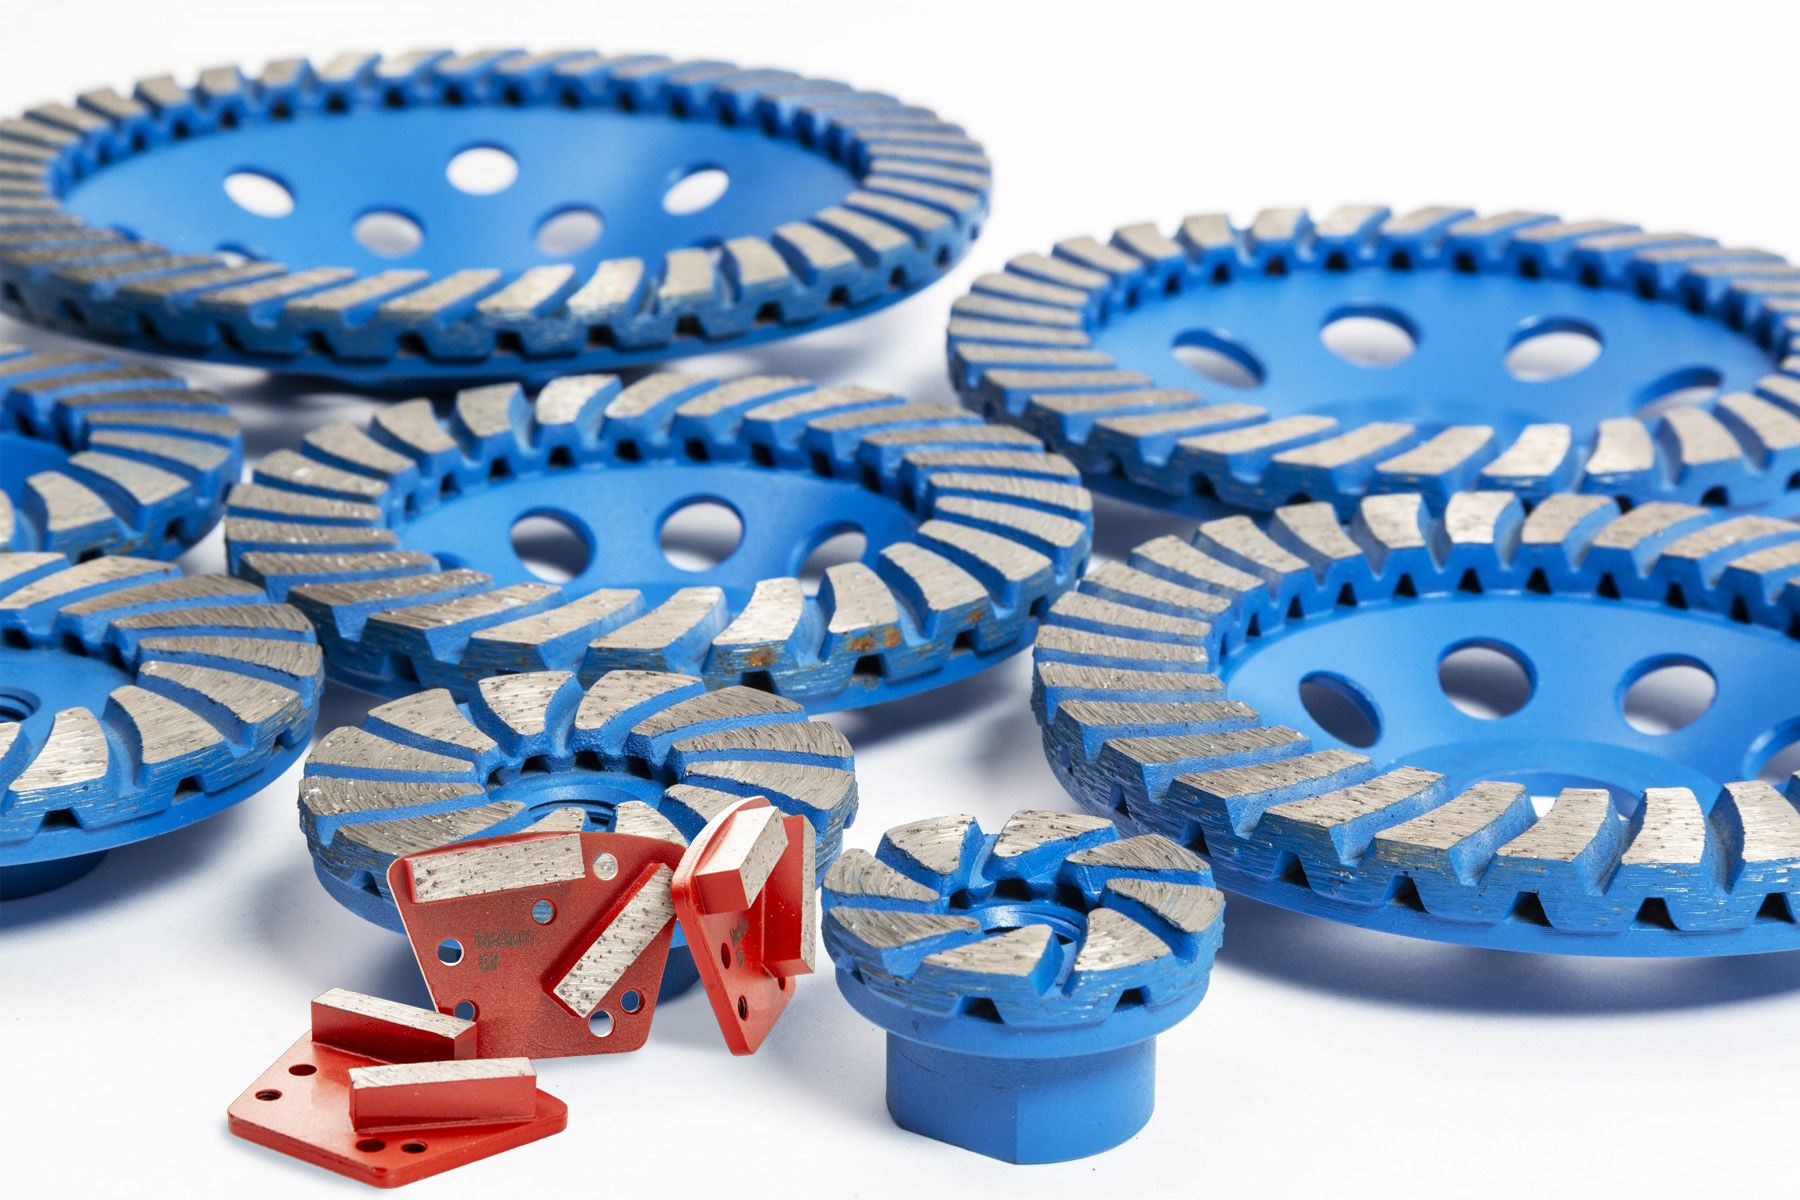
Grinder Wheels & Bits
The grinder machine spins the grinding wheel or bits, but it doesn’t actually level the concrete. That work is done by the bits or wheel. It’s important to choose the right bit for the job, and surface quality, that you want to achieve. here are a few tips:
- Large grinders use individual segments and not a single large wheel. Each segment has raised metal bits in different layouts. The bits are what grind and level the concrete.
- Small angle grinders use wheels with raised cutting surfaces built in.
- An aggressive grinder can take down 1/4 in of concrete at a time. They grind away concrete faster but leave a rougher surface.
- A less aggressive grinder removes smaller amounts of concrete but leaves a smoother surface.
Choose an aggressive grinder to remove large areas of concrete and a less aggressive one for small areas or clean up. Fine grinders are better at removing glue, excess thin-set, epoxies or glue.
In many cases I’ll go over the floor with an aggressive grinder and then again with a finer wheel.
Wear Safety Gear
Always use the proper safety equipment when grinding concrete floors. This includes:
- Hearing protection.
- Safety glasses.
- Respirator or mask.
Grinding machines are loud and can shoot concrete debris from the grinding wheel in all directions. Protect your eyes with goggles.
Grinding concrete also releases fine silica dust into the air which can be harmful if breathed in. Always wear a NIOSH-certified N95-rated respirator or mask.
Keep The Machine In Motion
When you’re using a large floor grinder, always keep the machine moving. Move the cutter head in a circular motion. Move back and forth and side to side. Always stay in motion. If the cutter head sits still for too long it will create a low spot.
Aggressive wheels will cut into the floor much quicker than finer finish wheels. When using an aggressive wheel it’ even more important to keep the machine in constant motion.
Using a hand held grinder is a little easier because you can take pressure off and on more quickly. It’s also easier to see the areas where you’re grinding. This is good for small areas but I wouldn’t use a hand held for large rooms.
Even when using a hand held angle grinder, I still constantly move the machine. Motion across large circular areas of floor are better for leveling.
Dust Control
Whenever you grind a concrete floor level, expect a lot of dust.
There are two primary ways I control the dust.
- Water: Use a hand held sprayer to soak the floor with water as you grind. Water mixes with the dust to create a slurry which keeps it out of the air. But you’ll have to clean the slurry up later. I use a wet vacuum.
- Vacuum: Most grinders will have a connection for a shop vac. I recommend using a vac that’s equal to the size of the grinder you’re using.
No matter which method you use, some dust will get into the air along with concrete chips shooting off the grinder wheel. You’ll have to vacuum this up once the floor is done.
I always seal the vents and doorways with plastic to prevent dust from going all over the house. When I’m leveling an exterior concrete slab, I make sure to close all the windows and doors. If you leave them open dust will fly into the house.
Grinding The Edges
If you’re leveling an inside concrete floor or an exterior slab that touches another concrete structure, you’ll have an edge. It’s important to level the floor right up to the edge or you’ll create a high spot.
I recommend using a hand held grinder with a fine wheel near the edges. Never remove the dust shroud to get closer to a wall. You’ll just spray more dust and concrete chips into the room.
To grind near walls with a dust shroud attached, push the open end against the wall. Go slowly back and forth with the shroud touching the wall. Shrouds are designed so that the wheel can get right up to the edge.
Don’t dig the edge of the wheel into the concrete as you move it back and forth. This will create a gauge that you’ll have to fill in later. Keep the wheel steady and flat against the floor. Move it back and forth carefully. Leveling near the edges and corners is a slower process so take your time and don’t rush.
Grind Down Heaves
Heaves can occur when two concrete slabs meet. The result is one slab’s edge sitting higher than the next. This is very common along sidewalks or driveways.
To level out a heaved sidewalk or cracked slab, use a hand held grinder. Tilt the grinder slightly to remove the bulk of the concrete about 6 to 12 inches back from the heave. Feather back the high spot to the low spot.
If you do it right, you’ll create a pitch that eliminates the heave. The two slabs won’t be level, but you won;t have a tripping hazard anymore.
When the grinder is tilted more dust can escape. I position a shop vac right near the grinding wheel where the dust is shooting from. This will help you catch most of it.
How To level An Uneven Concrete Slab
Uneven concrete slabs are a little different than slabs that aren’t level. Most slabs that aren’t level are pitched in one directions. Usually this is caused because the slab’s sub-layer is sinking and bringing the slab down with it. If the slab cracks you could end up with multiple pitched areas. This creates multiple slabs. But each of those slabs could still have a flat surface. Uneven slabs are different because they have high spots and low spots throughout the floor’s surface.
If you have an existing concrete slab that’s uneven, the best way to level it is with a grinder and leveling compound.
First, use your level, string or laser to go over the entire floor. Establish the finish floor height that you want and mark it on the walls. Then, based on the height you established, mark the floor with two different color chalks.
- Red chalk is used to mark high spots that need to be ground down.
- Blue chalk is used to mark low spots that need to be filled in with leveling compound.
Grind high and inconsistent spots down by moving the grinding plate forward, backward and sideways. I always grind down all the high spots first. If you grind too much you can always fill the space with leveling compound later.
Mix the leveling compound into a thin and consistent paste. Spread the leveling primer on the surface first. Use a soft bristle push broom. Make sure the primer is applied evenly.
Once the primer is dry, apply the leveling compound to all your low spots. Use a squeegee to push and pull compound where you need it. Leveling compound self levels is thin and self levels.
I recommend applying a very small amount over the entire floor to create a smoother, more level finish.
What’s The Cheapest Way To level A Concrete Floor?
The cheapest way to level a concrete floor is by creating you’re own leveling compound.
You can’t use concrete to level a concrete floor unless you plan on adding at least 2 inches to the top of it. Concrete has stone which means the slab has to be thicker. But cement mixes can be much thinner.
Mix your own batch of cement using 1 part Portland cement to 4 parts fine sand. Because floor leveler is very thin, I add about 3 tbs. of plastisizer to strengthen it. Once the dry ingredients are mixed together, add water slowly. Mix the compound in a bucket with a drill and paddle bit or in a tray with a hoe.
The compound should be thin enough to spread with a squeegee but not too watery. The consistency I go for is like syrup.
Mixing your own batch of leveling compound will save you more than 50% per batch. But don’t forget the bonding agent. That’s not something you can make yourself. Whether or not you buy or make the leveling compound, you still need the bonding agent or your new surface layer will crack, chip and flake off.
Summary: How To level A Concrete Slab
When you pour a fresh concrete slab, it’s important to make it level. The first step is preparation. Build your forms and check to make sure they’re level around the entire perimeter of the slab. If the slab touches other concrete walls, use a laser or chalk line to mark where level is. An easy way to do it is to string a line from one side of the slab to the other by attaching to the forms. I also pound stakes into the ground every 6′-8′ feet throughout the slab. I make sure the top of the stake is level with the forms and my wall marks. Concrete is a semi-liquid that’s pushed and troweled to make it level. Work the concrete as you pour it. Remove ground stakes as you go. If your forms, stakes and wall marks are all level, your concrete slab will be too.
Leveling an existing concrete floor that’s uneven is a little different. You have three main options:
- Use a leveling compound to raise the low spots up to the high spots. This is a great option if part of your concrete floor is sinking. I primarily use levelers for interior concrete floor leveling.
- Lift the slab with a jack. This is a good option for outdoor concrete slab leveling.
- Grind the concrete. Grinding the concrete floor until it’s level works for interior or exterior slabs. It’s the opposite approach to using a leveling compound. Instead of raising up the low spots, your grinding down the high ones.
No matter which floor leveling option you choose, make sure to invest in leveling tools. In order to make a slab level you need to know where level is. A long 6′-8′ framing level works great along with string lines, chalk lines and lasers.
If you have any questions or comments about concrete, email any time.

John Mazzuca | About | More Posts |
Custom Home Builder
John Mazzuca is a custom home designer and builder at Gambrick with over 25 years experience in the construction industry. John has designed, built and/or remodeled hundreds of homes, small buildings, and commercial projects. He writes about business, real estate, home building, and household electronics. His work has been featured in Fox Business, Better Homes & Garden, House Beautiful, and more.