Bathroom Wall Paneling Ideas
So you’ve finally decided to remodel a dated bathroom. Your moving into a new house and want to make it all your own. Or maybe your building that dream home and have a few new bathrooms to design. What you need are some bathroom wall paneling ideas and you’ve come to the right place.
Bathroom paneling ideas offer an easy DIY way to elevate your bathroom’s design and style. Whether you use tongue and groove, square panels, wainscoting or shiplap, bathroom paneling can add interest and warmth while creating a style. From Traditional to Modern, Rustic, Vintage or Beach themed, bathroom paneling works along side other bathroom ideas to help define the space.
Bathrooms are relatively small compared to other rooms in the house but they pack a lot of punch. Go floor to ceiling, 3/4 or stick with the traditional wainscotting height and pair it with some patterned wallpaper or a bold color for a more modern edge.
Historically, bathroom paneling ideas was a functional addition that helped insulate the home. However, it quickly became a decorative feature too. But wood work is more expensive than drywall so many have stopped using it or used tile instead. But wood bathroom paneling is is a great choice and definitely makes a huge difference in even a small bathroom.
The great thing about bathroom paneling is that it’s easy to do. If you own some basic tools and have the time it’s a great DIY project. A typical bathroom can be completely transformed in a weekend. And most wall paneling is installed right over the drywall so there’s no demo involved.
In this article we’ll go over the main types of bathroom wall paneling designs we use on our custom homes along with pros vs. cons, pricing, and builder tips.
Bathroom Wall Paneling Designs
The majority of homes, both old and new, could use some help when it comes to bathroom design. Even most brand new homes come with finished bathrooms that are kind of boring. These could be McMansions, tract homes or even custom spec builds. Sure, they tick some of the major boxes, living rooms have big windows, the floor plan is open and kitchens are generally top of the line. But when it comes to bathroom wall trim there’s nothing special about them. No built-ins, no wall paneling, no wainscoting and zero wow factor.
The majority of bathrooms we remodel have zero paneling on the walls. Clients who call us know that filling their bathroom full of “stuff” just to mask the fact it was poorly designed won’t really make them happy. And I know they’re not alone.
We all want an unforgettable home full of charm and character. But we generally buy based on other things like location, size, school district or budget. Even most brand new million dollar homes lack the character that gives many older homes their charm.
Vintage homes have some of the most impressive wall moldings and finish work you’ll see. But wood paneling is expensive so builders stopped using it and switched to drywall or tile to save money.
Some of the best bathroom wall paneling designs include:
- Wainscoting
- Bead-board
- Tongue-in-groove,
- Box
- Modern
- Floor to ceiling
- 3/4 height
- 1/2 wall combined with paint or wallpaper
We’ll go over these designs and a lot more throughout the article.
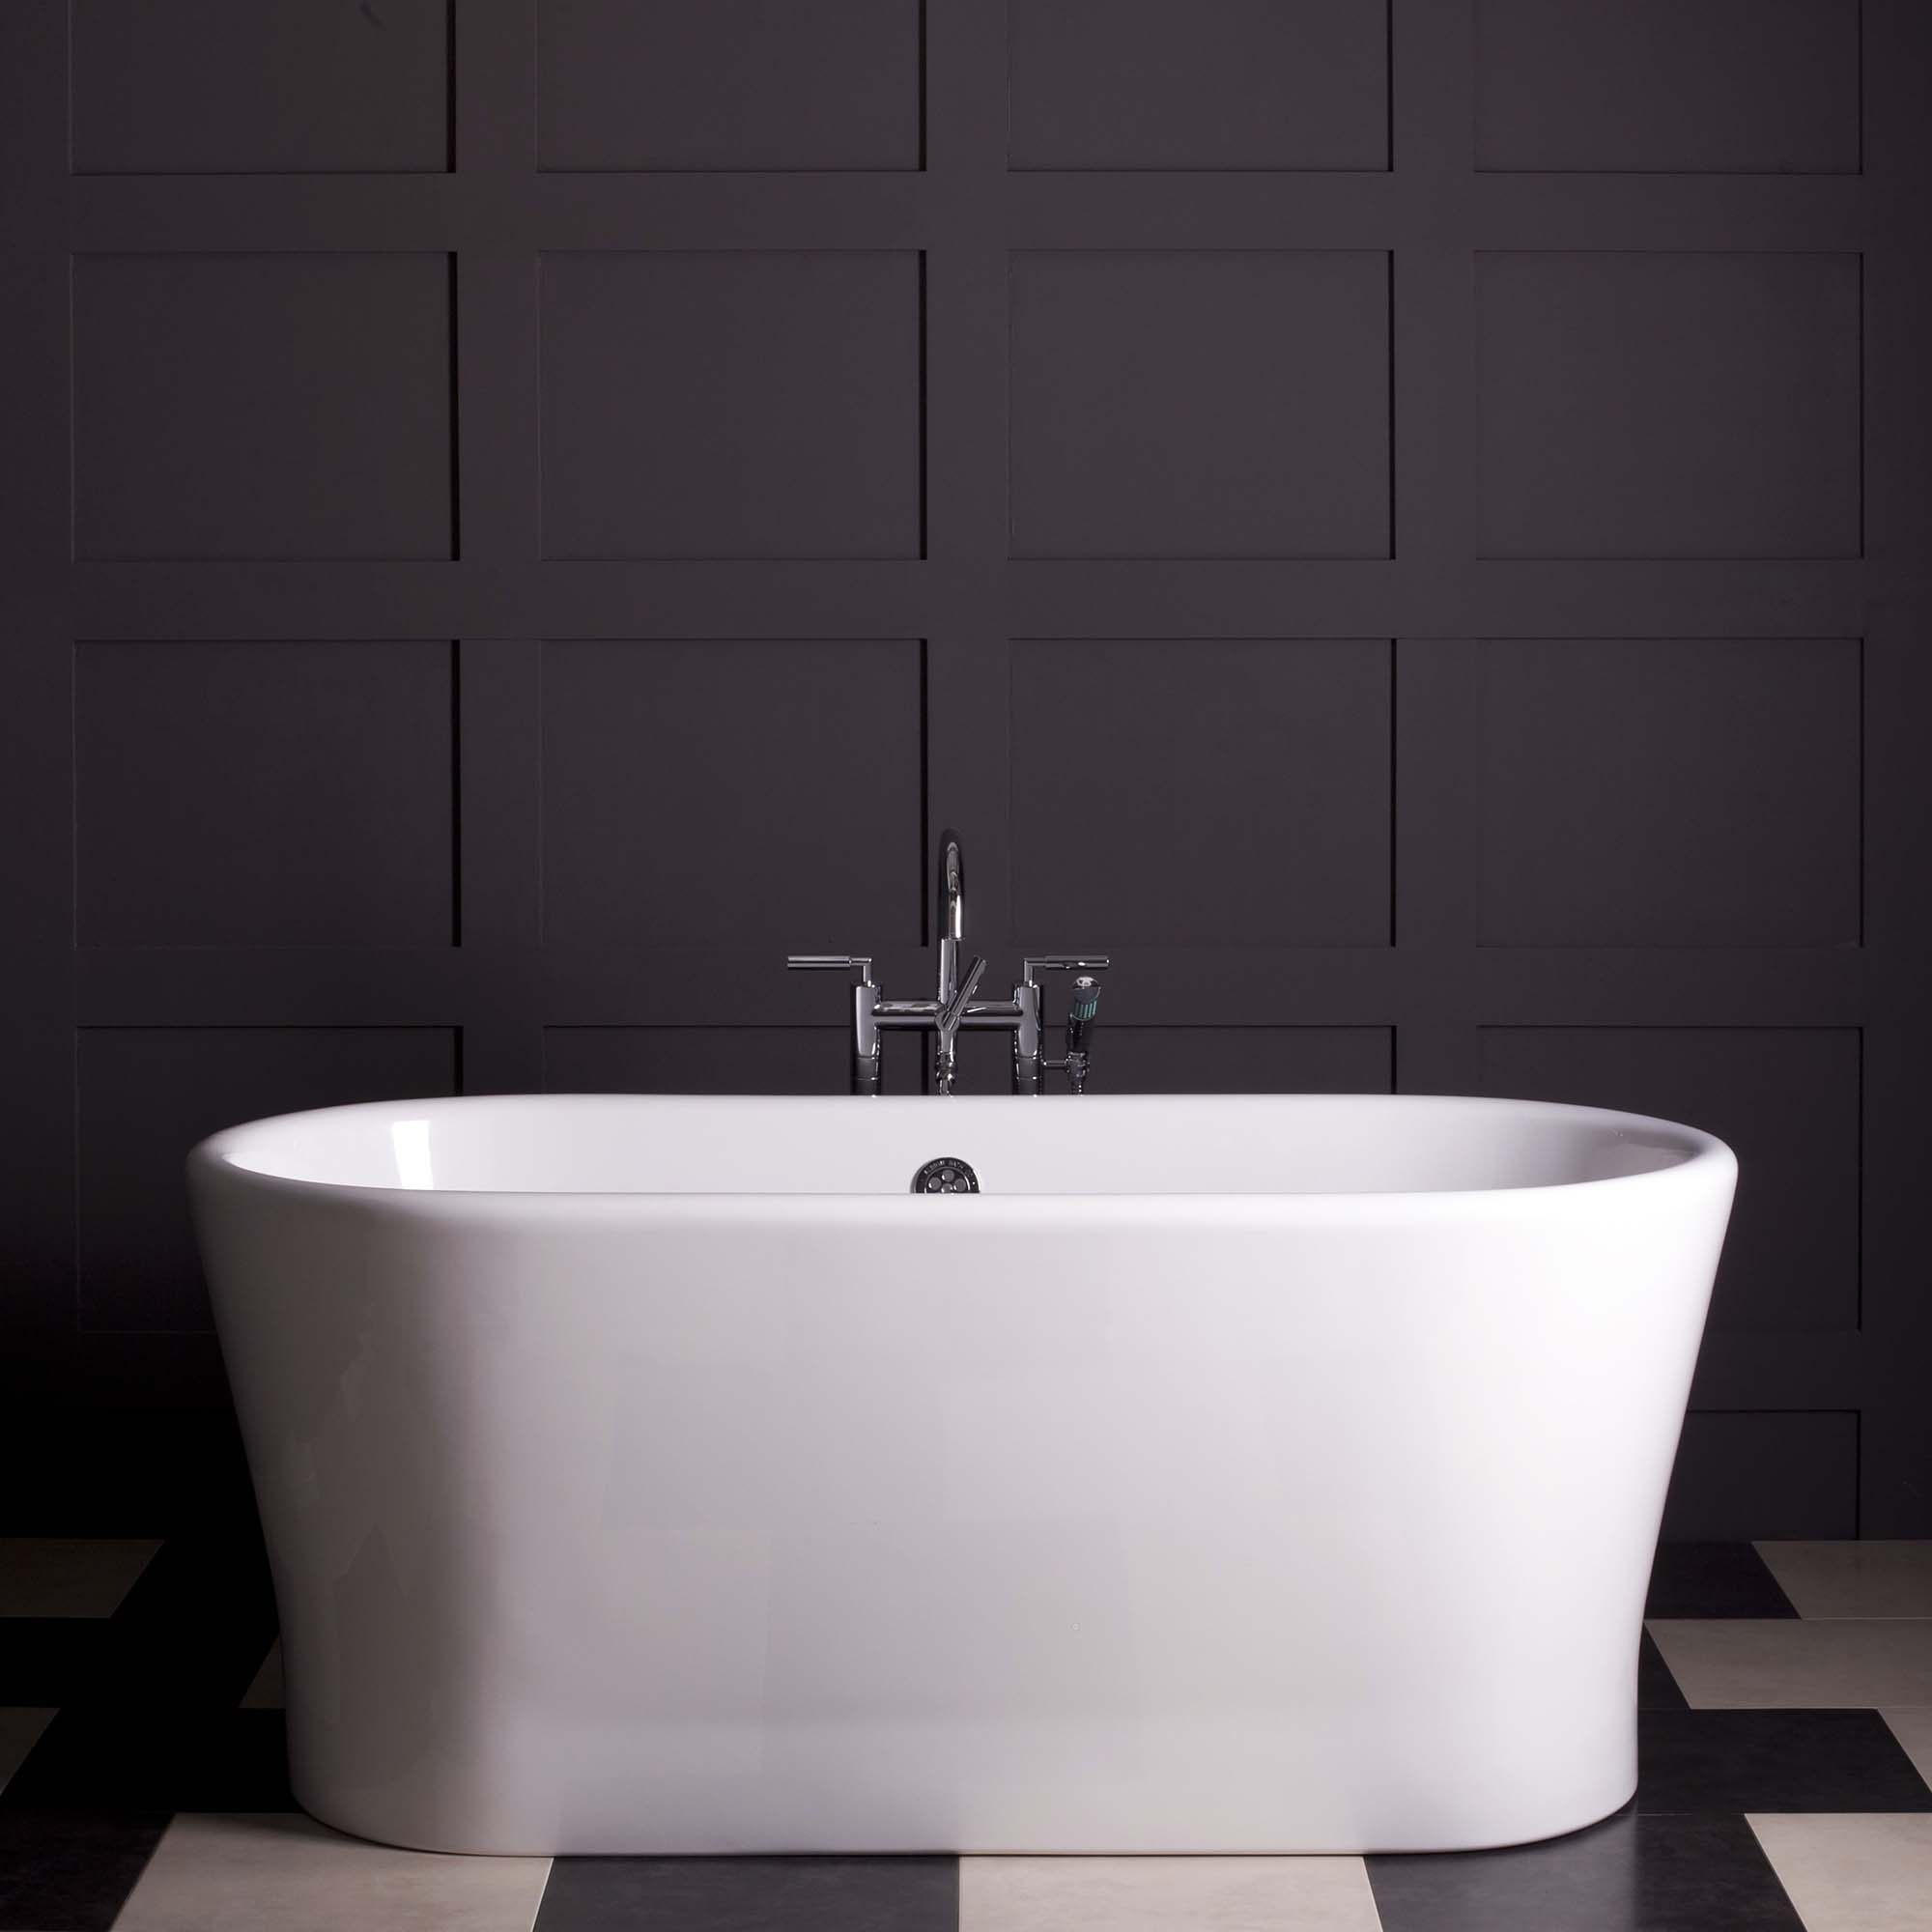
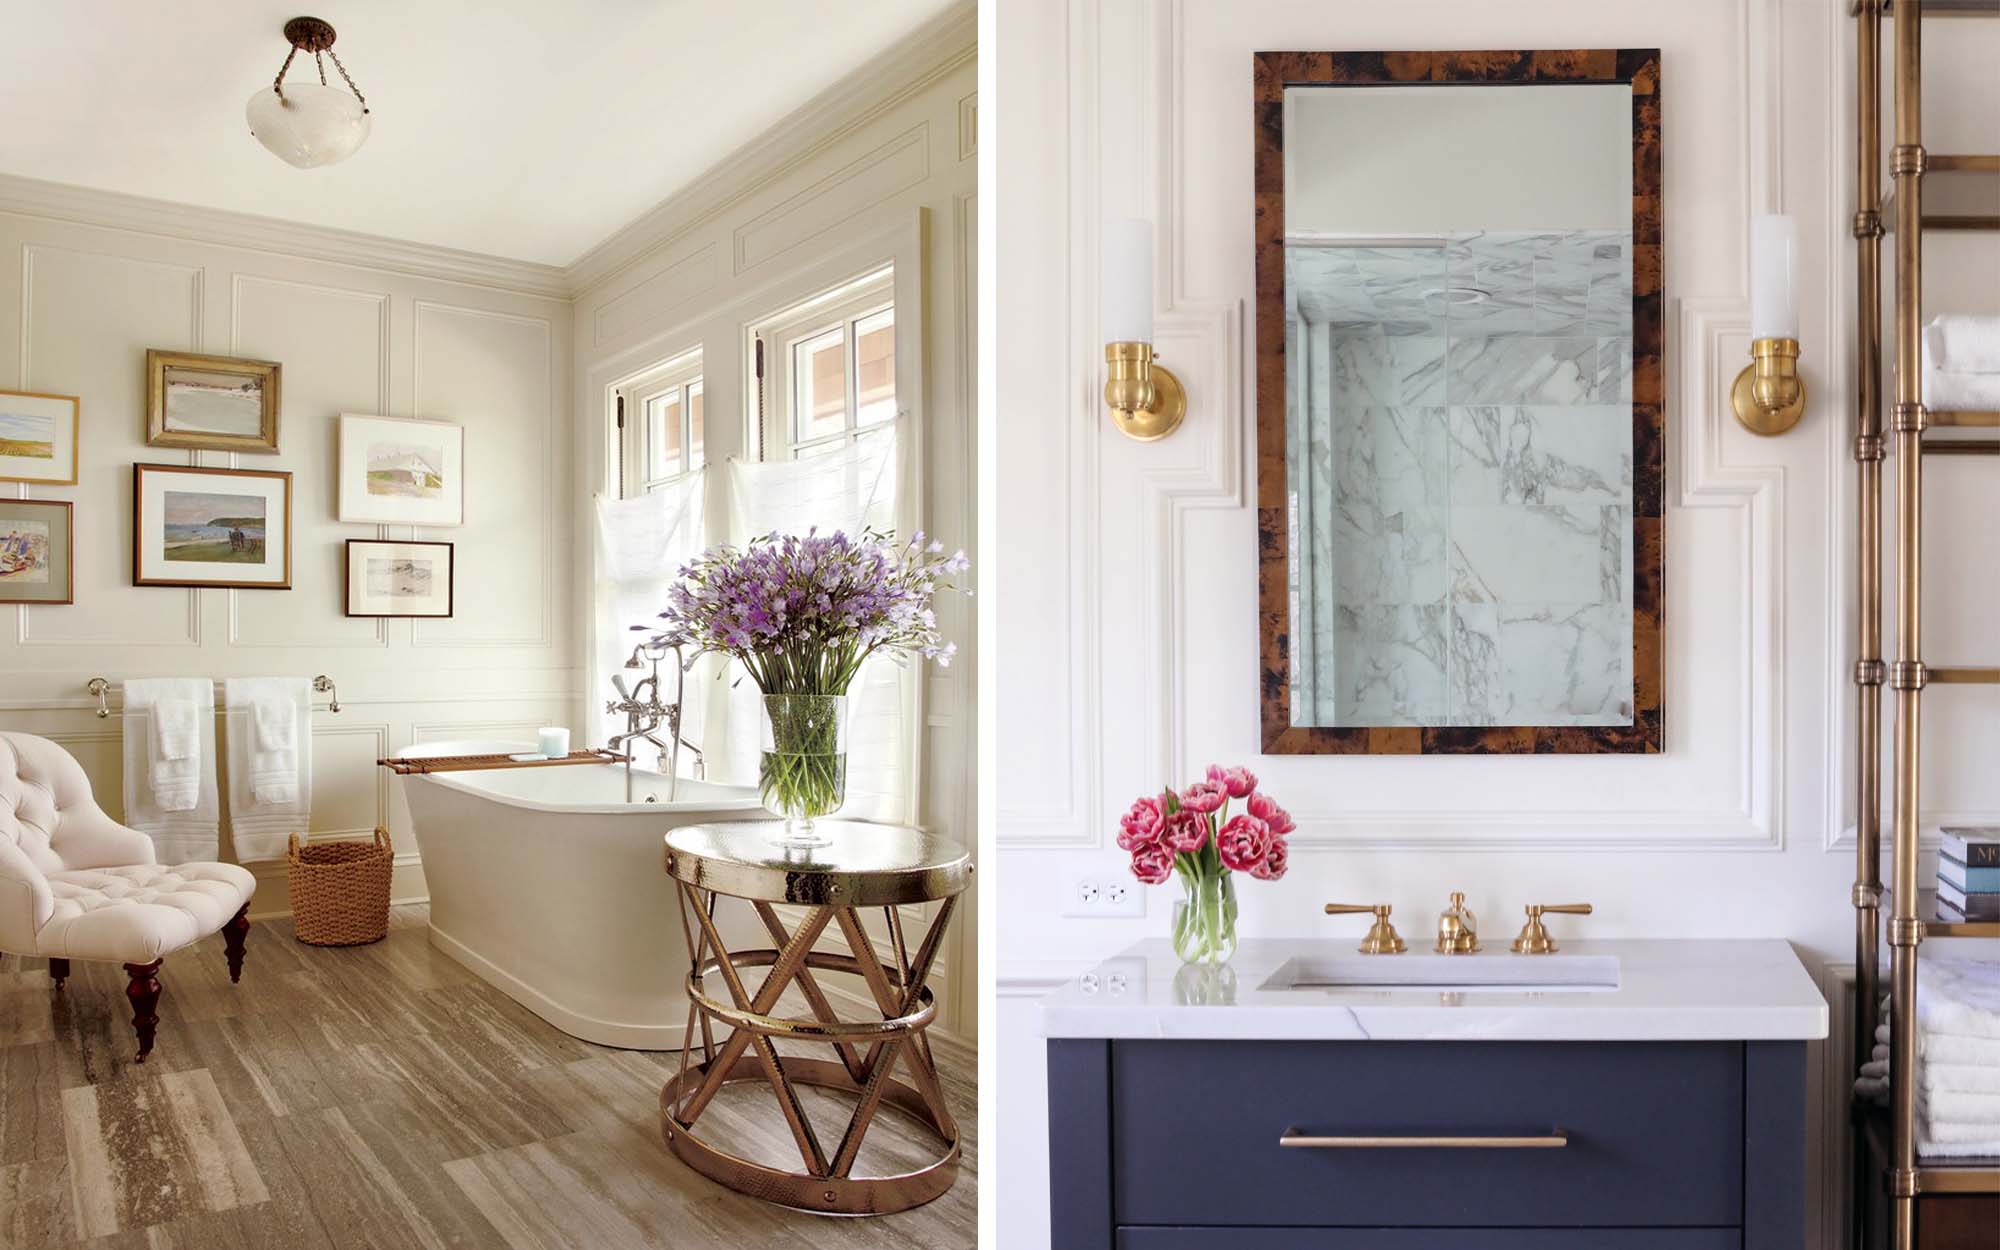
Bathroom Box Molding
How do you make a HUGE design impact with wall paneling without any extra decor? By adding wall paneling called box molding.
You know what I love about decorative wall molding? There’s almost no limit to the designs and it makes a great DIY project. If you have the skill and tools, it’s not that expensive to do and can be finished in a weekend.
This box molding deign is simply 3/4″ x 4″ boards glued and nailed to the wall frame in a square pattern. This is something anyone can do themselves with a saw and some other very basic tools like a caulk gun.
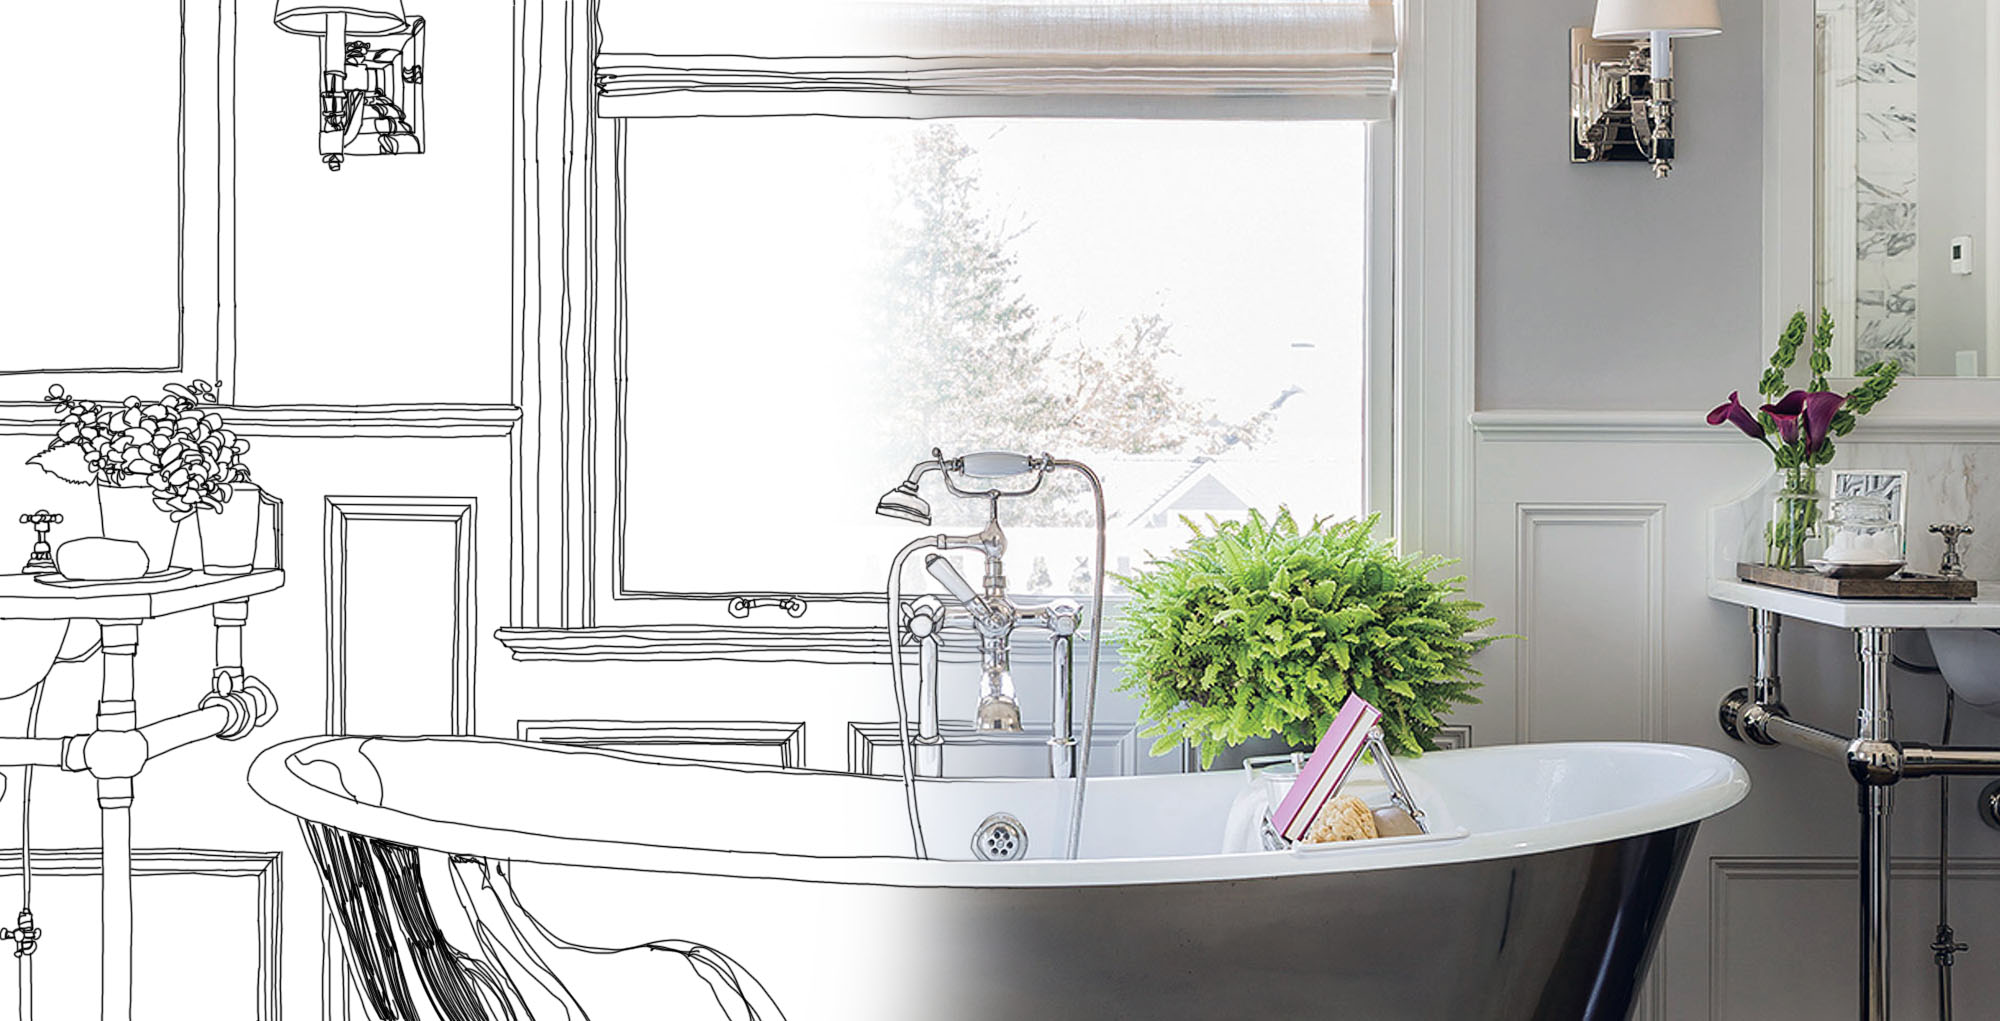
Once all the boards are nailed and glued in place, use some wood filler to smooth out all the tiny imperfections. Then sand, prime and paint. I love the way this dark gray pops against the white tub and tile floor.
This is one of the simplest, cheapest and easiest bathroom wall paneling ideas to build. And its also one of the most impressive. The strips of wood are installed right over your drywall so there’s no major demo. All you have to remove are the old moldings.
You can customize not only the size of the boxes to make squares, rectangles, or a combination of each, but also the thickness of the boards to achieve a more 3-dimensional look.
Because your basically just gluing strips of wood to the wall you don’t have to make complicated compound cuts. No ripping boards. And no building any multi layered trim pieces are required. That’s why this wall paneling design is such a great DIY project.
Box molding is very versatile and works really well in any style home. What helps define the style is the color you use. A dark grey like this leans a bit Modern but white is more classic.
Bathroom Paneled Walls With Box Molding
Crown molding can add elegance and style to an ordinary room. Wider door, window and baseboard moldings take a home from builder’s grade to something special. All of these trim styles are great additions to any bathroom.
But one of our favorite types of molding is a panel molding style also known as box molding. These are the square or rectangular shapes created out of simple pieces of pine applied to the walls with wood and glue. Most often box molding is used in the formal spaces of a home such as the dining room, foyer and living room but it can make a huge difference when added to a bathroom.
Pro Tip: We recommend that you paint the walls and moldings, especially the box molding, all the same color.
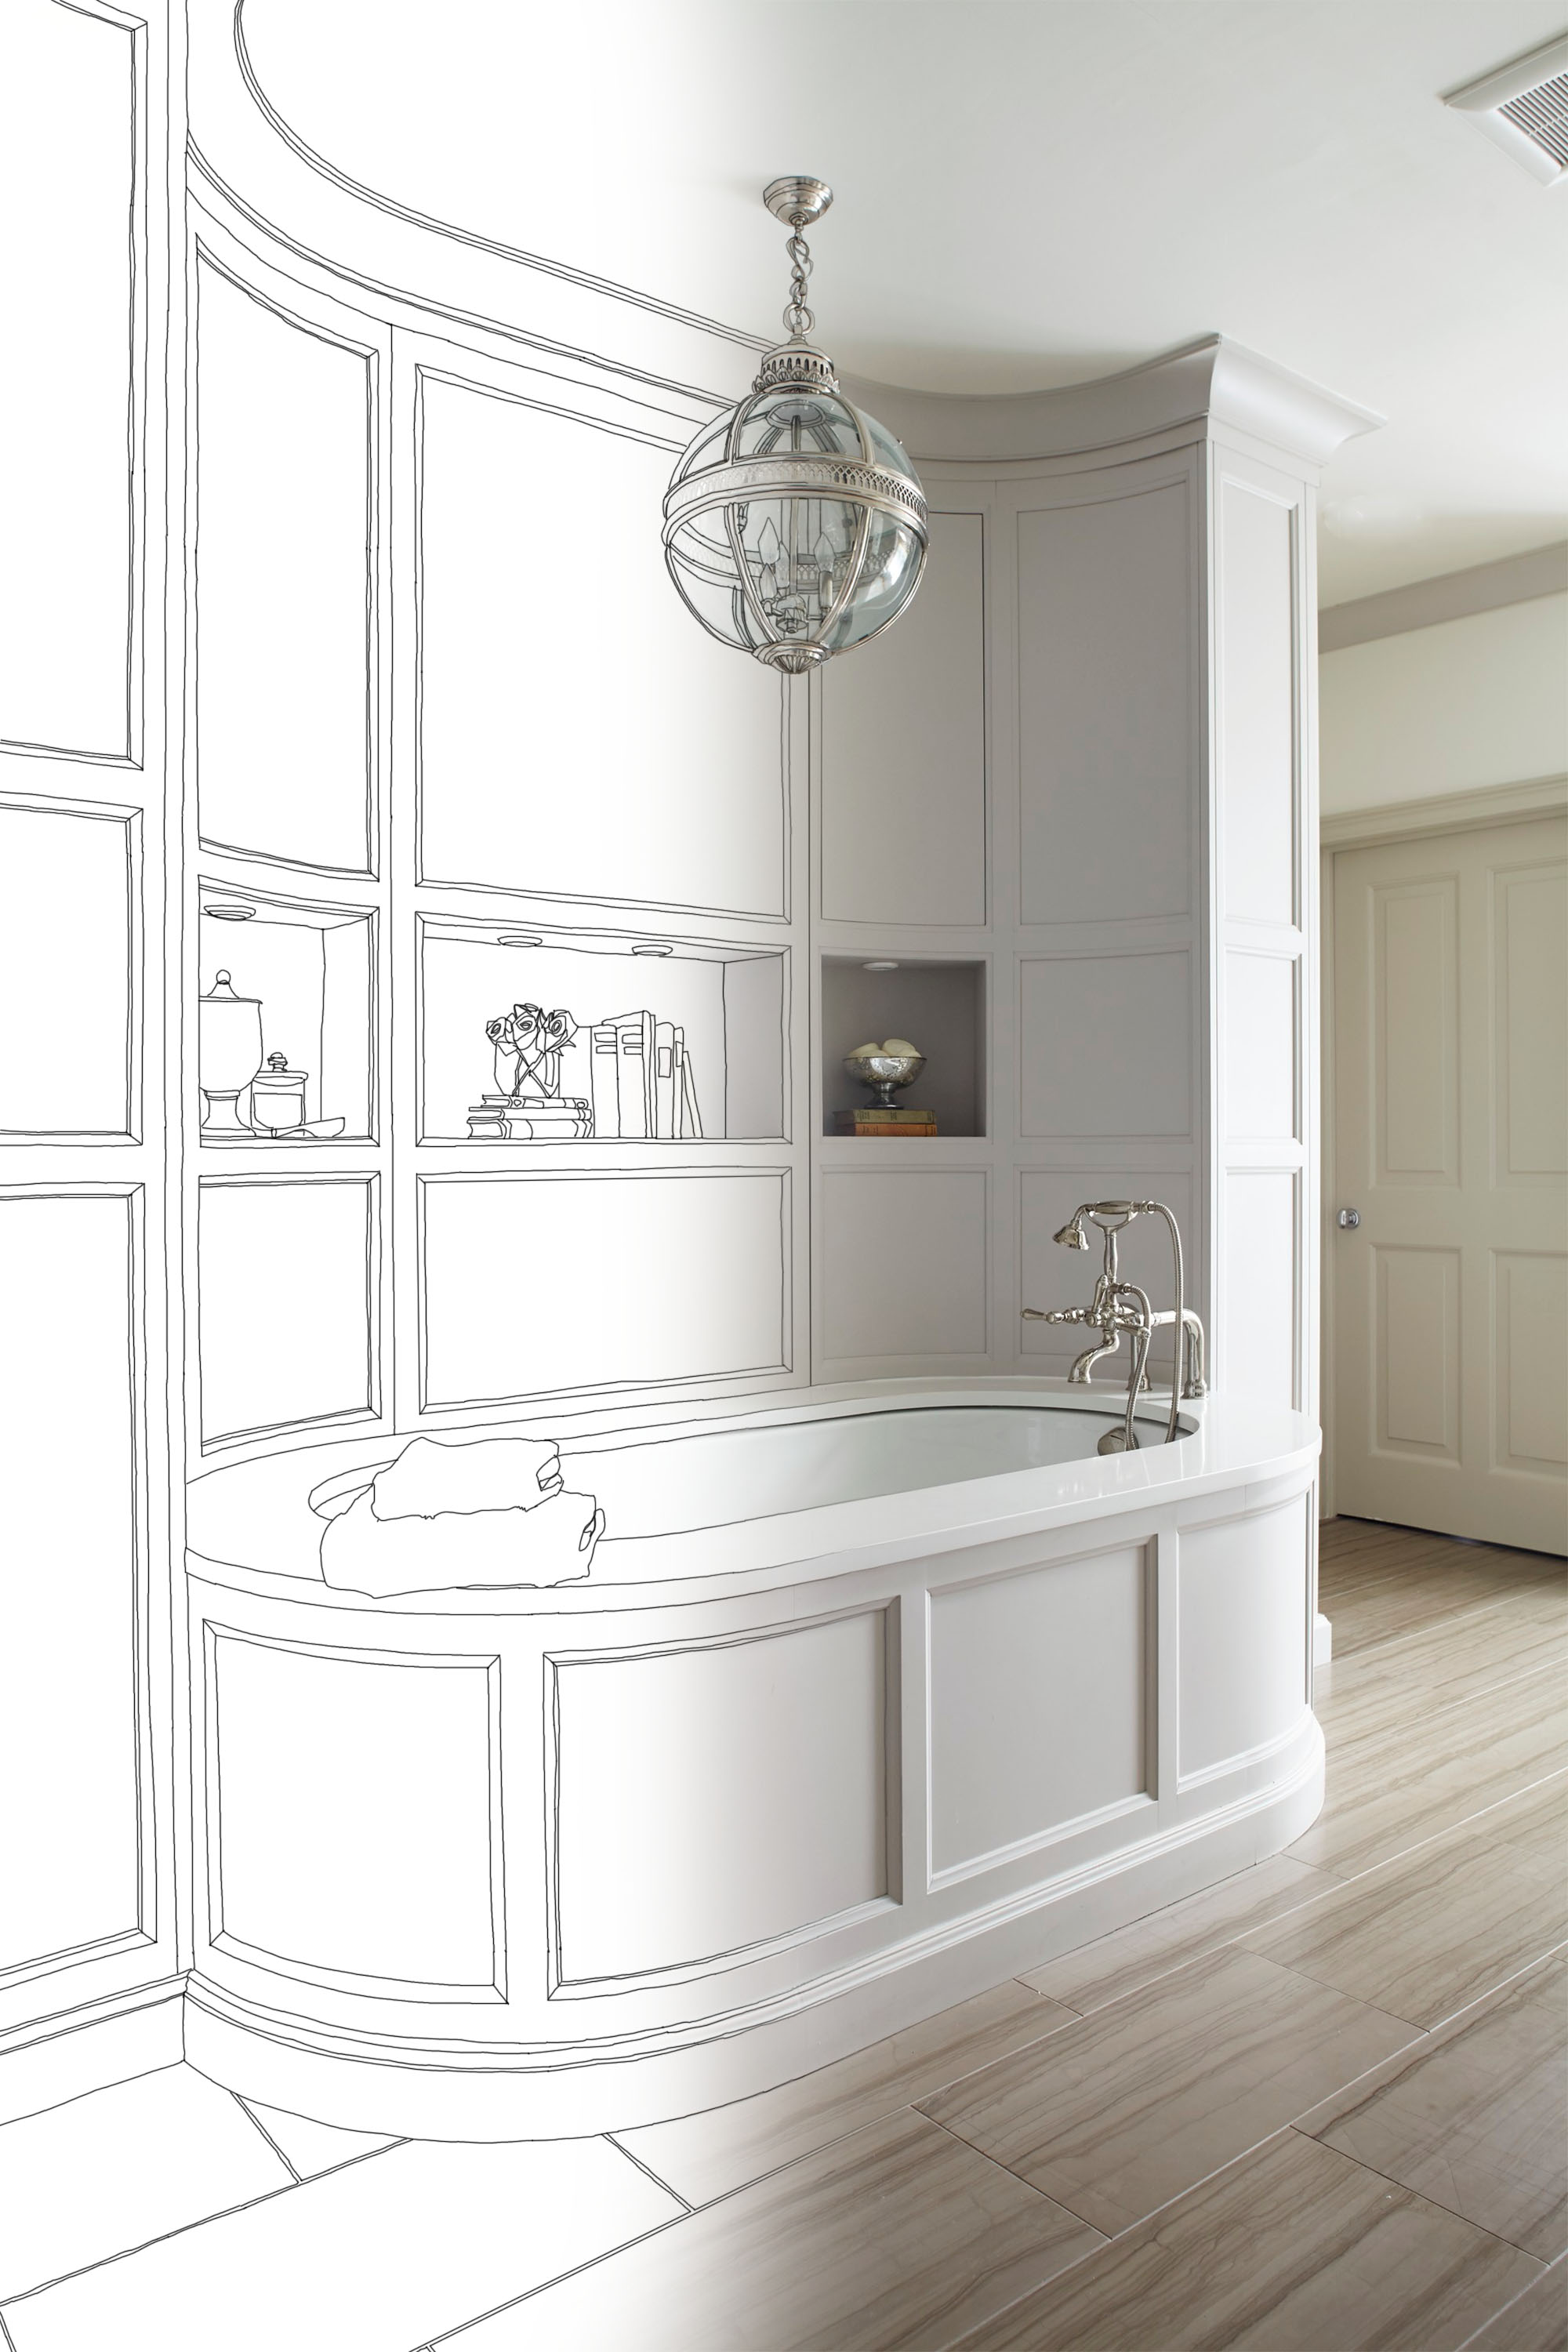
Design Your Own Box Wall Paneling
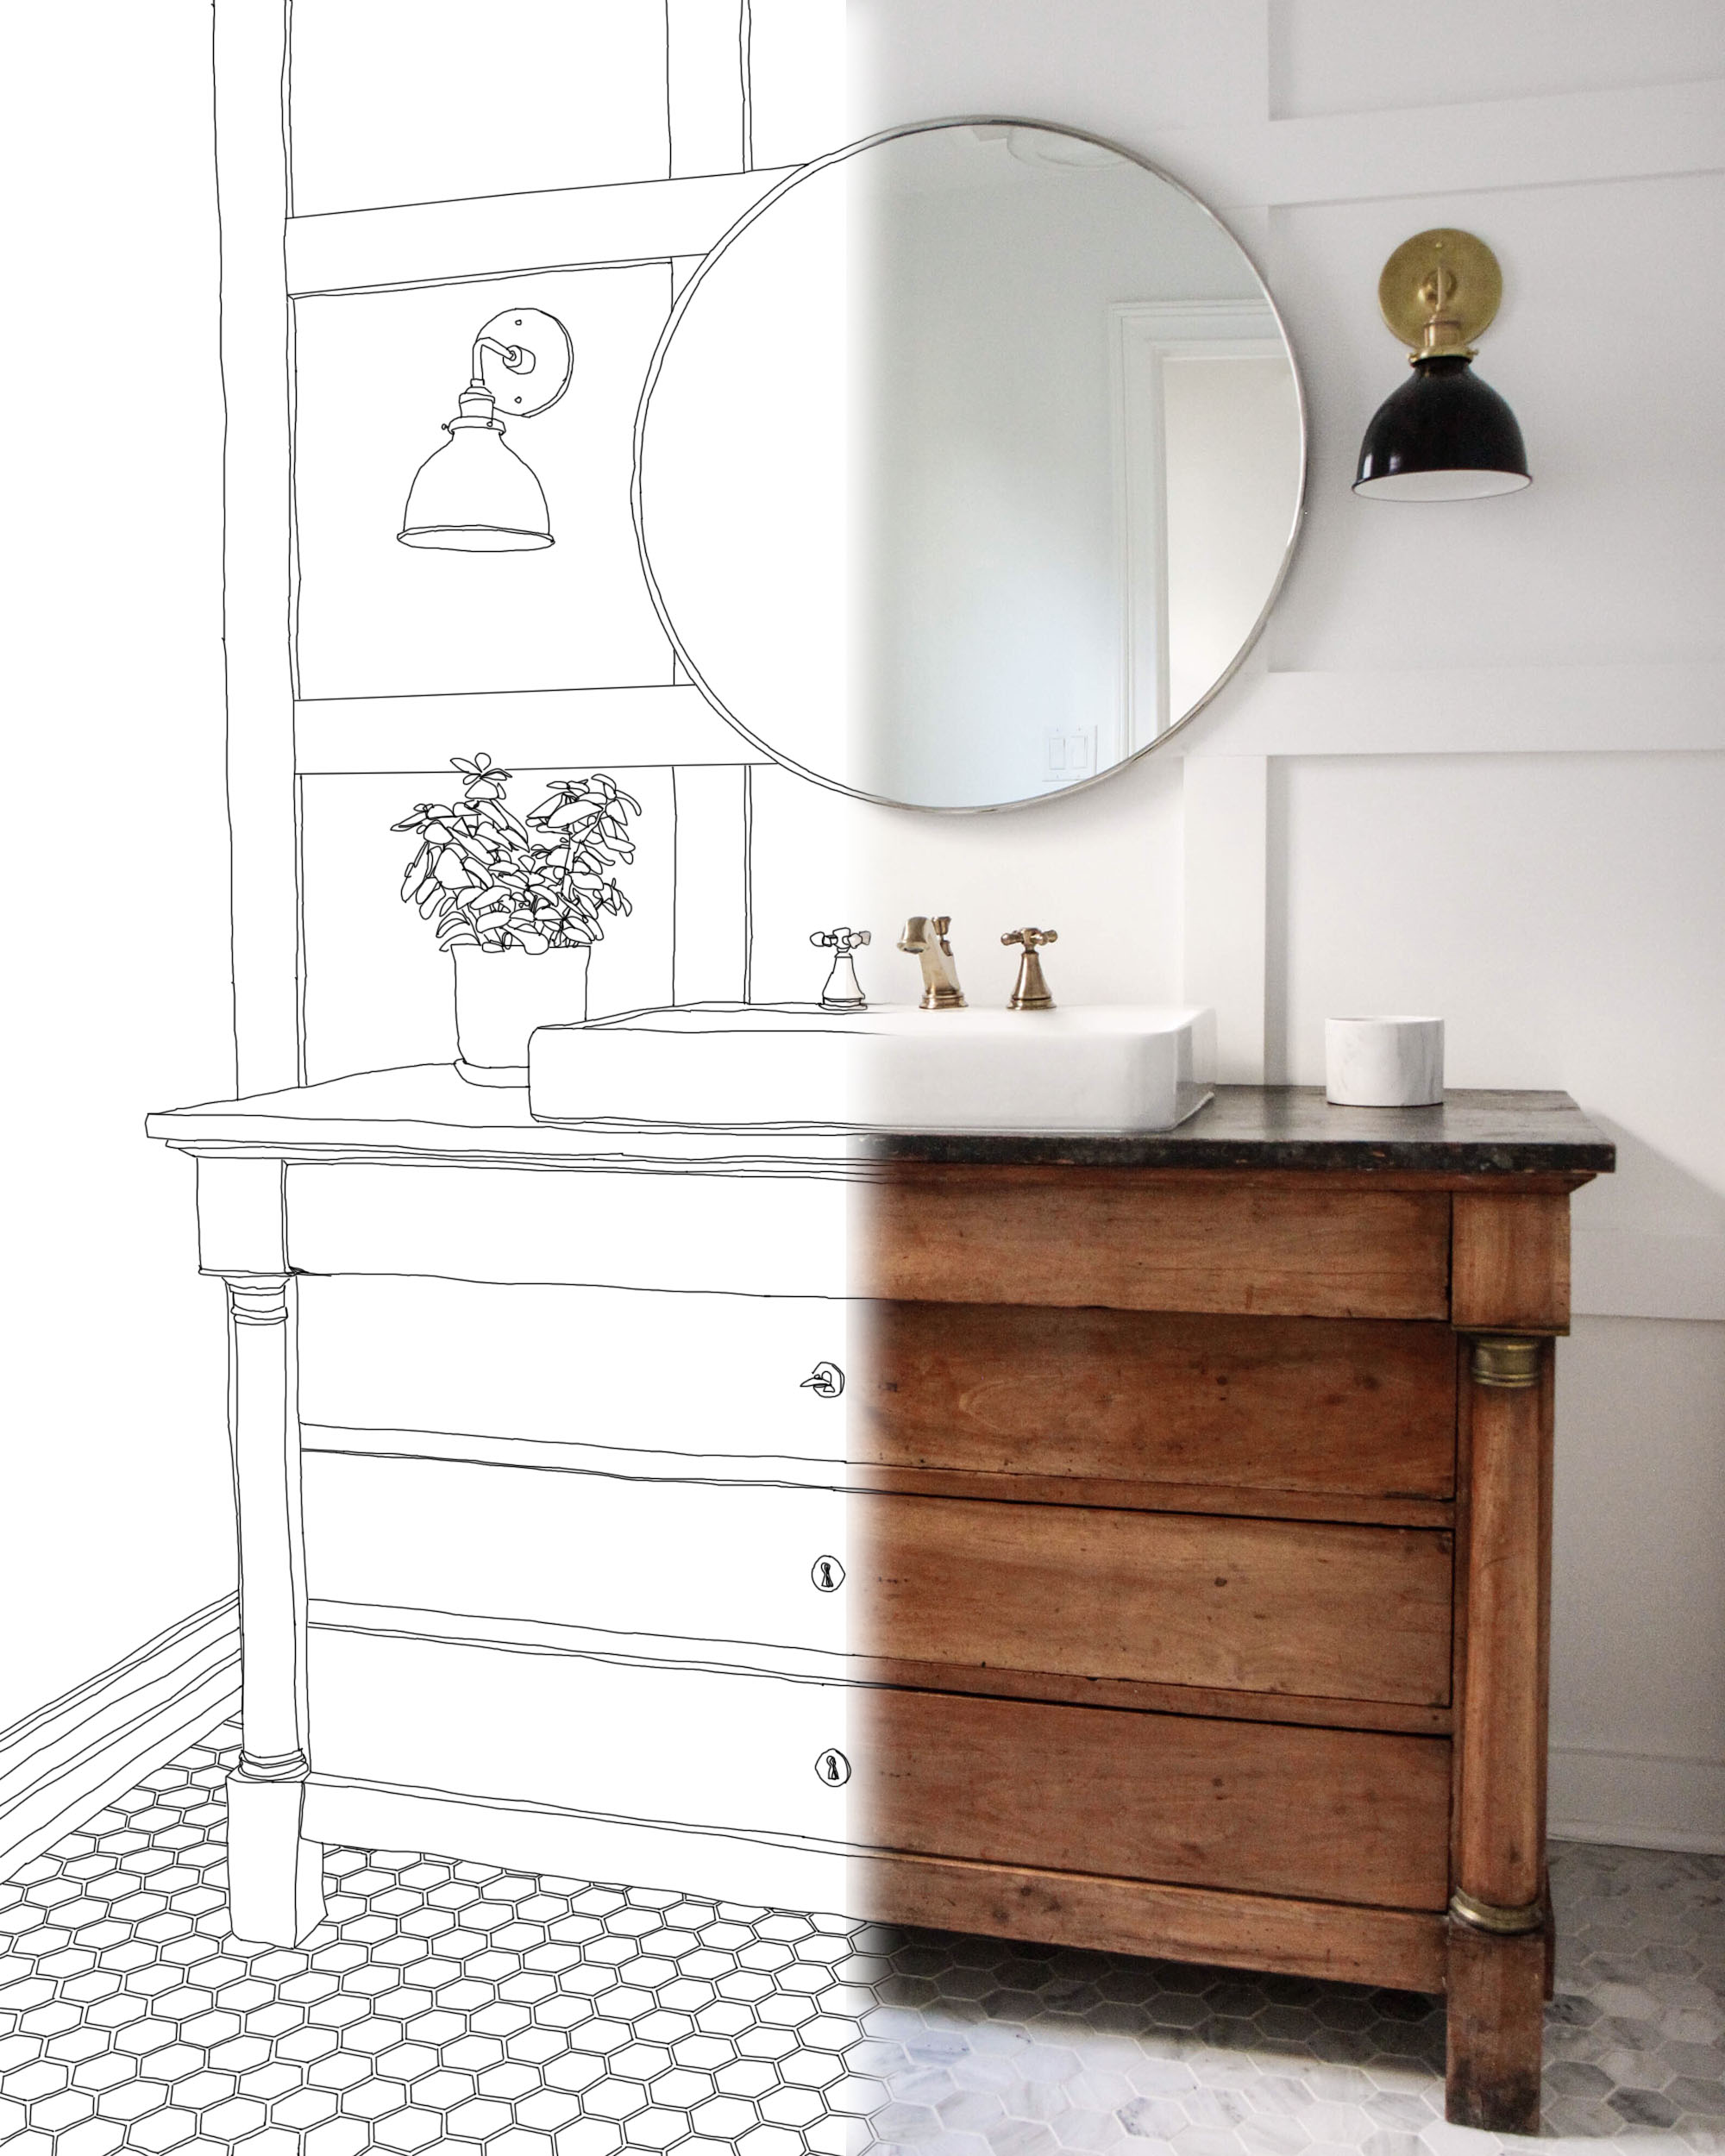
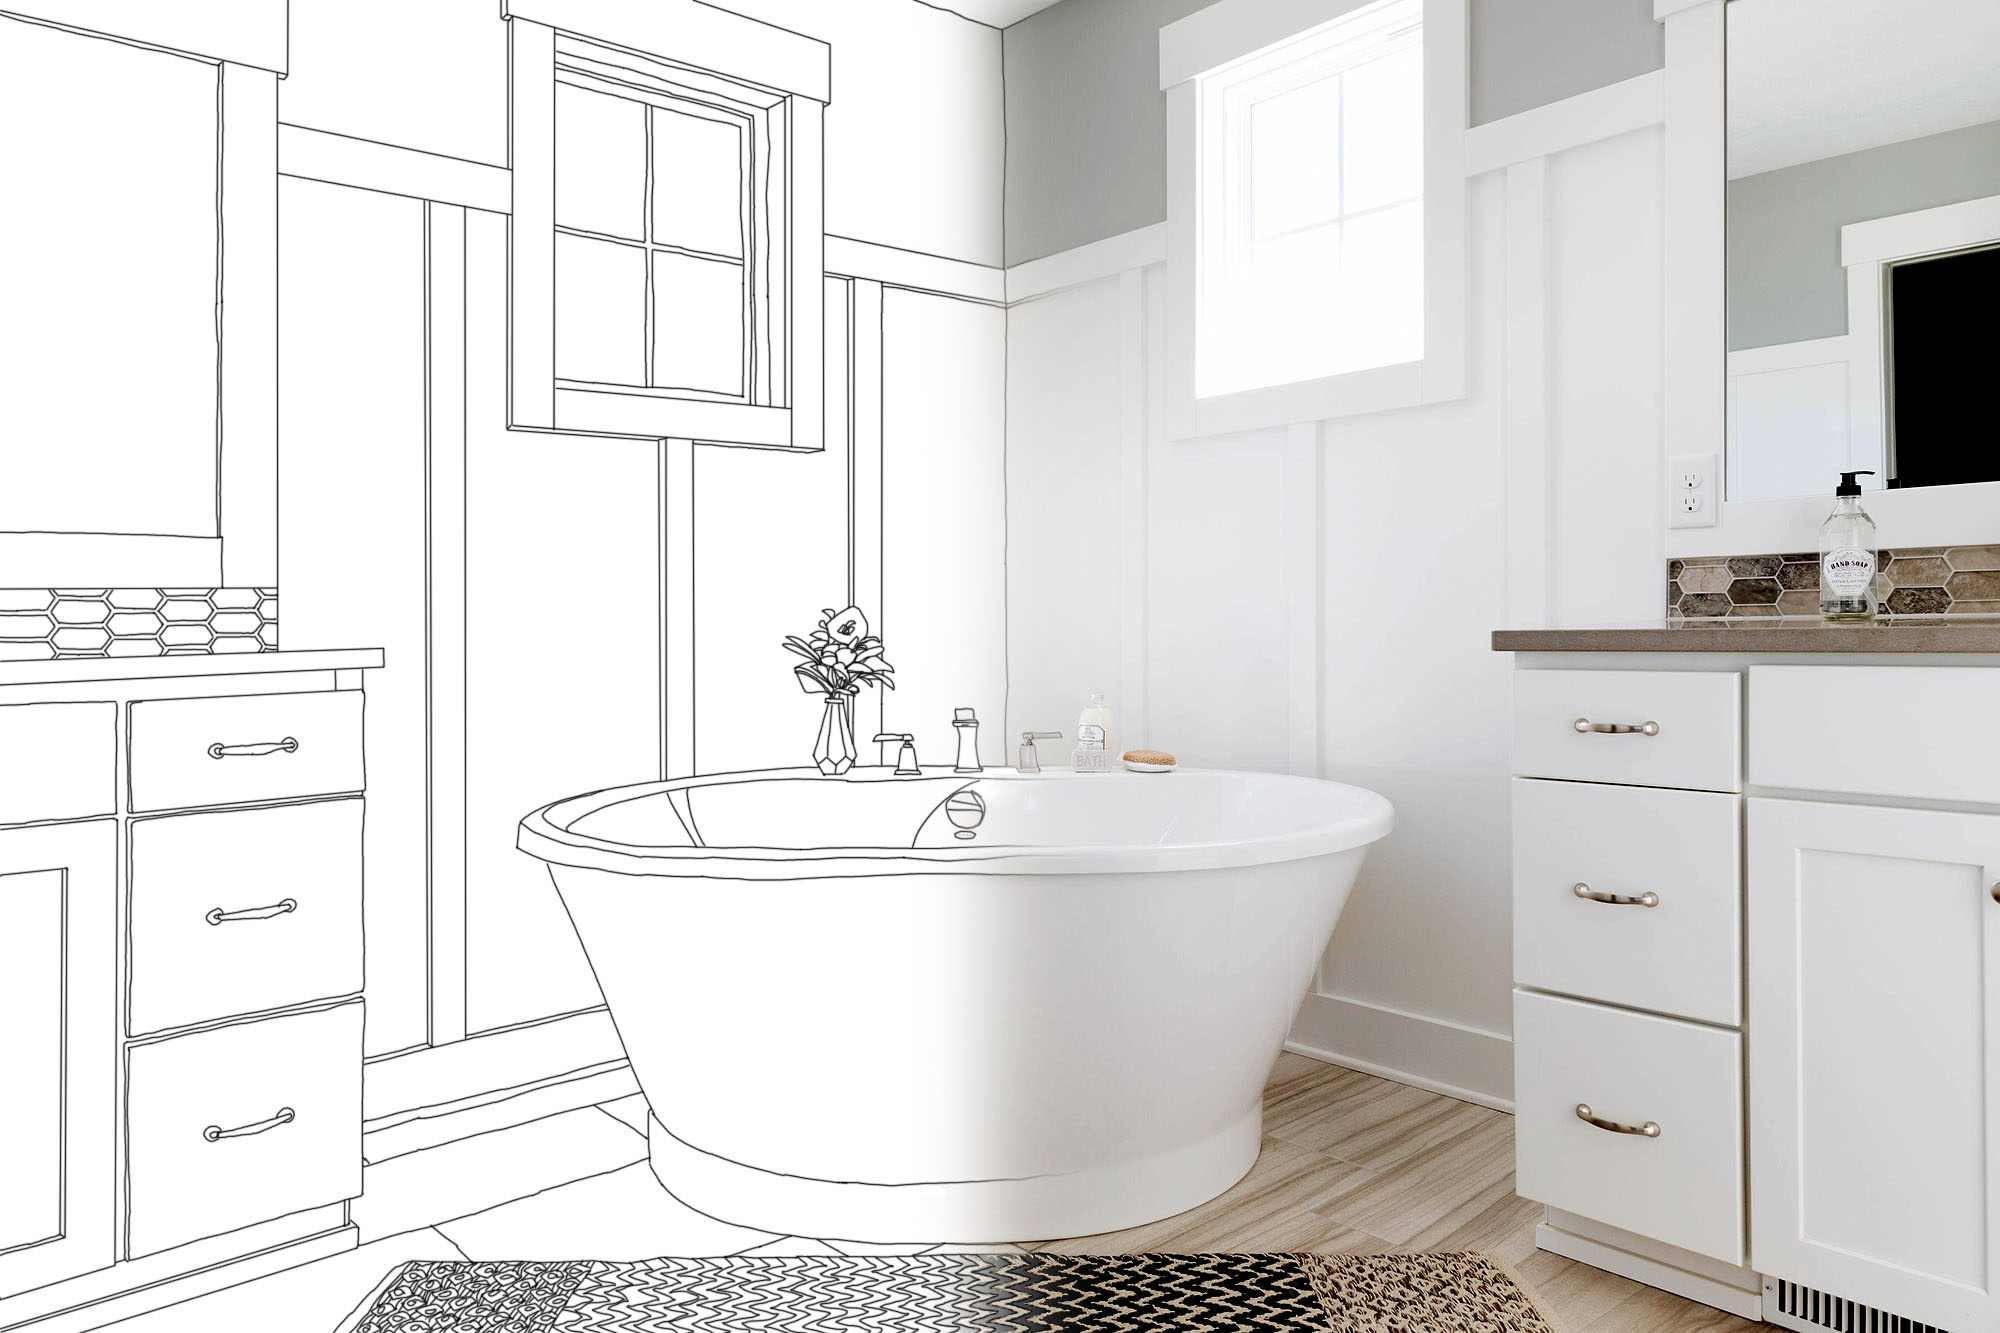
Before you build anything draw out your designs on paper first. It’s a big help and all the top designers do it. Imagine trying to build a home without having a blueprint.
As a builder, everything we do is planned out and designed before we do any actual physical work. And this includes all of our bathroom wall paneling ideas. Every design is first drawn to scale to make sure it looks good in the space before we start building.
When we make changes, new designs are drawn out to make sure they look good and stick with the client’s vision.
You can go through tons of variations with a simple pen and paper. If your not that great at drawing it’s no big deal, wall paneling design sketches don’t have to be perfect. Your just trying to get the general style ideas down on paper. Having something to look at will help you visualize the space.
Pro Tip: Design your wall paneling ideas on paper before you start work. Lay out the lengths and widths of each piece of wood. Make sure when buying lumber you get straight pieces, #1 or premium grade is best unless you want a rustic look because knots will show through the paint.
Pro Tip: Make sure when cutting the boards for box wall paneling that you get a clean, square edge. This can be done with any saw but it’s a lot easier with a miter saw. You can rent them by the day if you don’t own one. Any gaps will need to be filled and sanded which adds work to the job. Try to get the joints as tight as possible.
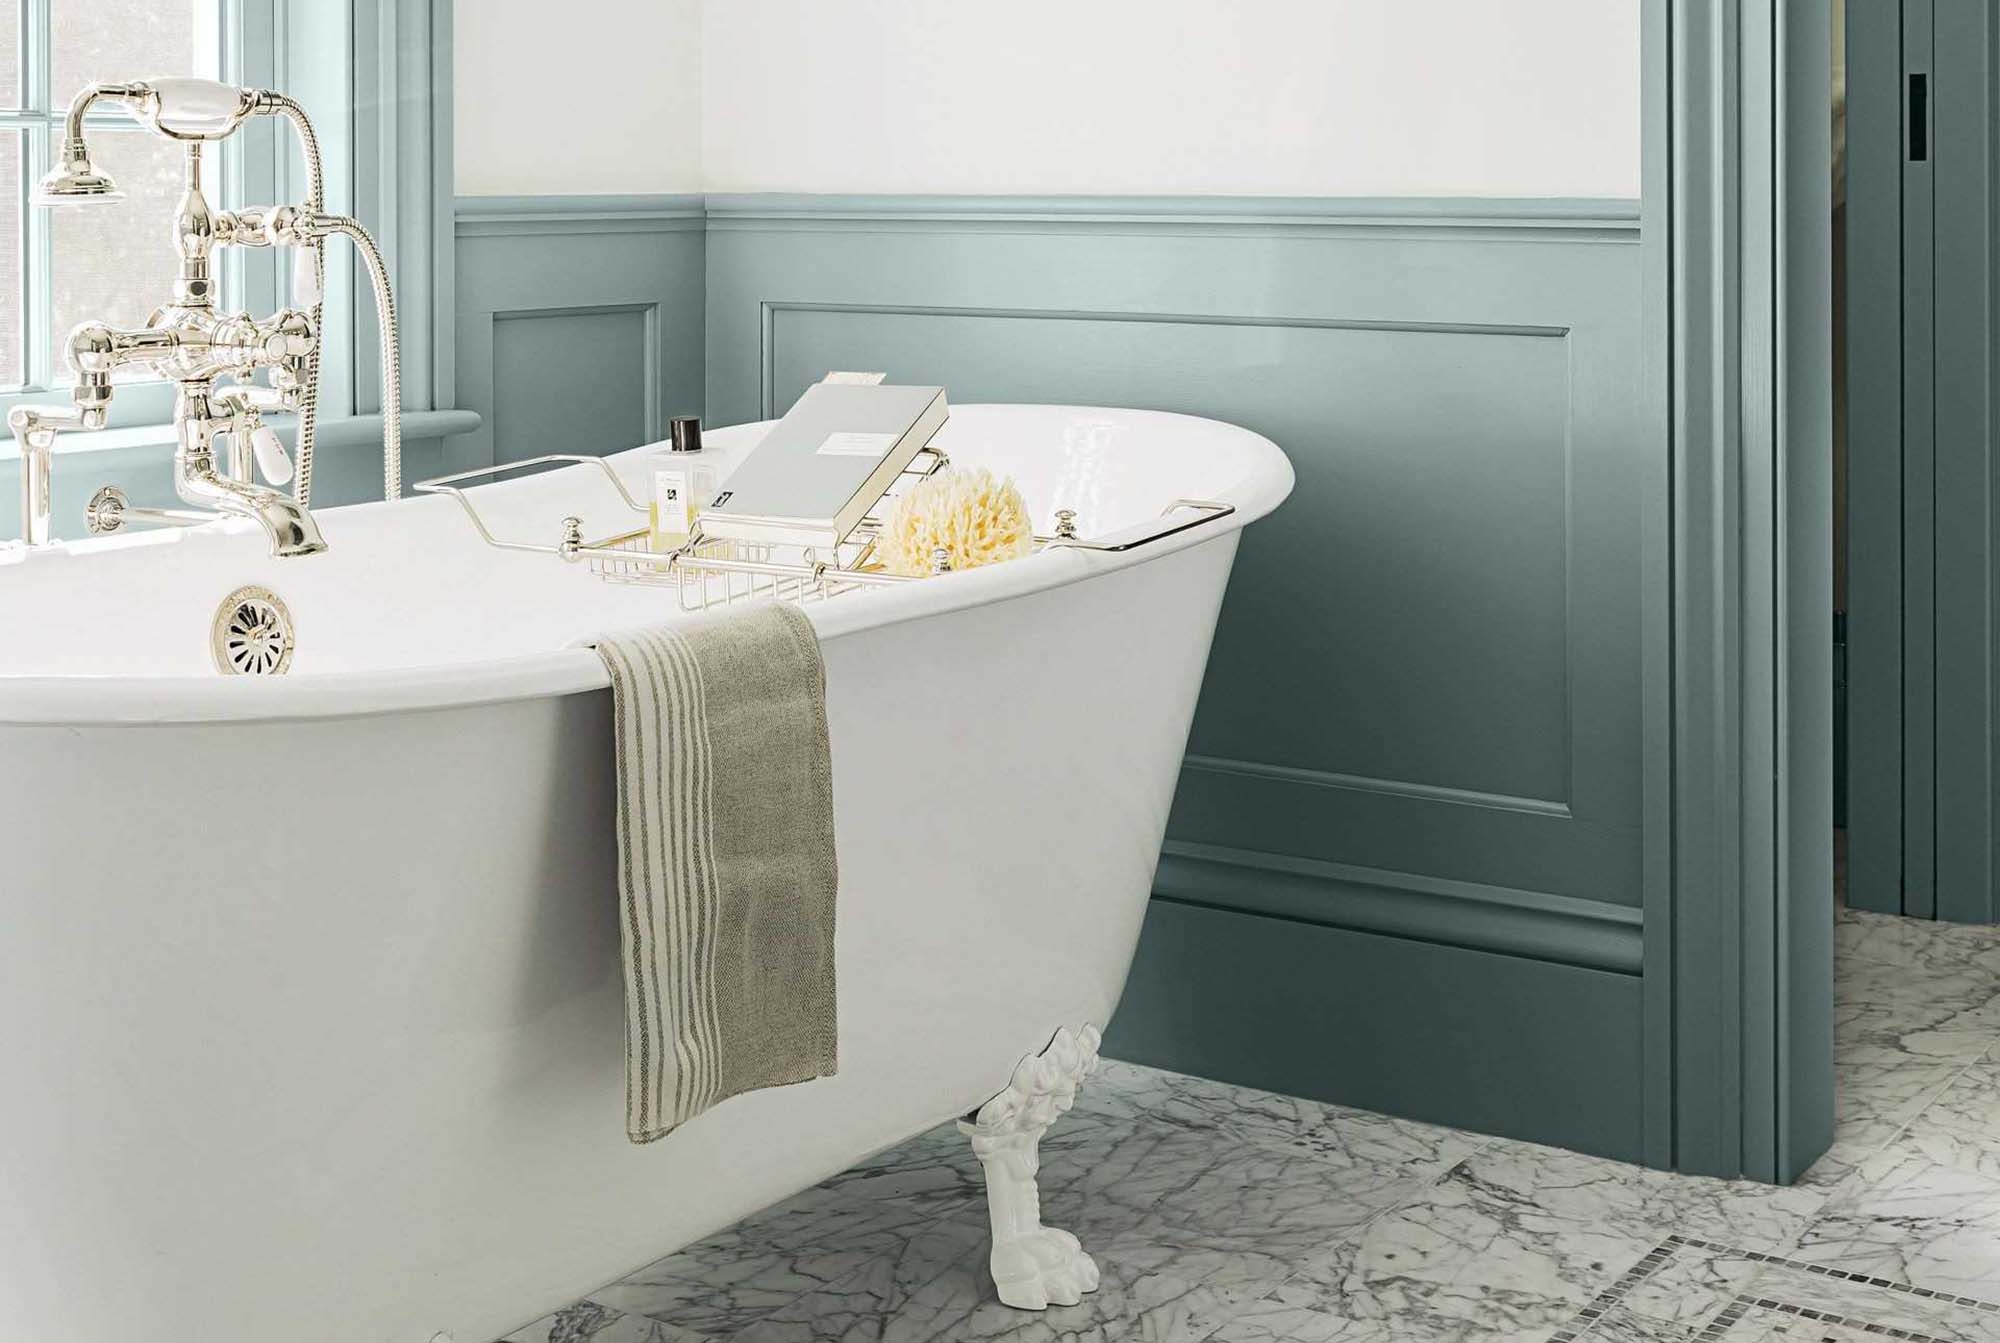
Bathroom Vertical Wall Paneling Designs (Shiplap)
When you hear the words vertical paneling it conjures up images of bad 70’s style, shiny fake wood walls and shag carpeting. But vertical bathroom paneling designs, when done the modern way, can bring a lot of character to a room.
Modern vertical wall paneling should be painted. The most popular color by far is white, but any neutral can work.
Vertical wall paneling can be customized by selecting different sized planks. This drastically changes the look and feel of a room. 4 inch is the most popular panel size. Go thinner than 4″ and the room starts to look more like bead-board. Go wider and it can either look Rustic or Modern depending on the color and wood you use.
Notice the wall paneling shown above. 4″ planks were used with a narrow gap. This is the most commonly used design and can be paired with base molding and/or crown molding.
Vertical paneling is one of the easiest ways to heighten your walls and create openness in a smaller space. That’s one of the reasons why vertical wall paneling works so well in a bathroom. It’s a detail that will also create dimension and visual interest to your walls.
Painting your paneling really takes your design up a notch. And it makes the space feel more modern and clean. I use mostly white, creams, greys or other soft neutral colors.
Unlike bead board and V-groove, which are connected via tongue and groove keep the joints tight but you can widen them a little if you prefer how it looks.
Pro Tip: Adjust the gap size depending on how to plan on painting the wall. Really tight gaps are are hard to paint with a brush so I use a sprayer. But if you don’t own a sprayer widen the gaps a little so you can squeeze in a brush.
Where And How To Use Vertical Bathroom Wall Paneling (Shiplap)
Shiplap is often installed horizontally in a room to help carry the eye around the room, making it feel larger. But installing shiplap vertically helps make bathroom ceilings feel taller.
Because vertical wall paneling creates interest in such a clean, simple way, it can work well in pretty much any bathroom. And it’s very easy to combine with other wall finishes like base and crown molding or tile.
Shiplap vertical paneling is very easy to install. It can be nailed to the wall frame or glued in place over existing drywall. This makes it another fantastic DIY bathroom wall paneling design.
Part of the charm of vertical shiplap comes from the gap between boards. When you paint the gaps be careful not to use too much paint. Drips and runs inside the gaps will look really bad.
Pro Tip: When installing vertical shiplap by yourself make sure the first board is level. Once the first board is installed and level the rest are easy because they follow the line of the first board.
Pro Tip: I almost always start in the center and then work outward so that the end boards are equal sizes. You may need to rip the last boards unless you get lucky and end with a full board.
Vertical Bathroom Wall Paneling Designs
Vertical bathroom wall paneling is usually done with Shiplap. It’s a refined classic and a very popular bathroom wall paneling idea.
Shiplap has historically been made out of wood, but these days there’s another choice called MDF. It’s a composite material that won’t warp, expand or contract, is very flat and easy to install.
The fact that MDF doesn’t expand and contract is a huge benefit as a painted wall paneling material because the paint won’t crack. This is why high-end painted cabinets usually include MDF panels. It’s very flat and takes paint well which creates a smooth finish.
MDF resists moisture making it perfect for a steamy bathroom wall. And with MDF you never have to worry about filling knots since it’s not made from wood. The material is super smooth and takes paint much better than most wood species which gives it a superior finish.
An additional benefit of MDF is that it’s usually cheaper than real wood shiplap. Especially now since wood has recently tripled in price.
MDF is installed just like wood vertical paneling. Nail it to the wall frame or glue it to the existing drywall. And you can combine it with wood if you’re also installing crown or base molding.
Board & Batten Bathroom Wall Paneling
Board and Batten is one of the oldest and most traditional bathroom wall paneling ideas you can choose. The construction typically consists of a wide “board” and then a smaller more narrow “batten” installed over each of the seams which creates the look.
Board and batten is used both as an interior wall paneling and an exterior siding design. When used on interior walls you don’t actually need the larger “board” area. You can fake the look with just the smaller strips installed over drywall.
The boards are usually about 12″-18″ wide with battens about 2″-3″ like the photo shown above.
Along with the vertical battens you also need a cap and a base molding. Usually the base and cap moldings are wider than the battens. I like to use 3 inch battens with a 4 inch cap and 5-6 inch base.
Board and batten wall paneling does 2 major things for a bathroom. First, it adds some architectural detail. Second, it creates contrast. Paint the board and batten light with a darker paint or wallpaper on top. Or reverse the design and use a dark wall paneling with a lighter color on top.
If your looking for a great small bathroom wall paneling idea then look no further. Board and batten is a great choice. The height and vertical battens make a small bathroom feel larger while the simple design adds detail without being too busy.
The height of board and batten varies. The most common sizes are 1/3, 1/2 or 3/4 wall paneling.
Board And Batten Trim DIY
Board and Batten makes a great DIY project. A bathroom like this one could easily be completed in just a day or two if you had some skill and basic tools. Since the cuts are all square you won’t need expensive tools or the skill to make complicated angled cuts.
MDF works great for board and batten. It’s super straight material that resists moisture and doesn’t twist. The face is totally flat and smooth since it doesn’t have a grain which makes it perfect for holding paint. And MDF comes factory primed so painting is that much easier.
To create the look above all you need is 2″ lengths of MDF for the battens. 3″ MDF for the cap. And 4″ MDF for the base molding and window headers. Cut the boards to length with any saw. Just make sure you can make a perfectly square cut and keep those joints tight. Glue and nail trim to the wall. Fill the holes with putty and sand prior to paint when dry.
A cap can be added to the top which is just a 1 or 2 inch piece turned on it’s side.
Some clients add quarter round to the base trim and some don’t. Either way is fine. Check out the pics above and see what you prefer.
Board And Batten Wall Paneling Design
So you’ve been searching for bathroom wall paneling ideas and have decided board and batten is the perfect look. But how do you design it? Whether your hiring a professional or doing it yourself, you still need a plan.
Designing board and batten wall paneling for you bathroom is a fairly straight forward task. Here’s how we do it. First, we design everything on paper. We don’t do any physical work or buy any materials until we have a plan signed off on by the client, or by ourselves, if the trim work is for a spec house. Once we have the perfect board and batten design we make a material list and go shopping.
To help you come up with the absolutely perfect design the best thing you can do is look at example photos. Find a picture of a finished bathroom you love and use that as a guide. Every bathroom is different so you’ll have to customize the design a little bit to match your bathrooms dimensions and layout, but the overall sizes will be pretty much the same.
Stick with a few basic board and batten design rules.
- The base should be the widest piece of trim.
- The Battens should be the thinnest.
- The top should be in the middle of the battens and base trim.
- If you want a cap don’t make it overhang too much. We generally make a 1/2″ to 1″ reveal.
- Quarter round base is optional.
- The height shouldn’t be too low or board and batten becomes wainscoting. 3/4 up the wall is a general rule.
That’s it. If you find an example picture you love and stick with these basic rules designing board and batten wall paneling is a piece of cake.
Applied Molding Wall Paneling Design A.K.A. Applique
Up next we have applied molding, which generally leans a bit more formal than the other options but can be designed to fit a variety of styles. Again, you have the option to customize the size and style of the molding as well as the shapes so applied molding or applique design is quite versatile.
The Applique is a decorative Wall Treatment achieved by trimming the wall with shapes using trim pieces like chair rail. Applied molding isn’t limited to any one section of the wall, far from it, many homes have them all over the walls and even the ceilings and doors. The most common Applique shape is the rectangle. The perfect Applique occurs when all four sides are the same distance apart from the Chair Rail, Baseboard and the next applique or wall. Symmetry is a classic component of applied molding design.
With different size walls in a room you will have to get creative with the shape of each individual applique, ideally you would like all of them to be approximately the same size but in reality it is nearly impossible. Using different combinations of widths and shapes you can achieve a beautiful design. Try to keep symmetry in mind when designing.
Top Bathroom Wall Paneling Ideas: Applied Molding
Applique is made from pieces of trim that can easily be cut down and customized to suit a variety of unique designs. With a little patience and time you can achieve a professional installation without paying a fortune for materials or labor. Bathrooms are generally small rooms so material costs won’t be much and a skilled installer will be done in a day.
As you can see in the accompanying pictures most of the appliques are uniform and symmetrical. These designs add a great deal of interest to the walls, leading the eye around the room.
The materials required to install appliques are quite inexpensive however you’ll need a saw that can do miter cuts like a chop saw. A lot of thought that has to be put in designing the layout, shapes and sizes. The finishing also takes some time and patience since with an elaborate design comes lots of joints and nail holes to fill and sand.
There are many different ways to finish an applique installation. Many people opt for the traditional white applique on whatever solid wall color they may like while others use many different colors both in and outside the applique. You can also use wallpaper inside the squares and paint the outsides, the possibilities are endless and only limited by your imagination. We recommend sticking with all one color for a bathroom as seen in the example pics. It’s best not to make walls too busy. If you want some color opt for hanging a picture or adding some flowers but keep the wall colors simple and bright.
Bathroom Applied Molding Design
When designing an applied molding bathroom design always keep in mind two thing, symmetry and uniformity. Take measurements wall by wall and break them down into equal segments, 1/2, 1/3, 1/4, 1/5 or a whole wall. The way you break down the wall will dictate the width of the applique designs. Obviously the more segments the smaller the appliques.
One you break down each walls measurements side to side decide how you’ll lay the wall out top to bottom.
As with any other type of molding look at lots of example photos and create a look book. The more pics you see the better. Find the perfect one and use it as a guide. Bathroom wall paneling ideas are easy ti find when searching online so you won’t have much trouble finding great pics to model your design after.
Once you have the design down make a material list and start shopping.
Top Bathroom Wall Paneling Ideas: Wainscoting
When it comes to bathroom wall paneling ideas it would impossible not to discuss wainscoting.
The term wainscoting refers to any type of wall treatment that goes a portion of the length of the wall. It is by far the most popular type of wall paneling used in a bathroom. So while some people think wainscoting only involves bead board or v-groove, there are actually hundreds of variations and styles. Wainscoting is a very broad term which can include combinations of some of the other styles we’ve already discussed like vertical wall paneling and board and batten.
In this article we’ll be looking at the more traditional style of wainscoting as shown in the example pics.
Now, its main use is as a decorative wall accent that typically rises to chair-rail level and helps make a room more visually appealing. While historically wainscoting was made from wood, this type of panel now includes a variety of materials with the key feature being that it’s installed only on the lower portion of the wall. Generally wainscoting is about waist high with some sort of cap although higher versions are sometimes built. Some amount of wall has to be left on top of the cap in order for it to be considered wainscoting.
Bathroom Wall Covering Instead Of Tile
Today’s wainscoting designs run the gamut of building materials but because this is in a bathroom we like to use either wood MDF. One of the reasons wainscoting is always a favorite among bathroom wall paneling ideas is because of it’s versatility.
Wood is what wainscoting has classically been made of. Since most bathroom wainscoting is painted we use premium #1 grade pine without knots. Unless your going for a rustic look a smooth, knot free face holds paint the best. Knots tend to eventually show through the paint even if you prime it first. Other types of wood works just as well but if your painting it you don’t need to buy the expensive stuff. Save oak and cherry for things you’ll stain.
MDF is a fantastic product for wainscoting and for use in a bathroom. It’s super smooth finish holds paint better than wood and because MDF is moisture resistant you won’t have to worry about water issues. MDF doesn’t expand or contract like wood does so joints aren’t as big an issue as with wood.
Top Small Bathroom Design Ideas: Wainscoting
Wainscoting is a classic wall paneling design that work beautifully in a small bathroom. Or any size bathroom for that matter.
When it comes to wainscoting design the first thing you need to determine is the height. The general wainscoting height is about waist high, it often times much higher but I’ve never seen it lower. There wouldn’t be much sense in building wainscoting 2′ high but 5′ would look great.
As with any other type of wall paneling look at lots of example pics and find the one you love most to base your design off of.
Pro Tip: Even though you may love a design doesn’t mean it works with the style of your home. Try to coordinate your wainscoting with the style of the home. A mishmash of styles doesn’t look very good.
Once you have the height figured out and the style determined lay out the wall from left to right. Figure out how many panels you want to create and make sure to keep them all symmetrical.
After the height and general layout is designed pick your individual trim piece sizes.
Pro Tip: Making base trim the widest is generally the right choice.
Depending on the style you choose bathroom wainscoting can be hard to do as a weekend DIY project. Wainscoting tends to have multiple piece of trim with compound angle cuts glued and nailed together to create the finished product. It’s not always easy. If your doing it yourself and don’t have a miter saw and the right amount of skill, try a simple design. Simpler designs are just as nice and are much easier to build.

Bathroom Horizontal Wall Paneling A.K.A. Shiplap
Next up we take the vertical wall paneling concept and turn it horizontal. There are different types of horizontal wall paneling, which is the technical term used in construction for wall paneling installed horizontally on the wall, most commonly known as shiplap. However, even though people refer to all horizontal paneling as shiplap, it isn’t, shiplap just happens to be the most well known type because you see it on TV all the time. In this article we’ll be discussing actual shiplap.
What makes shiplap so incredibly popular these days is how great it looks and how versatile it is, which makes it a perfect material to use in a bathroom.
Many homeowners are willing to spend a small fortune for a feature wall made of authentic, reclaimed shiplap. For some people, the more weathered, the better. But in most cases it’s painted white which means you can use new material that comes primed from the factory.
Many of the shiplap clad interiors you see on TV, online or in magazines are shiplap inspired and not the real thing. Whether a wall is covered with new or old wood, if the boards don’t have that groove for overlapping, it’s technically not shiplap. But at the end of the day, who really cares as long as your walls look great?

Wood Paneling Makeover Ideas
If your thinking of choosing a bathroom wall covering instead of tile, you should definitely consider shiplap. It’s such a versatile material you really can’t go wrong by using it as an accent or on every wall in the bathroom. Best of all shiplaps cheap and very easy to install yourself. All you’ll need are some basic tools.
Since the edges come grooved to fit together all you do is butt then up and nail. The boards keep themselves even so you don’t have to worry about gaps being too big or too small. We glue and nail out shiplap to the wall and recommend you do too.
The hardest part of doing shiplap is the finish work. Take your time when painting because paint tends to accumulate in the gaps if your not careful which looks terrible when dry. Make sure to get all the paint out of the gaps as you go and watch out for runs.
And speaking of gaps make sure you paint them. Sometimes people forget. Buy a small brush and get a nice coat of paint in each gap the same as you do the face of the wood.
Pro Tip: Take your time setting the first board. If the first course is perfect the rest will be super easy to install. If the first course is wrong you’ll have a lot of problems.
Bathroom Shiplap Design
Bathroom shiplap is a fairly easy thing to design since it covers the entire wall. But there are still a few questions you’ll need to answer. Will you be using shiplap on only one wall or multiple walls? Will you have a baseboard molding? Should you use crown molding? How will the shiplap flow with the windows, door trim, shower tile, etc?
Always consider the other elements in the room when designing your shiplap.
Another questions that plays into how you’ll finish the rest of the room is color. Shiplap doesn’t always have to be white.
Something a lot of people don’t realize is that dust and moisture tends to settle inside the horizontal gaps. Keep those gaps clean. Dust isn’t a huge deal, it just needs some cleaning, but moisture is. You don’t want water collecting on, and getting behind the wood. If you notice a particular area has some regular water collection after hot showers makes sure to wipe it down and keep things dry.
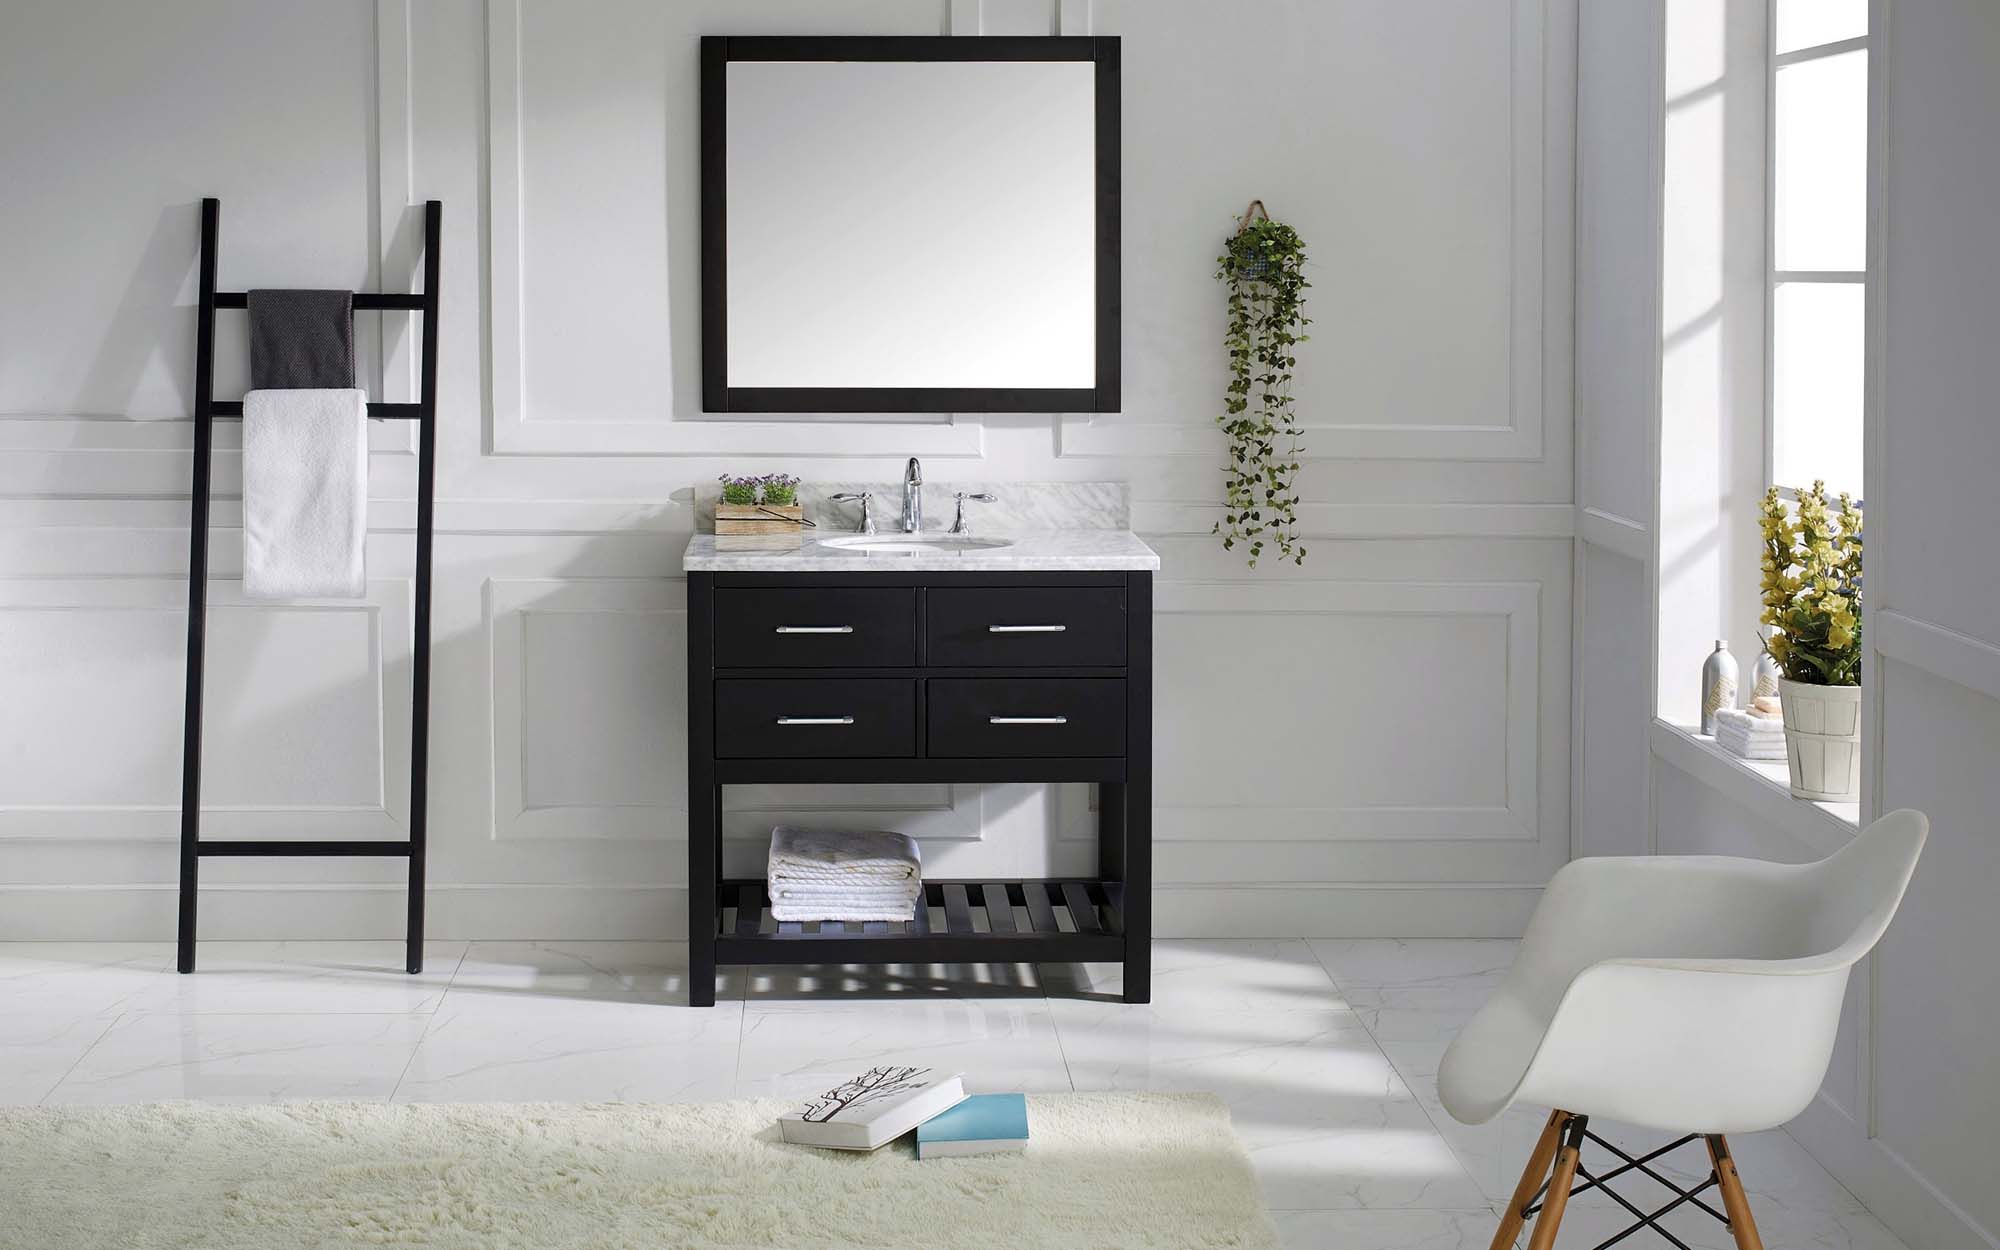
More Beautiful Bathroom Wall Trim
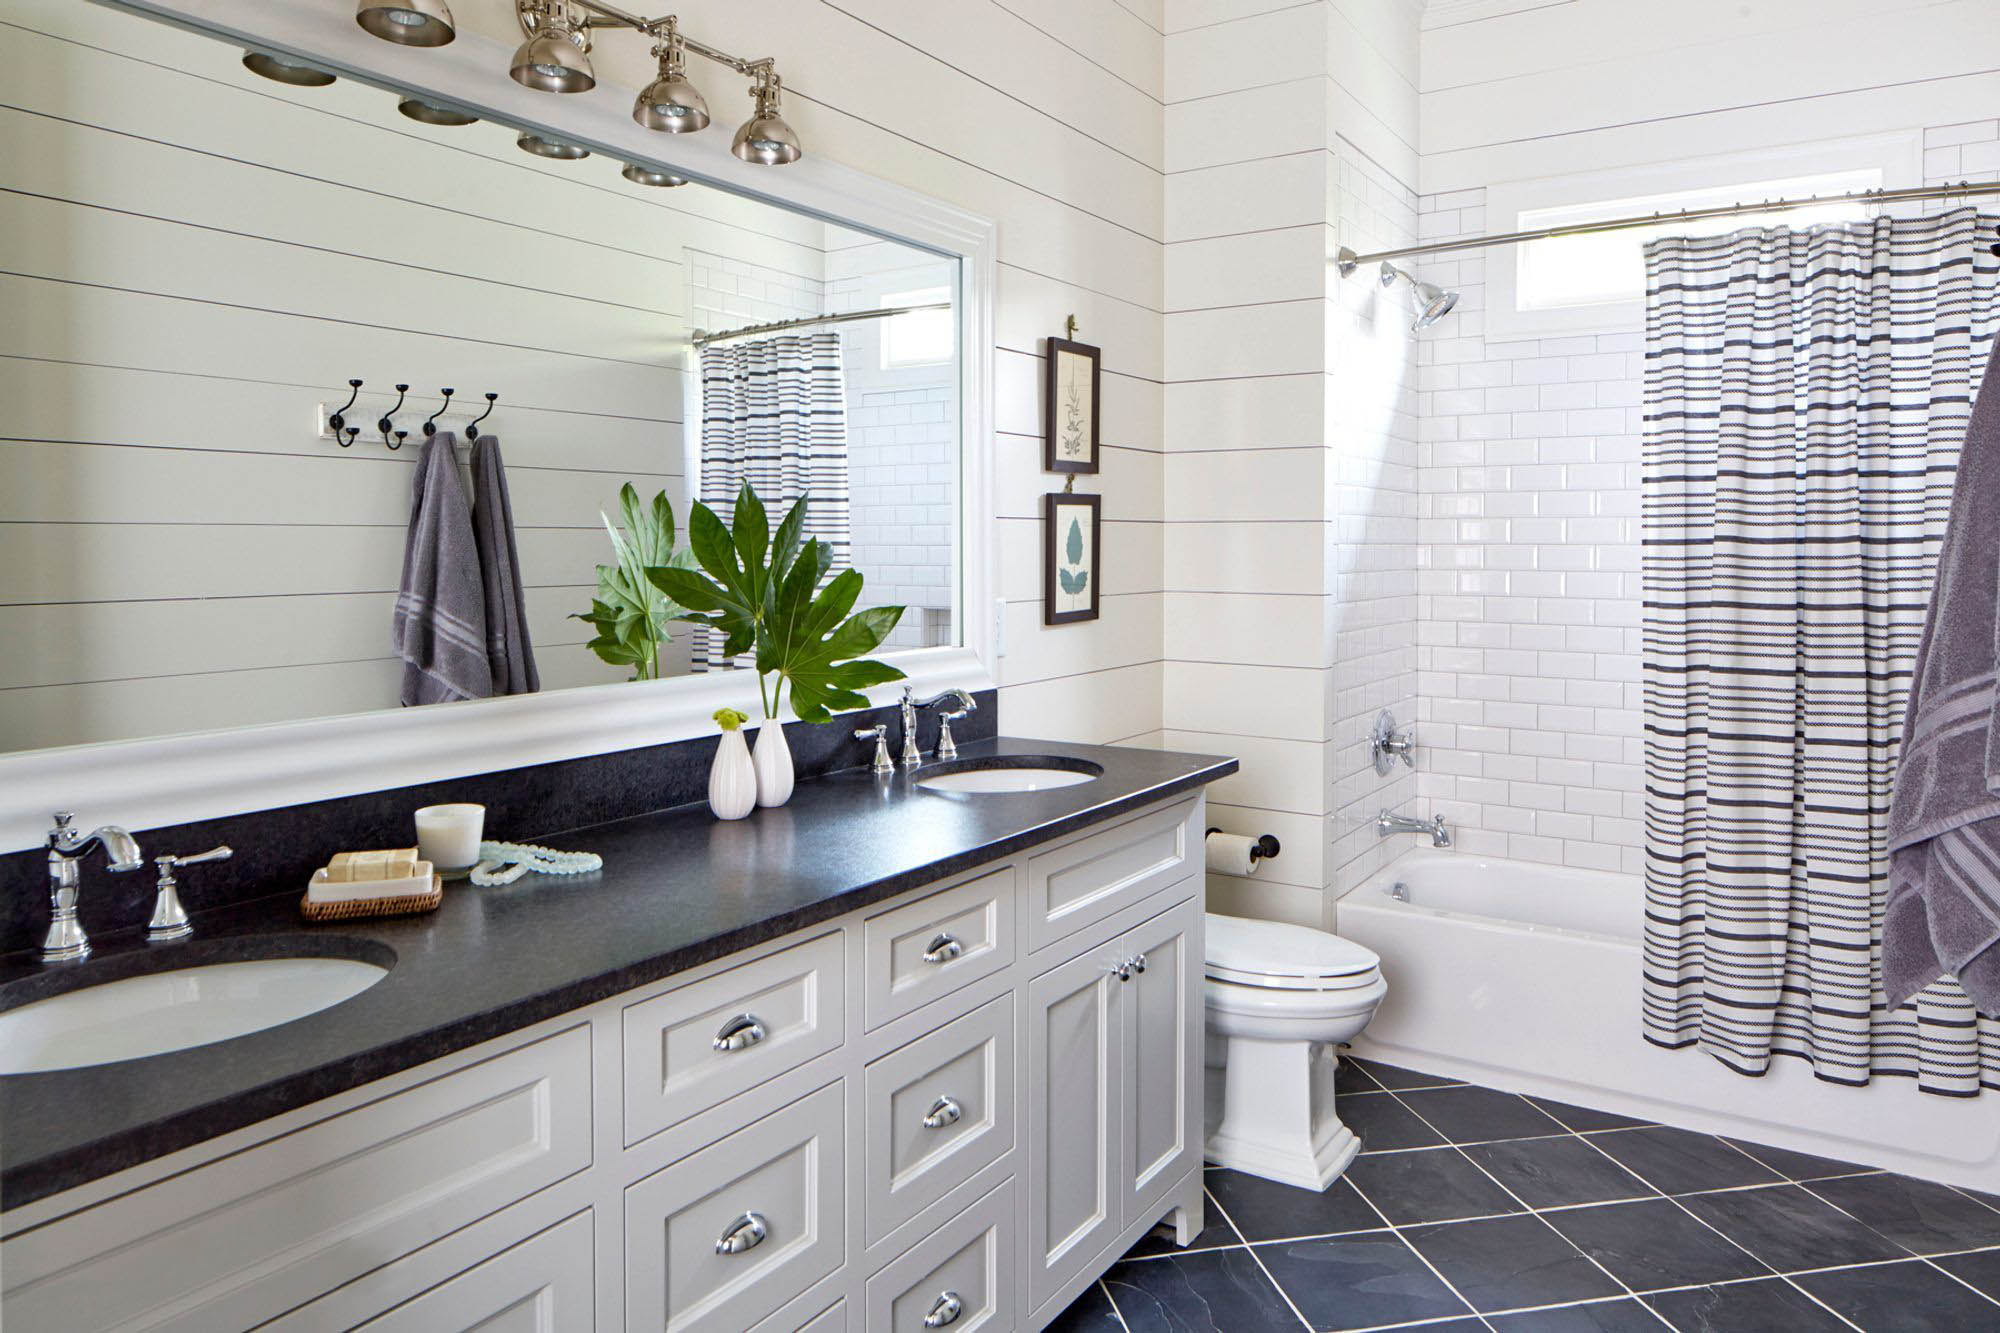
White bathroom with black granite countertops. Shaker style cabinets. White shower tile. Shiplap walls.
White Horizontal Shiplap Wall Trim
I just can’t get enough of shiplap in the bathroom. It really elevates even a simple bathroom into something special. Either horizontal or vertical is fine with me. The great thing about the design is that it’s so simple to do. Anyone with basic tools can install shiplap on their bathroom walls in a day. For very little money you could have the bathroom above which is much nicer than bare sheetrocked walls.
Shiplap goes great with shaker style cabinets which is a super hot trend. The square lines all match up very nicely and so does the white subway tile shower, another super hot trend. It all goes so well together it’s like the products were designed to be used as a set.
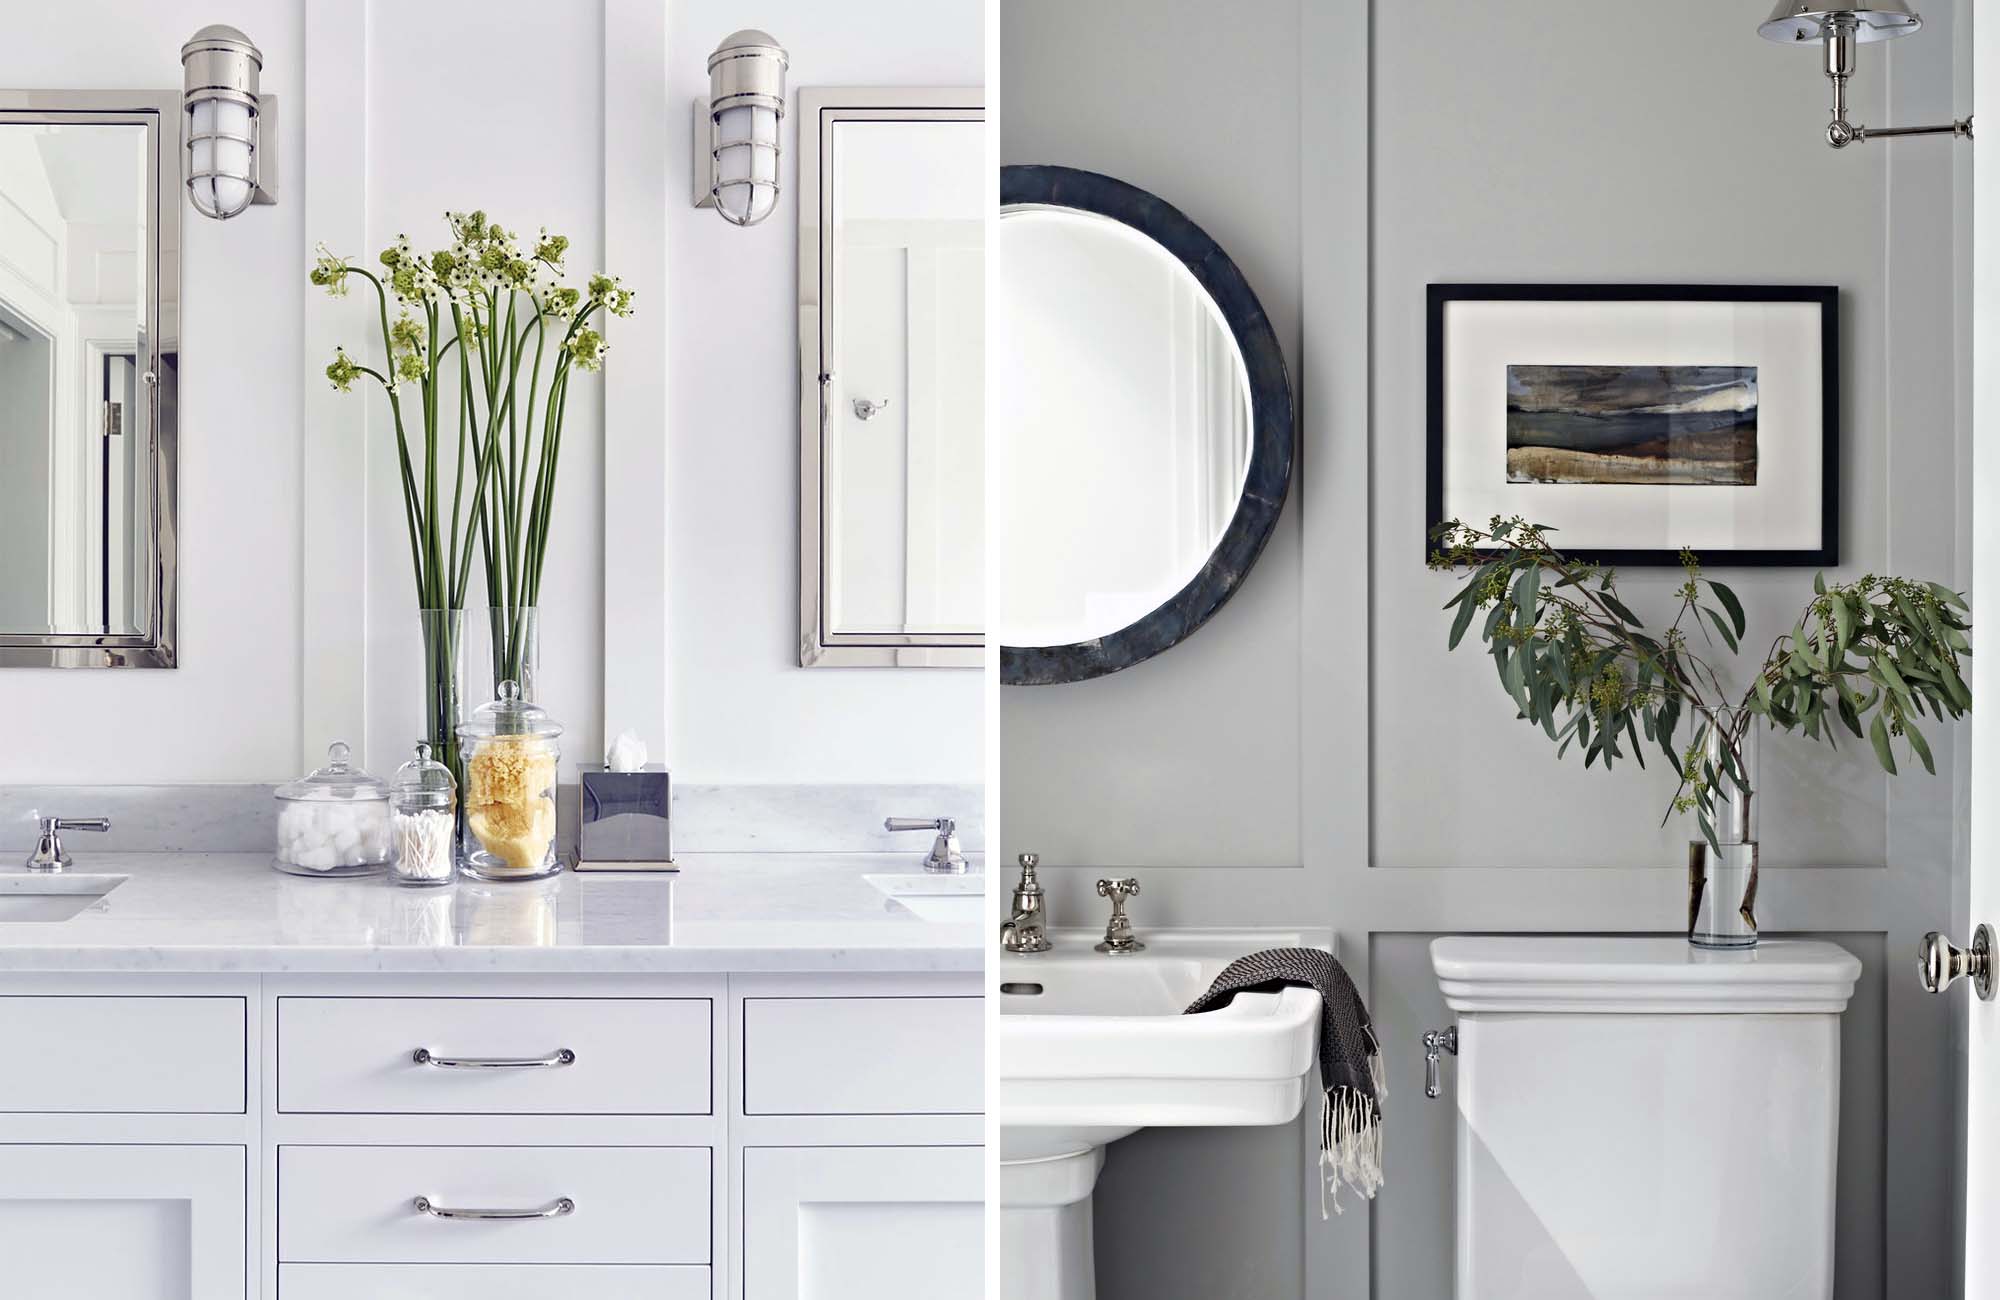
White wainscoting bathroom walls with a box beam design. What a wonderful way to class up your bathroom.
Wainscoting Box Beam Bathroom Walls
I just love using wainscoting on the bathroom. It’s such a fantastic way to add class and dimension to any bathroom. And it works no matter what size bathroom you have since many designs only stick out from the wall about an inch. This design however is a bit thicker at around 2 inch. I really like the box beam design. Square lines look great with these rectangular marble floor tiles.
Notice how the wainscoting design ties so cleanly into the window trim. It’s an area that trip up many novice woodworkers. Many smaller bathroom only have a single window that sits high so it’s not an issue, but with larger bathrooms like this you’ll probably have a window or two to deal with.
I would recommend a box beam design for most bathroom because the style is so versatile. When you get into more elaborate trim inlays it nails you down to a particular style or two but this design could be used in an Ultra Modern Home, Country Cottage, Victorian, Colonial or something Traditional.
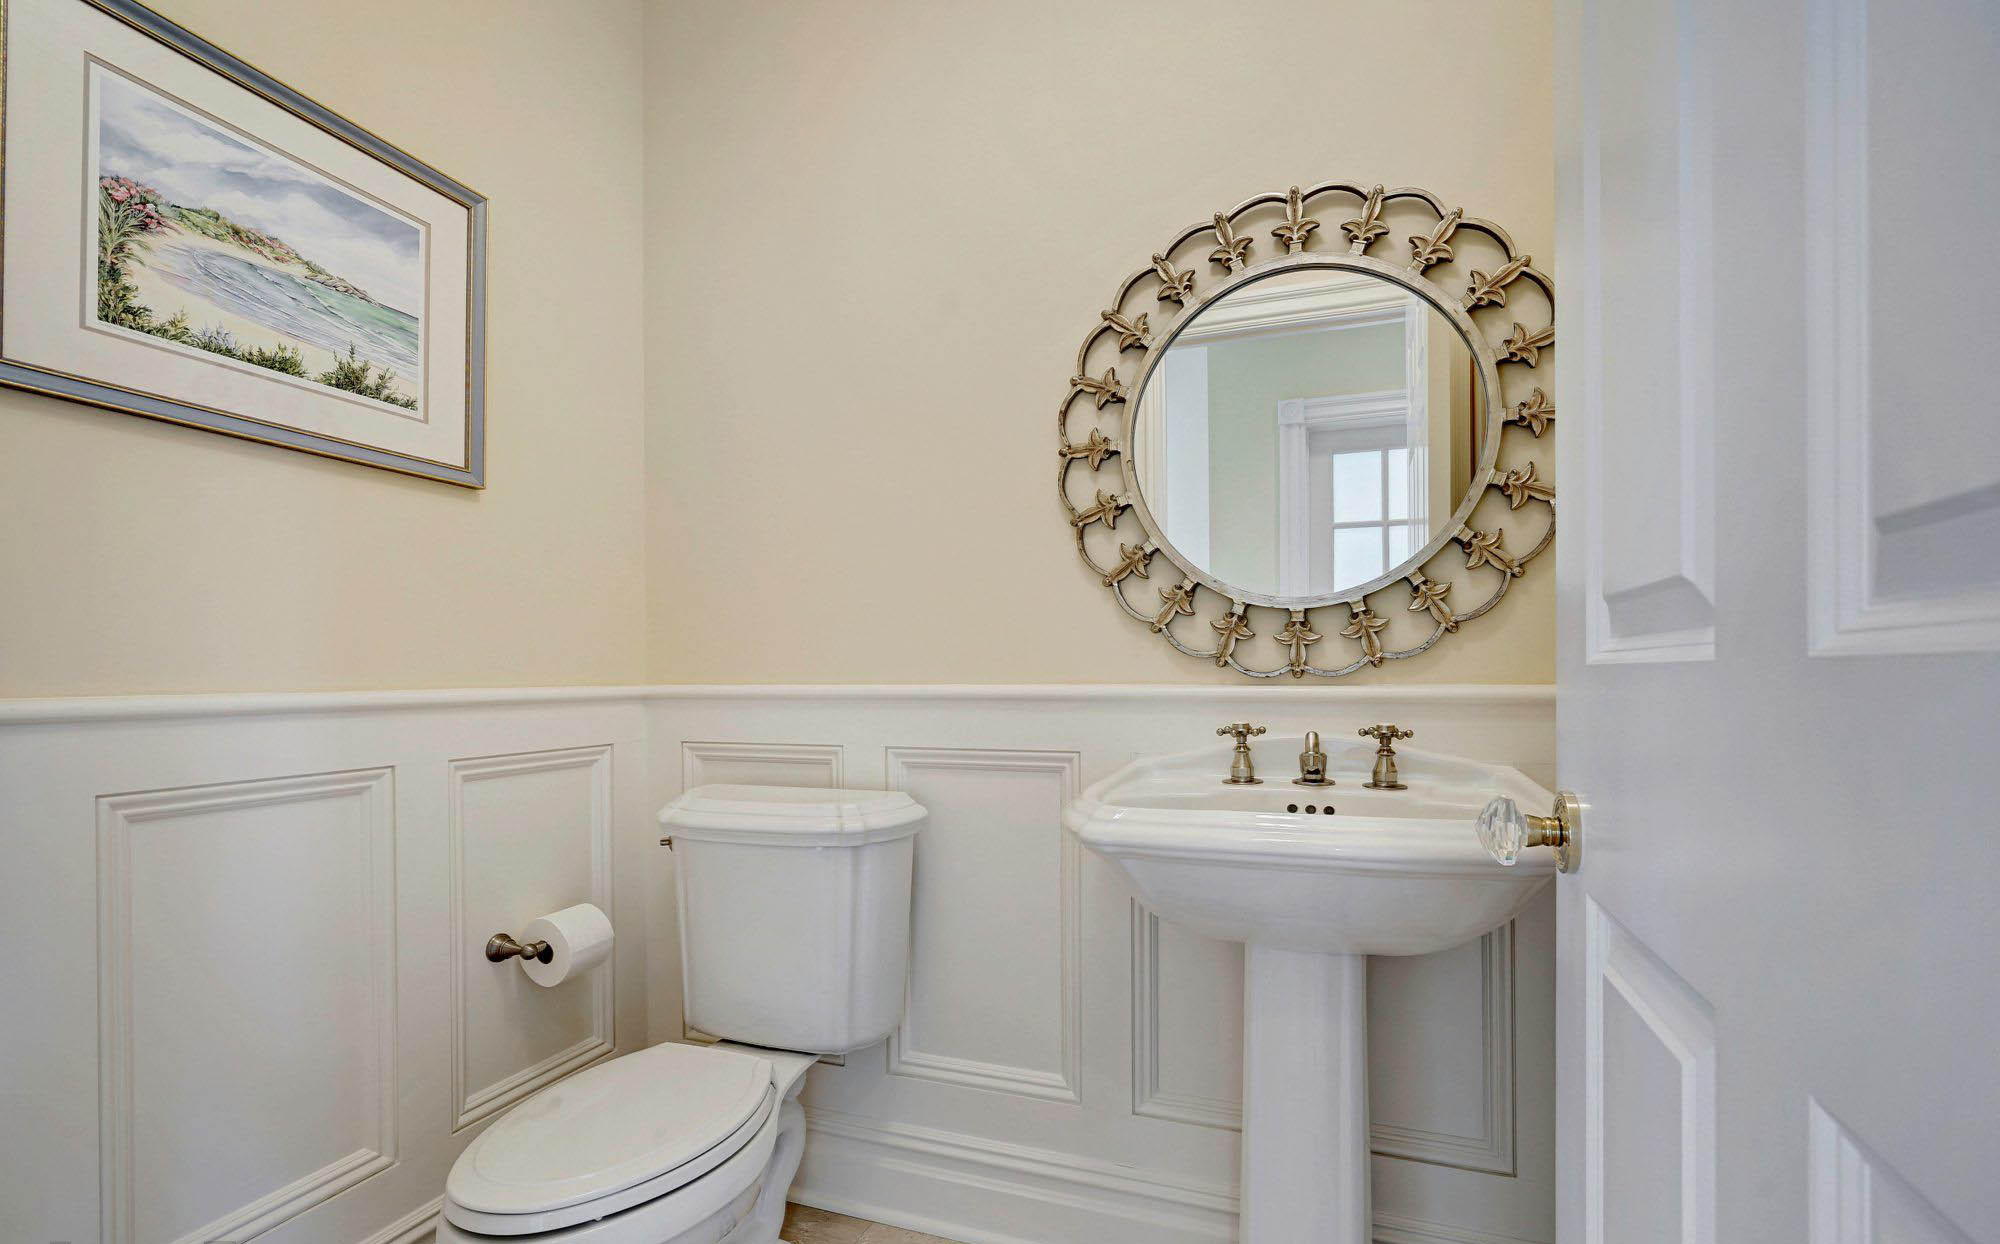
Beautiful 1/2 bath with white wainscoting. Colonial style trim. Light cream colored walls. White sink and toilet. What a nice, clean bathroom design.
Bathroom Wainscoting With Colonial Style
See how including a simple wainscoting design in a small 1/2 bath can really turn it into a beautiful space. It adds a level of sophistication that sheetrock or wall tile can’t match. And those are your only three options when it comes to wall finishing. Tile is kind of dated. We use it some master bathrooms but they tend to be very large. In small bathrooms tiled walls doesn’t work as well. And bare sheetrock is a little plain. It’s not a bad look, we still use it all the time and I prefer it over wall tile but if you want to take the bathroom design up a notch then wall paneling is the way to go.
The great thing about wainscoting is how versatile it is. Each room is unique so you can custom design the wainscoting however you like and in style you want. This traditional design would work in just about any home style other than modern.
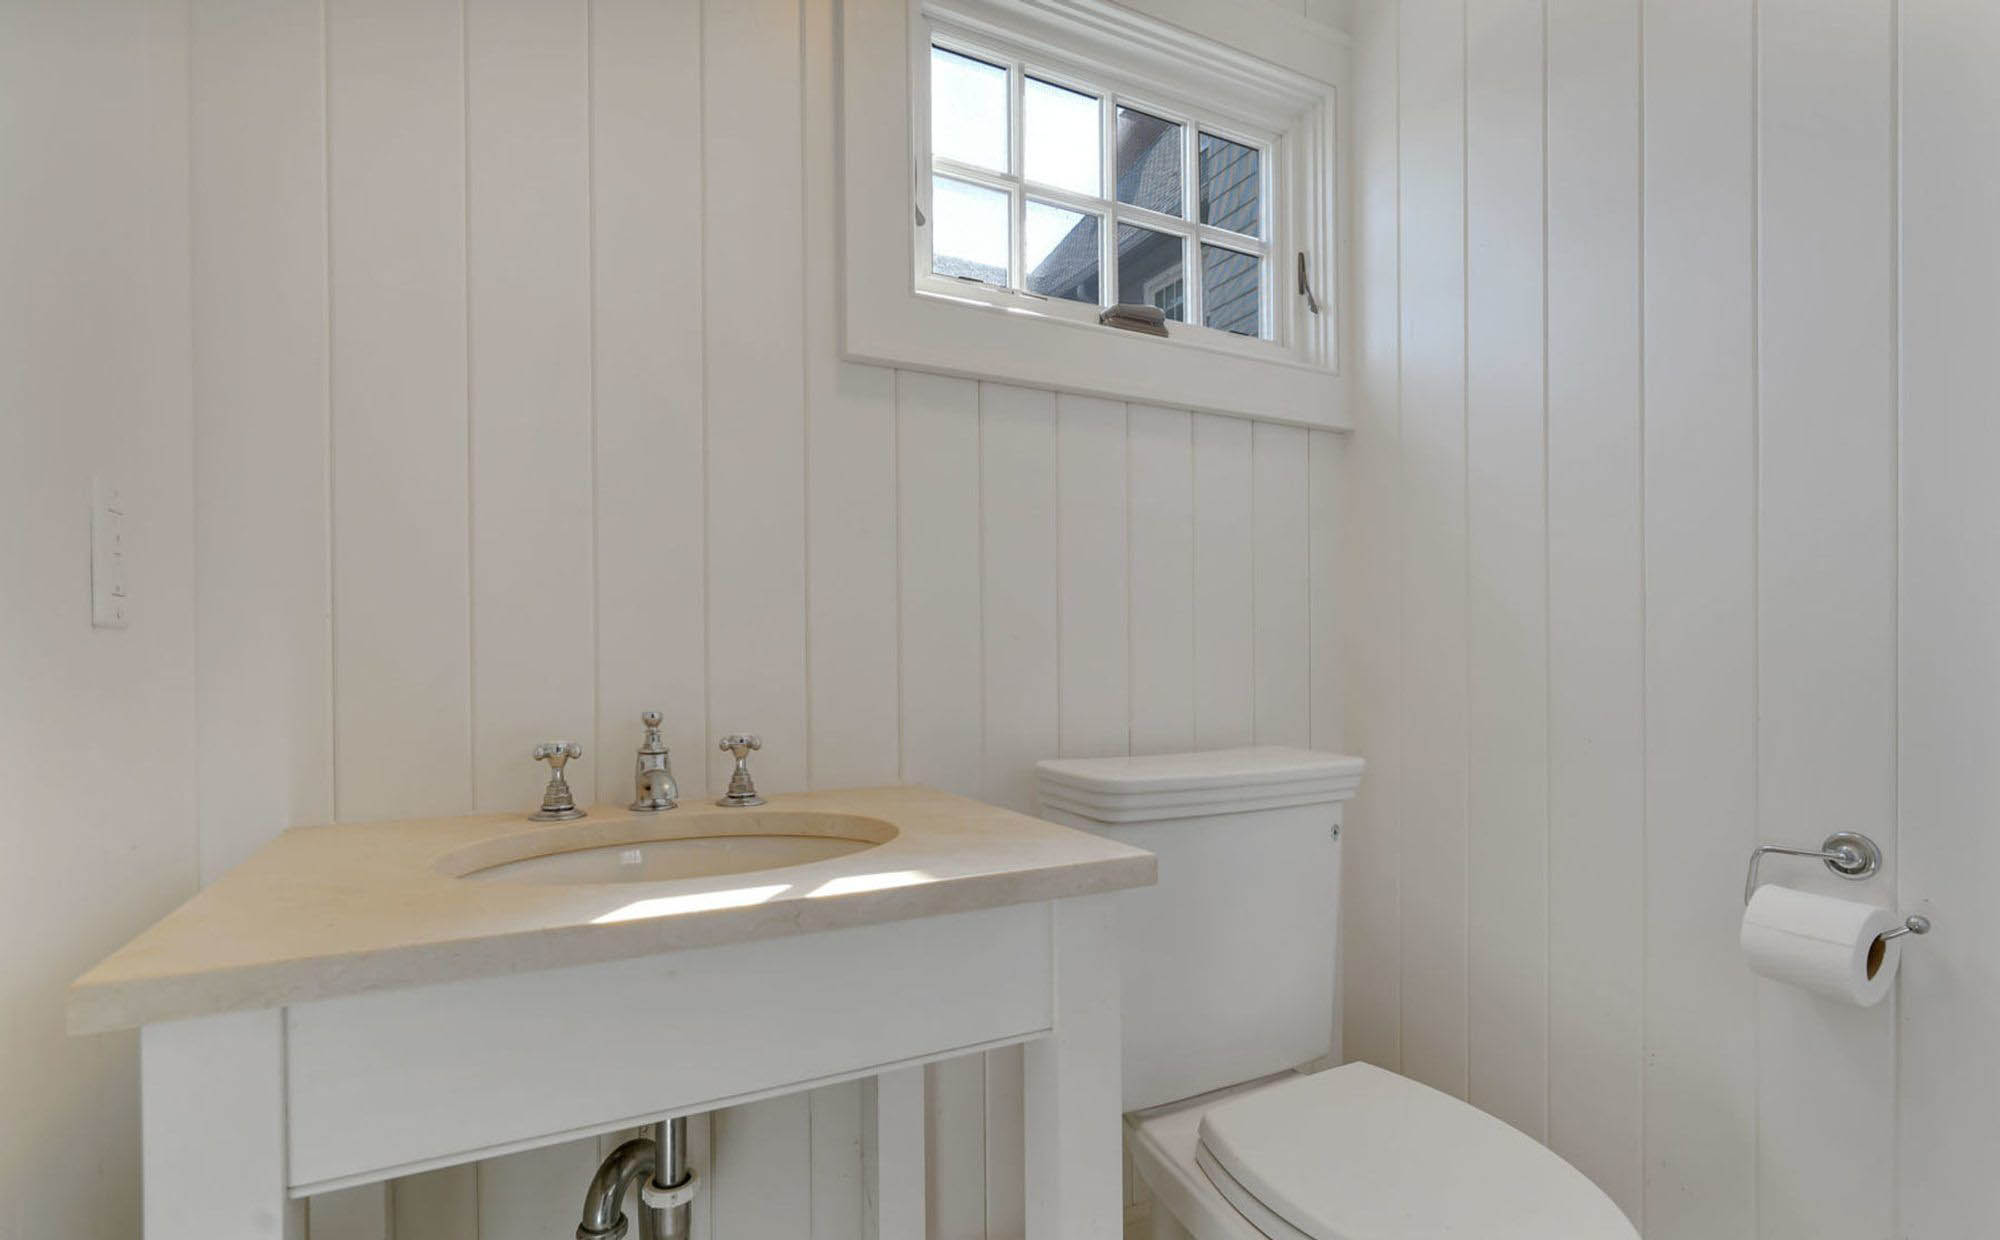
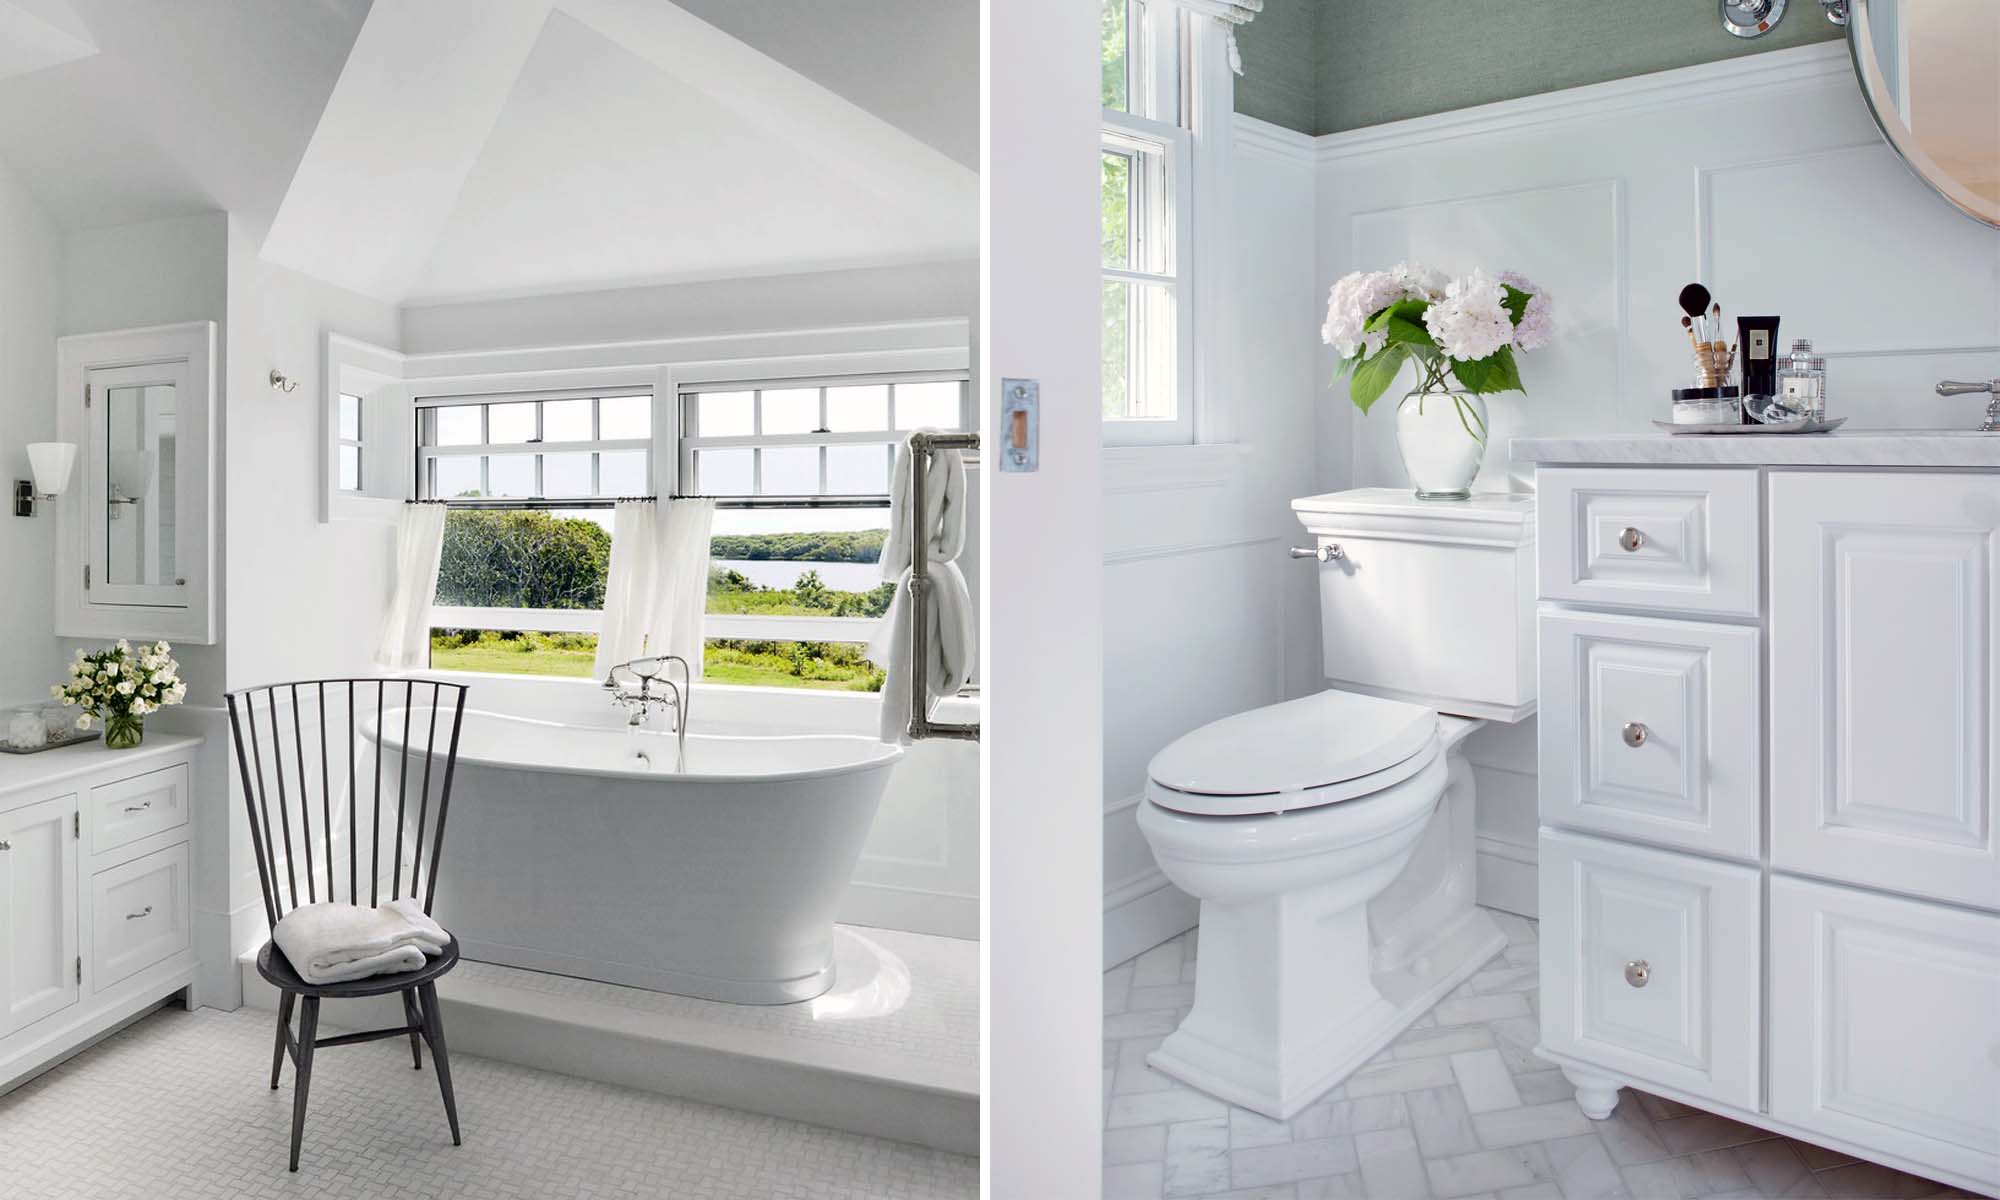
Small half bath with vertical wall paneling. The design can make a small bathroom feel much larger than it actually is.
Small 1/2 Bath With Vertical Wall Paneling
Vertical wall paneling is a great way to finish the walls of a small bathroom. It’s only 1/4″-3/4″ thick so including it won’t make the bathroom feel any smaller. The vertical panels create the illusion of height and make the room feel a lot bigger than it actually is. And it adds a lot of style to an otherwise boring room. There’s not much you can do with small bathroom walls. And in small rooms the last thing you want is intricate patterns or complicated woodwork. Simple designs always work best.
If you’ve got a tiny bathroom then vertical wall trim is the best option. And white is another great choice. Keep your colors light and bright. Especially if the room only has a small window because you’ll be relying on artificial light. Light and bright is the best way to go with a small bathroom design.
The cream countertop, white vanity with white sink and chrome finishes are all great choices too.

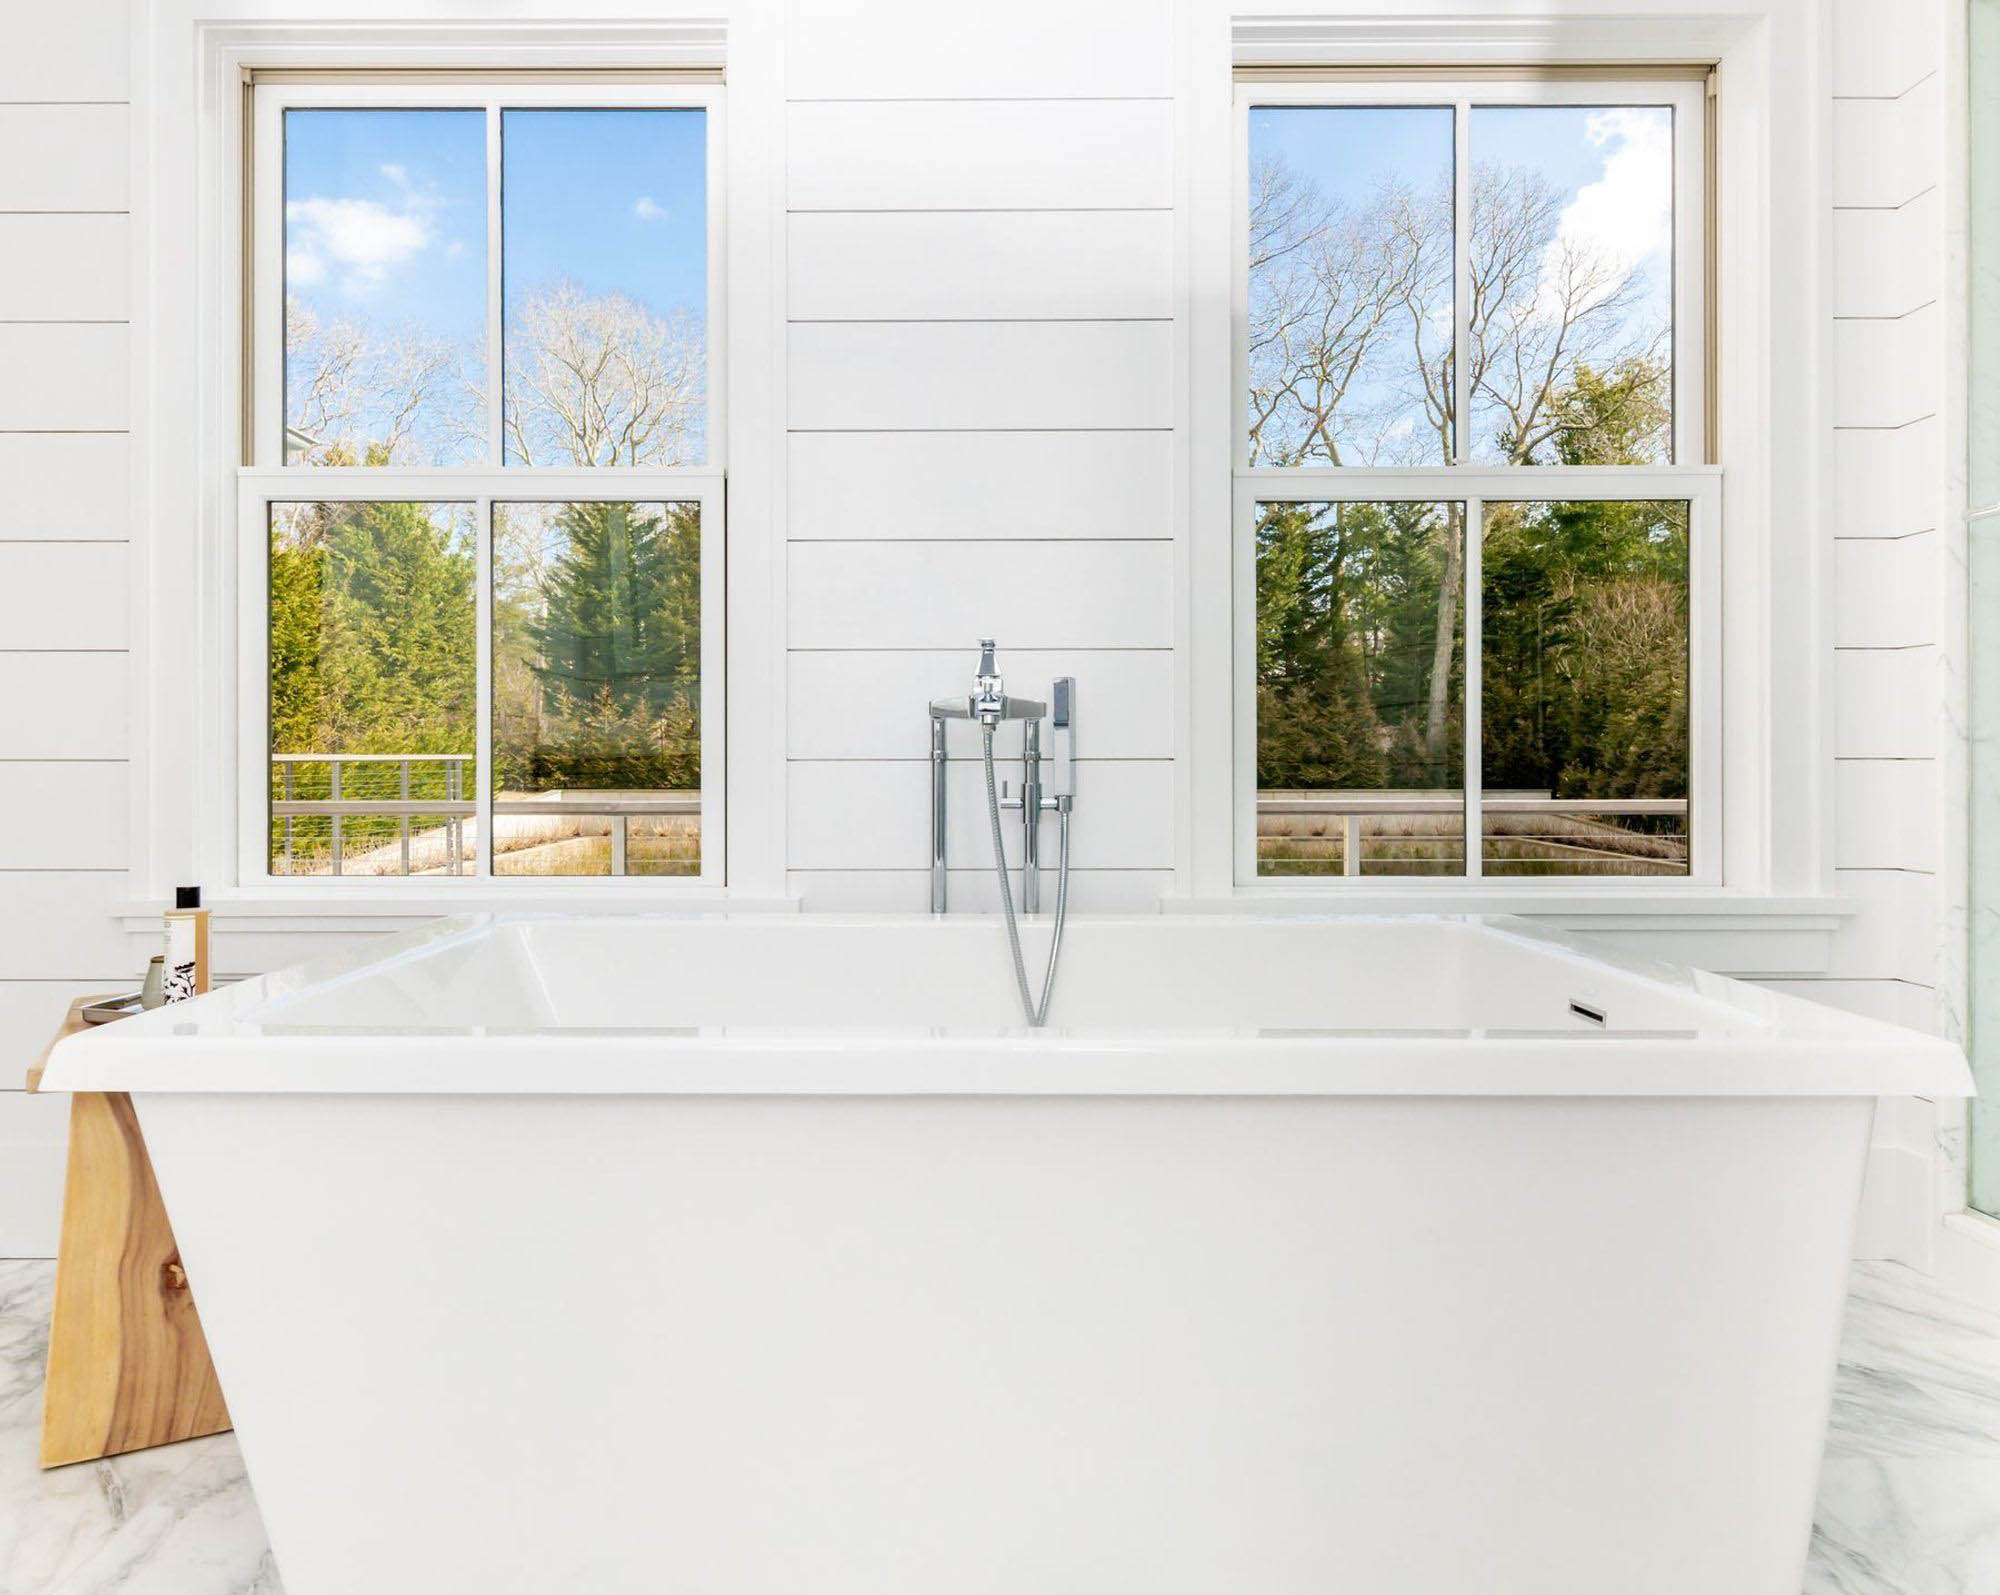
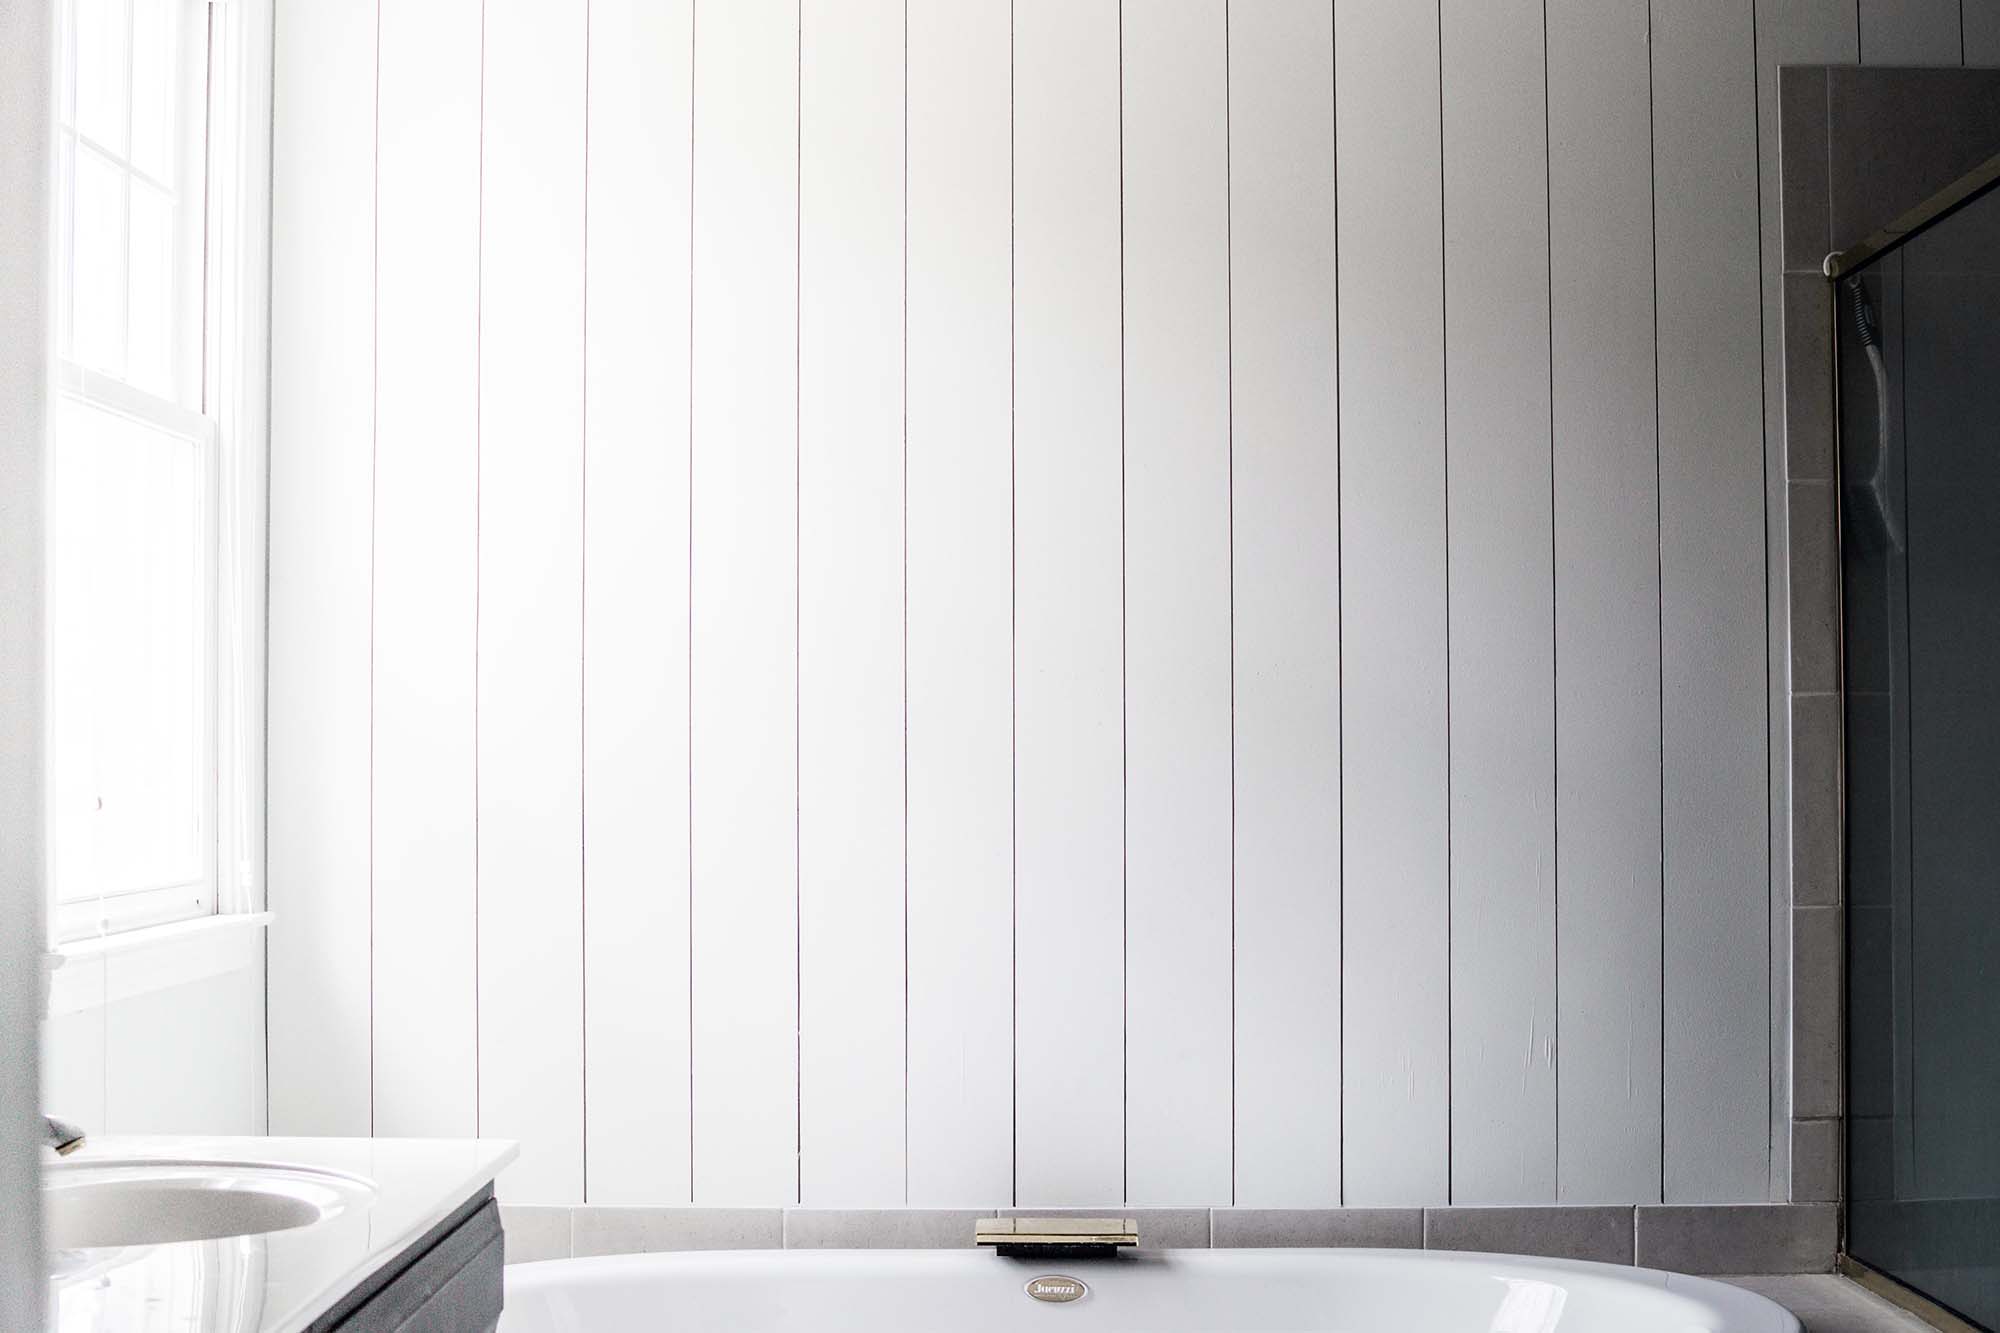
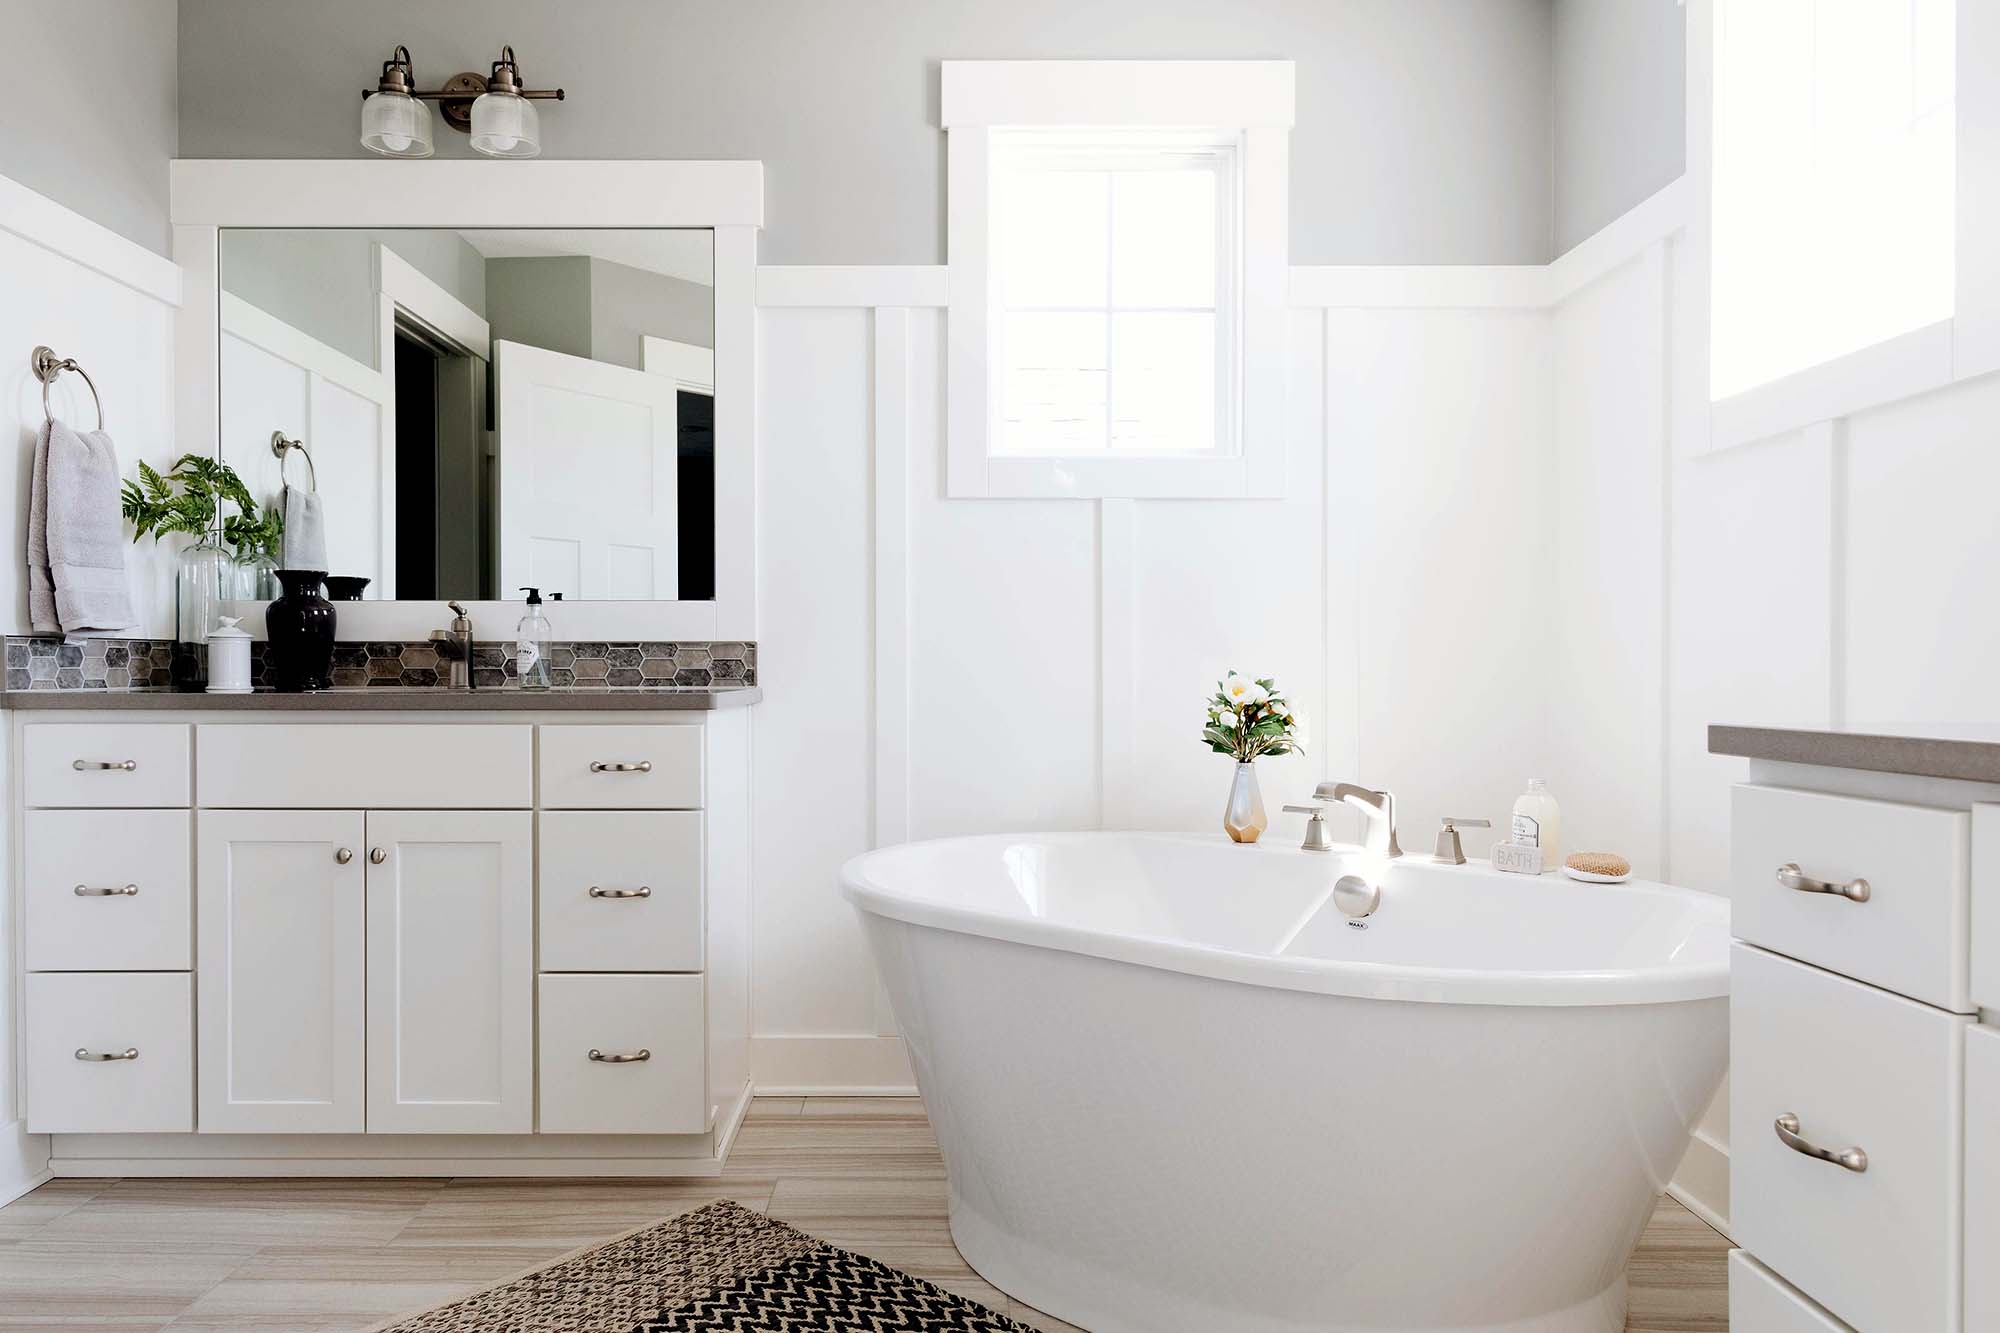
Modern marble bathroom with shiplap wall trim. White paneling and trim work. Large rectangle soaking tub with chrome faucet.
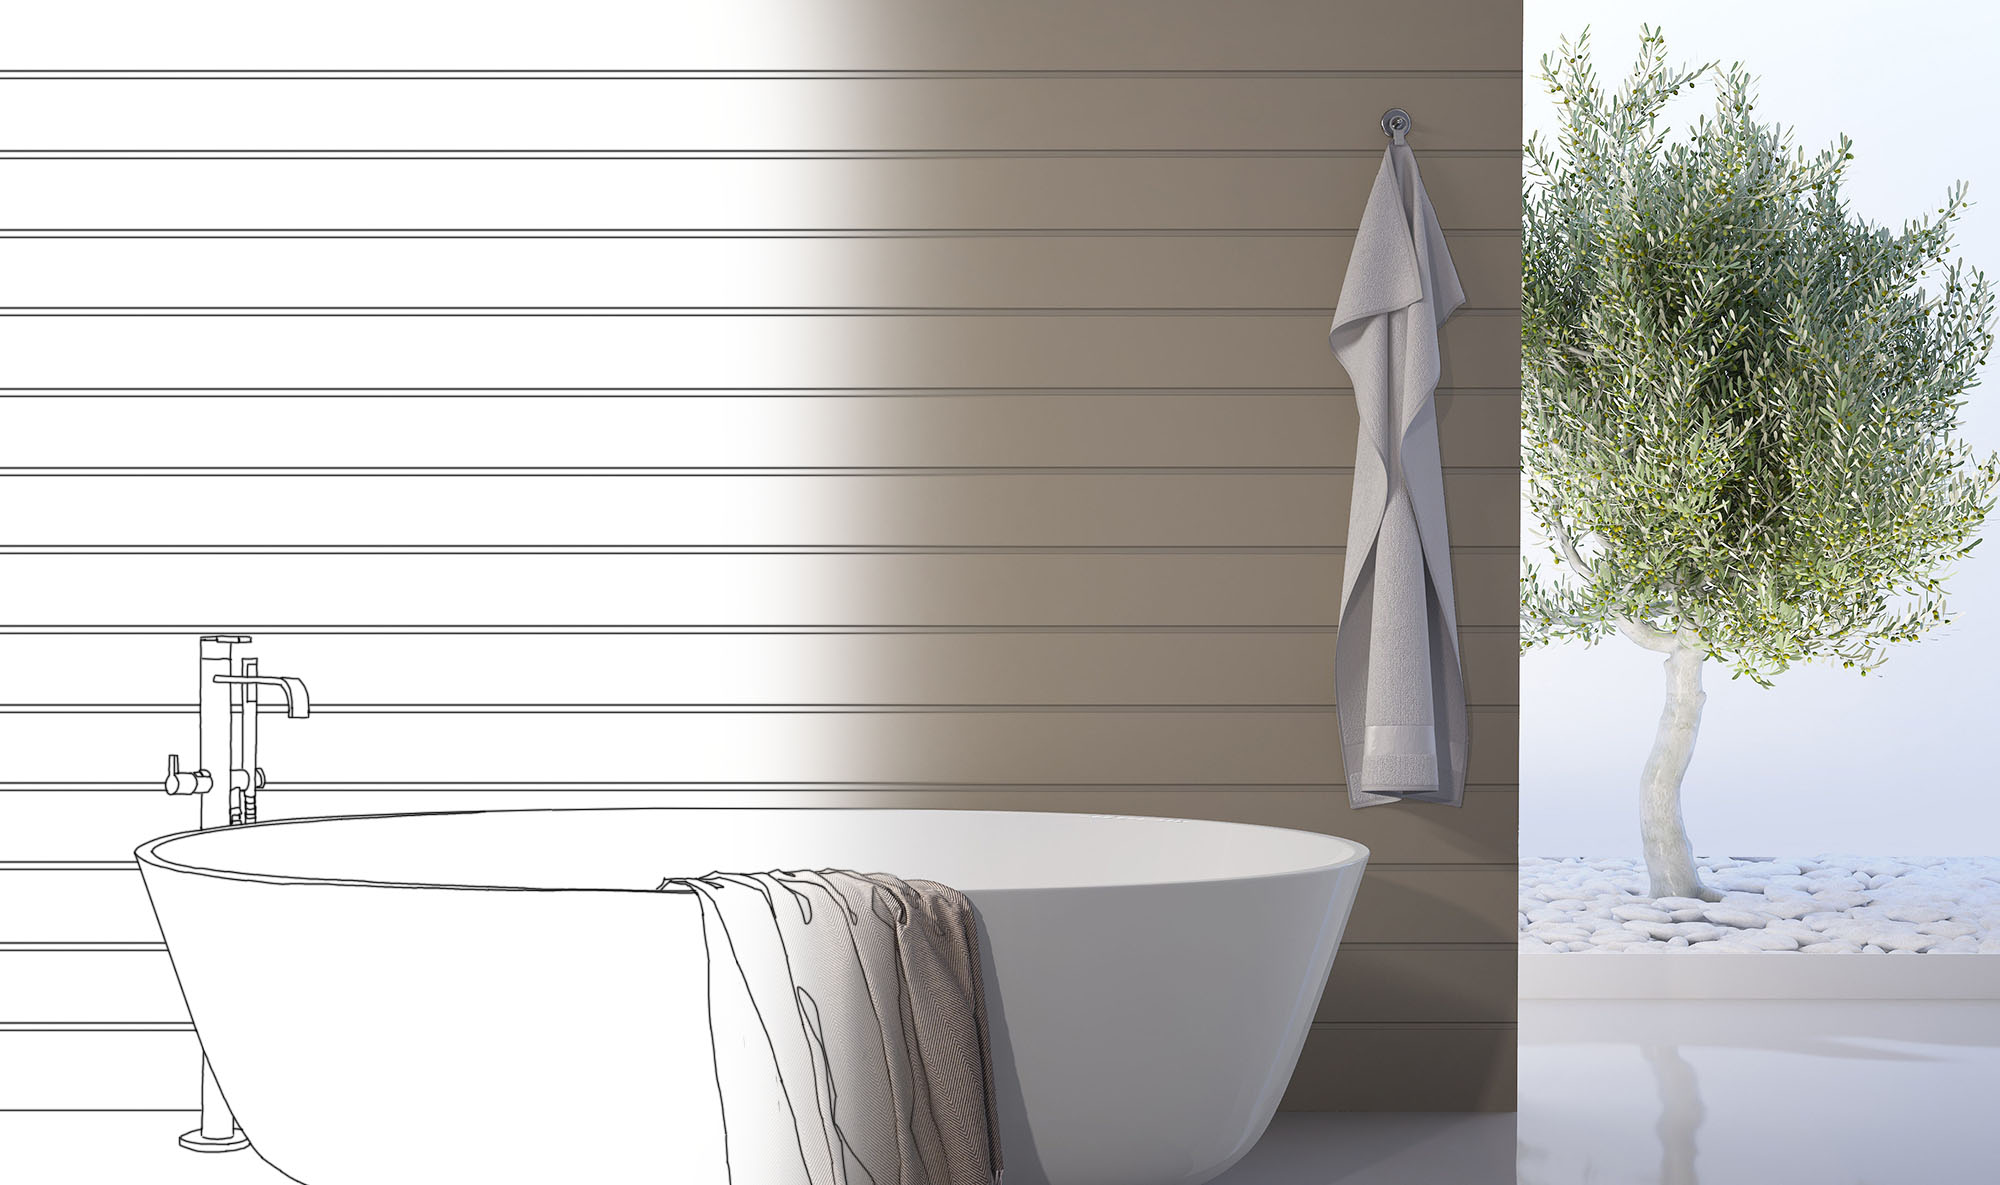
Modern Bathroom Design With Shiplap Wall Paneling
This modern bathroom design looks fantastic with shiplap walls. Modern design uses a lot of clean lines with right angles and shiplap fits perfectly into that design language. Notice how the wall paneling butts cleanly into the window trim which is made up on a series of square and rectangular boards.That edge of the window trim that sticks out a little is actually sitting on top of the shiplap. That’s how you can get this super clean edge. It adds some nice depth to the trim work as well.
The white freestanding tub is also a rectangle with it’s own super clean design. Flooring is made up of beautiful marble slabs which are also rectangle shaped.
If your looking for a modern, super clean, light and bright bathroom design then this is a great inspiration I just love it. Even the chrome faucet with white handles is a great choice.
The great thing about square trim work like this and shiplap is how easy the job is to do yourself. The cuts are all square, it’s hard to go wrong.
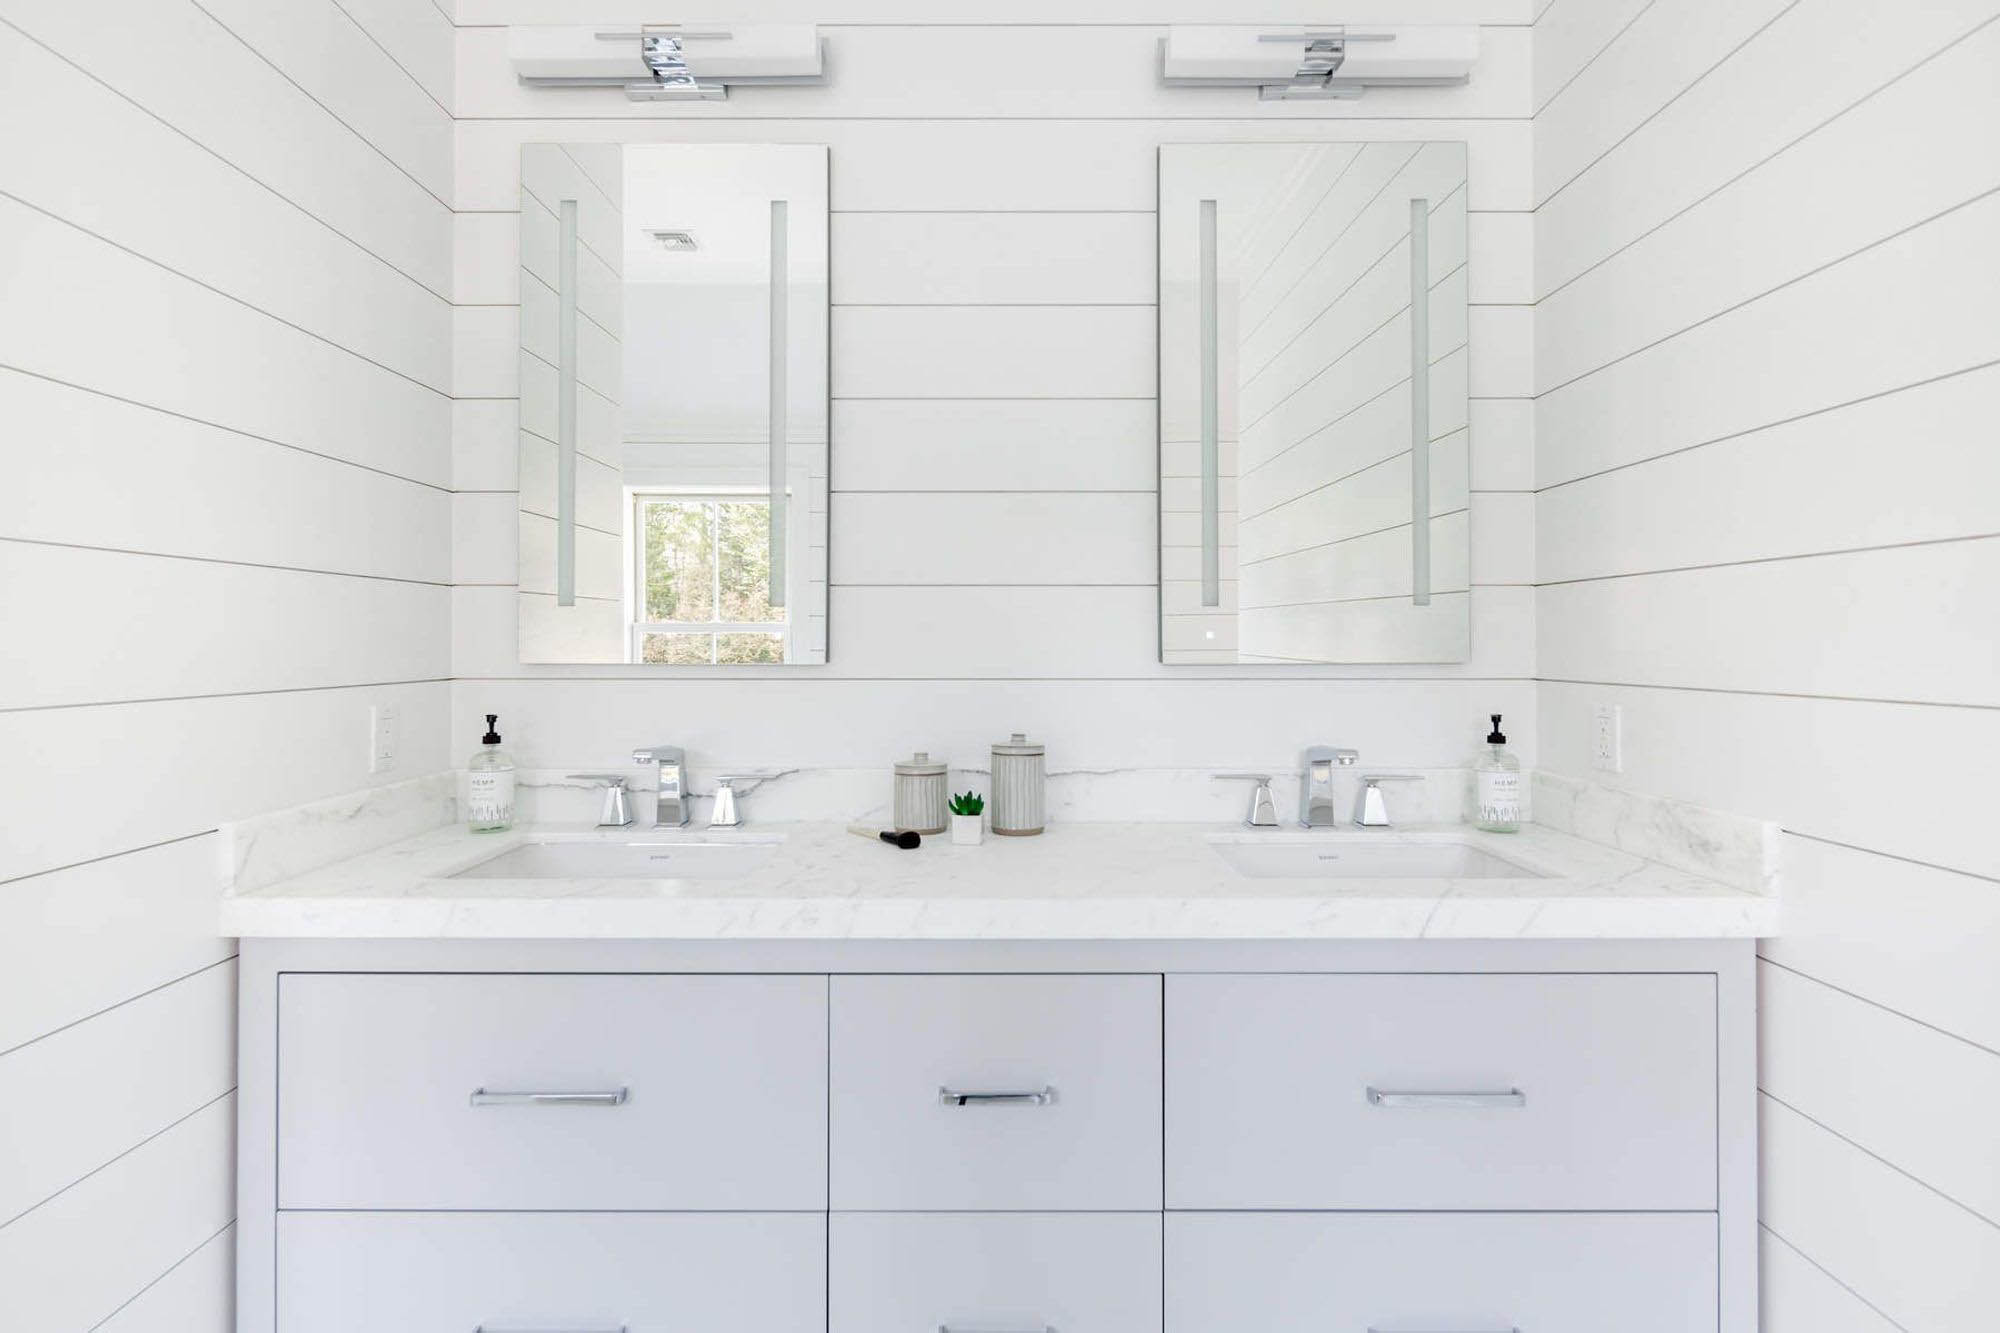
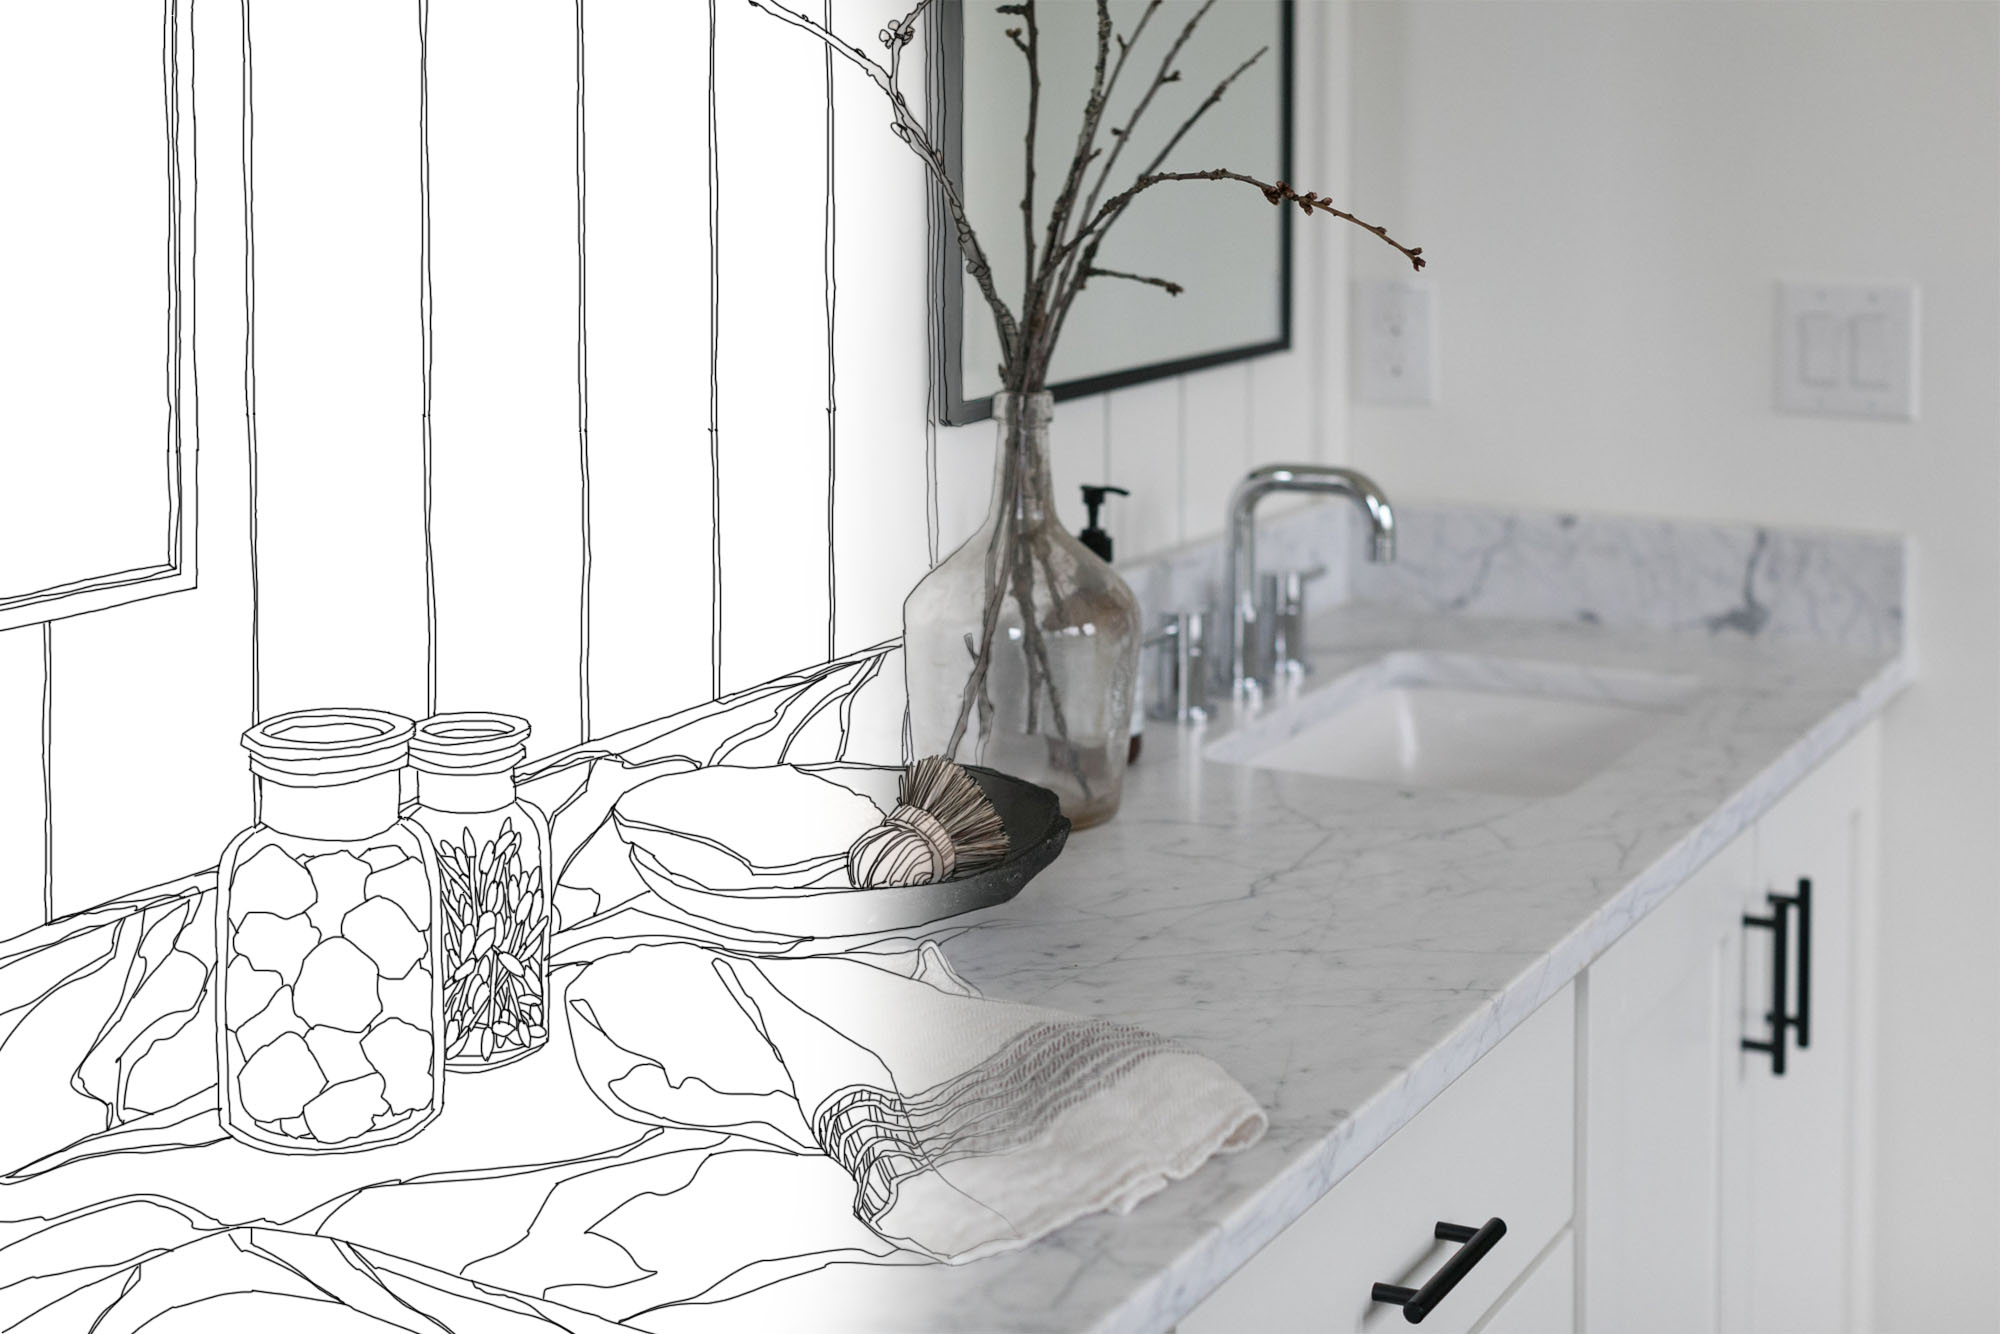
Beautiful modern bathroom design with shiplap wall trim. Double sink with marble countertop. Super clean vanity with flat faced drawers.
Modern Bathroom With Shiplap
Here’s another angle of that beautiful modern bathroom with shiplap walls. The sink area continues with the super clean square edge design. Square double sinks with marble countertops. Light gray vanity with clean edge flat faced drawers. Chrome handles and faucets.
If your somebody that likes white and super clean modern design then this bathroom may be for you. And it’s all about that wall paneling. Take that away and honestly the bathroom becomes a little boring. You need that additional element to make the bathroom stand out. Otherwise it’s just a bunch of white and gray.
Another beautiful master bathroom design with shiplap wainscoting wall paneling. Shaker style cabinets with a freestanding soaking tub.
Another Beautiful Modern Bathroom With Shiplap Wainscoting
Here we see shiplap used as a wainscoting instead of over the entire wall. It’s a really nice way to use wall paneling. This design separates the walls into two equal parts with a nice square edges cap to top off the wainscoting. The walls are painted with a very light gray that adds just a subtle amount of contrast against the white. It helps the wall trim stand out even more when you throw in a darker tone. And it doesn’t take much. many designers think you have to contrast the white wainscoting with a dark wall paint but even a slightly darker shade will do it.
The clean square edge shiplap design is carried into the window, base trim and shaker style cabinets. Double rectangle sinks sit under the white marble countertops. Brushed nickel faucets and hardware complete the look.
With an all white and pale gray, light and bright, bathroom color scheme you should add some splashes of color. Brown wicker basket and area rug with some green plants are fantastic additions. Consider adding decor like this to your white master bathroom.

Here we see vertical shiplap wall paneling used as wainscoting. With a small bathroom vertical paneling works better. it makes a small space feel larger.
Vertical Shiplap Wainscoting
If you’ve got a small bathroom and want wainscoting then consider using it vertically. vertical wall paneling is better in a small bathroom. It makes the space feel a lot larger than it actually is. As with the other bathrooms the lines are kept clean and square edged. That includes the wainscoting cap and shaker style vanity. They even smartly included a rectangle under mount sink with thick marble countertop.
I like that they went darker with the floor but still kept the color muted and light. Light and bright is definitely the way to go with a small bathroom design. And there are other options than marble. These faux wood tiles are a modern look that’s very in style at the moment.
Pro Tip: If your bathroom wall shiplap is a DIY project then make sure to stack the caps over the shiplap rather than resting them on top. It gives a much cleaner edge. If you don’t do it this way then your top cut has to be absolutely perfect or you’ll have a gap below the cap that most people caulk. It’s fine because not many people will look under there but an unprofessional way of doing it.

Full bath with horizontal shiplap wainscoting. In a medium sized bathroom horizontal shiplap becomes a viable option. This design matches the shower tile nicely.
Horizontal Shiplap Wainscoting Bathroom Wall Paneling
If you’ve got a full bathroom that’s a good size then horizontal shiplap wainscoting becomes a viable wall trim option. Notice how the shiplap so nicely compliments the rectangle shower tiles. As with the other bathrooms, this shiplap wainscoting has a simple square edges cap made of of two stacked trim pieces. We recommend using a simple design like this because it offers a super clean finish with no gaps to caulk and looks great. It’s also a transitional look so you can use it in traditional homes or ultra modern.
Remember when we talked about adding contrast with subtle changes in wall color. This shiplap was painted a slightly darker shade of white, almost a light gray while the walls are a pure white.
The designers also used a nice pebble shower floor that’s much darker than the surrounding bathroom. A dark floor is a nice look in a white bathroom. It provides a solid base to build your wall design upon.
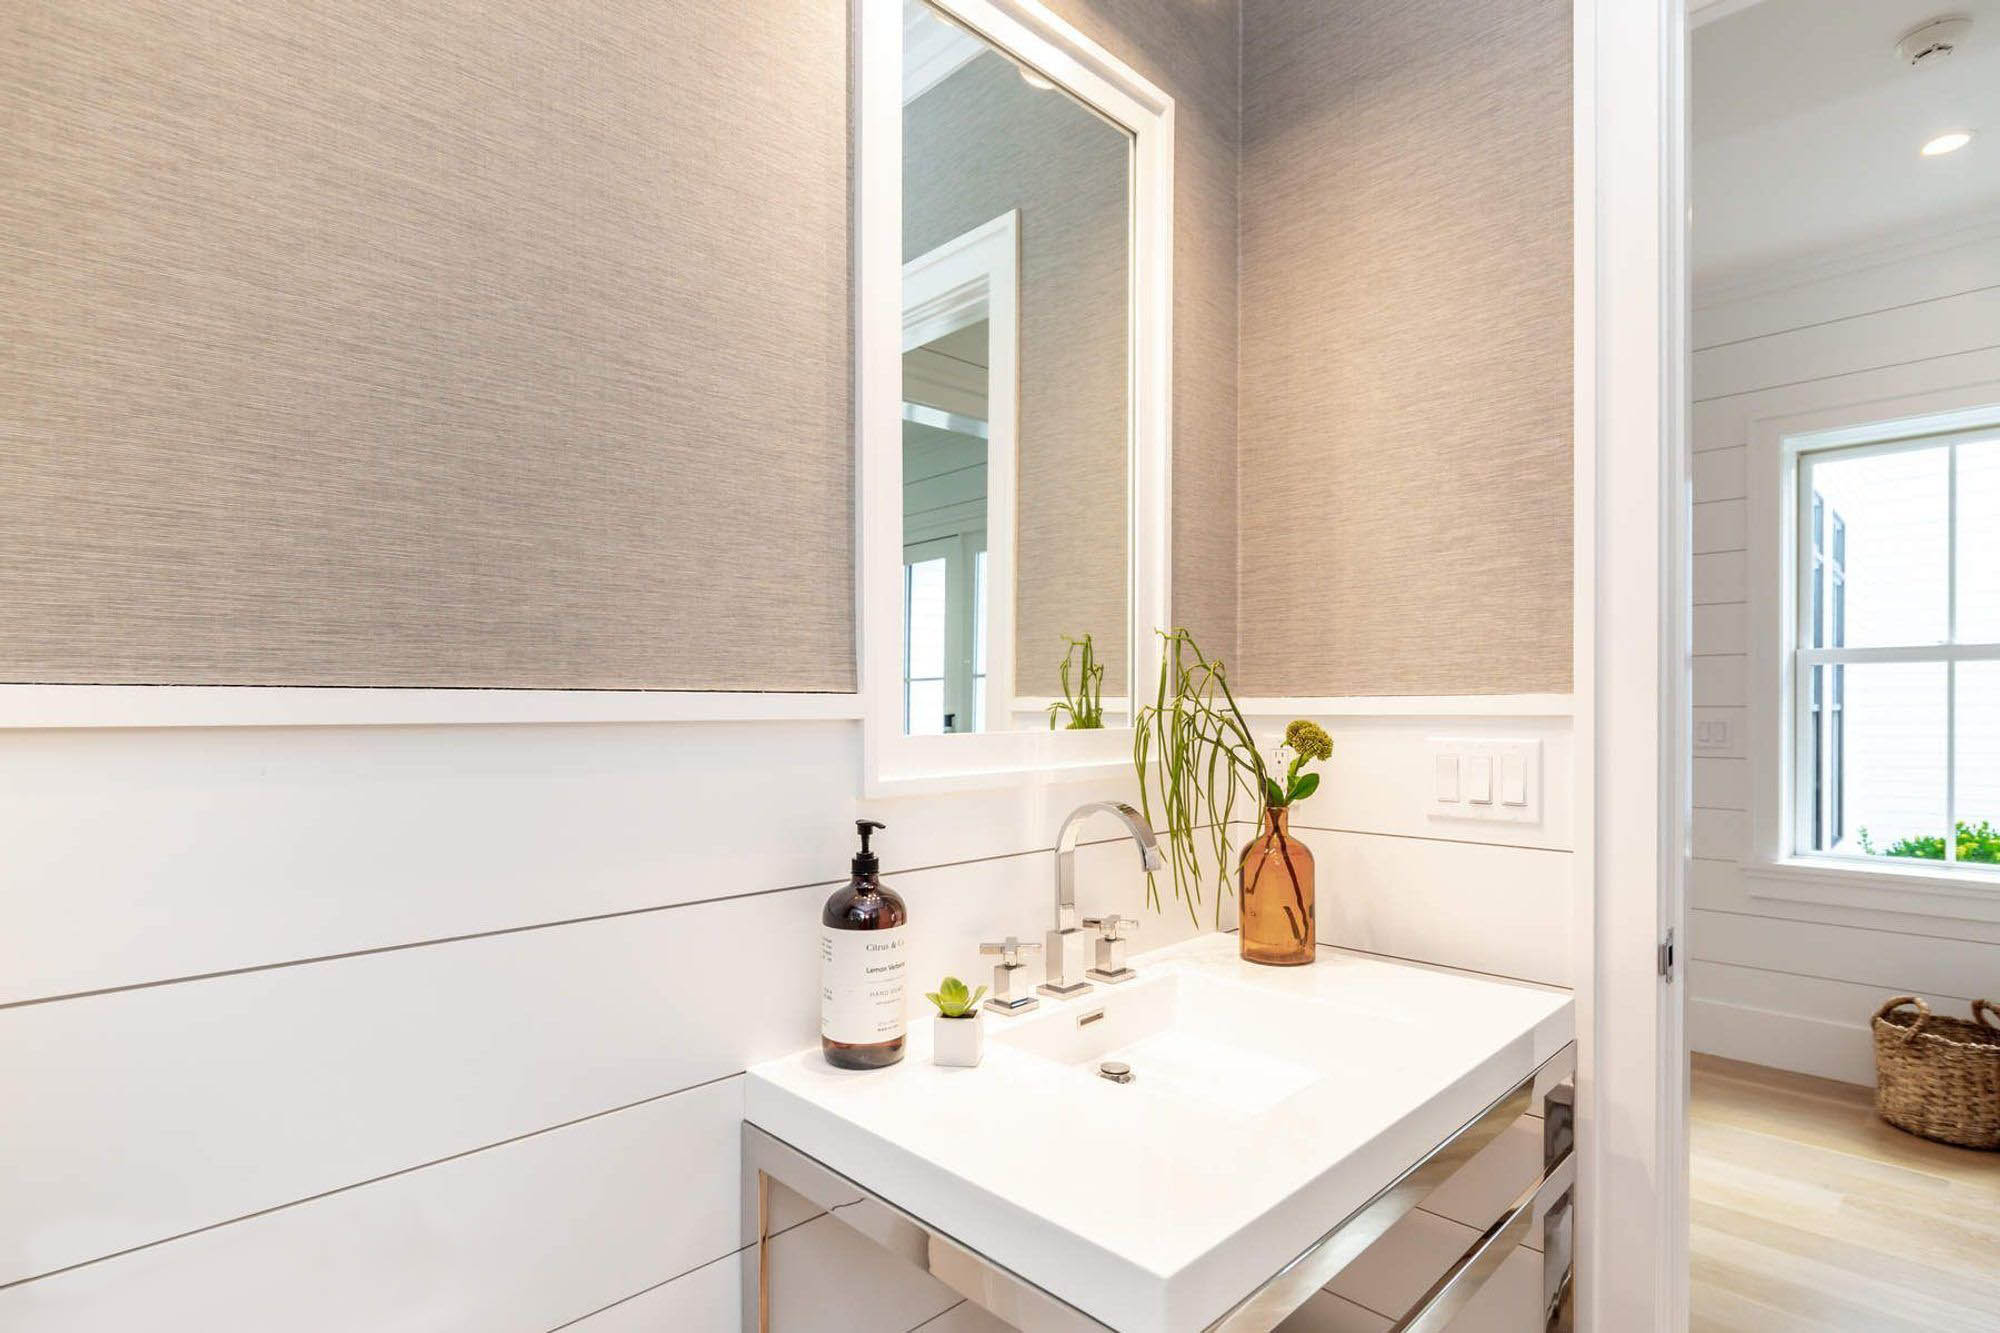
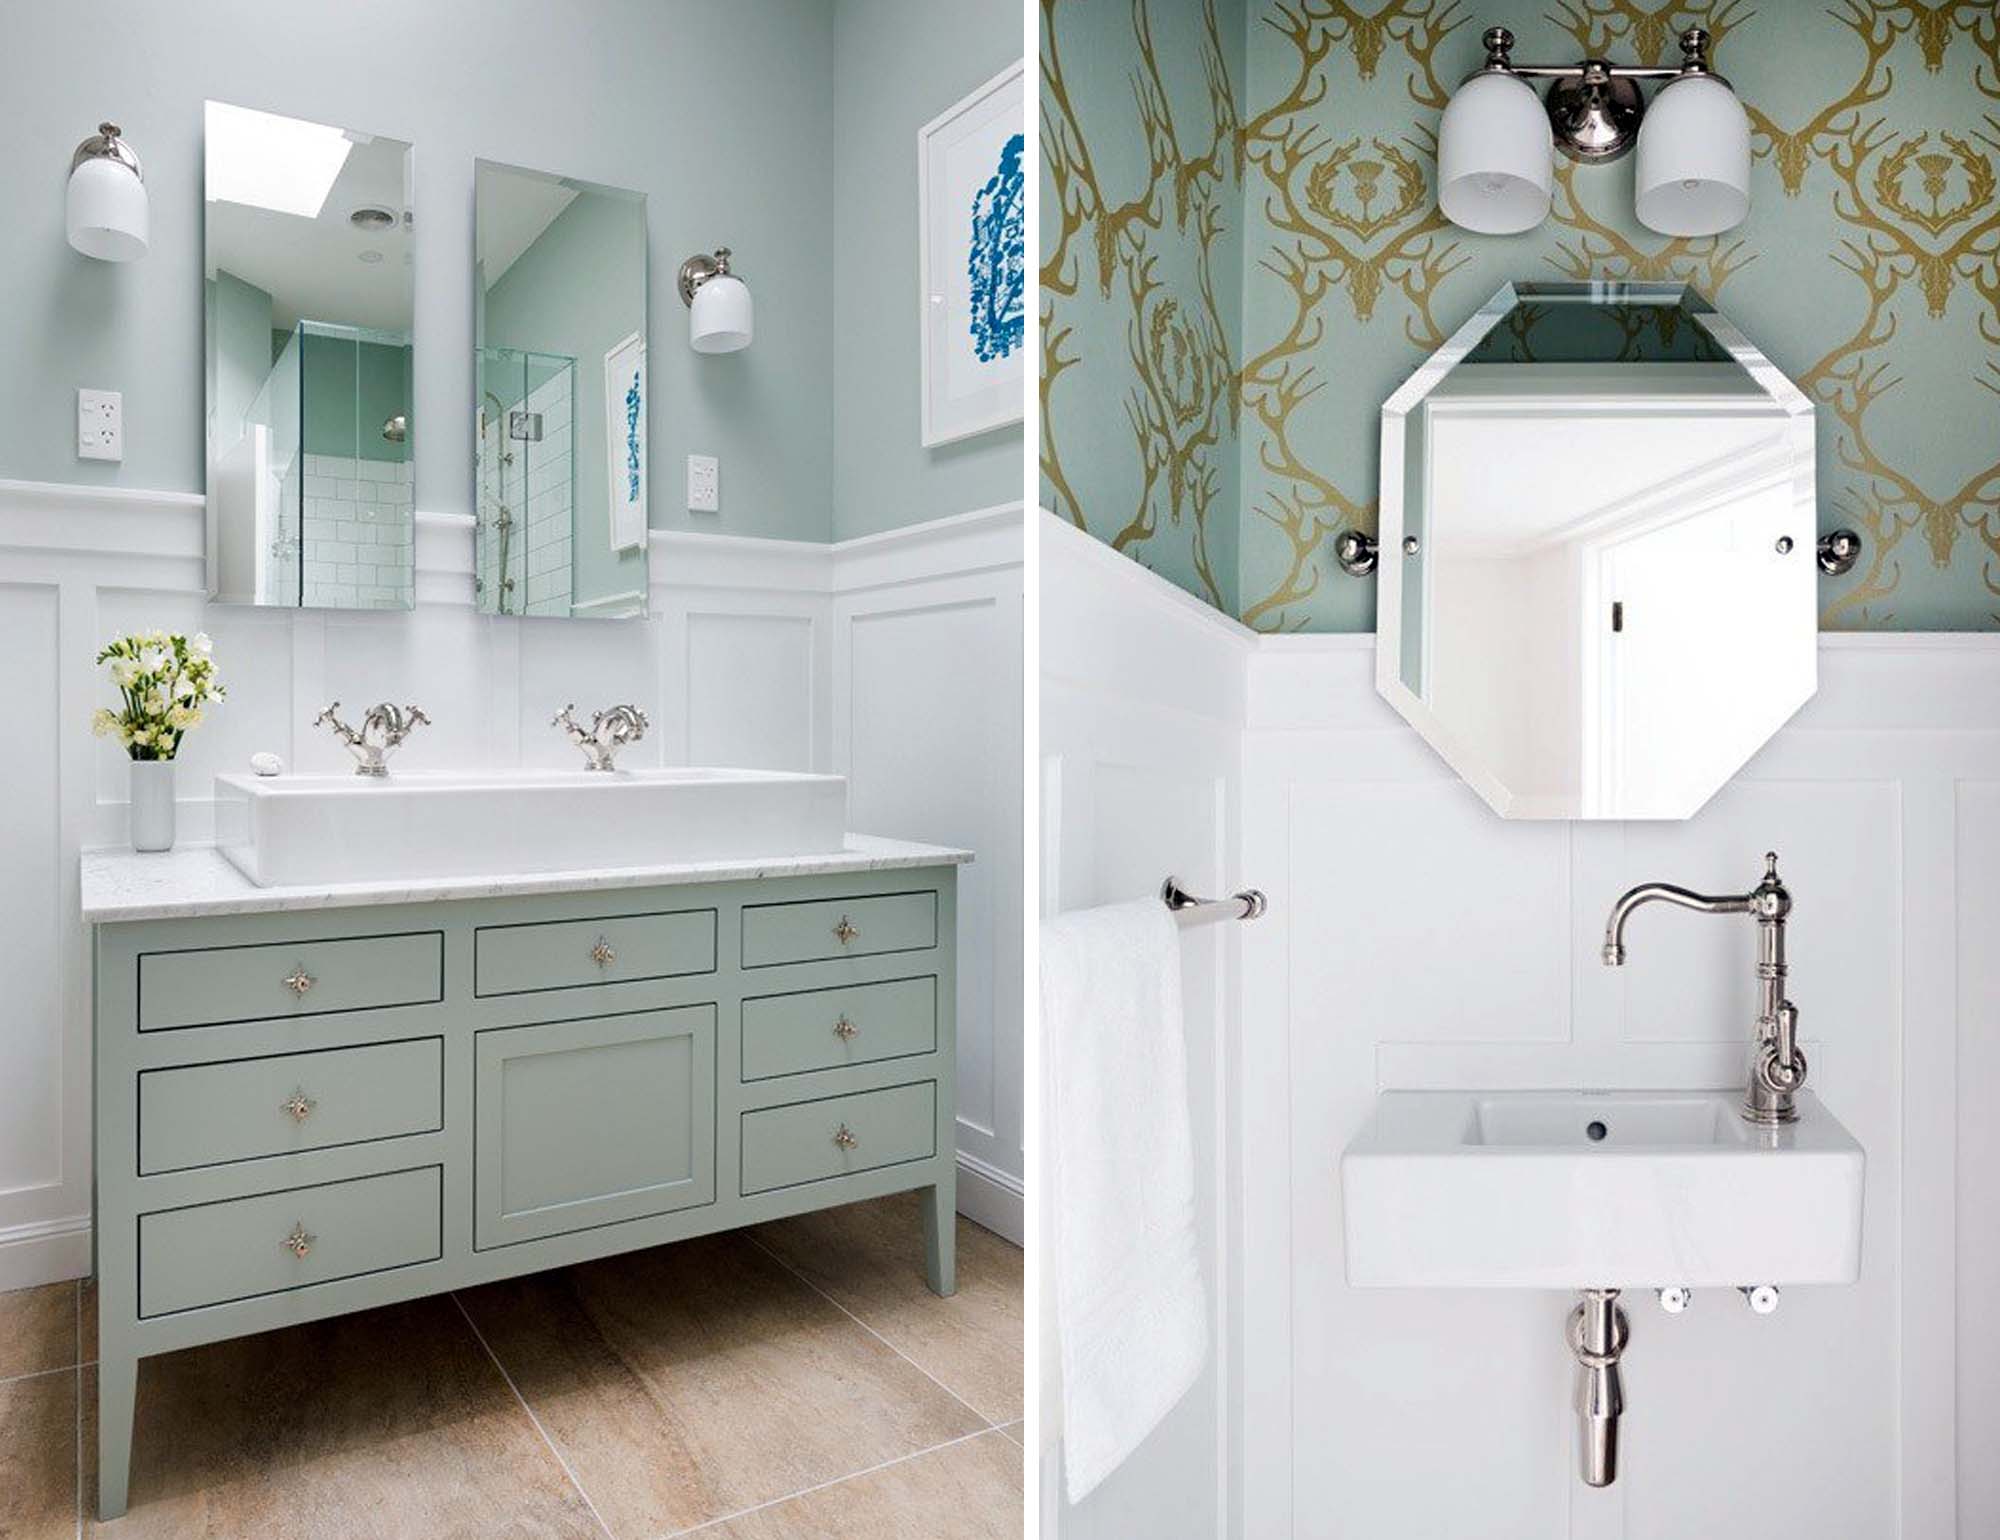
Bathroom shiplap wainscoting wall paneling with warm gray textured wallpaper. White sink with chrome faucet and vanity stand.
Bathroom Shiplap Wainscoting With Wallpaper
This beautiful small bath features horizontal shiplap wainscoting wall paneling with a simple square cap. It’s a wonderful modern design and a clean way to cap wainscoting. Warm gray wallpaper with a textured look nicely finishes off the top of the wall. White sink with chrome stand and matching chrome faucet. In wall medicine cabinet.
Simple clean finishes work best in a bathroom design like this one. I love including some green in the design, a simple countertop plants works best.

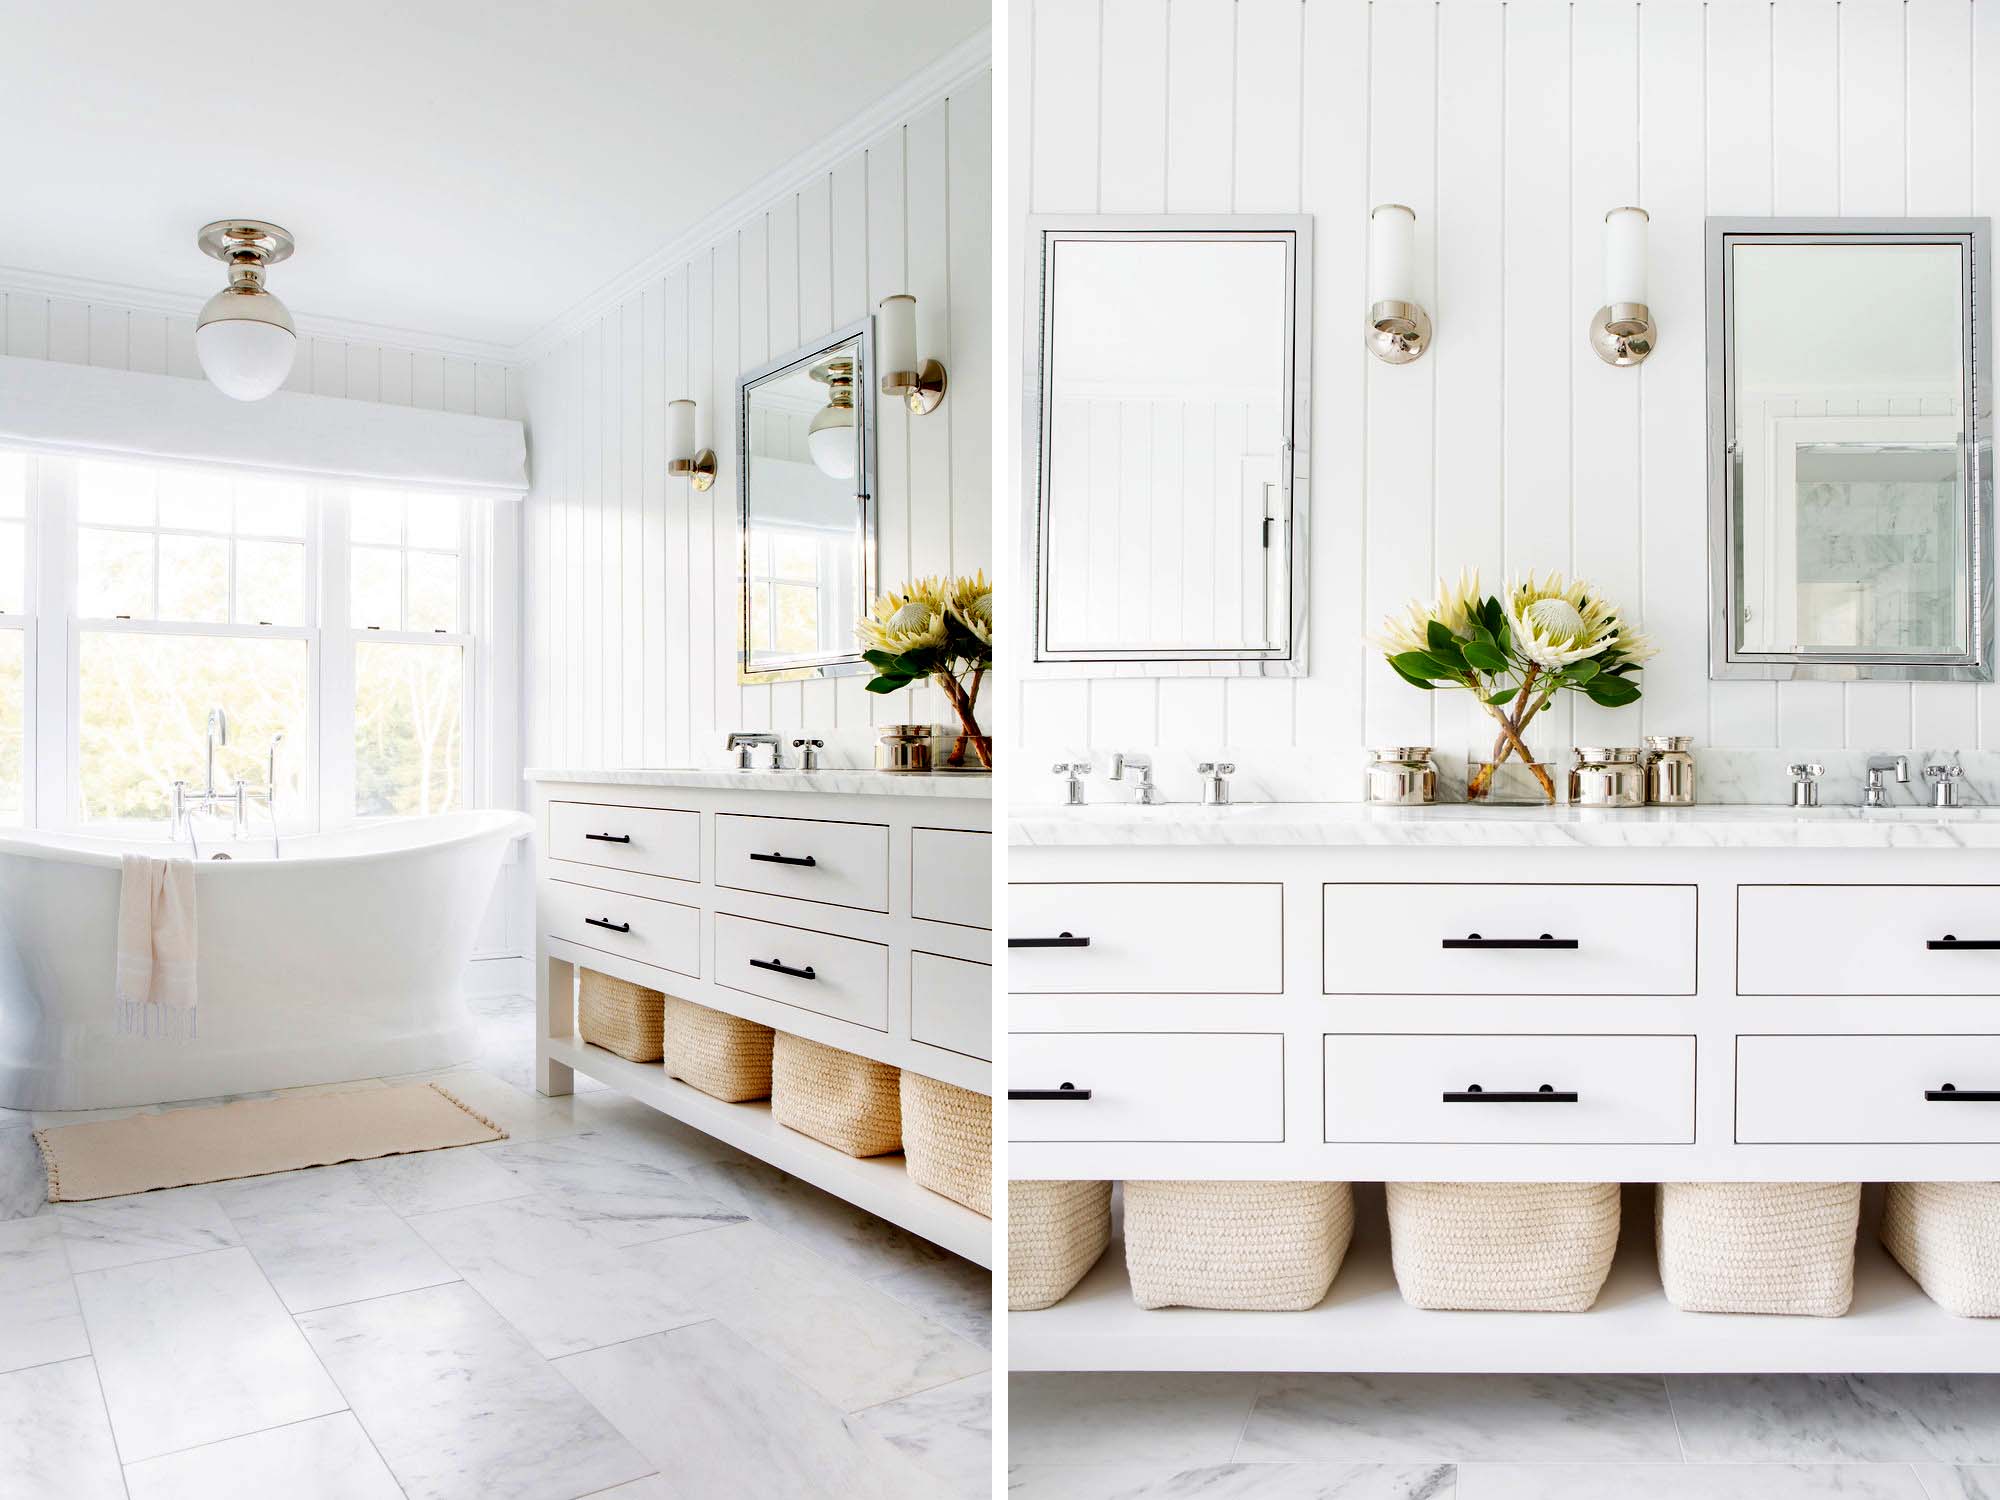
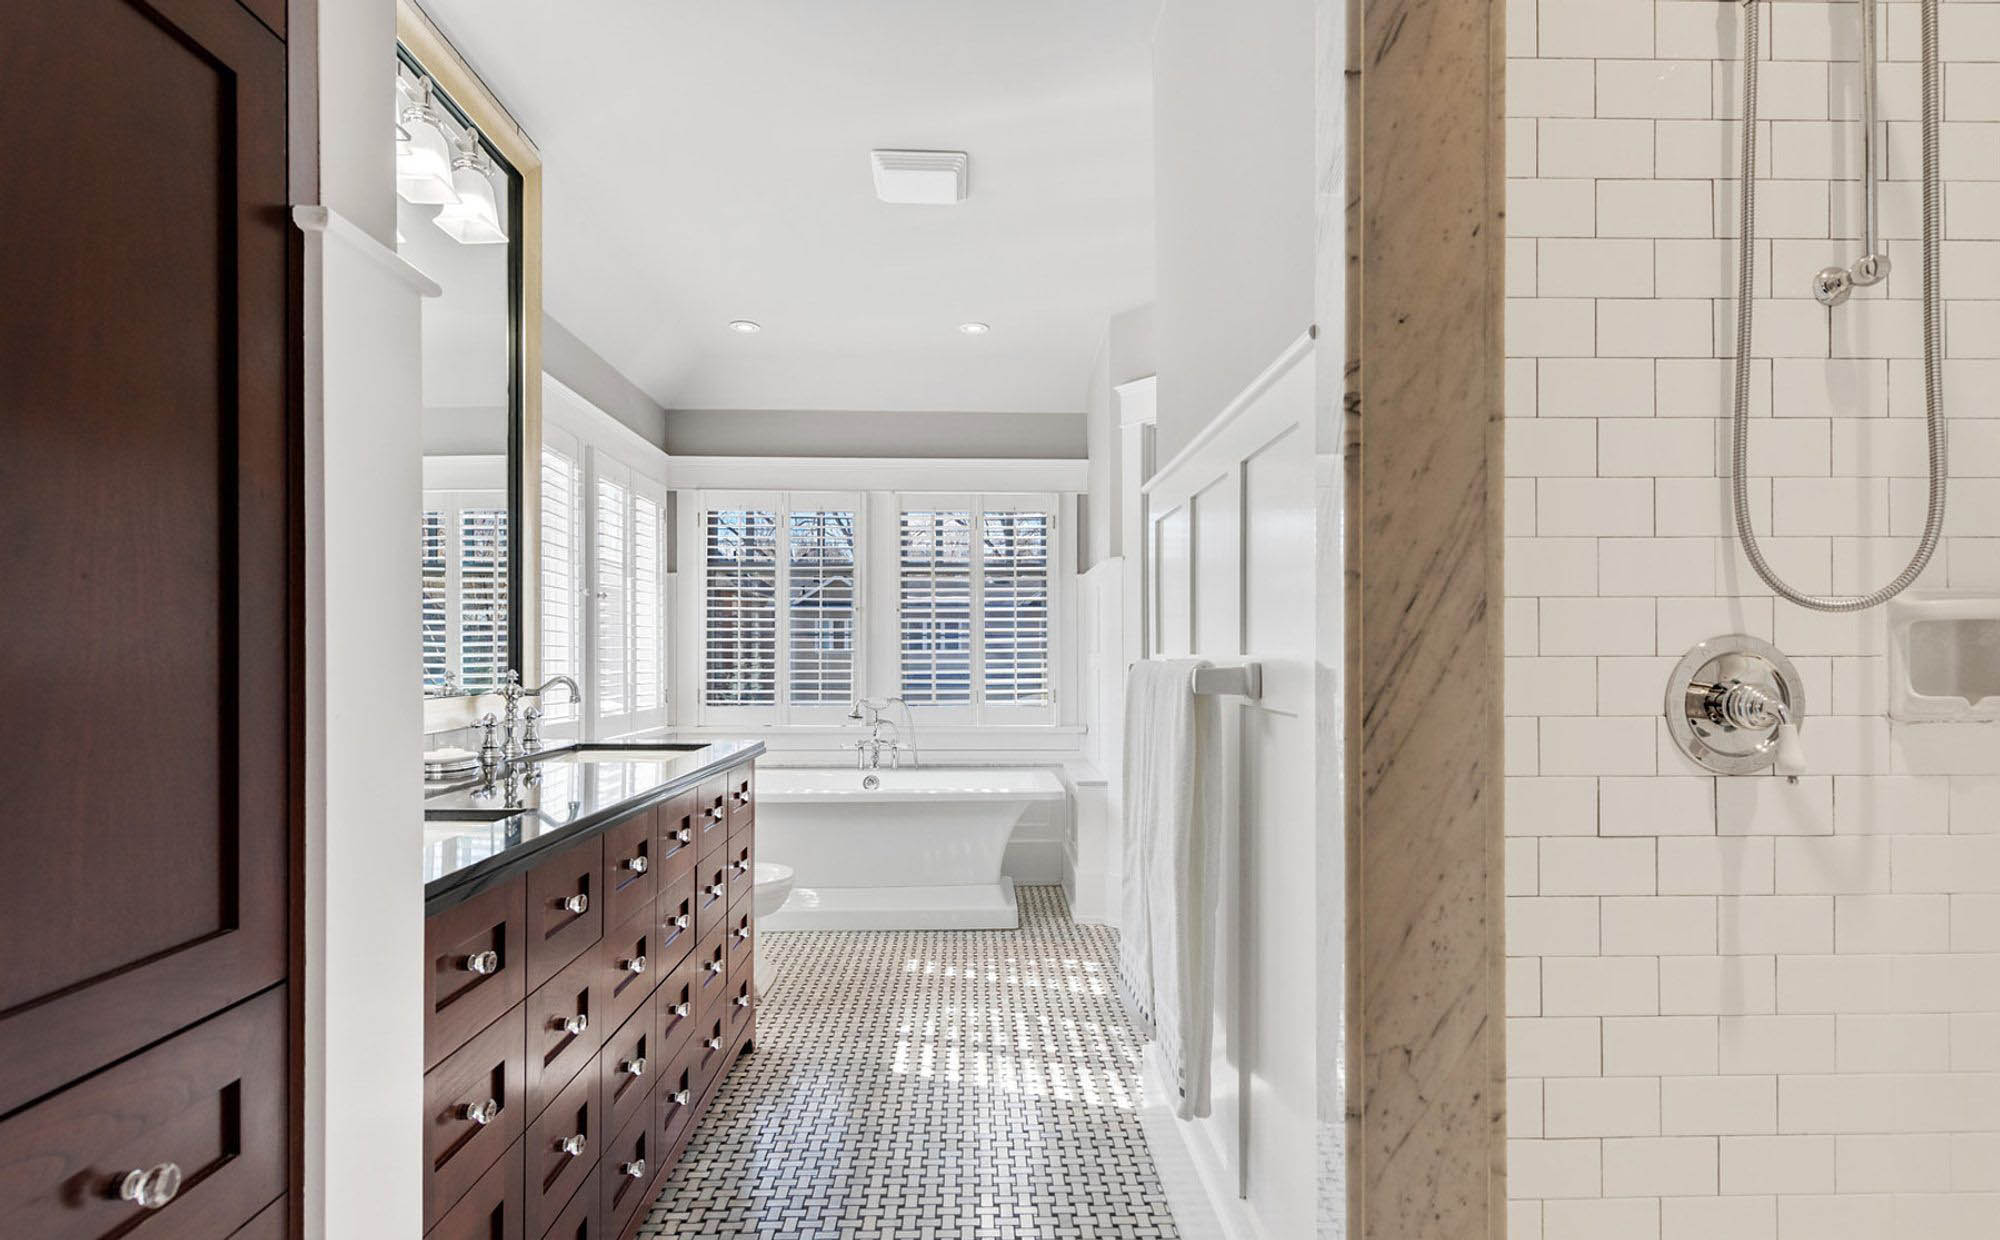
Beautiful master bathroom with box beam wainscoting design. White bathroom with wood vanity featuring lots of drawers.
Box Beam Master Bathroom Wainscoting
Box beam wainscoting is a really nice way to finish the walls in a master bathroom. We’d recommend going higher up the wall than the standard wainscoting height. Notice how the wainscoting goes up about 3/5 of the wall leaving the 2/5 for sheetrock. The added height is needed to create the box beam. This design features a large box on the bottom with a smaller one on top. The cap is a very simple one piece with a routed edge. Use a thick 6″ or more square trim for the base and maybe a quarter round if you like the look.
The great thing about box beams is that you can achieve the look with very thin trim work. Just a little bit of depth is needed but not nearly as much as with more traditional wainscoting styles.
As with other white wall paneling and sheetrock designs use paint combinations that create a slight contrast between the wood and drywall.

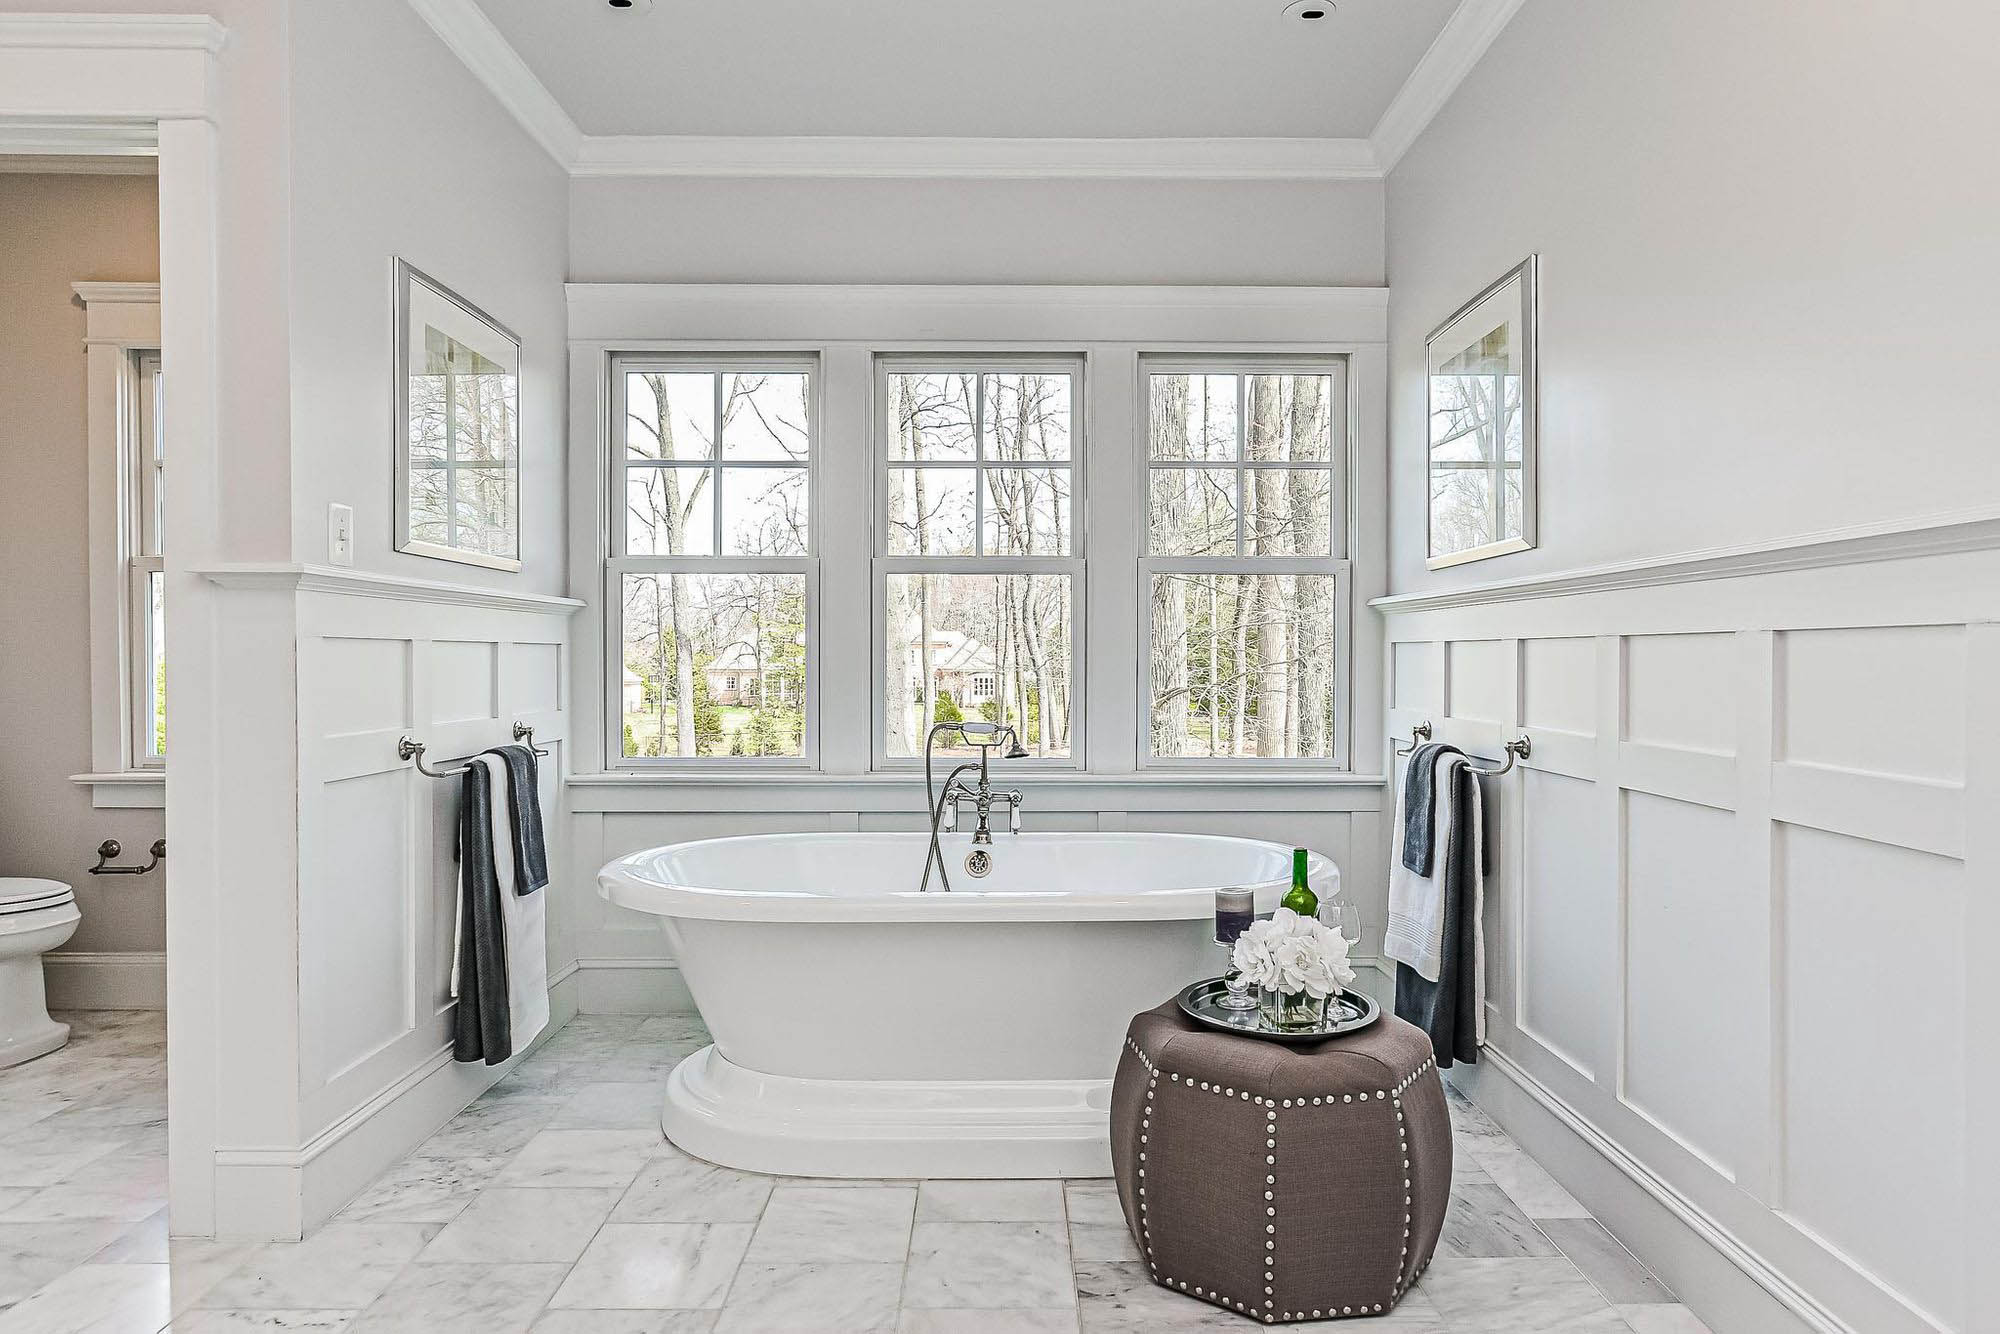
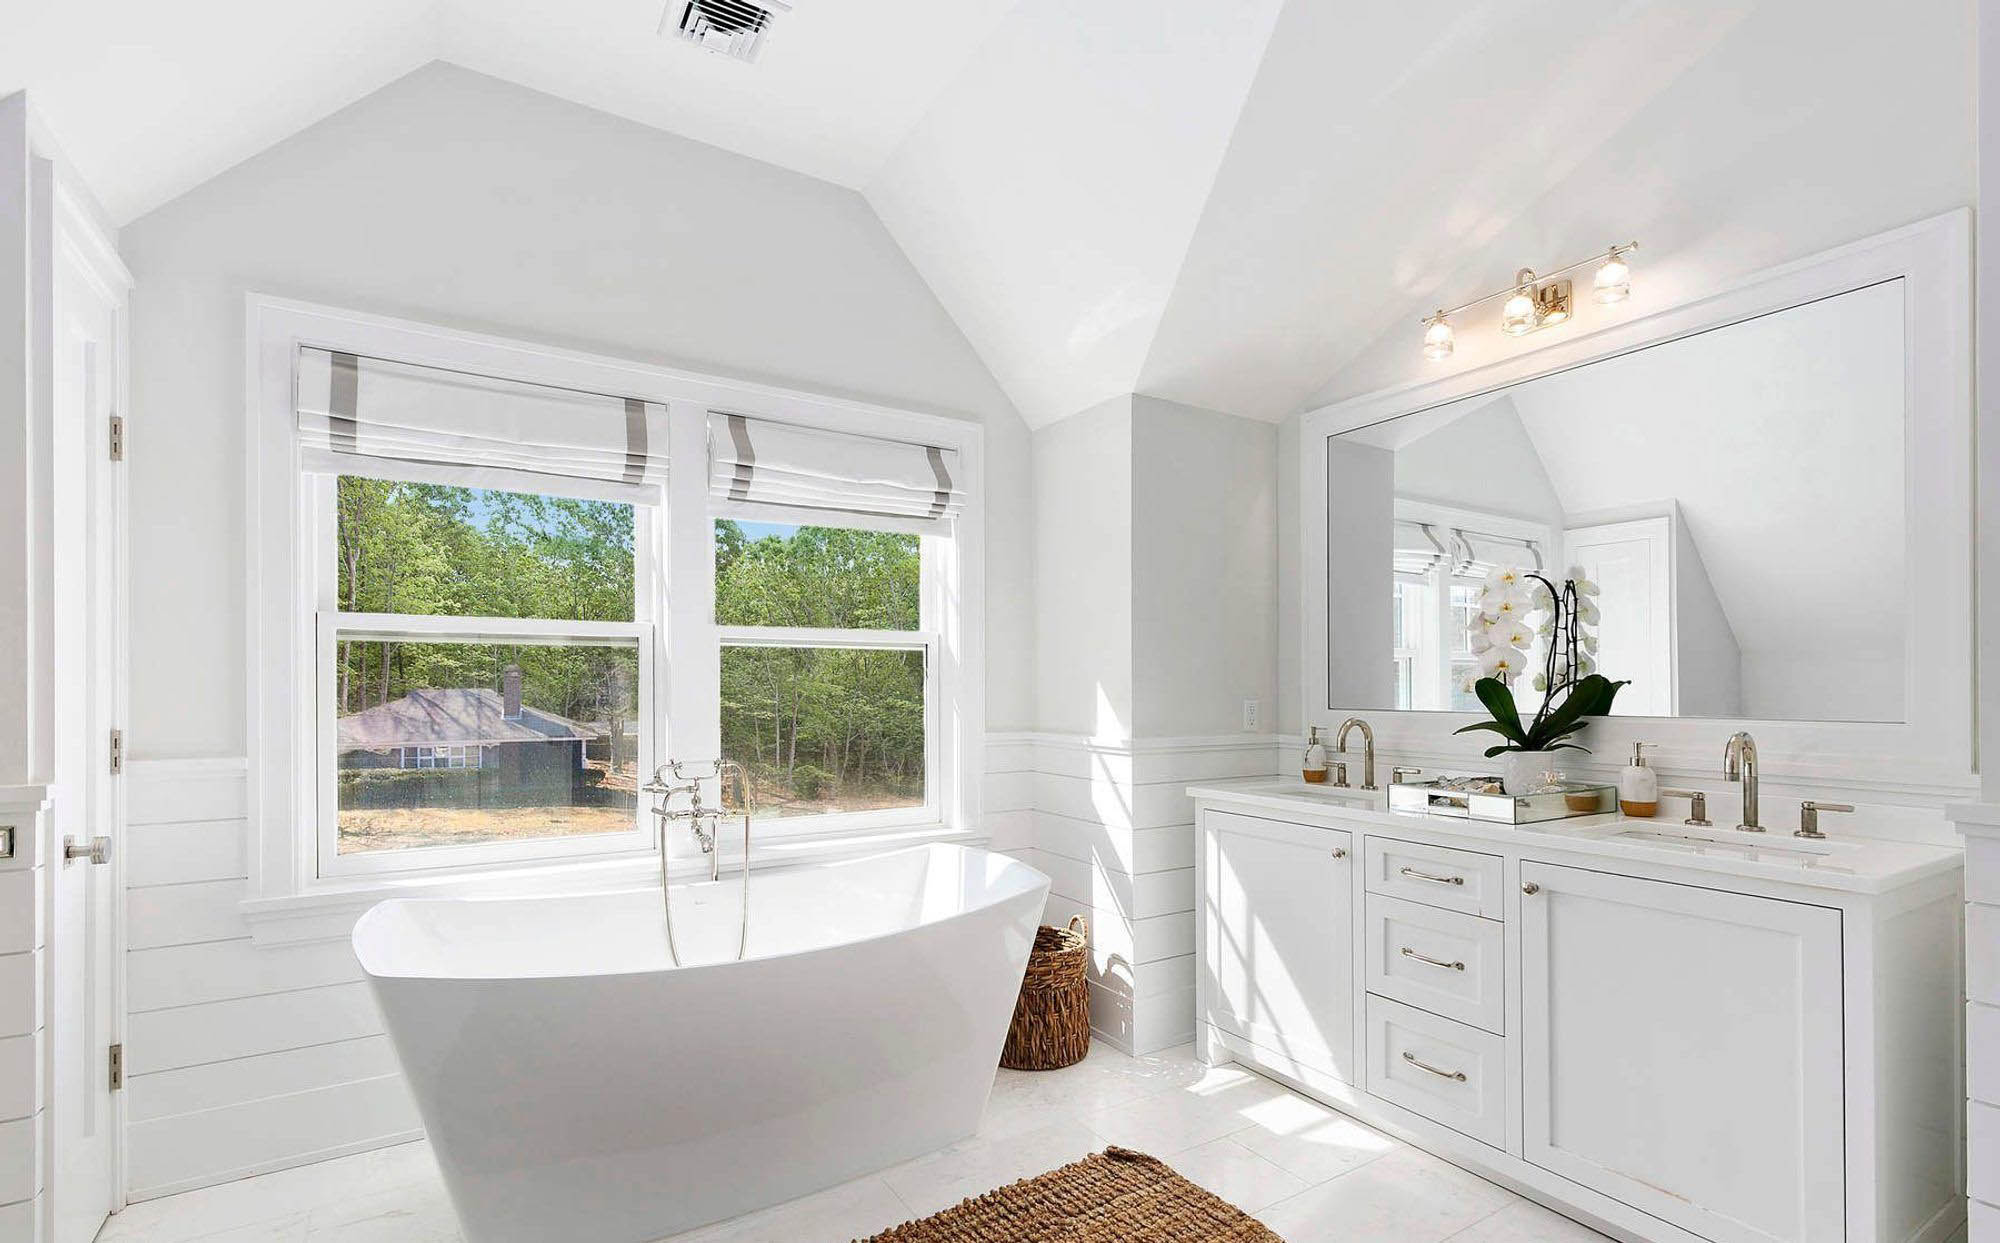
Box beam wainscoting design. Bathroom wall paneling adds sophistication like no other wall finish can.
More Box Beam Wainscoting Designs
Here’s another great view of that master bathroom with box beam wainscoting. It’s such a fantastic way of finishing your bathroom walls. Nothing adds the class and sophistication of wood wall trim. Especially when it’s styled in this way and painted white. What a beautiful bathroom. This design features a built in shelf with marble surrounding a white soaking tub surrounded by windows.
Warm gray walls contrast the white wall paneling perfectly. This bathroom features the same 3/5 wainscoting height as the previous example. That added height comes in handy with box beam.
Darker floors are another great addition that I really like. The colors matches nicely with the walls. Coordinating your wall and floor colors is a nice way to draw the room together.
Beautiful master bathroom with box beam style wainscoting.Wood vanity with white wall trim. Warm gray walls.
Master Bathroom Box Beam Wainscoting
Here’s another view of that beautiful master bathroom with box beam style wainscoting. It’s such a fantastic bathroom design that I thought a few views was warranted. The mix of white wall paneling with warm gray walls, wood cabinetry and other accents creates one classy master bath.

Modern master bathroom with full floor to ceiling wood wall paneling and built in sona. Natural finished wood with cream stone.
Modern Master Bathroom With Full Wood Wall Paneling And Built In Sona
Modern master bathrooms use natural materials and wood wall finishes. Here we see full wall floor to ceiling wood wall panels finished with a nude stain and sealant. The wood has to be properly sealed since it’s in a bathroom however you don’t have to add much color. The more natural the wood looks the better. If this is your style it’s extra important to choose wood that has a nice grain since you won’t be hiding any of the grain or knots with paint or filler.
This is a spin on the light and bright bathroom design. Even though they’re not using white and gray here it’s still a very light bathroom. Pair the natural wood with light cream colored stone and tiles. These types of designs stay away from bright whites and opt for more natural cream colors and warm undertones.
A mater bathroom with a built in sona is a very nice feature to have. Glass walls are another nice touch. If you like modern bathroom styles then I’m sure you appreciate this design as much as we do. It’s one of the most beautiful and refined designs on the page.
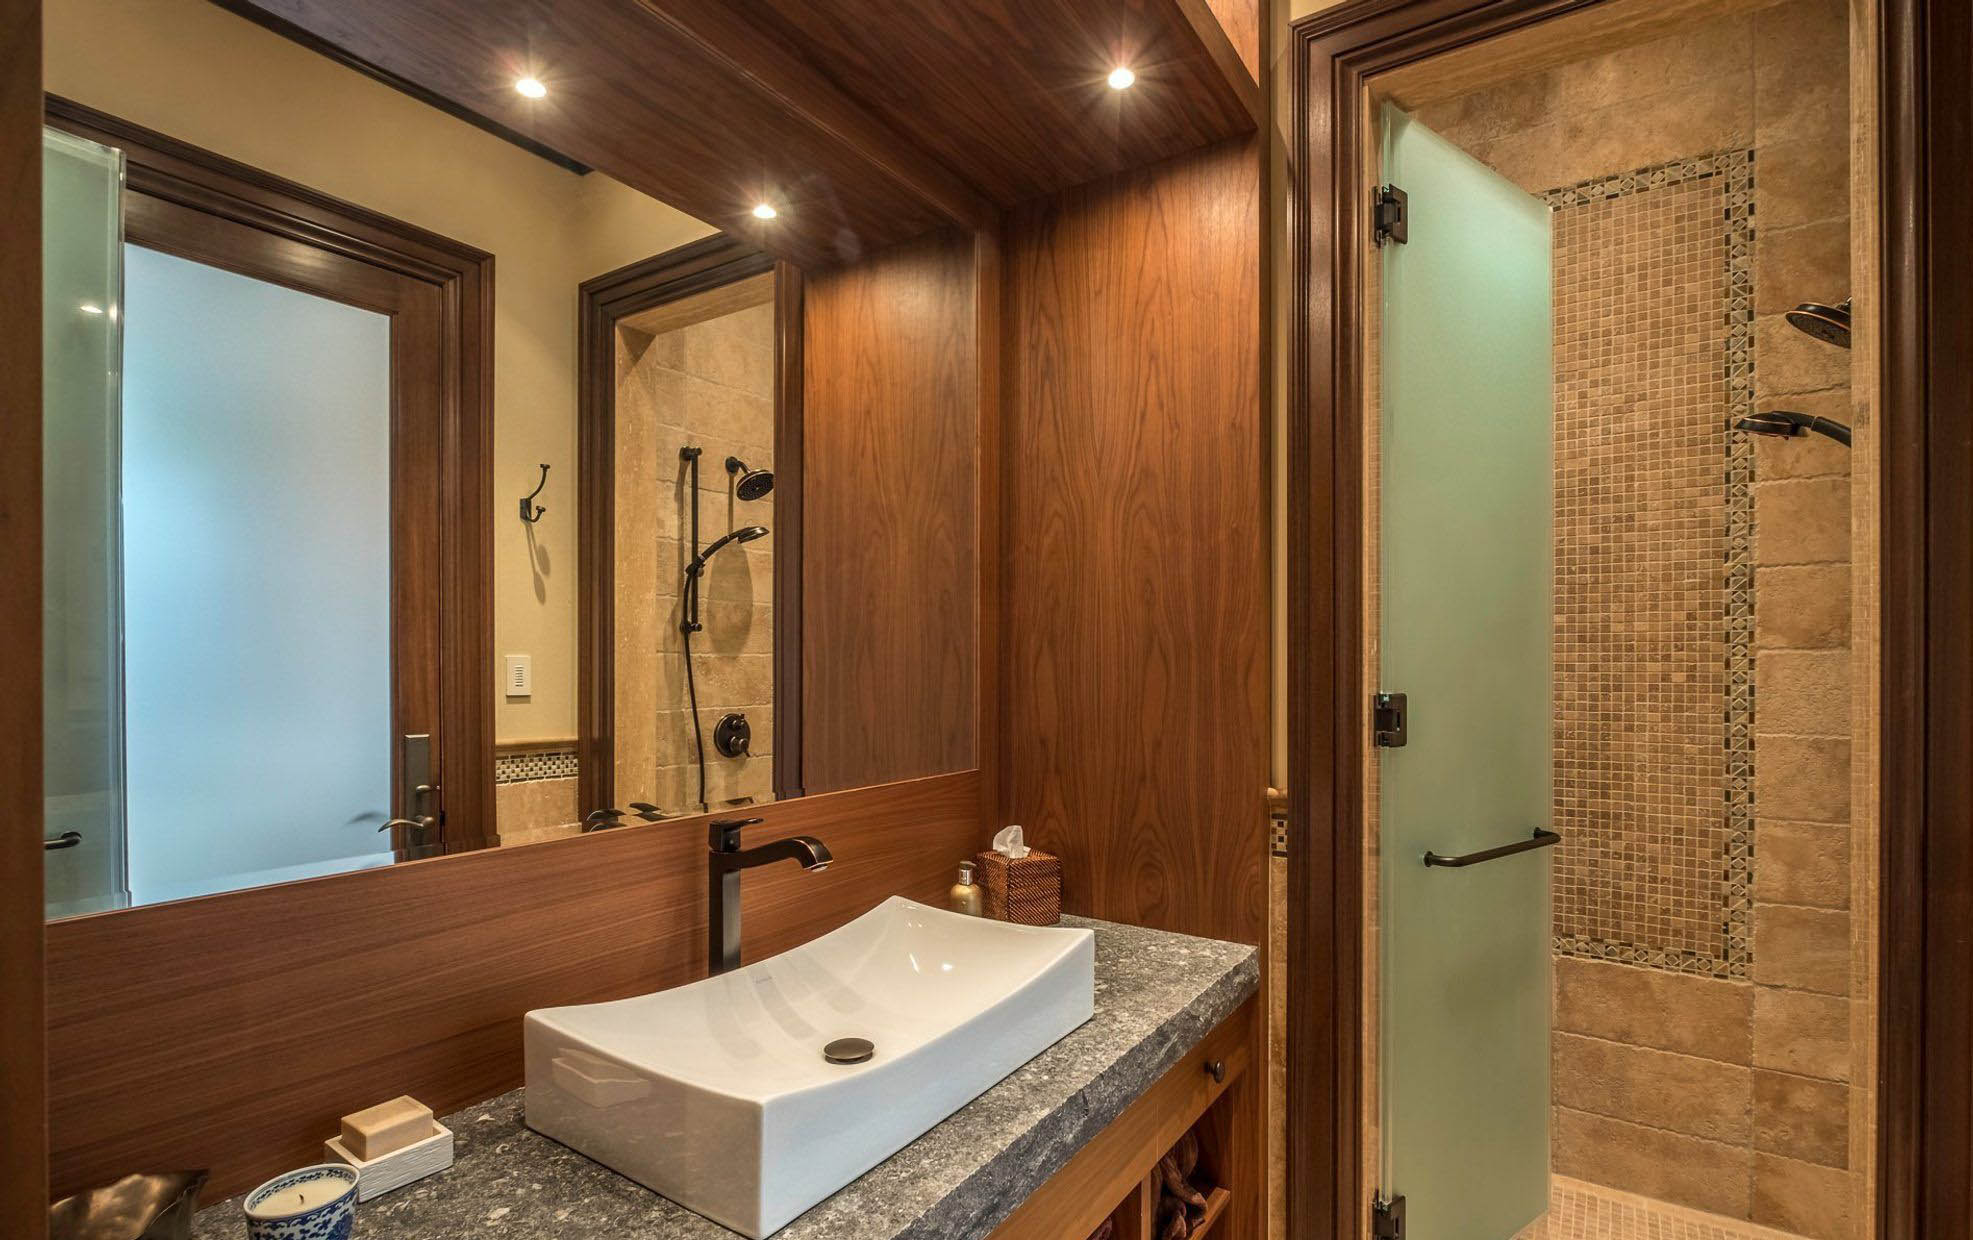
Master bathroom with exquisite wood wall paneling stained a rich medium brown with wood backsplash.
Master Bathroom With Medium Stained Wood Wall Paneling
This is an interesting master bathroom design because it features elements that are rustic with others that lean more modern. I’m not really sure what style category to put it in but I like it. The full floor to ceiling wood wall panels have been stained a medium brown. It’s a nice wood too with solid grain and barely any knots. That’s not easy to come by with such large panels and it just goes to show you how important picking the right wood panels are.
Just look at that wood backsplash. It’s rare to find a stained wood backsplash and this one just so happens to have one of the nicest wood panels I’ve seen. Finding panels like this is rare. That’s a beautiful grain and the wood holds stain really well.
The rest of the bathroom has a more rustic appeal which I’m not a huge fan of personally but that wood paneling is exquisite.
Bathroom Wall Trim FAQ
Here are some answers to a few of the most common questions we get asked about bathroom wall paneling and trim.
What Kind Of Paneling Can Be Used In A Bathroom?
There are a bunch of different kinds of wall paneling suitable for bathrooms. This article is all about wood wall paneling but there are other types we’ll go over in another post. Just be sure whatever type you install that it’s water resistant. At some point those walls are going to get wet.
When choosing a type for your bathroom, make sure and design one that compliments your home’s architecture and style. Try to picture what the paneling will look like before you install it. What we like to do is draw it out to scale which you can see in some of the example pics above. Planning is so important before you build anything.
We recommend wood walls for a bathroom but some of the other finishes are nice as well.
What Are Bathroom Wall Panels?
Bathroom wall panels are water resistant panels you install or build over the drywall or studs. It’s a much different look that tiles or bare drywall and in our opinion a lot more sophisticated and in style.
Tile walls are kind of old fashioned. They’re still used on some larger master bathroom walls but more clients use wood. bare drywall is another common finish but that’s typically reserved for small bathrooms. Although even small bathrooms look better with wall paneling. Many clients think wall paneling is old fashioned because they picture some 80s living room with wood walls. But that’s not the case at all. Just look at any of the pictures throughout this page, they’re all modern bathrooms built within the last few years.
Can You Put Wood Paneling In A Bathroom?
Yes. We use wood all the time. Just make sure it’s finished properly so that it resists water. Wood isn’t water proof but with the right finish it’s water resistant enough that it’s fine to use. We finish entire bathroom walls in wood with nothing but a few good coats of sealant. that’s the key. Your paint and sealant has to be really good so that no moisture actually touches the wood.
Take special care when sealing the bottoms of the wood paneling because that’s where water can pool and possibly get into the wood. Surface moisture won’t be an issue but pooled water that’s allowed to sit at the base of the wood can be if it’s left there for a long period of time.
I Paneling Cheaper Than Drywall?
No. Drywall is definitely cheaper than wood wall paneling. You may be able to find some very thin PVC wall paneling sheets at Home Depot but they generally install over drywall anyway. Although when you add paneling to drywall you only need a skim coat of spackle and not a finish coat, so you’ll save some money there.
All the wood wall paneling design shown throughout this page are more expensive than drywall.
Is Paneling Waterproof?
Wood wall paneling isn’t waterproof but if finished correctly it is water resistant. If your painting your paneling then include a sealant as the final coat. If your staining then the sealant goes on after stain. This layer of protection is critical because it prevents moisture from getting into the wood.
Generally surface moisture isn’t an issue, you just wipe the paneling dry after a steamy shower or even let it air dry. However pooled water can be a problem. If water pool at the base of the paneling or on top of the shelf then you can have problems. Seal the base of the paneling where it meets the floor and the cap where it touches the wall with silicone and keep these areas dry.
How Can I Make My Bathroom Look Expensive?
Bathroom wall trim is the best way we know of to make a bathroom look a lot more expensive than it actually is. And best of all it’s a great DIY project. Materials are cheap and installation is fairly easy for many of the designs. Especially box beam, which happens to be one of the nicest and most versatile wall paneling styles.
Wall paneling gives a bathroom a sophisticated, classy look that few other wall finishes can match.
What Is The Best Wall Covering For A Bathroom?
Nothing can match the rich, sophisticated beauty of wood wall paneling. It’s relatively cheap when compared with other wall finishes like tile and is easy to install. And there are really no drawbacks as long as you seal it properly. However there are plenty of negatives with other forms of wall finishes. For the money you really cant beat it. Just make sure you spend a lot of time designing. Draw it out before you build anything. Just like our example pictures above. Make sure the design fits the style of your home and bathroom.
What Tools And Supplies Do I Need To Do Bathroom Trim Work?
Here’s a full list of supplies & materials that we use to install our bathroom wall paneling.
- Blueprint
- Pneumatic nail guns. We use different nails for different purposes
- Air compressor
- Materials (Wood, MDF, Nails, Glue, etc.)
- Measuring tape
- Laser level (optional)
- Pencil
- Knife
- Level
- Stud finder
- Miter saw
- Jig saw
- Spackle, joint compound, or wood filler (for filling nail holes)
- Paintable white caulk meant for moldings & a caulk gun
- Sandpaper and/or palm sander
- Primer
- Paint
- Paint brush, roller, and other painting supplies
*Buy your wood around a week before you start the project and just let it sit in your house (this is called “acclimating” the wood) to avoid any cracks caused by expansion or contraction, which can happen if it’s not acclimated before installation.
Summary: Bathroom Wall Paneling Ideas
So you’ve finally decided to remodel a dated bathroom. Your moving into a new house and want to make it all your own. Or maybe your building that dream home and have a few new bathrooms to design. What you need are some bathroom wall paneling ideas and you’ve come to the right place.
Bathroom paneling ideas offer an easy DIY way to elevate your bathroom’s design and style. Whether you use tongue and groove, square panels, wainscoting or shiplap, bathroom paneling can add interest and warmth while creating a style. From Traditional to Modern, Rustic, Vintage or Beach themed, bathroom paneling works along side other bathroom ideas to help define the space.
Bathrooms are relatively small compared to other rooms in the house but they pack a lot of punch. Go floor to ceiling, 3/4 or stick with the traditional wainscotting height and pair it with some patterned wallpaper or a bold color for a more modern edge.
Historically, bathroom paneling ideas was a functional addition that helped insulate the home. However, it quickly became a decorative feature too. But wood work is more expensive than drywall so many have stopped using it or used tile instead. But wood bathroom paneling is is a great choice and definitely makes a huge difference in even a small bathroom.
The great thing about bathroom paneling is that it’s easy to do. If you own some basic tools and have the time it’s a great DIY project. A typical bathroom can be completely transformed in a weekend. And most wall paneling is installed right over the drywall so there’s no demo involved.
If you have any questions or comments about wall paneling email us any time.