How To Texture Walls With Drywall Mud
Most people use drywall mud to cover seems, corners, nails and screws which creates a super smooth wall finish when sanded. But you can also use mud to create a textured finish over the entire wall similar to plaster. It’s very easy to do and makes a great DIY project. All you need is some drywall mud, trowels, a power drill and mixing bit, and a paint roller. Texturing your walls is a great way to add visual interest while covering up imperfections. It’s as much an art form as a DIY project and it’s easy to do once you get the hang of it.
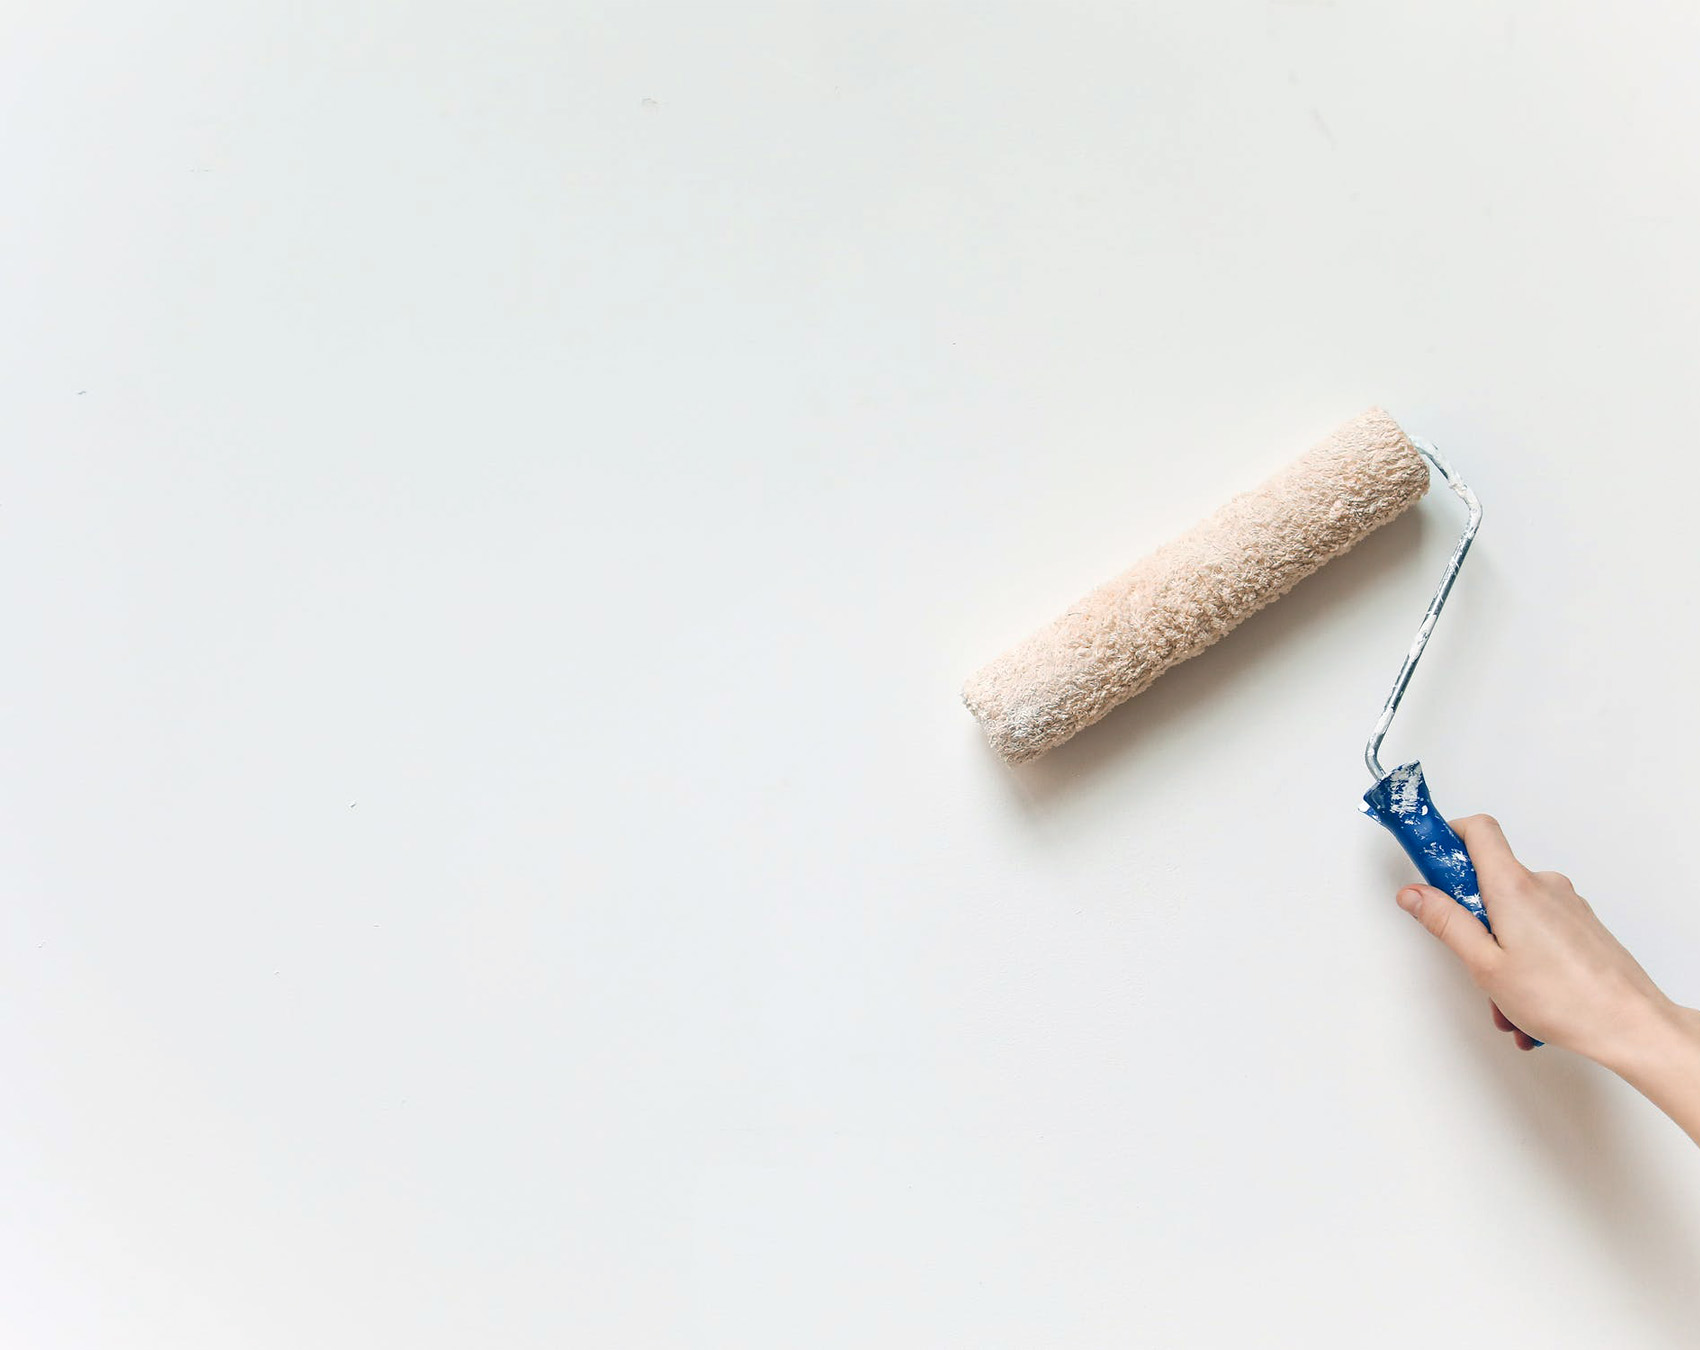
To texture walls with drywall mud, thin it a little bit by mixing it with water until it becomes like thick paint. Then pour the joint compound into a paint tray. Use a thick textured paint roller to roll it onto the wall. Wait for the mud to partially dry, then roll over the wall again with a fresh roller. This will pull up the some of the dried compound to create a 3-dimensional texture. Use a brush and small rollers to texture in corners and tight areas.
To create an orange peel texture with drywall mud. Repeat the same basic process. Thin the mud, paint it onto your wall with a thick roller and wait for it to partially dry. Then wrap your roller in plastic and run it lightly over the wall. This knocks down and smooths out high spots which creates an orange peel design.
If you’re looking to texture your flat walls and give them a little more character, drywall mud is a great way to do it. In this article we’ll show you how.
Types Of Wall Texture
Texturing a wall is an affordable way to add interest to your walls and hide defects. It’s an easy project to DIY and only requires basic tools like a roller, mixer, brush and some drywall mud.
There are two basic ways to texture a wall, physical texture or a faux finish.
- Physical texture is created by adding plaster or drywall mud to the walls. It adds actual depth, dimension and weight to the wall.
- Faux texture is achieved with paints and mimics the look of an actual textured wall.
Adding wall texture with drywall mud creates physical texture with density, sound dampening and a 3-dimensional look. Texture grades create with joint compound range from very fine to coarse.
Here are some of the things you can do with drywall mud:
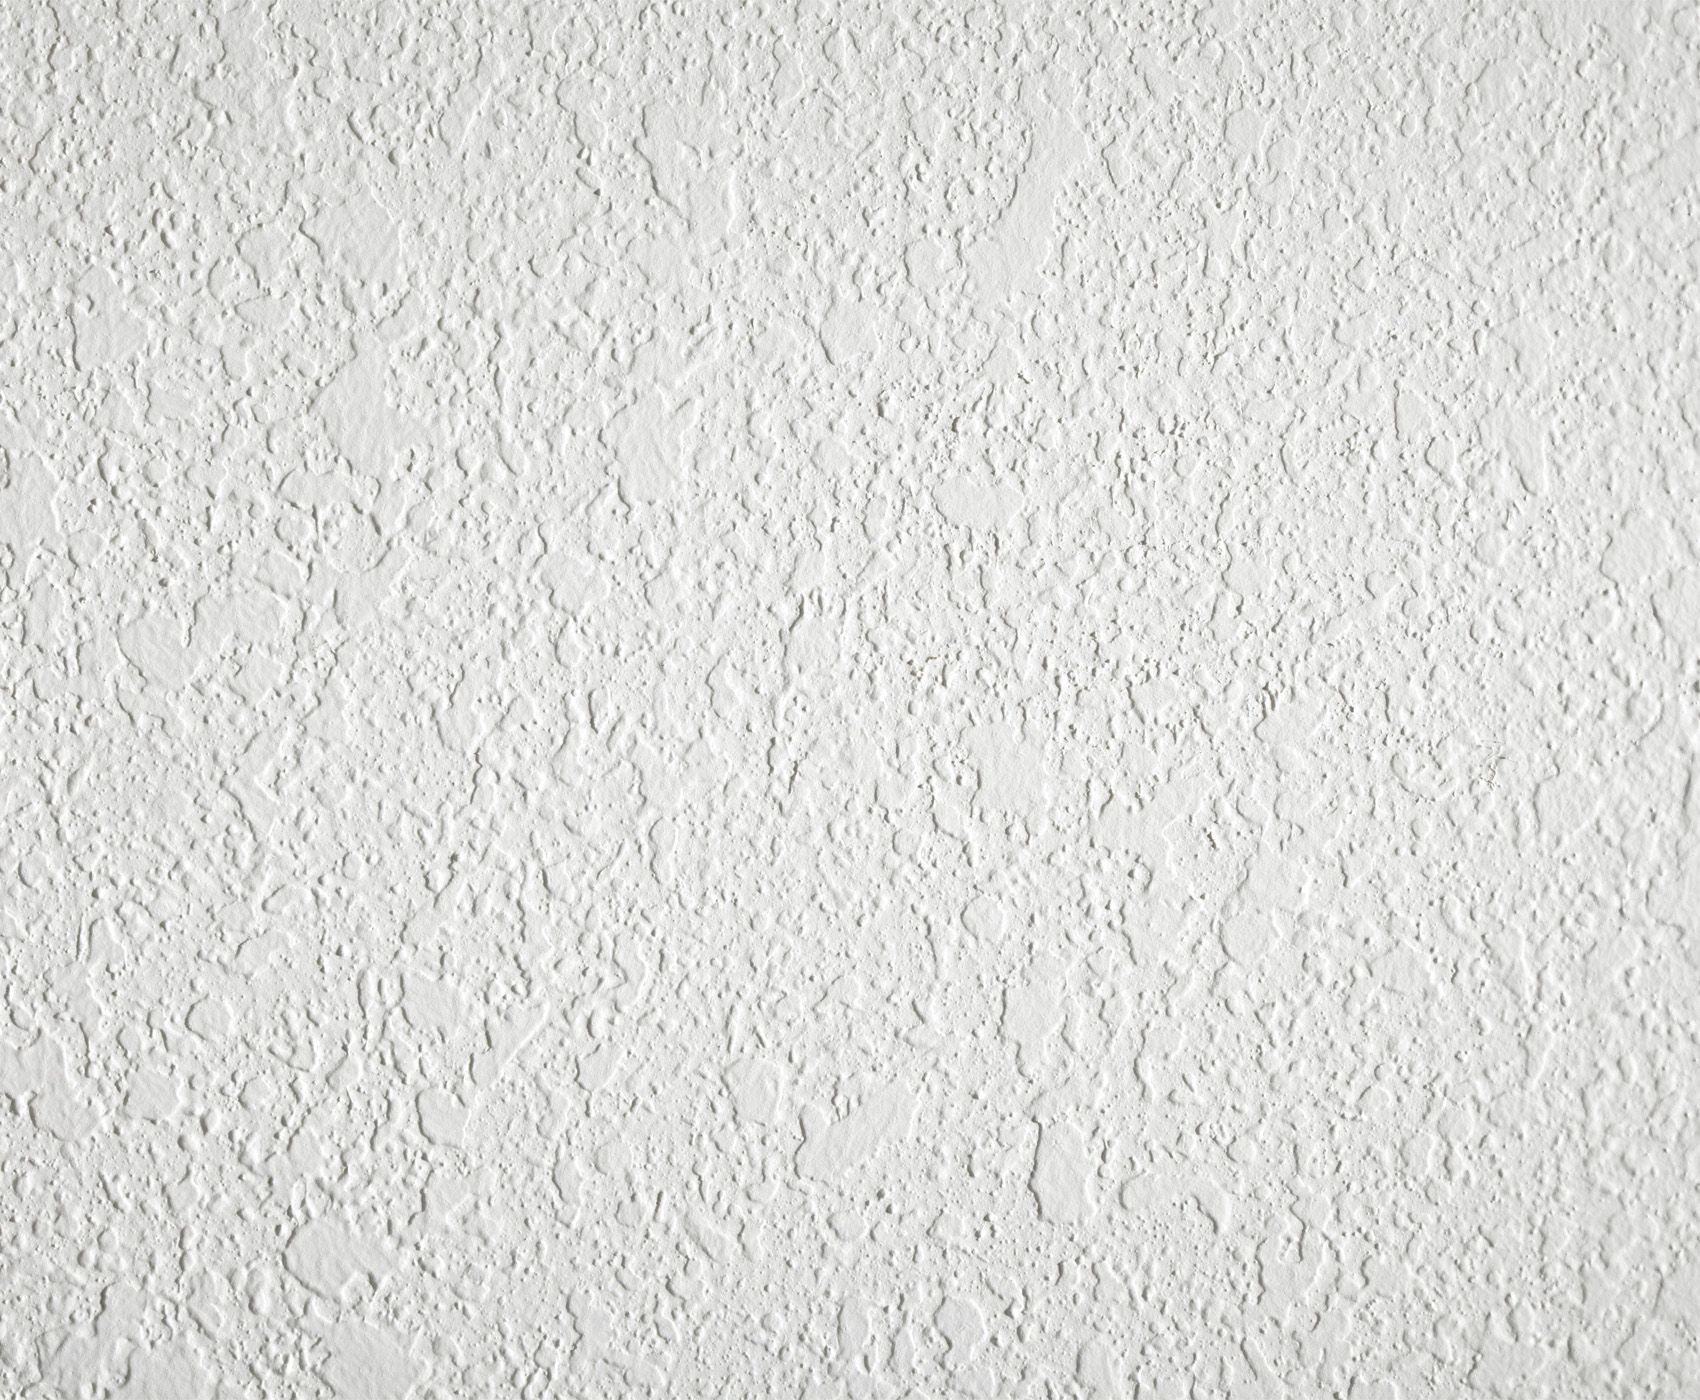
- Smooth: Smooth textured walls are not actually smooth. They have a light texture that mimics the look and feel of plaster. You achieve the look by wrapping your roller in smooth plastic.
- Grit: Apply wet drywall mud to your walls with a roller, wait for it to partially dry, then roll over it again. The result is a subtle gritty texture evenly spread throughout the wall.
- Sand: You can achieve a gritty texture by adding sand to your drywall mud before applying it to the wall.
- Knockdown: Create a knockdown texture by applying joint compound to your walls or ceiling, then smoothing the peaks down with a knife. The result is a marbled texture.
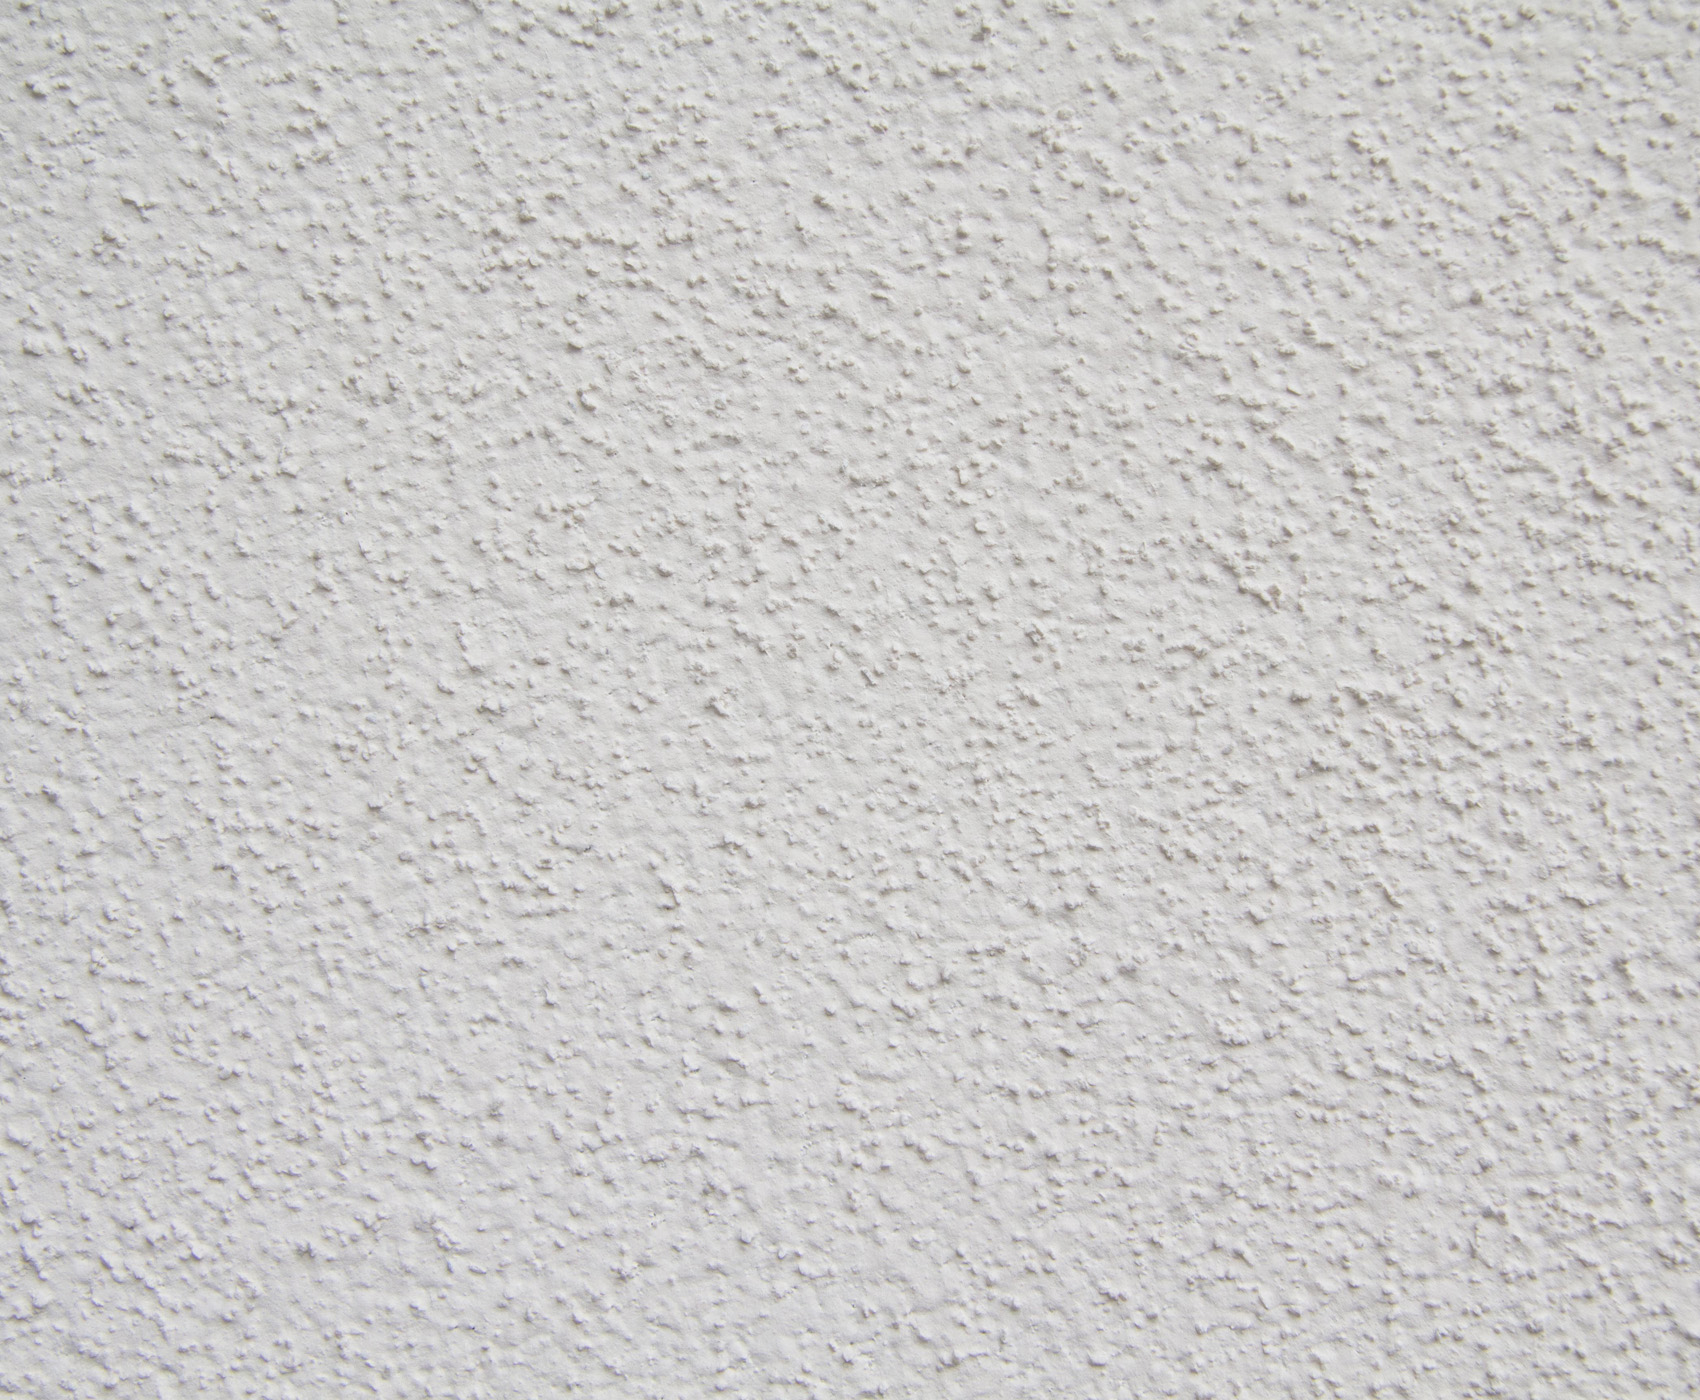
- Orange peel: A subtle texture created by applying drywall mud to the wall with a thick roller and then knocking down with a roller wrapped in loose plastic or a bag.
What Type Of Drywall Mud Works Best To Create Texture?
An important part of creating texture on a wall with drywall mud is choosing the right type of mud. Joint compound comes in a variety of formulas designed to do different things. There are fast dry formulas, all around mixes, low dust compounds and formulas that are light weight and better as a final coat.
Here are some things to consider when choosing the right type of mud for your texture:
- Because you’re creating texture, not going over seems and tape, you don’t need a heavy mud. These are best used as a base coat. However if they don’t have a light weight mud an all around mud will still work.
- You also won’t be sanding your wall texture, so formulas that create less dust aren’t necessary.
- Don’t use fast dry formulas. Once of the benefits of creating wall texture with drywall mud is that you have plenty of time to work and create textures.
I use light weight finish coat mud to create wall textures. It’s thin, goes on easy and looks great. And it doesn’t have a bunch of additives that I don’t need. If you go to Home Depot or Ace Hardware, it’s the joint compound with a light green lid and costs around $22 per bucket.
If they don’t have ultra light weight in stock, I use all purpose joint compound. It has a darker green lid and costs around $25 per bucket.
How To Texture A Wall With Drywall Mud
Texturing a wall with joint compound (drywall mud) is a great DIY project because the material is forgiving. It’s cheap, easy to apply with basic tools and dries slowly so you’ll have lots of time to work.
Here’s a brief step-by-step overview of how to texture walls using drywall mud:
- Prepare the area by moving furniture out of the way and laying down tarps.
- Make drywall repairs.
- Sand the walls flat.
- Start by cleaning the walls. You should not apply mud to a dirty wall because it won’t stick properly.
- Mix your mud with water to thin it out a little bit. It should end up with a consistency of very thick paint.
- Pour the mud into a paint try.
- Apply compound to the wall with a thick textured roller.
- Wait for the mud to partially dry, then roll over it again with a fresh roller. The result is a gritty textured look all over the wall.
- Add some sand to your mud to give the walls a sandy appearance like gritty plaster.
- For a stucco-like texture, dip a sponge into the mud and pat it onto the wall.
- Use a trowel or putty knife to make lines or flat areas in the compound.
- For a knockdown texture, apply joint compound to the walls with a thick roller. Then use a putty knife to scrape away peaks the roller leaves behind. But be gentle with the knife, you don’t want to remove too much compound.
- Once you’ve textured the entire wall, look at it from a distance and do touch-ups as needed.
- Multiple techniques can be used on the same wall.
Wait at least 24 hours for the compound to dry before painting the wall.
In the next section we’ll go over the steps we listed above in more detail.
Step 1. Prepare The Area
Start by preparing the area, because working with drywall mud can get messy. Remove furniture in the room where you’ll be working and spread some tarps on the floor. This is especially important if you have carpets. Use painters tape and sheet plastic to mask areas where you don’t want mud.
If the furniture is too large to remove from the room, cover it with tarps or sheet plastic. Drywall compound is easy to wash off objects and hard surfaces but it could leave a stain on fabrics so be careful.
Because texturing walls with joint compound involves watering it down first, the mud becomes easier to splatter. Depending on the technique you use, wet compound could end up flying in different directions or dripping off your roller.
- Place drop cloths or plastic on the floor and baseboards: Use painters tape to secure the tarps and plastic sheets in place.
- Mask off areas with tape and plastic: In addition to covering floors, furniture and baseboards, also mask off windows and trim.
- Take down pictures: Make sure nothing is hanging off the walls and remove all your picture hooks because they’ll get covered in compound.
- Mask light switches and outlets: It’s important to mask off light switches and outlets so mud doesn’t get into anything electrical. If there’s a thermostat or any other control box on the wall, mask that as well.
I usually use an especially thick tarp under my paint tray and where I mix the mud. Splashes of wet mud can seep through thin tarps and potentially get into carpet or a wood floor and spills are always a possibility. It’s easy to clean compound off most surfaces but it could leave a stain so work carefully.
Step 2. Make Repairs
Before texturing a wall with drywall mud, you need to make any significant repairs that are needed. Ignore minor scratches and cracks but fix major cracks, dents, gauges, holes, etc. Texturing a wall will hide small imperfections but it won’t cover up major damage. If you have holes in your walls, patch them before applying texture on top.
Depending on the type of texture you create, a damaged wall could ruin your design. However, for some textures a small amount of damage will blend in or even enhance the design.
- Ignore small damage like scratches and cracks.
- Fix major cracks, gauges, dents, chips, holes, etc.
If there are large holes or cracks in your drywall, fix them before applying texture. Once the damaged areas are repaired, the drywall mud will cover up the patch work by blending it into the rest of the wall.
Step 3. Sand The Walls
After you’ve made all the necessary repairs, sand the walls to make them as flat and level as possible. You don’t have to sand the entire wall, just the uneven areas. Texturing with drywall mud looks best if it’s applied to a flat surface. Make sure to cover your furniture, floors and important items with tarps before sanding. I also like to cover doorways and hallways with a plastic sheet to keep drywall dust from spreading throughout the house.
If your walls are already flat and level you can skip this step.
- If the walls have an old texture, sand them down until they’re flat.
- Sand repair work and patches.
- If you have high spots or uneven areas, sand them down as much as possible.
- Sand areas with a rough texture.
- Don’t worry about over-sanding if you expose some tape, you’ll be covering the entire wall with compound later.
Wipe down the wall with a damp rag to remove all the dust created by sanding. It’s very important to remove all the dust because drywall mud won’t stick to a dirty wall.
Step 4. Prime The Walls
Priming the walls with a drywall primer before applying compound is an important step because it helps the mud stick. Primer creates a base coat with even color for paints and compound to stick to. Because you’ll be creating texture with your mud, it helps to have a high quality base coat underneath.
An oil-based or latex primer work best. Apply one or two coats with a sprayer or roller and use a brush for corners and edges. Wait for the primer to dry before creating texture with your mud.
Here are the only two drywall primers I use on all my jobs:
Kilz Interior Drywall Primer: This is a fantastic water-based drywall primer that dries fast and even. It’s great for creating a base layer under your mud texture and has a 4-5 star rating depending on the formula you buy. I use the standard formula for new homes, low odor for remodeling work and stain blocked for badly discolored walls.
Zinsser Drywall Primer: I really like Zinsser primers because they offer a huge variety of formulas so there’s always something that works for the walls I’m priming. They’re easy to apply with a roller and brush and don’t smell that bad if you use a water-based formula. Zinsser primers have a 4-5 star rating on average just like Kilz primers but they’re usually a little cheaper.
Step 5. Prepare The Drywall Mud
Before you can create wall texture with drywall mud, you need to thin it a bit. You can’t simply put compound right out of a bucket onto the wall as if you were spackling. Compound is way too thick to create wall texture. To do it, you must mix the joint compound with water. The mix ratio I use is about 4 parts compound / 1 part water. This creates a compound with the consistency of thick paint.
You can use powdered compound or premixed in a bucket. I recommend using premixed. The compound is already mixed perfectly at the factory, all you have to do is water it down a little bit so you can paint it onto the wall with a roller.
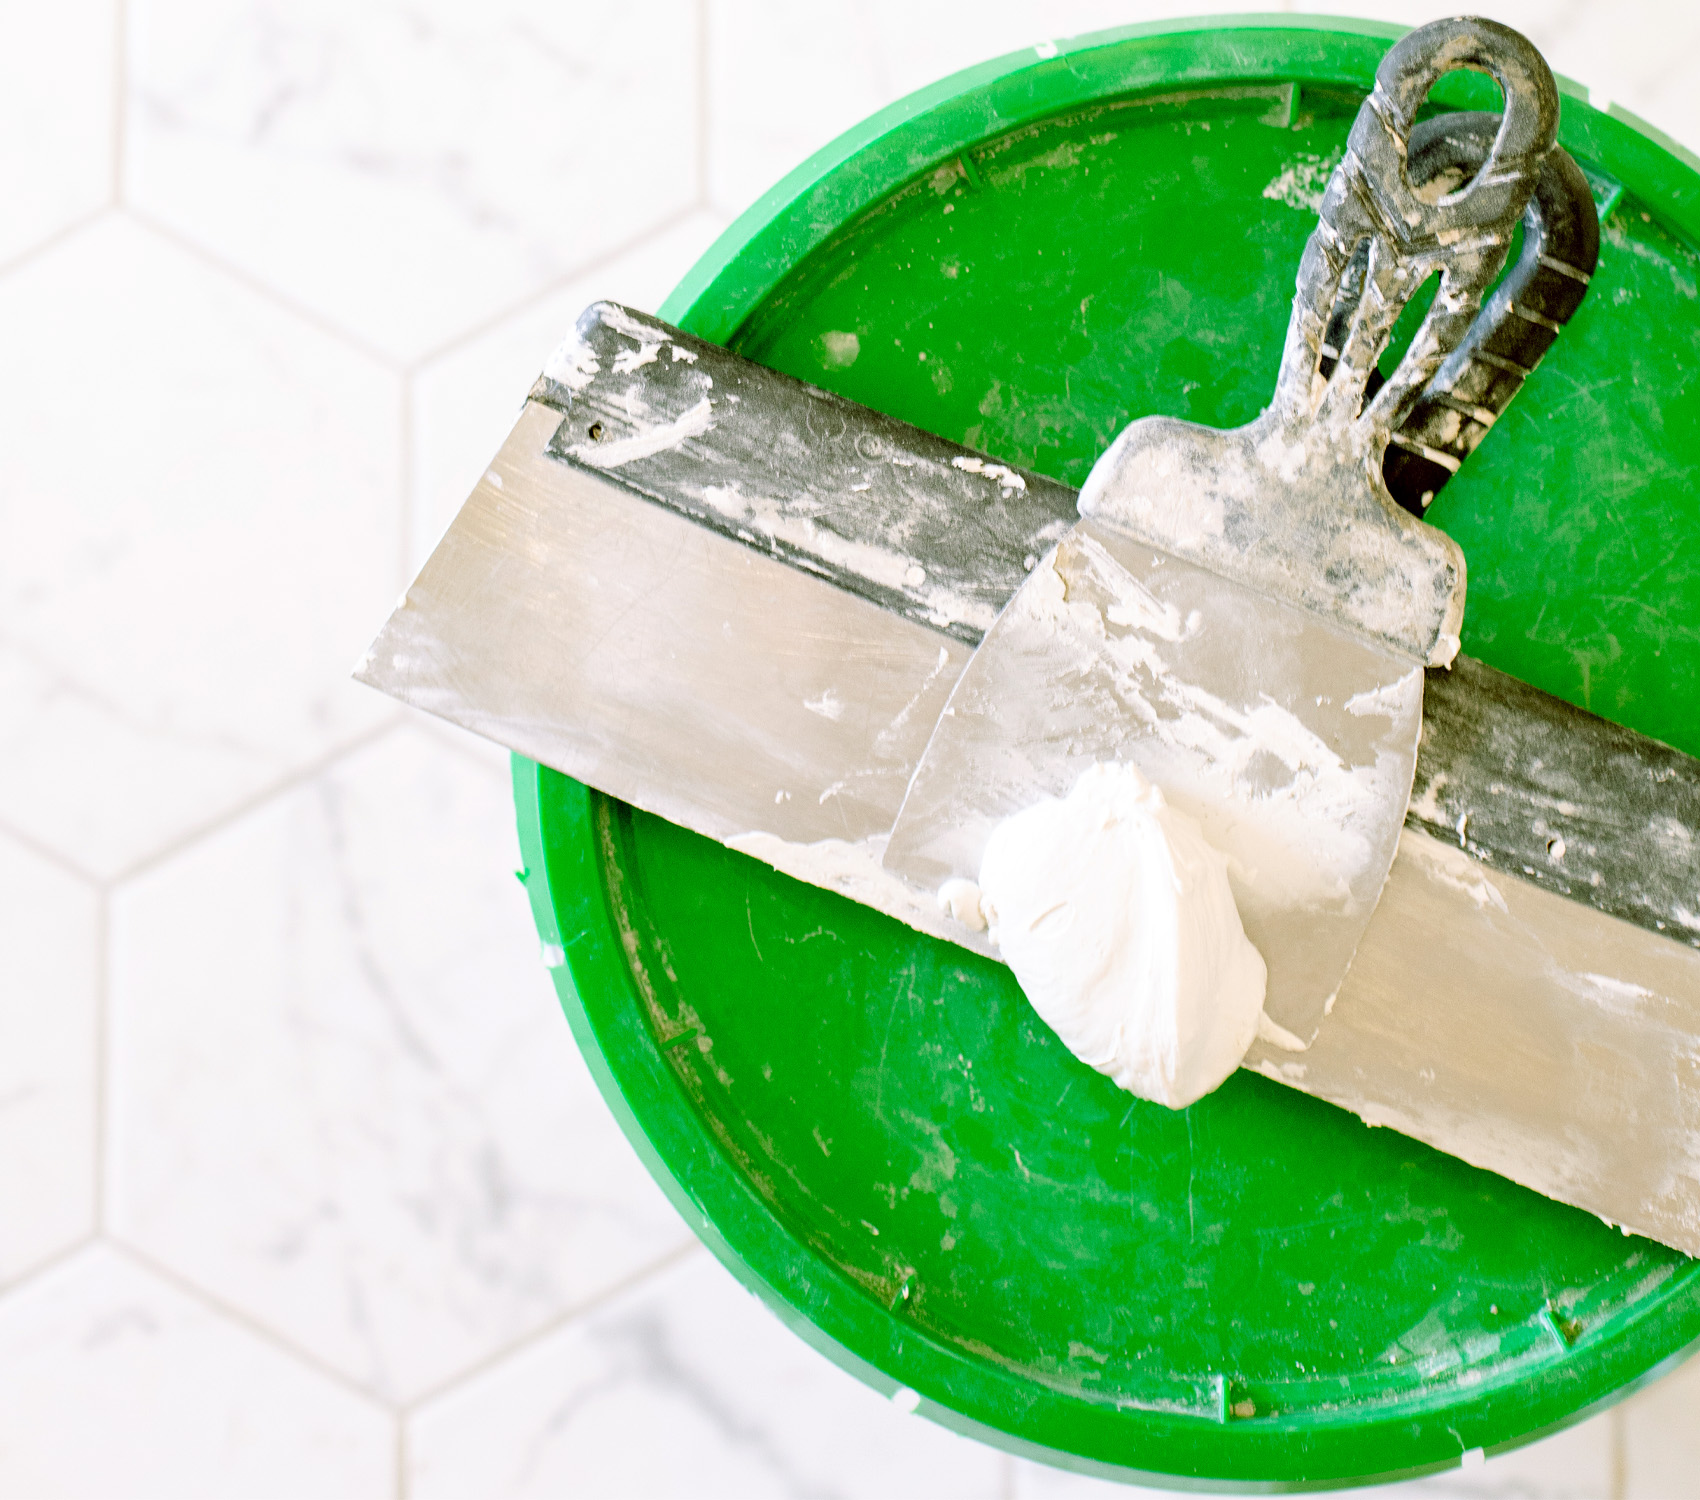
Here are the tools and supplies you’ll need:
- 5-gallon bucket
- Drill with a mixing bit
- Joint Compound
- Room temperature fresh water
- A scoop or trowel to take compound out of one bucket and put it into the other
How To Make Drywall Mud For Texturing Walls
Once you’ve got all your supplies and mud ready, it’s time to mix it. This is a very important step because the consistency has to be just right. Mix it too thin and it will be watery and drip runs all over the wall. Mix it too thick and you won’t be able to apply it with your roller.
Put about 4 scoops of compound into the 5 gallon bucket for every 1 part water. Then mix with it up with your drill and check the consistency. It should be like thick oil paint out of a tube or pancake batter.
- If you want the mud a little wetter, add water slowly.
- If you want a thicker consistency, add a little more mud.
The mud should not be runny or too thick to apply with a roller. It should be smooth enough to roll on but shouldn’t drip. If your mud is dripping water, it’s way too thin. If it won’t coat the roller, it’s way too thick.
Mix small batches at a time because the mud will dry out fast and you don’t want dry bits of mud in your wall texture. I always cover the top of my bucket with plastic when I’m working. Plastic prevents the mud from evaporating moisture and drying out.
Unfortunately, you can’t rehydrate drywall mud. If your mud dries out before you’re done, throw it out, rinse the bucket and mix a new batch. Don’t add water and remix it because the consistency will be off and you’ll get dry bits in your wall texture.
How To Mix Small Batches Of Mud
If your texturing a very small area and don’t need to mix large amounts of drywall mud, you can mix a small batch with a drywall knife and tray. Fill the tray about half way with mud. Then add water slowly and work the mud with your knife. Add water a little at a time followed by mixing with your knife until the consistency is right.
Mixing small batches of joint compound like this is great for small texture projects and patch work. I like to do it when applying texture with a brush or my sponge. Dip the brush or sponge into the wet mud and then dab it onto the wall. You can create some fabulous wall textures if you use the right type of brush or natural sponge.
Step 6. How To Create Wall Texture With Drywall Mud
There are a variety of techniques you can use to create texture on your walls with drywall mud. Each technique creates a different look ranging from relatively smooth to extremely rough and gritty. But the basic process is always the same, the walls must be clean and smooth and the drywall mud must be watered down to the consistency of a thick paint.
Once the walls and mud are ready, how you apply the compound and what you do after it’s partially dry helps determine the finished appearance.
In the next section, I’ll go over the best ways to texture a wall with drywall mud using a variety of techniques.
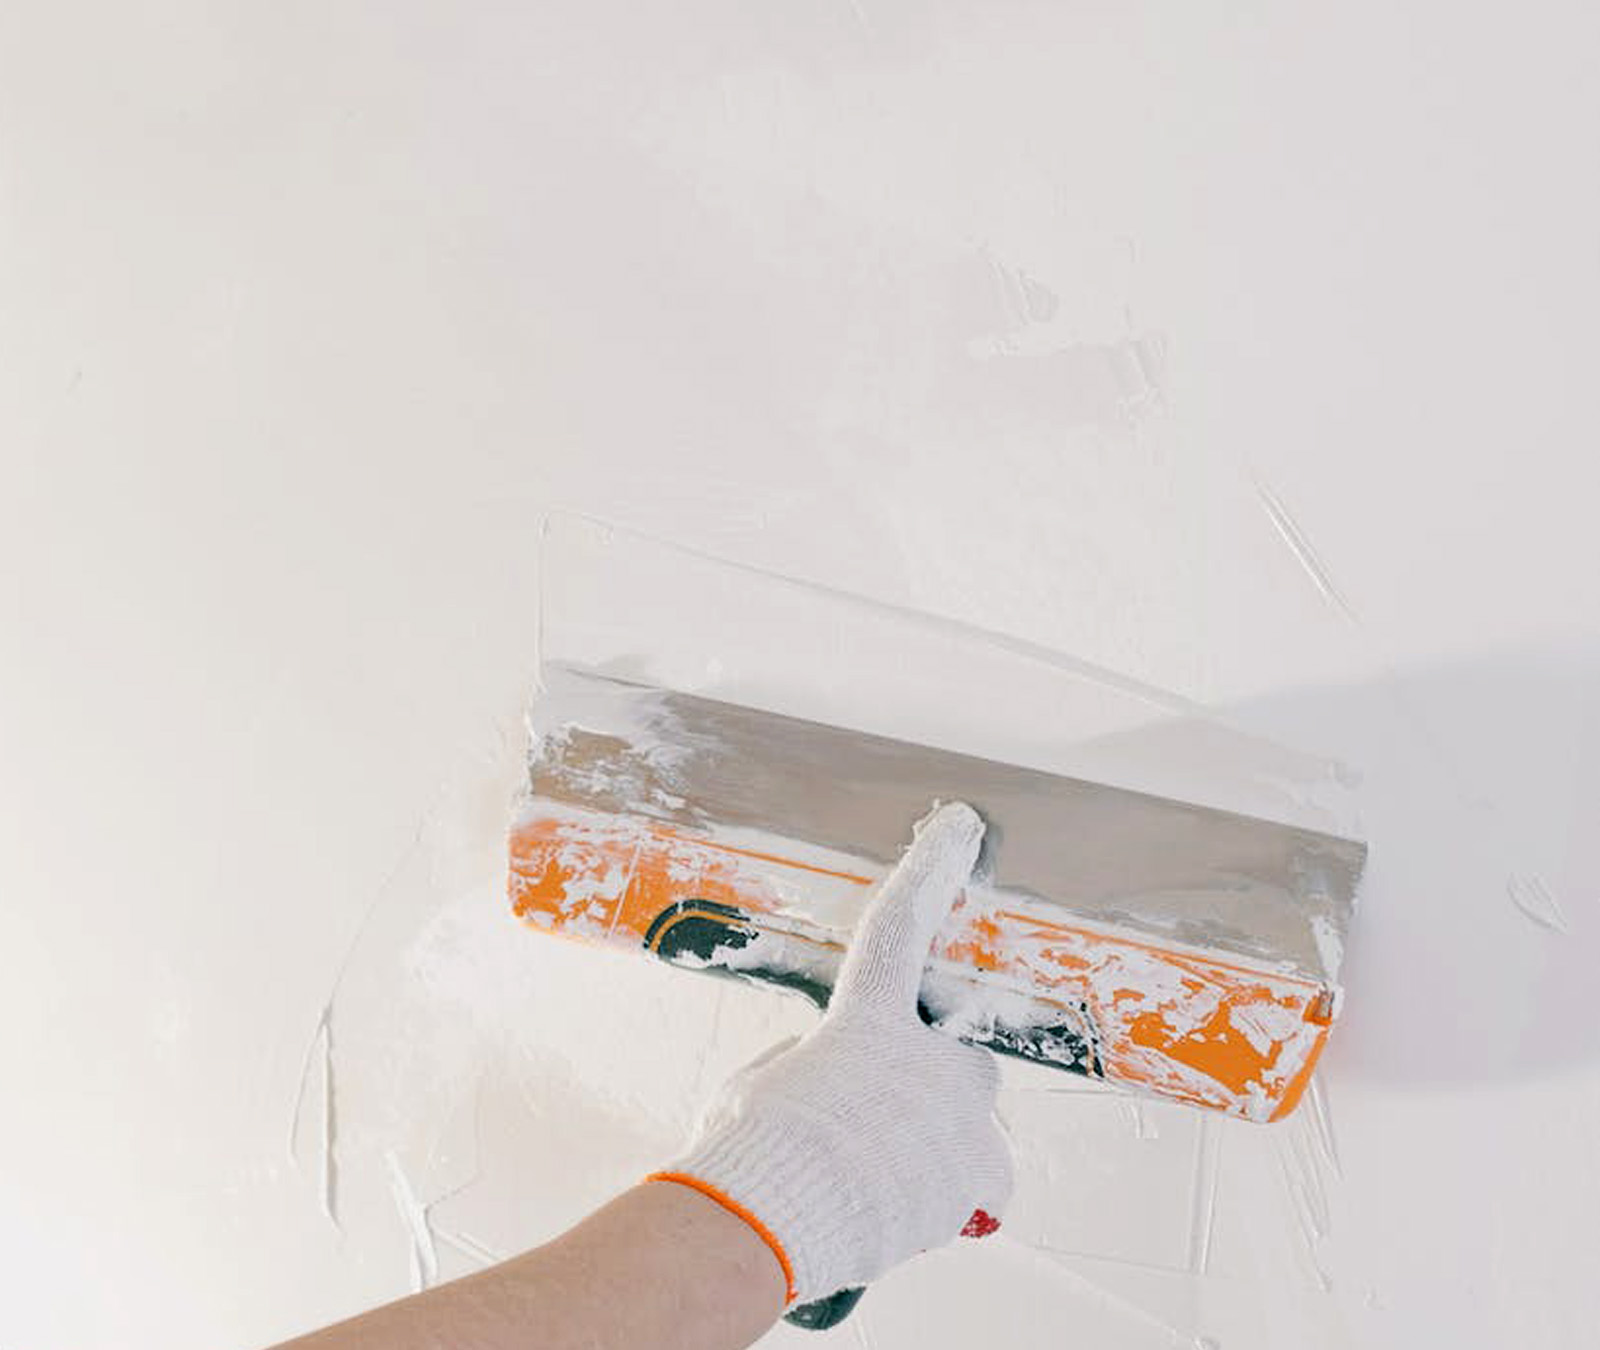
Paint Roller
The easiest way to texture walls with drywall mud is by using a paint roller. If you’re a beginner this is the best method to use because it’s as simple as rolling paint. Simply by rolling mixed wet drywall mud onto the wall, you’re creating texture.
Start by thinning your joint compound with room temperature water. The mix ratio I use is 4 parts compound / 1 part water. This makes the mud thin enough to coat a roller but not watery.
- If your compound is wet and drips, it’s too thin. Add some mud to thicken it up.
- If your compound won’t coat the roller, it’s too thick. Mix in some more water.
- I use a power drill and mixing bit to mix my mud in a 5 gallon bucket.
- I use premixed joint compound rather than dry.
Once the joint compound is the right consistency, pour it into your paint tray. Then, coat your roller and start painting the walls with it. Use a brush or a small finish roller to get the edges and tight areas.
Cover the tray and mixing bucket with plastic as you work so the compound doesn’t dry out. You don’t want dried flakes ending up on your walls. If the compound does dry out, throw it out and mix a new batch. There’s no way to rehydrate dry compound to the right consistency.
How To Create Wall Texture With Drywall Mud & A Roller
Once you’ve applied drywall mud to the wall with your roller, you can leave it alone and let it dry or apply more coats to create different textures. You can also use different rollers to create more or less texture. For example, a thicker nap roller makes a very different texture than a tight roller does. Try using a thick roller for the first coat followed by a thin roller for the second. This creates an interesting orange peel effect.
- A single coat creates small texture all over the wall.
- A second coat creates thicker texture.
- Rolling a second time with a fresh roller creates smoother, more subtle texture. This is the method I use the most because it looks like plaster.
- Don’t be afraid to use more than one roller design on the same wall.
If your texture is a little rougher than you want, you can smooth it out before it’s totally dry with a drywall knife. Very gently run the edges of the knife along the wall to knock off high spots and create some flatter areas. Make sure the wall is almost totally dry so the mud won’t smear. This creates an orange peel effect.
You can also use other tools to create different textures. I like using a sponge to dab areas of the wall where I want thicker textures.
Texture Sprayer
A texture sprayer is primarily used for ceilings and not walls. However, you can use it on walls if you want a thicker textured surface. I recommend renting a texture sprayer because they can cost over $10,000 to buy. But you can rent one for around $100 to $150 per day.
Depending on the nozzle you use and your technique, you can create all sorts of designs with a sprayer.
- A texture sprayer will give you an orange peel or popcorn texture.
- Sprayers typically create deeper textures than using rollers and brushes.
- It takes some practice to use a sprayer effectively.
- Start on a low setting at first and then add pressure as you feel more comfortable.
- Adjust the amount of compound the sprayer shoots by varying the airflow.
Start by placing your mixed drywall compound into the sprayer’s hopper. Then adjust the nozzle and airflow and do a test spray until you get the desired texture.
Decreasing the airflow will spray more compound while increasing the airflow will spray less. This gives you a more or less textured appearance.
Spray mud onto the wall with a slow and steady pace. Don’t stop of you’ll load too much compound in one area. Use even strokes so the texture is uniform and even. Work a wall at a time so you don’t run out of compound too soon.
For a rougher texture, apply a second coat when the wall is almost dry.
Sprayers can be combined with other texturing methods like a roller, brush, sponges, etc. Don’t be afraid to get creative.
Sponge
One of my favorite ways to create wall texture with drywall mud is a sponge. You can use it all by itself or along side a sprayer, roller, brushes or other tools. Depending on how rough and pitted the sponge is, you can create all sorts of textures. I like using a natural sea sponge because they create some fantastic textures.
You can use a sponge in two basic ways, here’s how:
- Apply drywall mud to the walls with a sprayer or roller first. These use the sponge to press texture into the wall wherever you want it.
- Dip the sponge in wet drywall mud and then dab it into the wall. You can use the technique on a dry a wall or a wall coated with mud by a roller or sprayer.
My favorite technique is to coat a wall with a thick roller. Then when it’s almost completely dry I roll over it with a roller coated in plastic. This knocks down the high spots and creates an orange peel effect. I then go over the wall and add texture with my sponge so the wall doesn’t appear too flat.
Using a sponge correctly can create a stucco-like texture and appearance.
- Apply some wet mud to the wall with a knife or trowel,
- Then dab the sponge into the mud and the all over the wall.
- Be sure to coat the entire wall so it looks natural.
- Continue to add mud and work the sponge until you’ve textured the entire wall.
Don’t be afraid to use other tools along with your sponge to create even more texture. It’s a very artistic process that can achieve some fantastic natural textures if you experiment a bit.
Natural Sea Wool Sponges are what I use to create great textures with drywall mud. The thicker and more textured the sponge the better.
Notched Trowel
A notched trowel can create nice lines and ridges or a crosshatch pattern in your joint compound. Apply wet mixed drywall mud to the wall with a regular trowel or knife. Then drag the notched trowel down the wall. I draw some light guidelines in pencil on the wall to keep my lines straight and even. The process is just like troweling thinset for tile.
To create a cross pattern, run your trowel vertically first followed by a horizontal pass, or vice versa. For the best results, I use a very small 1/8-inch v-notch trowel. If done correctly with a small enough trowel, your wall texture will look like woven fabric.
This type of texture requires a very small amount of drywall mud and a steady hand. Once the entire wall is coated in compound and almost completely dry, you can go over it with a roller to soften the peaks of your trowel lines. This creates a texture even more like real woven fabric.
1/8-inch v-noth trowel is what I use to create wall texture with drywall mud. If you do it correctly, the wall will look like woven fabric.
Other Tools
There are lots of other tools you can use to texture a wall using drywall mud. Just about anything can technically be used to create a texture, but some tools definitely work better than others.
Here are some materials I’ve used to texture a wall that work really well:
- Plastic bag: I wrap my roller with a plastic bag and run it over the wall as a second or third pass. The result is a really cool knock down effect similar to orange peel.
- Paint comb: A paint comb is nice is you want to add some lines or hatching to areas of the wall as a finishing touch.
- Rag: I use a thick woven fabric rag to press texture into wet drywall mud. If you do it at the right time, the mud will retain the texture of your rag.
- Linen: Use it the same as a rag, to imprint texture into the wall.
- Cheesecloth: Again, this is used the same as a rag or linen, press it into the wall to imprint texture.
- Wood: Pressing a piece of wood or rolling a round stick across the mud will create veining or the look of bark.
Let the joint compound get almost completely dry before using these tools to create texture. If you press texture into the mud too soon it will be less effective and mud will stick to your tool.
Summary: How To Texture Walls With Drywall Mud
Most people use drywall mud to cover seems, corners, nails and screws which creates a super smooth wall finish when sanded. But you can also use mud to create a textured finish over the entire wall similar to plaster. It’s very easy to do and makes a great DIY project. All you need is some drywall mud, trowels, a power drill and mixing bit, and a paint roller. Texturing your walls is a great way to add visual interest while covering up imperfections. It’s as much an art form as a DIY project but luckily it’s easy to do once you get the hang of it.
To texture walls with drywall mud, thin it a little bit by mixing it with water until it becomes like thick paint. Then pour the joint compound into a paint tray. Use a thick textured paint roller to roll it onto the wall. Wait for the mud to partially dry, then roll over the wall again with a fresh roller. This will pull up the some of the dried compound to create a 3-dimensional texture. Use a brush and small rollers to texture in corners and tight areas.
To create an orange peel texture with drywall mud. Repeat the same basic process. Thin the mud, paint it onto your wall with a thick roller and wait for it to partially dry. Then wrap your roller in plastic and run it lightly over the wall. This knocks down and smooths out high spots which creates an orange peel design.
If you have any questions or comments about how to texture walls with drywall mud, email any time.