
How To Clean A Dryer
Doing laundry is a tedious chore you’ll perform hundreds, if not thousands, of times throughout your life. Most people take for granted that their washing machine and dryer will just keep on working like new without any kind of maintenance or cleaning. But that’s not the case. Just like with any other piece of machinery, some maintenance is required to keep your dryer working it’s best. The biggest problems for dryers are the bits of fluff and fuzz that build up over time. Allowing too much lint to accumulate can result in malfunctions or decreased efficiency. To avoid problems, and to keep the machine running properly, clean the dryer regularly. And best of all, it only takes about 30 seconds. Here’s how to clean a dryer.
Dirty Dryers Start Fires
You may be asking yourself. Why should I clean my dryer? Well, not only does it make the dryer work better, it’s a big safety issue. Every year, dirty clothes dryers cause more than 15,000 house fires in the U.S. Do you think cleaning your lint trap after every use is enough to keep your dryer clean and safe? Think again. Lint builds up in the exhaust hose as well as inside the dryer itself.
So, while it’s a task that takes around 20 minutes, it’s an important one to do at least once a year to keep your family safe.
Signs Your Dryer Needs A Cleaning
If your dryer isn’t drying loads of clothing in the same amount of time that it used to. Your clothes are coming out of the dryer extremely hot. Or it’s been a really long time since the last time you cleaned your dryer. It may be time to give it a thorough cleaning. You can clean your dryer and the vent yourself fairly easily, but remember to disconnect the electricity or gas before attempting any kind of dryer maintenance.

After Every Load
Always remember to unclog the lint screen after every use. It’s a small detachable piece that’s usually located along the rim of the door. Consult the manual for its location on your specific model. Once you’ve removed the screen, gently scrape away whatever collected. Usually it’s just a bunch of fuzz and lint build up. Every so often, especially if you regularly use dryer sheets, wash the screen with soap, water, and a scrub brush. Replace the screen once it’s been cleaned. Make sure to be gentle when washing the screen, it’s made of fairly delicate wire.
Why is this so important? Maintaining a clean trap reduces the risk of lint finding its way into parts of the machine where damage can be done. That’s the purpose of the lint screen, it keeps lint out of the inner workings of the dryer. But when lint builds up, the odds of some getting past the screen increase.
Once Every Three – Six Months
Your dryer needs a thorough cleaning a few times a year, depending on how much you use it. Some experts recommend every three months and some say once a year. But it really depends on how much you use it and how quickly lint builds up. Start with every 3 months and if that’s too soon adjust the cleaning schedule to 6 months and so on. Find a time frame that works best for you.
All it takes is a vacuum, an all purpose cleaner, and a microfiber cloth. It’s a simple process that can take less than 20 minutes and it’s well worth the effort since routine cleanings help the dryer work it’s best.
Dryer Cleaning Steps
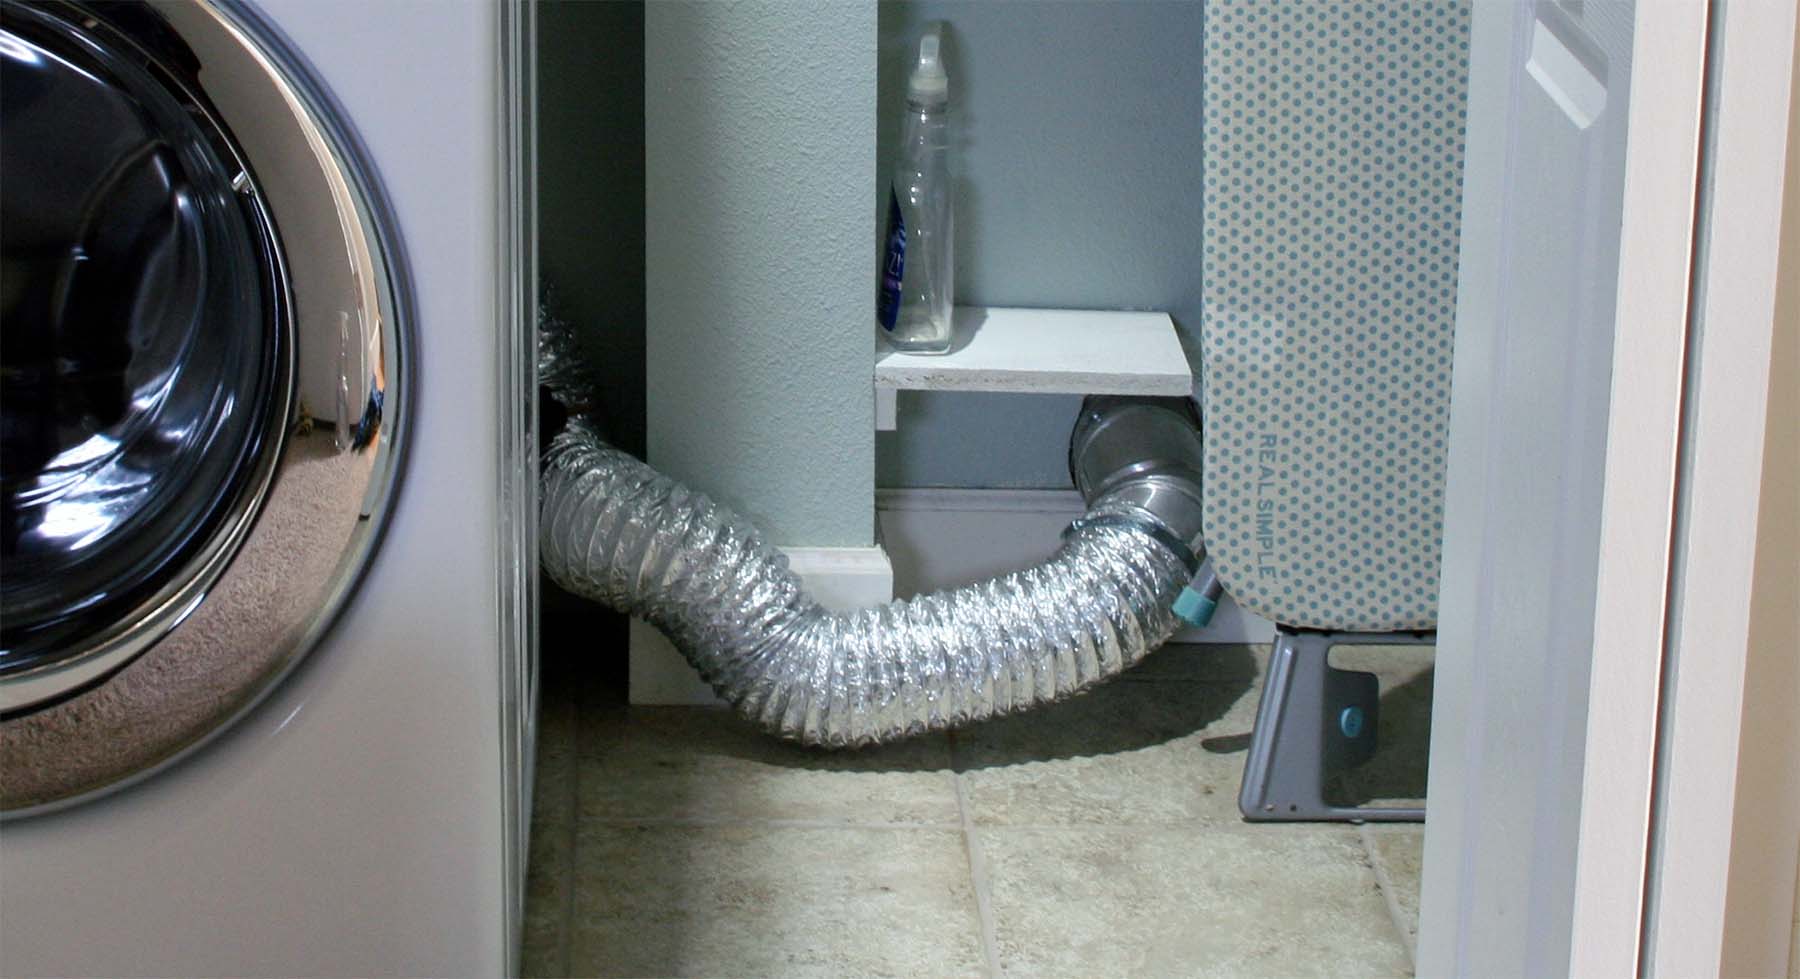
- First, make sure to unplug the dryer. Then remove the exhaust hose from the back of the machine. You can expect the tube to be full of lint and debris. This lint is extremely flammable and can be a fire risk. It also dramatically reduces the efficiency of your dryer. Reach in with your hand and clear out as much as possible. For the rest, us a cleaning brush or a DIY bent metal clothes hanger. Finally, follow up with a vacuum to suck out the leftover dust.
- Next, before you reattach the exhaust hose, unscrew and remove the back panel of the dryer. Vacuum up any lint you find within the machine, particularly in the part that connects to the exhaust vent. Try using the small nozzle vacuum attachment or a handheld vacuum, as they can reach into small spaces.
- Clean the lint catcher. First, remove the screen, then vacuum its housing and wash the lint screen with soap and water. If possible, unscrew the housing, lift it out, and vacuum the space beneath it.
- Vacuum inside the dryer drum to remove any lingering dust bunnies. Next, wipe down the drum, along with the door rim. Use an all purpose cleaner along with a clean microfiber cloth.
- Replace the lint trap, the back panel, and the exhaust hose. Having completely reassembled the dryer, feel free to plug it back in and give it a test run. Your clean dryer should be running at it’s best.
How To Remove escaped lint from the body of the dryer.
You may choose to clean out the hollow body of the dryer that you cannot easily access. This is not required and will not increase the efficiency of the dryer, but may be appropriate when moving or selling the appliance.
- You may be able to simply lie the dryer on its side and vacuum out any escaped lint from the bottom.
- Completely enclosed dryers will have small bolts on the back or along the bottom that hold the outer metal housing onto the frame of the dryer. Removing those bolts will allow you to slide the body of the dryer off the frame and vacuum any escaped lint from inside the body.
Don’t Forget To Clean The Outside
Dryers build up a lot of dust and lint on the outside too. To finish a proper deep cleaning of your dryer don’t forget to clean the outside including all the knobs. We do this step last because sometimes while cleaning the insides, lint and dust can get onto the machine, so you’ll end up having to clean the outside parts twice if you cleaned them first. Clean the exterior with a microfiber cloth and some all purpose cleaning spray. Be sure to clean the knobs and buttons. Dirt tends to build up there and collect dust.
How To Remove Bigger Messes From The Drum Wall
Gently scrape gunk up with the edge of a spatula. Get rid of scuffs with a Magic Eraser or by gently rubbing with a paste of baking soda and water. Once you’ve removed messes, spray the inside of the drum with all purpose cleaner and wipe it clean.
How To Clean gum or candy out of your dryer.
If gum or candy has melted in your dryer it can be extremely difficult to remove, but failing to do so could lead to ruining your clothes on future loads.
- Use a hair dryer to heat the candy or gum until it’s soft, then scrape it off using a credit card or scraper.
- Spray a small amount of all purpose cleaner onto the candy to remove any excess material that did not scrape off. You can also use a solution that’s 1 part water and 1 part vinegar.
- If there’s still some residue left, use warm water to wet a washcloth and leave it on the candy for a few minutes. Scrub the gum or candy again when you return and repeat the process until it’s all gone.
- Dry the interior of the dryer before using it again.
How To Remove crayon from your dryer.
If you have children, a melted crayon in your dryer is bound to eventually happen. Try using a mild dish soap on a wet rag or a magic eraser to clean it first. Otherwise, you may need to use WD-40. Be very careful when following these steps as WD-40 is flammable and could cause a fire if improperly used:
- Use a credit card or scraper to remove any chunks of crayon that are present.
- Spray a small amount of WD-40 on a rag and use that to scrub the remaining crayon material out of the drum. It should come off fairly easily.
- Do not spray WD-40 into the drum of the dryer. The WD-40 could seep through the holes of the drum and cause a fire the next time you turn it on.
- Wet a rag with water and use it to wipe down the areas of the drum you used WD-40 on and ensure it is completely dry before operating the dryer again.
How To Remove ink from your dryer.
Having a pen explode in your dryer can be extremely frustrating. Some inks don’t dry quickly, so you may run the risk of ruining clothes you put into the dryer.
- Try using mild dish soap and water to remove the ink that remains in the drum. Some inks can be scrubbed off with relative ease.
- If the ink stain persists, try using an all-purpose cleaner or a vinegar and water solution. This will work for most other kinds of ink.
- You can also try using a magic eraser to get rid of the stains.
- If the all-purpose cleaner fails to remove the ink, blot some rubbing alcohol on a rag and use the rag to scrub away the remaining ink. Rubbing alcohol is flammable, so never apply it directly into the dryer drum.
- Wipe the dryer out with water again then ensure it is completely dry before operating it.
How To Remove dye stains from your dryer
If dye’s been releasing into the dryer drum then the entire drum is likely covered with splotches of dye, which makes it unlikely you can remove all of it by hand.
- Soak several old towels in a solution comprised of three gallons of hot water to one cup of household bleach.
- Wearing protective eye wear and rubber gloves, wring the towels nearly dry.
- Throw the towels in the drum, and run the dryer for 30 minutes at an air fluff setting.
- Repeat the process as needed.
How To Remove lipstick stains from your dryer
Cleaning lipstick from the inside of the dryer drum will be easier if the dryer is still warm.
- Remove as much of the lipstick as possible with a soft, dry cloth.
- Unplug the dryer and let it cool down completely.
- Wipe the remaining lipstick stains with a soft cloth dampened with rubbing alcohol.
- Plug the dryer back in and dry a small load of old towels to remove any remaining lipstick stains and traces of rubbing alcohol.
Tips to Keep Your Dryer Clean
- To keep the dryer running well between deep cleanings, empty the lint trap after every load.
- Once a month, wash the lint filter with warm, soapy water and let it fully air dry to get rid of greasy residue that can clog it, then wipe the drum and exterior with all-purpose spray to keep them clean.
- If you’ve washed pet bedding or lint-prone fabrics (like terry cloth and flannel), consider hanging the pieces outside to dry instead of putting them into the dryer. Keep the tub of your washing machine clean. Don’t overload your washer or your dryer.
- If you have any doubts about whether you were able to clean the entire length of the vent, if you noticed any cracks or deterioration or if you have questions about whether your vent components are safe and operable, contact a qualified professional for an inspection and cleaning.
- In addition to keeping your dryer operating safely, a thorough dryer vent cleaning can help your equipment perform more efficiently and effectively.
Fun Dryer Facts
Your average clothes dryer will last for about 8 to 12 years. However, during that period you might have problems that need repair. If these problems arise, you’ll probably want to fix them quickly. To ensure that you’re not without a dryer for too long, consider getting covered with a Clothes Dryer Warranty once your manufacturer warranty runs out.
How To Clean A Dryer Vent
Now That You’ve thoroughly cleaned the dryer, it’s time to clean the dryer vent. This is the hose that connects the dryer to the outside and is usually found sticking out of the back of the dryer. It’s generally silver and flexible. Cleaning the dryer vent every 6 – 12 months is just as important as keeping the machine itself clean. However, if your dryer gets a lot of use or if you have an older machine, you may need to clean it more often.
There are some other signals that your vent may be clogged or need cleaning besides clothes not drying thoroughly or longer drying cycles. If you notice that your dryer is hot to the touch or that there is a musty or unusual smell when you open the door, investigating the vent is a good place to start looking for a problem. You may also notice a large amount of lint accumulating on the lint screen or in the trap, in spite of regular cleaning. If any of these signs occur, it’s best to take action immediately as clogged dryer vents are a fire hazard.
How To Remove The Vent Clamp
Pull out the dryer far enough to get access to the vent duct. You’ll have to unscrew the clamp that holds the vent pipe to the wall opening. Depending on the type of clamp, you can either squeeze to release it, or you may have to use a screwdriver to detach the clamp. Now is a good time to inspect the vent pipe for cracks or other signs of deterioration and to replace it if needed.
Keeping the vent pipe clean and working properly is extremely important not only to help the dryer work properly but also to prevent fires.
Check For Vent Clogs And Remove
Look into the vent to inspect it for any clogs or debris that you can remove with your hands. Reach in slowly and carefully in case you come in contact with anything sharp. Consider wearing gloves to protect your hands. To clean further into the vent we use a bent wire hanger or cleaning brush with a long reach. Special tools for cleaning vent pipes are sold at hardware store but generally they’re not needed for a residential machine. Be sure to clean the vent tube and components that you disconnected from the wall, too.
Use A vacuum To Remove Debris
Using a vacuum, remove as much lint and debris as you can from as deep into the opening as you can reach. Vacuums are great at sucking out built up lint. Small attachments or portable units work best as they can snake into small places a larger vacuum hose can’t.
Remove Clogs From The Exterior Dryer Vent
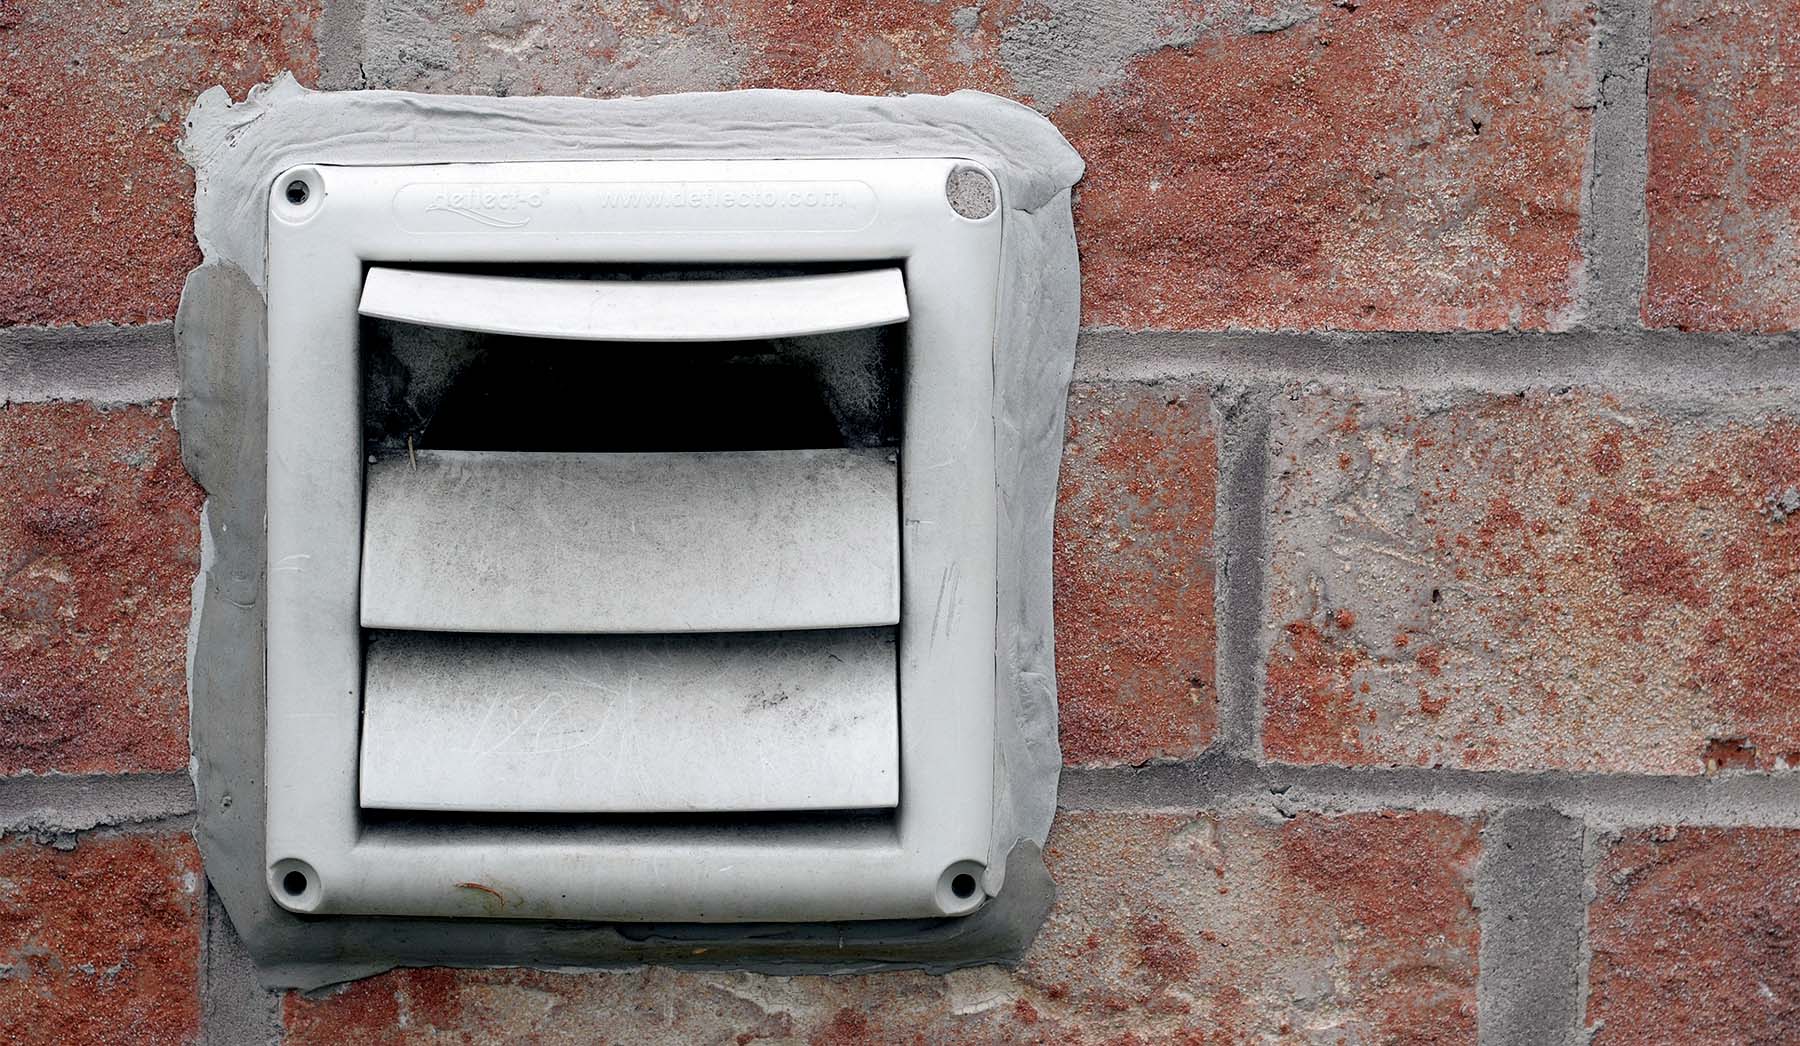
Now it’s time to go outside your home and inspect the exterior vent opening. It’s usually located outside the wall closest to your dryer. It’s easy to find, simply run the machine and look outside, the vent will hot air blowing from it while the dryers running. If your exterior vent has a covering or flap, remove or raise it so you can look inside. Remove any clogs or debris that you can reach with your hands, or use the same tools that you used to clean the opposite side of the vent.
Check For Object Obstructing The Vent
Now is also a good time to inspect the area around the exterior opening to see if any plantings have grown around the vent, or if anything else is interfering or obstructing the airflow coming through it. If you have problems with birds nesting inside your exterior vent or with insects or rodents entering, consider installing a special ventilation cover that’s designed to prevent these problems.
Reattach The Vent And Dryer
Go back inside and reattach the vent to the dryer by fastening the clamp. Sweep or vacuum any lint or debris that fell out while you were cleaning.
Turn On The Power
Turn the power back on and start the dryer. Let it run for a few minutes to see if any other debris is loosened. Check the exterior side of the vent one more time to see if any new debris appears after air has gone through.

Conclusion
If your dryer isn’t drying loads of clothing as fast as it used to. Your clothes are coming out of the dryer extremely hot. Or it’s just been a really long time since you last cleaned your dryer. It may be time to give it a thorough cleaning. It’s an easy DIY task that’ll not only keep your dryer running like new but will help keep your family safe by preventing one of the leading causes of house fires.
There you have it. Some simple tips on how to clean a dryer and a dryer vent. Clean them both thoroughly and on a regular basis.