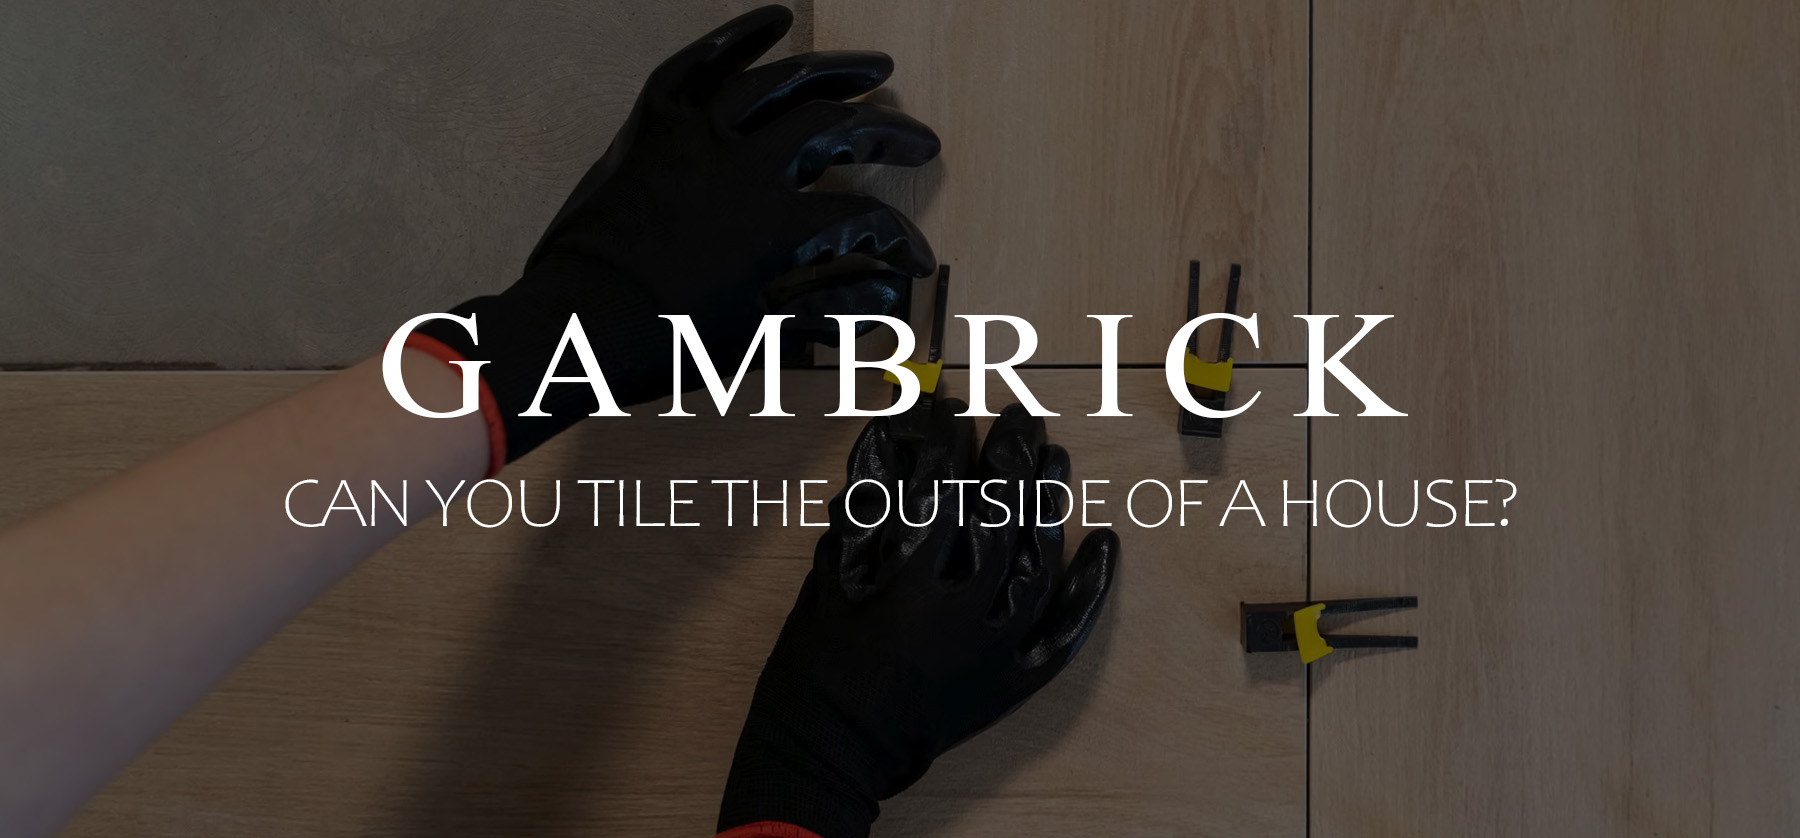
Can You Tile The Outside Of A House?
You can tile the outside of a house as long as it’s rated for outdoor use. Not all tiles are durable enough to survive exposure to the elements. Ceramic, stone, porcelain, clay and glass are all great choices. Tile has been used as an exterior finish for centuries in Middle Eastern countries, Europe, South America, Asia and Africa. But in the United States it’s a fairly new trend. Many modern style homes are using exterior tile as a siding material or a wall cladding.
If you want to install tile on the exterior walls of your house, make sure to choose a durable outdoor tile that can resist the elements. There are just as many styles, sizes and colors to choose from as interior tiles. But make sure to select a tile that’s durable and thick. Tile installed outdoors will see more wear and tear than indoor tiles.
The key to installing tile on the outside of a home is proper preparation and using the right mortar.
- The surface of the wall must either be masonry like poured concrete, block, stone or brick, be covered in a layer of cement board or wire mesh.
- The mortar should be a modified thinset or type N mortar. Type N is better for porous stone tiles, modified thinset is better for dense, flat tile.
Exterior tiles come in a variety of sizes ranging from large stone slabs to standard 4-inch and very small tiles attached to a mesh. Any size works fine, but vary your trowel size based on the weight of the tile. Large tiles are heavier and require thicker mortar than smaller tiles which are light.
Once properly installed, exterior tile doesn’t require much maintenance to retain their beauty and/or durability.

Tools & Supplies
Installing exterior tile requires basic installation tools like brushes, trowels, floats and a tile saw. The main difference is that the tiles need to be thicker and more durable and you need a stronger mortar to resist the harsh outdoor elements.
Here’s a list of my tiling tools for exterior projects:
- Stiff brush
- Square
- Scraper
- Carpenter’s pencil
- Measuring tape
- Level: The longer the better.
- Chalk line: Used to snap guidelines.
- Mortar: Exterior-rated modified thinset or Type N mortar.
- Trowels: Smooth and notched of different sizes
- Painter’s tape: Mask areas you don’t want mortar.
- Tile wet saw
- Angle grinder
- Tile spacers
- Rubber mallet
- Tile nippers
- Grout: Use sanded exterior-grade grout the color of choice.
- Grout float: Sized for the tile you’re installing.
- Tile sponge
- Buckets: 5 Gallon
- Sealer: Water based for grout and tile.
- Extension cords
- Tarps
- Exterior caulk
How To Tile An Outdoor Exterior Wall
Tiling an exterior wall is a little different than an interior wall because you have to deal with things like weather, impacts, temperature changes, storms and other environmental stresses. The outside isn’t temperature controlled so you could have big swings from hot to cold and isn’t predictable, so bad storms could happen at any time. So the tiles need to be very strong, dense, durable and resistant to the elements.
Keep in mind that installing tile on your house as siding first and foremost needs to keep water out. This means properly installing them with the correct type of mortar, on top of s strong base and a water barrier.
Exterior tiles must be installed on concrete, block, brick or stone, a cement board or wire mesh. If you’re installing over cement board or wire, you must install a high quality vapor barrier to keep moisture out.
In the next section, I’ll go over step by step how we install tile on a house as siding including lots of tips and tricks.
Step 1. Purchase Materials
Measure the length and width of the wall you’ll be tiling and multiply the measurements together to get the square footage. Then round up to the nearest whole number and add 10 to 15 percent for waste.
Follow the same process to find the square footage of every surface you’ll be tiling.
Once you’ve found the square footage of every surface, purchase your tile, mortar and grout.
Use a flexible, exterior rated, modified thinset mortar for exterior tile. A flexible mortar with increase the mobility and stability of your tile. It can also adapt to rapidly changing outside temperatures, moisture points and expansion and contraction of the wall.
Consider buying an exterior grade flexible caulk the same color as your grout. It comes in handy when sealing areas around vents and other protrusion through the wall that could move. Tile around windows and doors is another area that benefits from caulk. They vibrate when they’re opened and closed which can crack the grout.
Step 2. Prep The Surface
Preparing the surface of your wall before installing tile is very important if you want the tiles to lay flat and even.
If the wall is made from concrete or block, scrape off any bumps or other imperfections from the wall with your scraper. This ensures the tiles have a flat and level surface for the tiles. Installing tile on a clean wall also helps the mortar bond which creates more secure tiles.
- Scrape the wall free of any chunks of mortar or concrete.
- Clean the wall with a stiff bristle brush and water.
- Clear away debris away from the ground around the wall.
- Don’t worry about small cracks or holes because the mortar will fill them in.
Make sure any surface the tiles will be installed on are clean and flat and that no obstruction will interfere with the tiles laying flat against the wall.
Lay down tarps if you’re tiling over a finished surface such as a patio or deck. Spilled mortar and grout or dirty water can cause stains.
Step 3. Draw Guidelines
Before you install exterior tiles on your walls, take measurements and draw guidelines. Guidelines will help you keep the tiles level and even as you install them. Take your time with this step because accurate guidelines make tiling much easier to do.
Here’s how I do it step by step:
- Measure from side to side and mark the center of the wall with your pencil. Then, use a long level to draw a line vertically. The longer the level the better. Make your mark accurate because you’ll be using it to measure off of later.
Some tile patterns place a tile in the center of the center line and some place the grout line in the center. Decide which pattern you’ll be using before tiling.
- Measure the height of the wall from bottom to top.
- Divide the total height in half and to find the vertical center of the wall.
- Use your long level to make a horizontal guideline.
- At this point you should have a plus shaped guideline in the center of your wall.
Once you’ve found the center, measure the width and height of your tile making sure to account for the grout spacing. Once you know the measurement of your tiles, including the grout spacing, you can figure out how many tiles it takes to cover each section of wall based on the pattern you’ve chosen.
- Using the width and height of your tile as a guide, measure and make more guidelines to help you.
- Guidelines are important because they help you install accurate tile.
I use my measuring tape and a long chalk line to snap guidelines across the entire wall. Precise measurements and planning will ensure that you don’t end up at the top or sides of the wall with a partial tile.
Step 4. Mix Mortar
Once all of your guidelines are measured and snapped, it’s time to start installing tile. To do it, you’ll need to mix a batch of mortar.The most important thing to keep in mind when mixing thinset or mortar is to get the water level right. Follow the directions on the package if you’re using a bagged mix. Or follow your mortar mix ratio if you’re mixing your own mortar.
Add water to a 5 gallon mixing bucket first followed by dry mix. This helps prevent dry areas. The correct consistency you’re going for is creamy peanut butter. If the mix is watery, you need to thicken it up with more dry mix. If it’s overly dry, clumpy or powdery, add more water.
- Use latex-fortified, non-sag, exterior-rated thinset if your tiles are dense and flat. Latex additives give thinset more pliability which helps prevent tile and grout cracks.
- Use mortar mix type N if you’re using real stone tile that’s porous.
Add water slowly to the dry material and mix with your power drill and mixing bit. Adjust the water level and dry mix as needed until you reach the desired consistency.
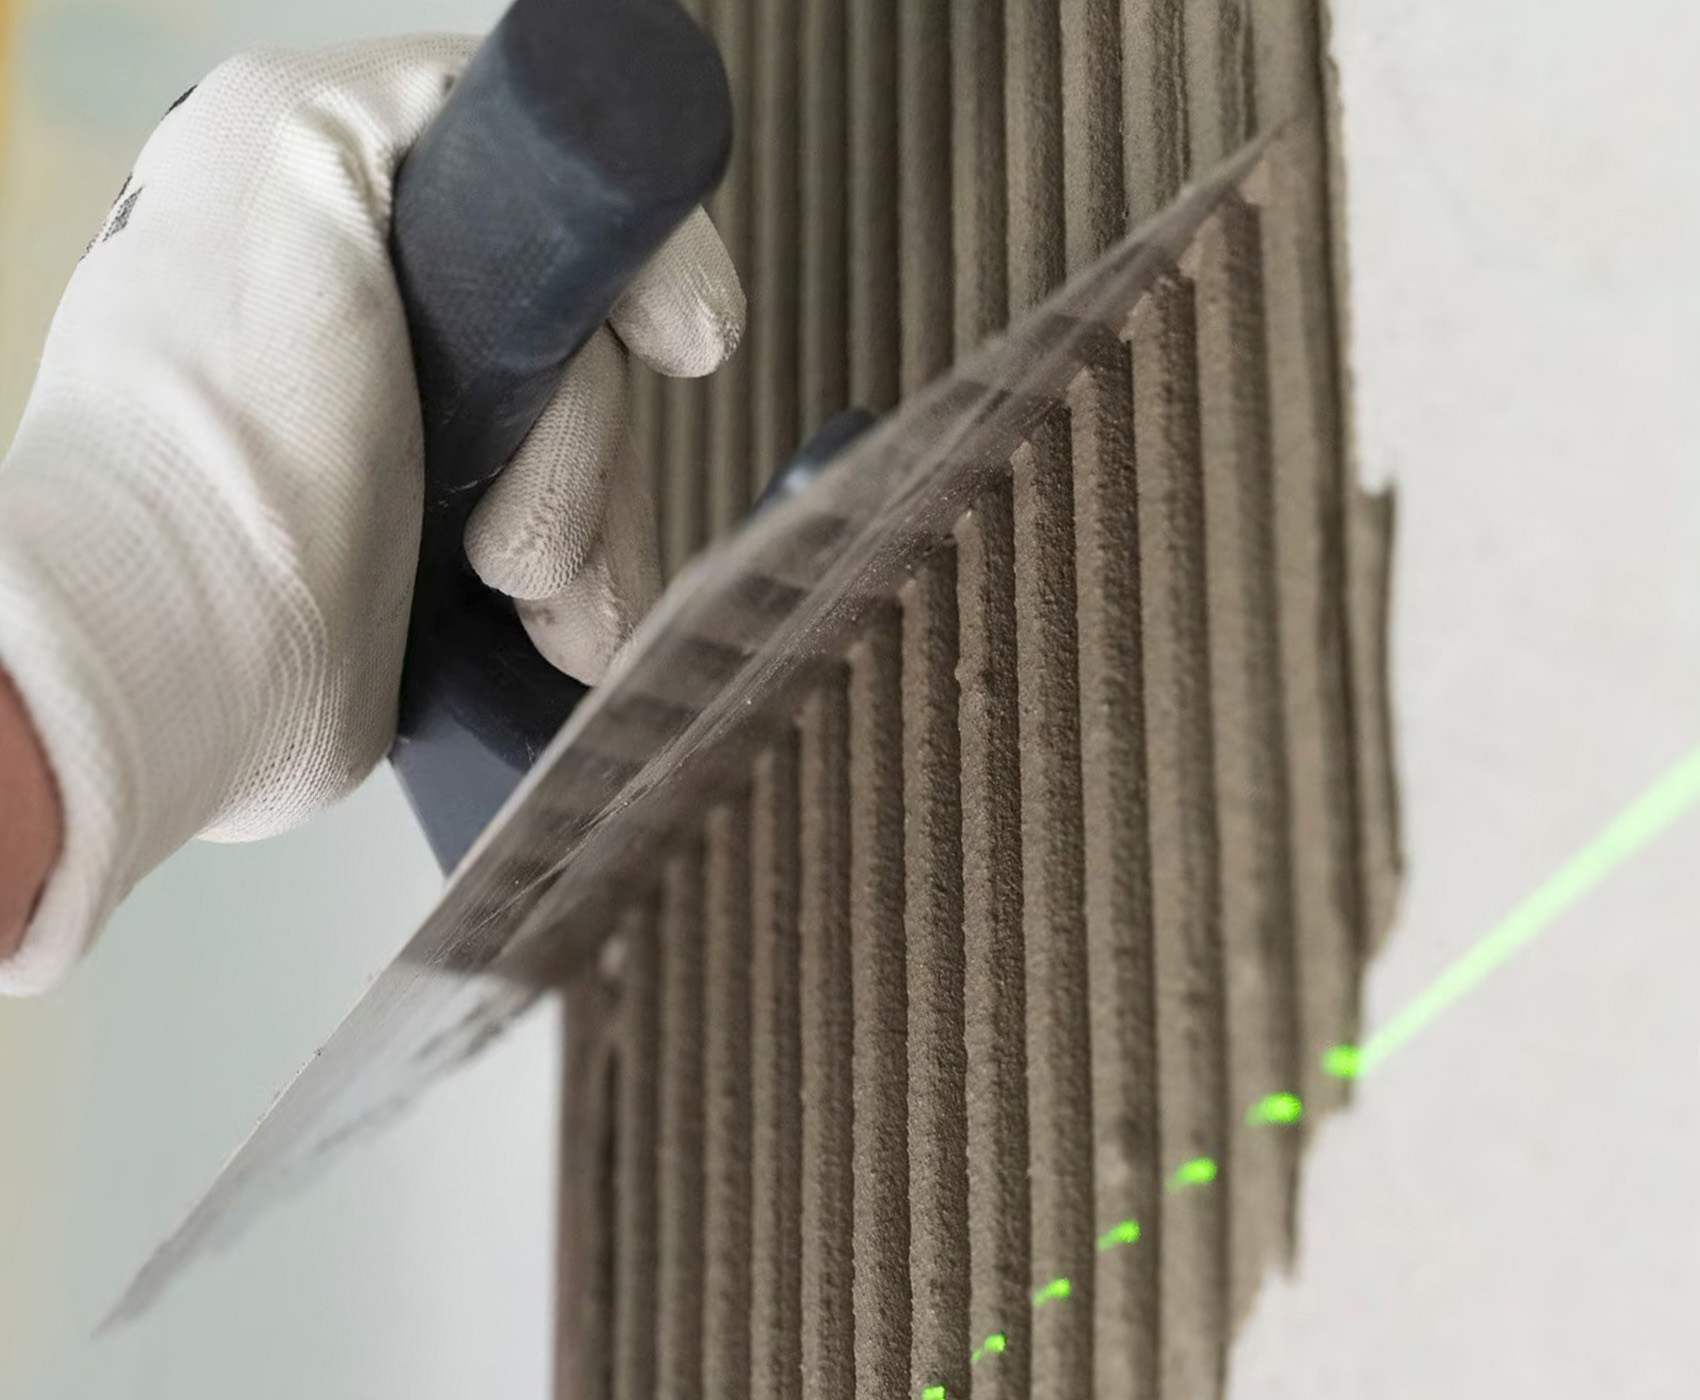
Step 5. Spread Mortar
Spread a layer of thinset/mortar on an area of wall about 3 square feet starting at the center point. I typically install tile one quadrant at a time. You should have 4 quadrants marked on the wall based on your initial vertical and horizontal center lines.
- Run the notched trowel at an angle through the mortar to create a ridged bed for your tile.
- Make sure the ridges are evenly spaced.
- If the mortar is mixed correctly, the ridges should stand up rather than collapsing.
- The size of your trowel is based on the weight of the tile.
- Heavier tiles require a larger trowel size than small tiles.
Make sure to spread mortar evenly across the wall. Your mortar ridges should not collapse after you’ve removed the trowel. If they do, the mortar is mixed too thin. Clean the wall and thicken up your mortar.
Make sure to choose the correct size trowel for the tile you’re installing. heavier tiles require a larger trowel than light tiles.
Step 5. Install Tile
Before you install your first tile, you need to butter the back of the tile with mortar. This is called “back-buttering”. Tests have proven that back-butting tile before you install a tile is much more effective than pressing a tile directly into a bed of thinset. It creates better coverage on the back of the tile and a much stronger bond.
- Back-buttering a tile creates a stronger bond with less voids. This means less areas where water can penetrate and loosen or crack a tile.
- Once you’ve back-buttered a tile, press it into your thinset. Press the tile into place as you wiggle it a little back and forth. This collapses the mortar ridges and creates a better bond.
- Make sure you press the tile into the exact correct position by following your horizontal and vertical guidelines.
- Use tile spacers between the tiles to ensure even spacing.
- If you’re using tiles on mesh, align each square so that the space between each section of mesh is the same as the space between each tile. Also check the spacing between tiles on the mesh. Sometimes they’re misaligned from the factory and need correcting before you install them.
Continue back-buttering and installing tiles following your guidelines and using spacers as you progress.
Step 6. Make Cuts
As you install exterior tiles, you’ll eventually require a cut. It’s extremely rare to tile an entire surface and not require a single cut tile. Carefully measure and mark your tile, then cut it with your tile saw.
- If you need to fit a tiles around obstructions like a pipe use your angle grinder and a diamond tipped blade. They’re great for cutting circles and other shapes into a tile. But for straight cuts, use the tile saw.
- Use your tile nips to snap off small bits of tile that you can’t cut with your grinder or tile saw.
- If you have sharp edges, use a tile stone to smooth them out.
One of the keys to professional tile work is carefully measuring and marking your cuts. This is especially true for round cuts in the center of a tile or cuts around an object because they’re much harder to make. I use an artists compass to help me make accurate circles. Then I cut them with an angle grinder and a small 4-inch blade.
The smaller the blade on your angle grinder, the easier the cuts are to make. Cut from the back of the tile and not the front. This creates a more accurate cut and a cleaner finish.
Step 7. Continue Laying Tile
Continue to spread mortar, back-butter, make cuts and lay tile onto the rest of the wall in sections. Start from your center marks and work outwards. As you work, check to make sure your mortar remains the correct consistency. If it starts to dry out, add a small amount of water and mix it up or make a new batch.
Do not spread dry mortar on the wall because your tiles will become loose over time.
Continue laying tiles, follow your guidelines and use spacers until they’re all installed. Then let them dry for 24 hours.
Step 8. Remove Tile Spacers
Remove all the tile spacers after the tiles have dried at least 24 hours. I usually keep them on until it’s time to grout. If you remove them too soon, the tiles can start to sag under their own weight.
Step 9. Grout
Mix a batch of sanded, exterior-grade grout according to the directions on the bag. It’s very important to get the consistency right when mixing grout. Add too much water and the grout will be watery and unable to fill the gaps between tiles, use too little and it will be dry and brittle. Grout isn’t just for show, it seals the voids between tiles and keeps water out.
Mix grout in smaller batches than your mortar in a 5 gallon bucket. Pour water into the bucket first followed by dry grout. Then hand mix the grout with your tile trowel.
- When you apply grout with your float, push it into the voids.
- Check the consistency of your grout as you work.
- Do not let your grout dry out. If it does, add water and mix it up or make a new batch.
Using a grout float, spread grout all over the wall pressing firmly. Push grout into the voids between tiles to seal them tight. Hold the float at a 45-degree angle and work the grout in from all angles.
Don’t worry if you get grout on the surface of the tiles, you’ll be wiping them clean with a wet sponge later.
You don’t have to grout an entire wall in one pass if it’s extremely large. It takes too long and gives the grout too much time to dry hard. Instead, grout in sections you can manage so that it doesn’t fully dry out. For me, that’s about a 25 to 50 square foot section at a time.
Step 10. Sponge Clean The Grout
Let the grout dry until it develops a haze on the surface of the tile. This can take anywhere from 10 minutes to half an hour depending on the temperature, sunlight and humidity. Fill a bucket with clean fresh water and soak your sponge. Squeeze excess water out of the sponge and swipe it across the surface of the wall. Use light pressure to avoid gauging grout out of the gaps.
- Wipe a damp sponge across the wall to remove grout.
- Use light pressure to avoid removing grout from the gaps.
- If you accidentally remove grout from a gap, apply more, let it dry and wipe again.
- Dip the sponge back into the water to clean it every time you swipe. Then wring out the sponge and wipe again.
- Continue to repeat the process until the water is dirty. Then pour the bucket out, wash it out, and refill with fresh clean water.
- Make sure to wipe with both sides of the sponge before cleaning it.
- Once the wall is clean, wait a few hours and buff the tiles with a soft cloth to remove any lingering grout haze.
It’s very important to use clean water as you work. Wiping the wall with dirty water will leave a haze that will have to be removed later.
Step 11. Apply A Sealer
A sealer can help prevent water from penetrating into porous stone and grout. But it’s less effective on dense non-porous tiles because they’re naturally very resistant to water. Applying sealer is an optional step. Tiles have been used on homes and buildings for centuries without the aid of a sealer. But they offer a little bit more protection and may be worth the time and money if your tile is porous.
- For exterior tile, use a sealer that also has some UV protection. It will help the tiles resist fading.
- Sealers also help prevent mold, mildew and bacteria growth.
- Apply sealer after the grout is thoroughly dry.
- Spray sealers are easier and more convenient to use vs sealers that come in a bottle.
- I recommend using a water-based sealer with low toxicity.
If you’re using a dense tile with low porosity, a sealer is more for the grout than the tile itself so concentrate in those areas. However, if the tiles are porous, spread sealer on the grout and tiles.
Even if your tiles are dense, like clay porcelain, and don’t benefit from the water blocking properties of a sealer, they may still prevent some fading. So buy a sealer with UV protection.

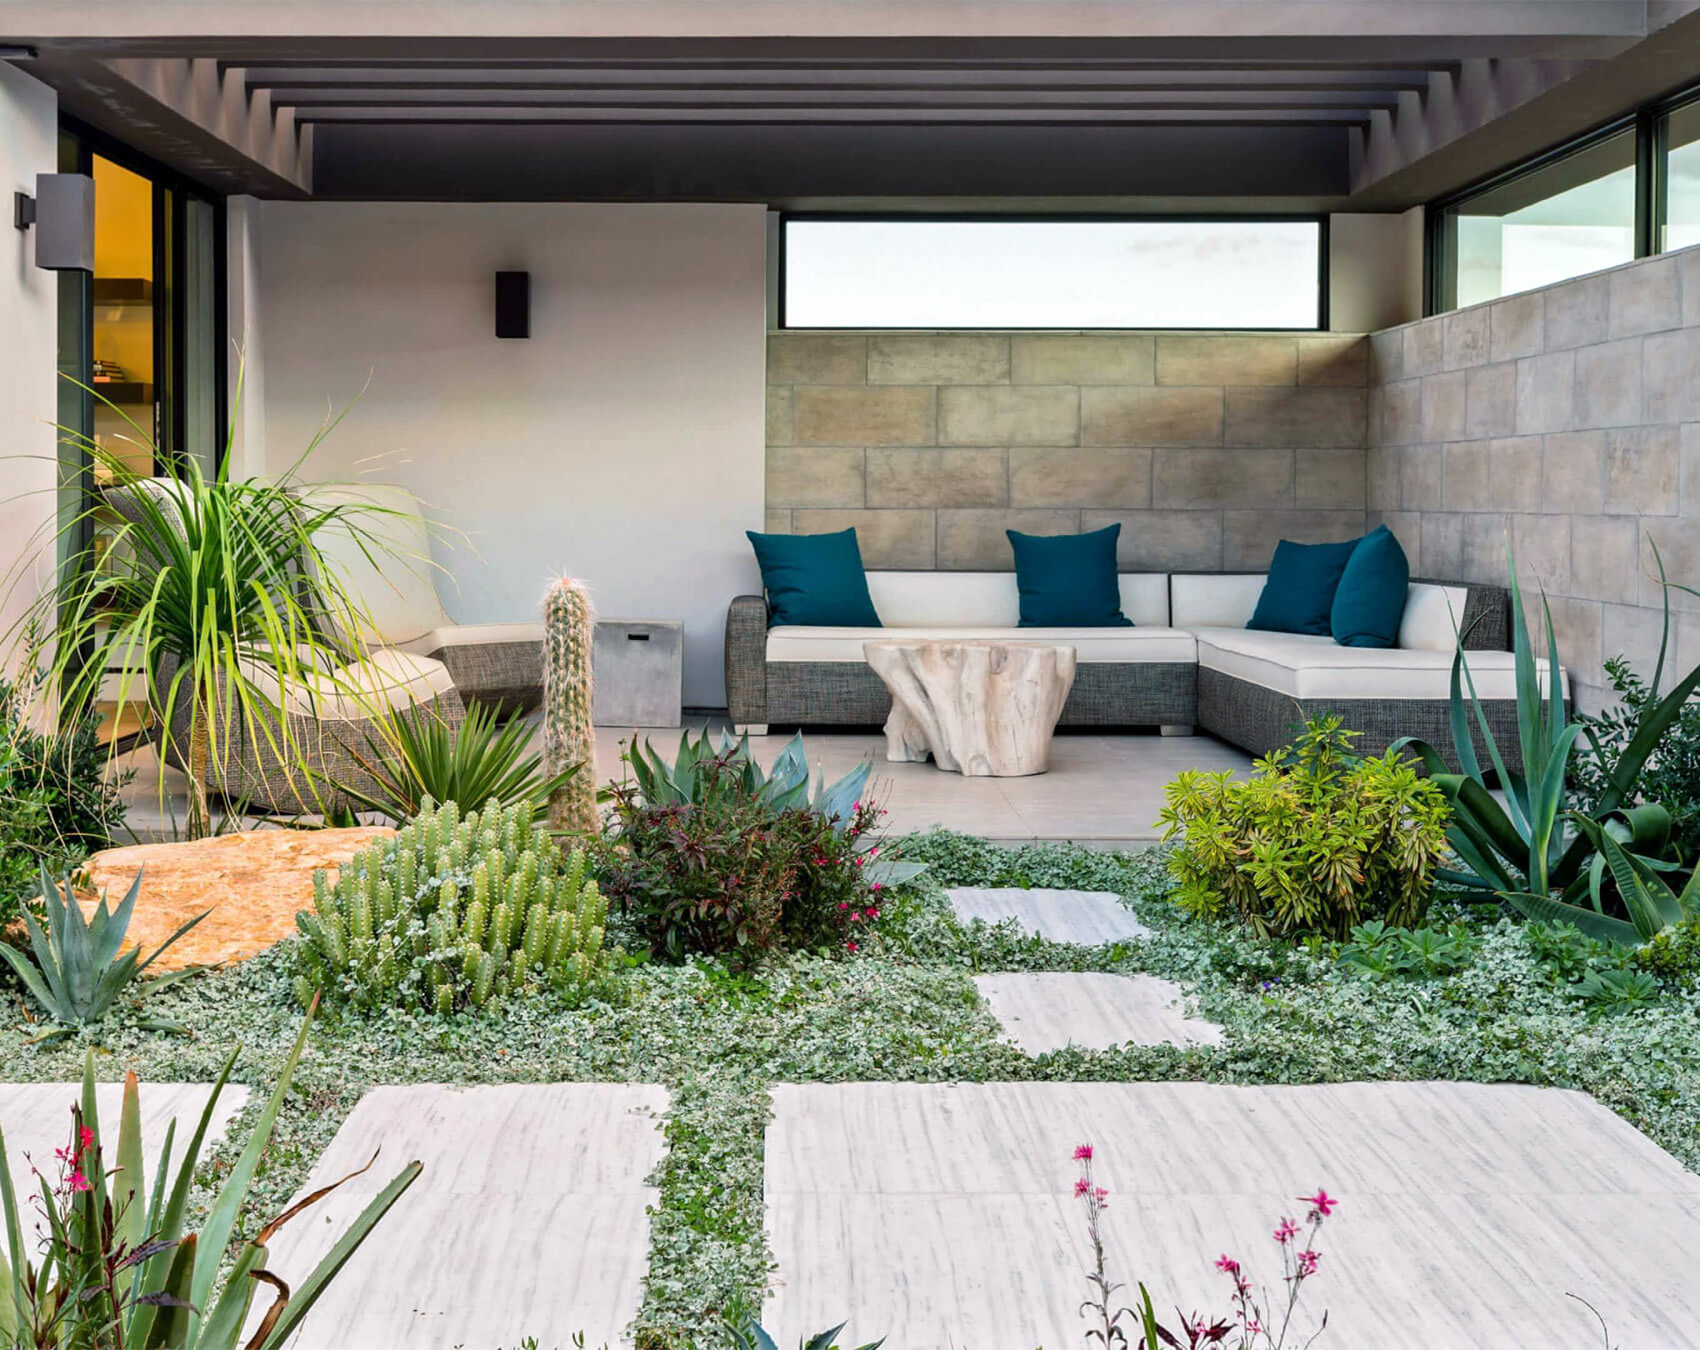
Pros
If you have the right style house, tiling your exterior walls is a beautiful finish. They look great, are super durable, last for decades, don’t require much maintenance and are easy to keep clean. Tile siding is most popular on Modern or Contemporary styled home that use other masonry products like stucco, stone, brick or concrete. However, it can work on just about any style home if you use them strategically as an accent and choose the right pattern and/or colors.
- Tile is extremely durable if you buy the right kind. Use natural stones or clay because they’re long-lasting and resistant to the elements.
- Exterior tile isn’t susceptible to common outdoor issues like insect infestations, animals, bacteria, and mold.
- Tile typically lasts a lot longer than wood or vinyl siding on a house.
- Outside tile requires less long-term maintenance.
Stucco and wood or fiber cement siding needs to be repainted periodically to keep them looking fresh and vinyl siding fades. But exterior tile and stone don’t fade or need paint or stain. This drastically cuts down on long term maintenance costs.
All outside tiles need to stay looking great is a sealer and cleaning with regular soap and water.
Using outside tile in a few key areas can be a great addition to your home’s exterior design. They can add texture, patterns and lots of color. Try them on small areas at first like a retaining wall, around the garden, a mailbox, the front of your steps or on the top and bottom of columns.
Cons
There are plenty of advantages to using tile on the outside of your house, but there are some disadvantages too. But luckily most of them can be avoided if you use the correct type of tile and install them properly. Exterior tile can crack or fall off the wall which could cause water leaks into the house. Water penetration can then cause rot, deterioration and mold. But these major issues can be avoided if you install the tile correctly.
- The most important thing to remember when installing outdoor tiles is to use the correct tiles and proper installation.
- If you choose the wrong type of tile, and do not install them properly, the result could be water damage and/or mold.
- Choose a tile that’s rated for the outdoors or it may not hold up when exposed to the elements.
If you use the wrong tile, it could fade, break, chip, crack, become weak and/or fall off the wall. This will not only look bad but could cause water leaks into the structure.
To prevent water damage, make sure you use the right type of tile for exterior use, install them properly and consider using a sealant. Sealants are not required, but they decrease the porosity of your tile which helps protect them from sun damage, water and temperature changes.
One of the most important details to get right when installing exterior tile is using the right kind of mortar and grout.
- A mortar that’s too weak will crack and become loose.
- The wrong grout won’t keep water out from behind and between the tiles.
Although there are some cons to using tile on the outside of your house, they’re avoidable if you do the work properly and use the correct materials.
Tips For Installing Tile On The Exterior Of A House
The 3 keys to successfully installing tile on the exterior of a house are choosing the right tile, using the right type of mortar and creating a string base for the installation. The first two are fairly easy to do, but a thick exterior grade tile and use a modified-thinset or type N mortar. But the third can be a little harder to achieve and this is where most exterior tile installations go wrong.
- Exterior tile must be installed directly onto masonry, like brick, stone, block or cement, or a very strong and stable base. The base could be cement board or wire mesh which is secured to the house frame.
- If you’re installing exterior tile over wire or cement board, which is called a substrate, you also need a high quality vapor barrier between the base and house. This prevents water that seeps behind the tile from penetrating into the home.
- Use tarps if you’re tiling over a finished surface such as a deck or patio. Spilled grout, mortar or dirty water will cause stains.
- Wipe up spilled grout or mortar as soon as possible.
If you do not install a strong base for the tile, they will typically crack, break, chip or fall off. This can lead to water penetrating into the cracks and eventually onto the house frame.
Should water penetrate behind the tile, it will be blocked by the vapor barrier. This is why the vapor barrier is so important, it’s the home’s last line of defense against water damage.
Exterior Tile
When tiling the outside of a house, you must choose an exterior grade tile. They’re thicker and more durable than the standard thin tiles you’d use as a backsplash or in a shower. I use either porcelain or real stone tiles for my exterior tiling work. Both have been used all over the world for centuries to tile homes and buildings.
- Outdoor tiles must be string enough to withstand rapidly changing weather conditions, sunlight, and other outdoor stresses.
- Select a tile that’s thick and well made.
- Use a tile with a thick outer “shell” coating.
- Outside tiles should be dense with very low porosity.
- Exterior tiles should have a thick outer shell that resists fading.
- Focus on the quality of the tile first, then select the color, size and pattern you like best.
An exterior grade tile should be sturdy and resilient to the elements. It should be very dense with low porosity like clay so that it repels water rather than absorbing it. A porous tile will absorb large amounts of water, which can crack the tile or cause leaks to the mortar and home.
If water should penetrate behind the tile to the mortar, it can pry the tile off the wall. By choosing a dense tile that won’t absorb water, you lessen the chance of popped tiles.
A single damaged or cracked tile can compromise all your tiles if water can reach the mortar layer. But this is preventable by choosing the right type of tile.
Porosity and thickness are the biggest concerns when buying outdoor tiles. Carefully select your tiles to make sure they’re thick enough to last and dense enough to repel water. Also look for a thick outer shell which protects the tile from water, sun and impacts.
Types Of Outdoor Tiles
Outdoor tiles come in a variety of materials and in a wide array of colors, shapes, and styles. There are just as many choices with exterior tile and interior, especially when you start looking at real stone.
Here’s a list of the best wall tile materials you can use:
- Granite: Granite is one of the strongest and most durable types of stone tile. It’s naturally waterproof, durable, hard to crack and resistant to bacteria.
- Slate: Slate comes in a wide range of colors. Tiles can be smooth or have an uneven surface, which is known as a natural cleft finish. It’s water-resistant and tough, which makes it a popular choice for outdoor use. But it’s not as durable as granite.
- Porcelain: Porcelain tile is a good choice for outdoor spaces because it has low porosity, is strong, fade resistant and very durable. It’s resistant to freezing and hot temperatures making it ideal in any climate.
- Ceramic: Ceramic tiles are similar to porcelain but not as durable. They’re sealed with heat and have interior color which makes them very fade resistant.
- Soapstone: Soapstone is resistant to water, staining, fading, high heat and cold making it a great choice for exterior walls.
Other exterior tiles can also be used as siding, such as marble, travertine and limestone, but they’re soft and porous stones. However they’re very beautiful and worth considering if you’re careful and install a thick vapor barrier behind them.
When choosing an exterior tile for your walls, make sure it’s thick and durable enough for outside use, water resistant and high quality. Then consider the size, color, pattern and overall appearance.
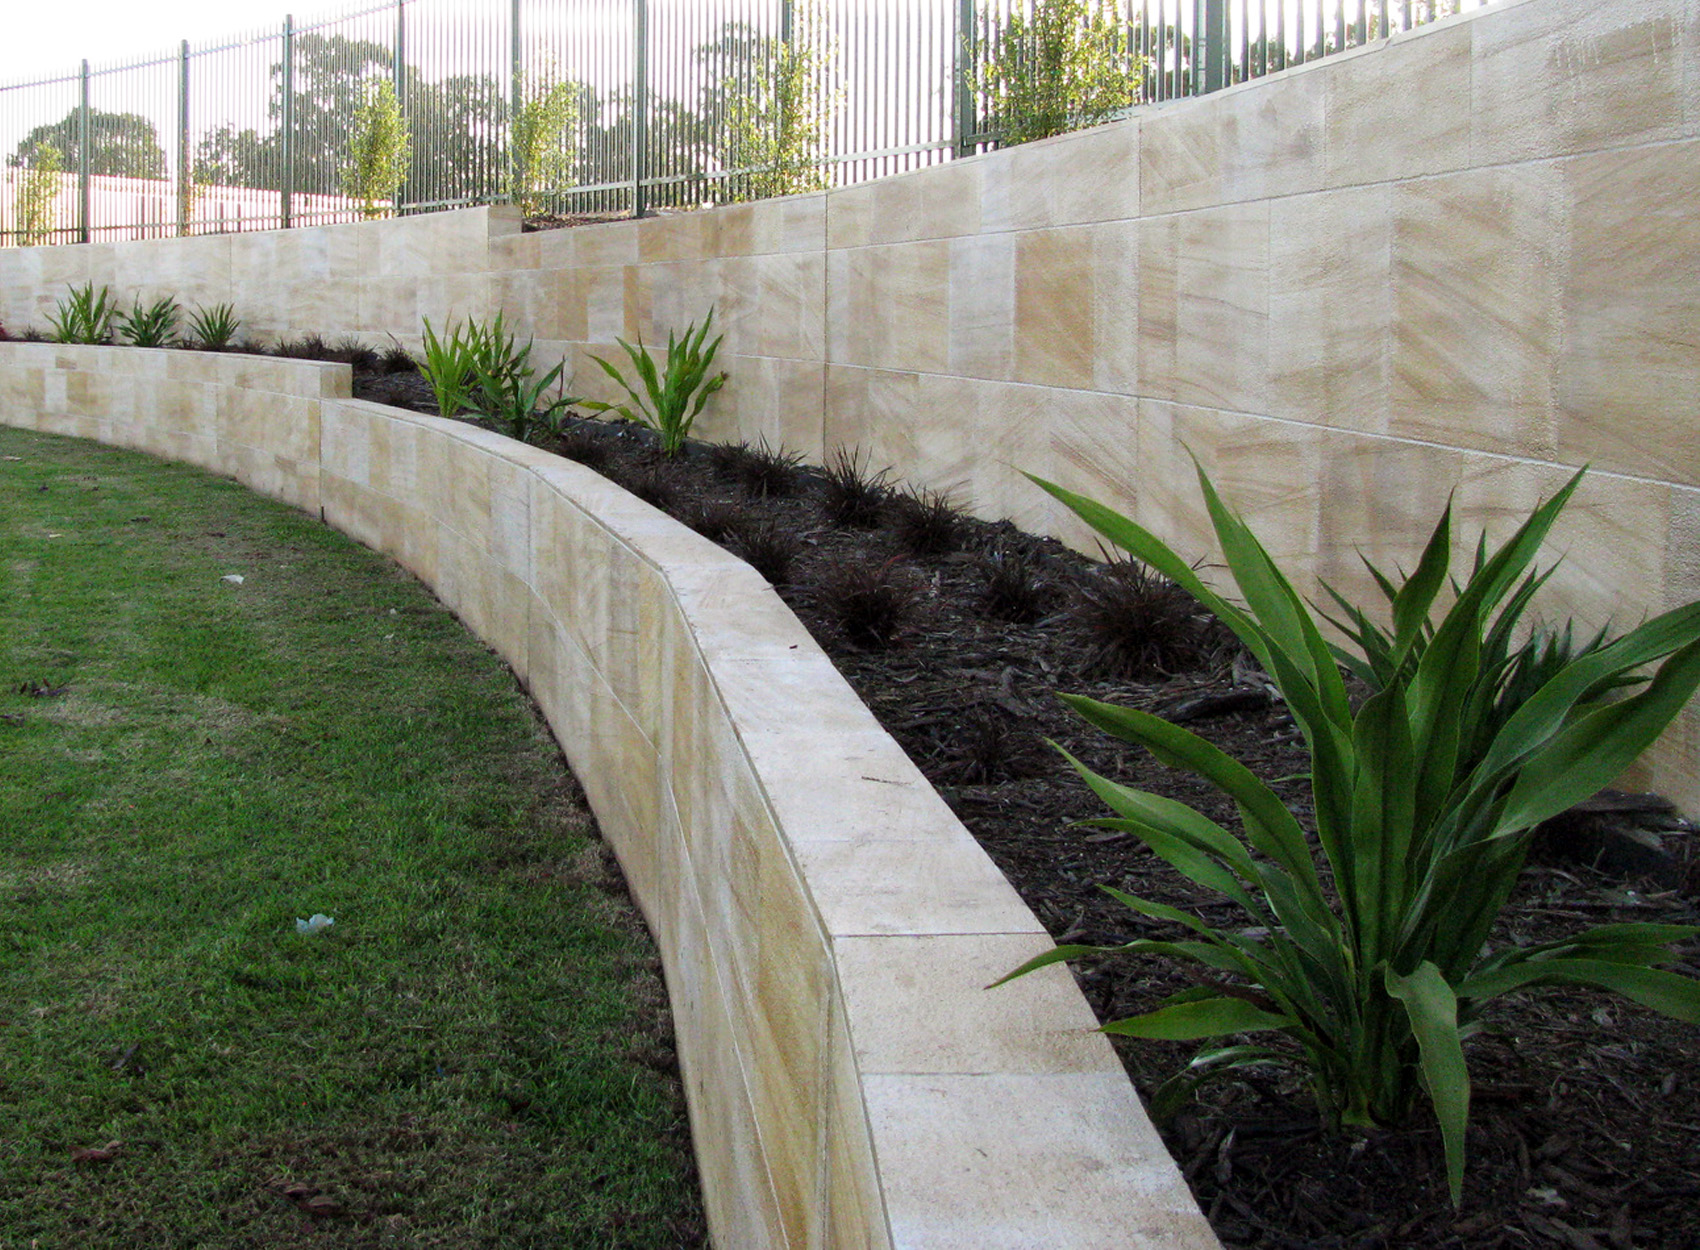
Tips For Tiling An Exterior Wall
If your tiling a freestanding exterior wall, consider how you’ll be finishing the top of the wall. You can do it with matching tile, a different tile or a cap stone. Any of these options will work fine, but you need a plan for finishing the top before you start tiling because it effects your tile pattern.
- If you’re installing a cap stone that will overhand the wall, consider using bullnose tile to cap your wall tiles. They’ll provide a nice transition from the tiled wall to the cap stone.
- When tiling the top of the wall, the cap tile should be installed on top of the wall tiles. It’s done this way because it helps keep water from penetrating behind the wall tiles.
- Another way to finish a tiled wall is by combining the previous two methods. Install bullnose tiles to cap the wall tiles, the use a tile to cap the top.
- Inlays are a nice addition to exterior wall tiles.
- Don’t be afraid to use different tiles and materials on the same wall. It’s very common to mix porcelain tiles with a real stone.
If your exterior wall is concrete or block, you can apply your tile directly to the wall with mortar. There’s no need for cement board, wire mesh or a vapor barrier. The mortar will bond the tile to the masonry and seal water out all by itself.
Install tiles on a wall in the same way you would the house by following out step by step instructions. Plan, measure, mark, cut, install, grout and finish.
Wear Safety Gear
Wear safety gear like eye protection, gloves and a dust mask when using a tile saw and mixing mortar. Cement based products are caustic and can irritate your skin and eyes.
Summary: Can You Tile The Outside Of A House?
You can tile the outside of a house as long as it’s rated for outdoor use. Not all tiles are durable enough to survive exposure to the elements. Ceramic, stone, porcelain, clay and glass are all great choices. Tile has been used as an exterior finish for centuries in Middle Eastern countries, Europe, South America, Asia and Africa. But in the United States it’s a fairly new trend. Many modern style homes are using exterior tile as a siding material or a wall cladding.
If you want to install tile on the exterior walls of your house, make sure to choose a durable outdoor tile that can resist the elements. There are just as many styles, sizes and colors to choose from as interior tiles. But make sure to select a tile that’s durable and thick. Tile installed outdoors will see more wear and tear than indoor tiles.
The key to installing tile on the outside of a home is proper preparation and using the right mortar.
- The surface of the wall must either be masonry like poured concrete, block, stone or brick, be covered in a layer of cement board or wire mesh.
- The mortar should be a modified thinset or type N mortar. Type N is better for porous stone tiles, modified thinset is better for dense, flat tile.
Exterior tiles come in a variety of sizes ranging from large stone slabs to standard 4-inch and very small tiles attached to a mesh. Any size works fine, but vary your trowel size based on the weight of the tile. Larger tiles are heavier and require thicker mortar than smaller tiles.
If you have any questions or comments about tiling the exterior of a home, email any time.