Benefits of Cedar Shingles
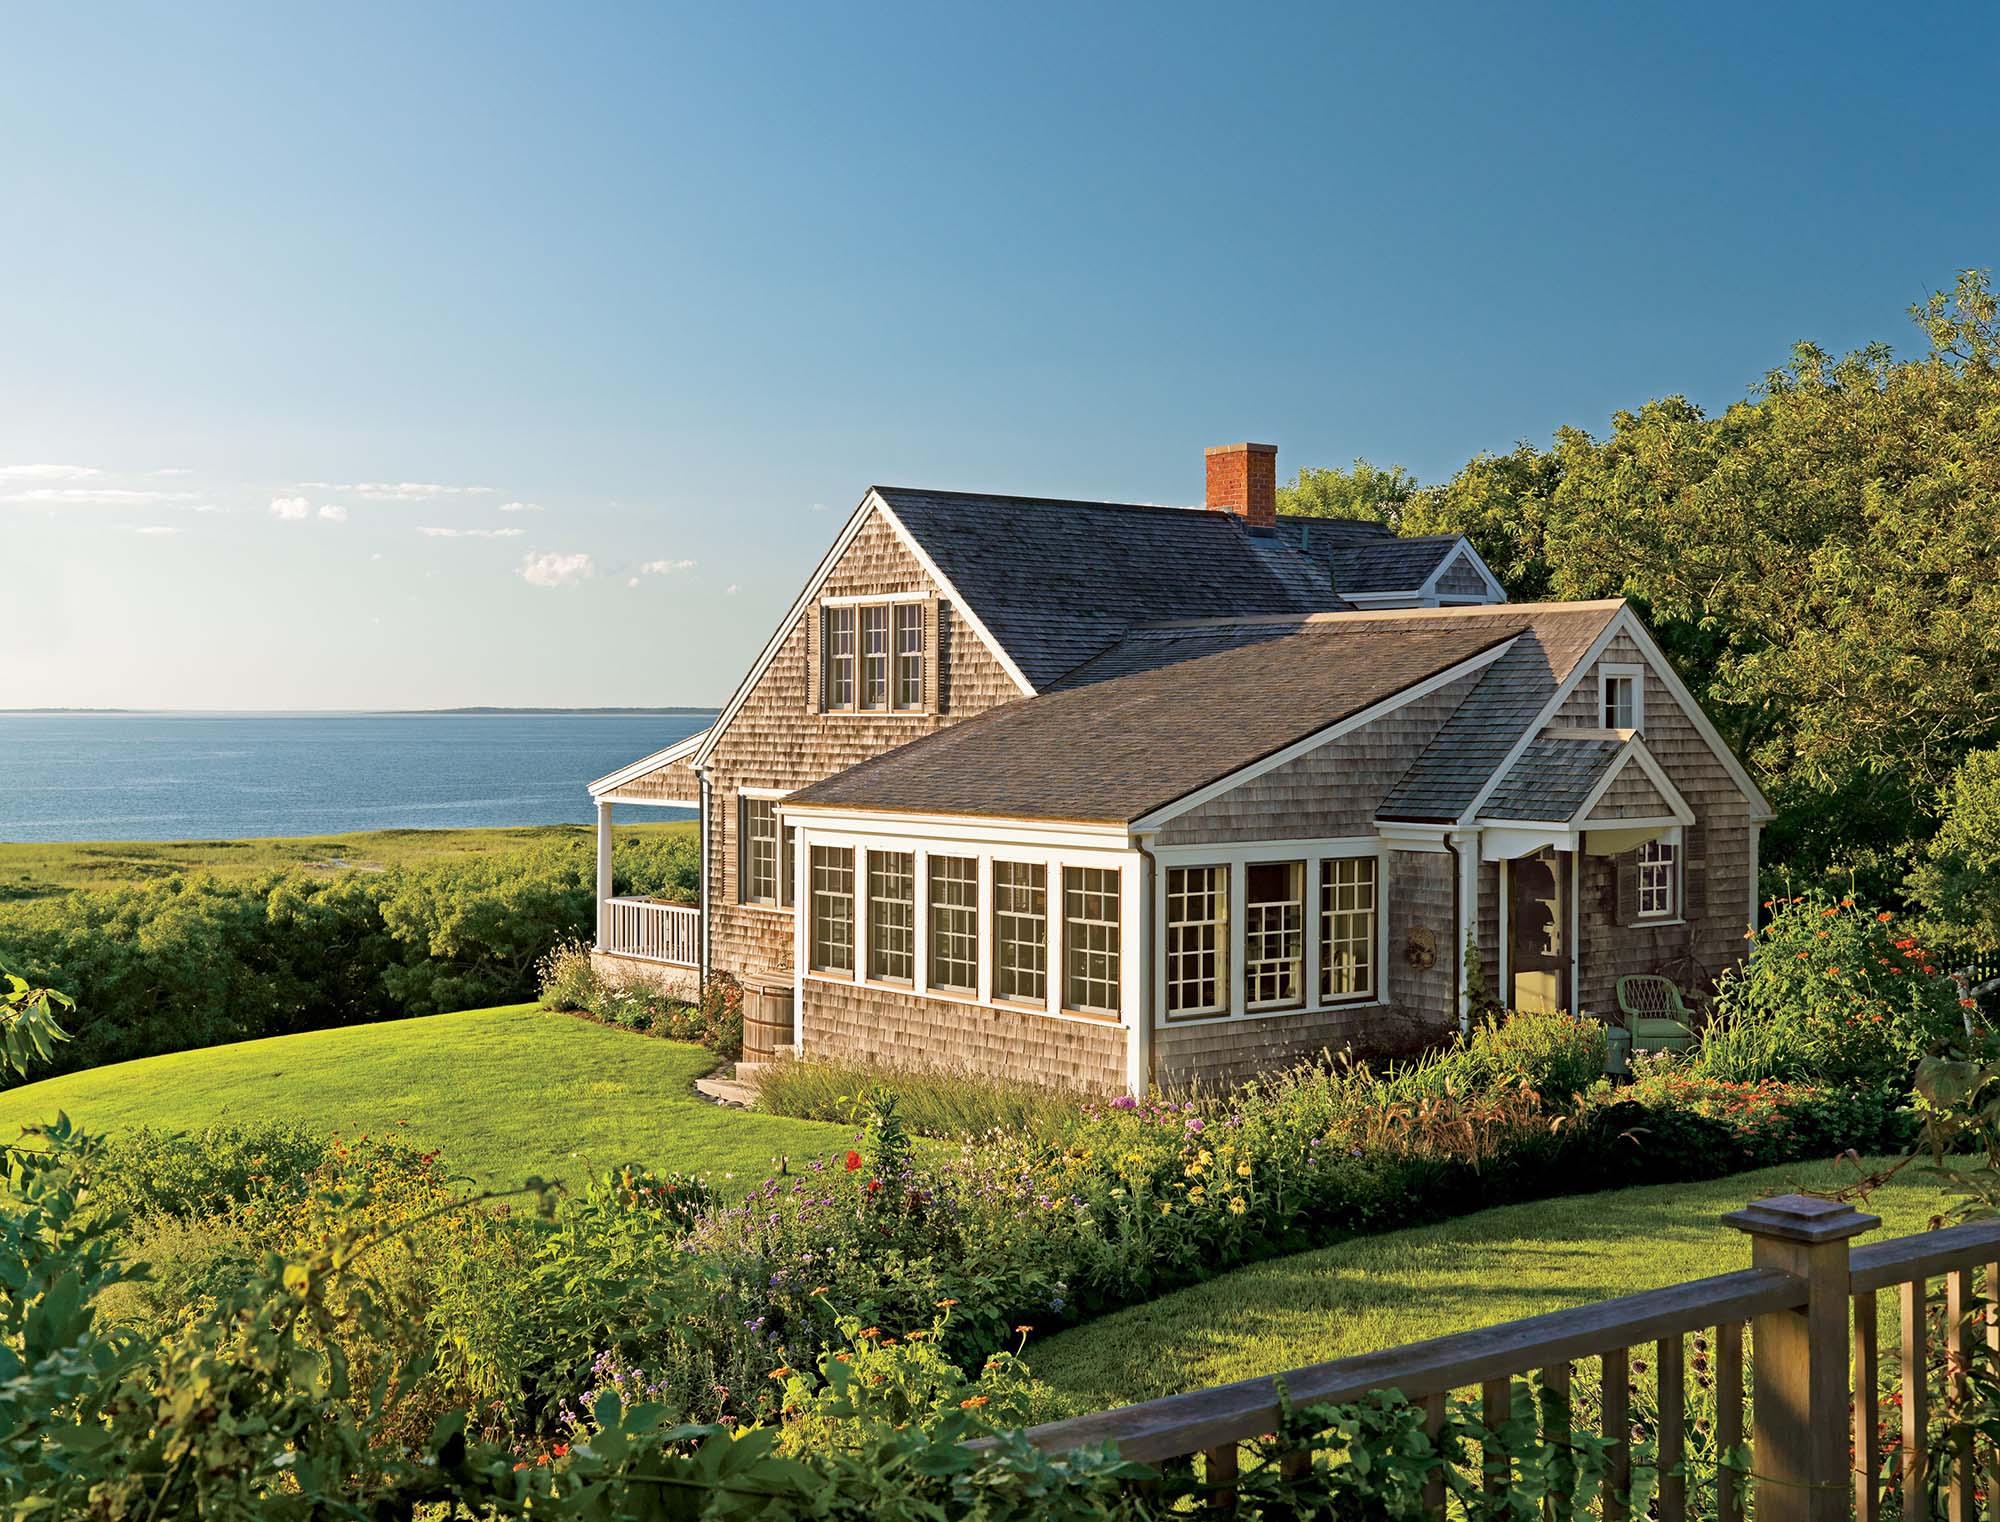
Cedar shingles are a terrific siding material for your home’s exterior. It’s one of the most durable softwoods you can buy which makes it great for outdoor use. Cedar shingles offer excellent noise abatement, insulation, and are naturally water and rot resistant which means longevity. And it’s a beautiful look that ages really well. Take a ride along the Northeastern coast and you’ll find lots of homes sided with real cedar shingles. There are so many benefits of cedar shingles. Durability, weather and rot resistance, looks, versatility and longevity. But they’re are some drawbacks like cost and maintenance. Cedar shingles are one of the most expensive siding choices and require maintenance. Especially if you paint or stain them. However, if you do paint or stain, the color choices for your home are endless.
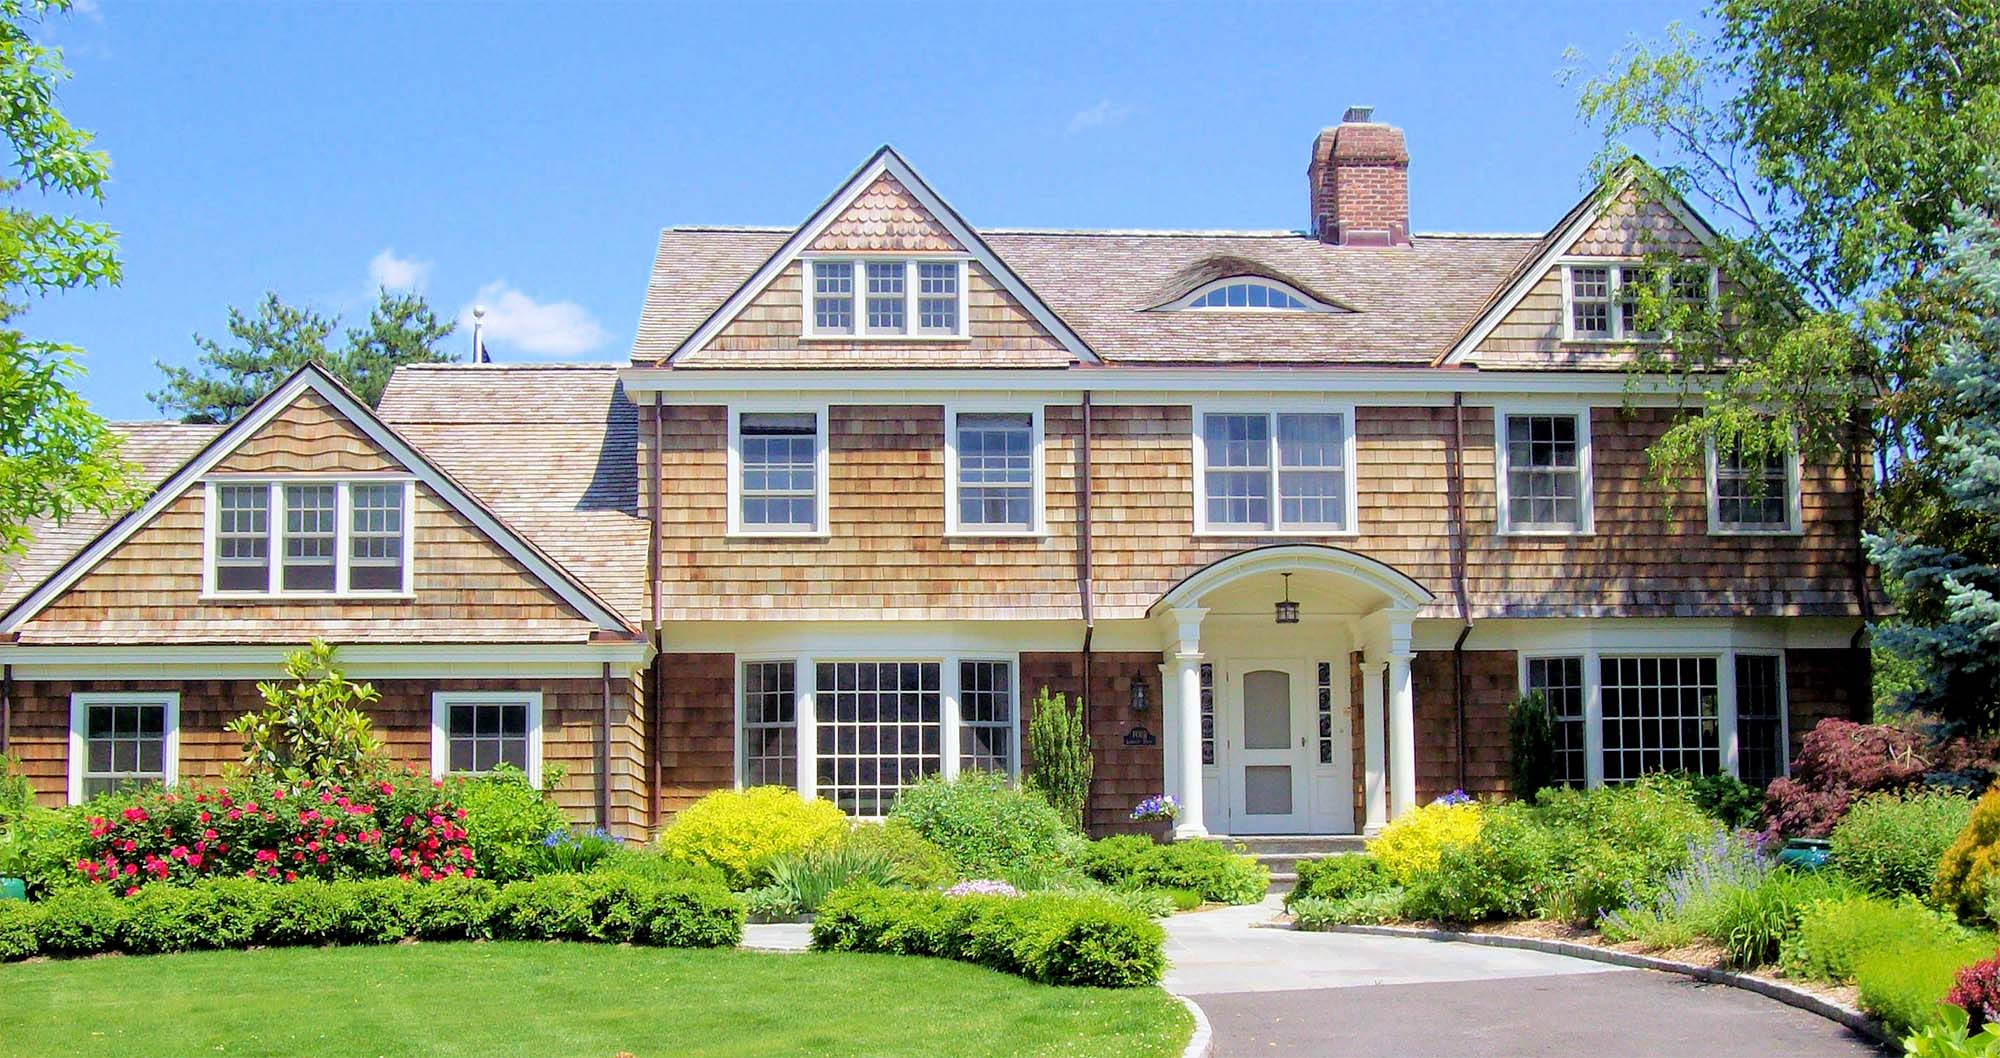
Cedar shake is far and away the most popular type of real wood siding for good reason. It’s been used for centuries and that’s not going to change. If you want a classic look for your house that also has great performance then definitely consider cedar.
In this article we’ll take you through the pros and cons of cedar siding compared to vinyl and fiber cement. We’ll also discuss cedar shake shingle maintenance which should definitely be considered before using cedar on your home.
How is Cedar Siding Made
One of the great benefits of cedar shingles is that it’s a 100% natural eco friendly product. Check out the video below to find out how and where your cedar siding is manufactured.
The Benefits Of Cedar Shake Siding
Cedar is a low-density softwood with an open cell structure. In other words, it’s durable and resistant to the elements. This durability makes it a great siding material and is one of the major benefits of cedar shingles.
Because of it’s low density, less heat is transported through the wood, making cedar a terrific insulator. This helps stop heat from escaping in the winter and the cool air from escaping in the summer. Cedar has a reduced heat flow which creates a natural sound barrier. Cedar is also a sustainable, durable wood. It can be stained, painted or left natural. But the main reason people choose cedar siding or shake as it’s commonly called is the style. It’s a very rich look and most people at the shore really love it. These are just a few of the benefits of cedar shingles.
Most cedar mills are greatly concerned with the wood’s grade where knots and blemishes can potentially come into play. Clear grades are considered premium. For the most part, all cedar shake used for siding is a premium, clear grade. However if your going with a double layer, a lesser grade may be used underneath, as it presumably has no exposure to the elements and won’t be seen.
Cedar Shakes Vs Cedar Shingles. What’s The Difference?
Real Cedar shingle siding and cedar shake siding are two great cedar siding products for setting your home apart from the majority of homes that opt more and more for composite. With Real Cedar shingle siding, you get a look that is beautiful and timeless. In addition, Real Cedar shingles and shakes get better with age as the warm undertones mature into a beautiful lustrous grey patina.
Cedar shakes and shingles are similar wood siding products, but there are some differences between the two. For instance, cedar shingles are generally saw cut on both sides, while shakes are typically split on one or both sides. Wood shingles are more precisely milled than shake siding. Shakes are more irregular, and don’t lay as flat when installed. Cedar shake is also thicker than shingle siding, ranging from 1/2″ to 3/4″ or greater at the butt end, while wooden shingles range from about 3/8″ to 1/2″.
This article will be discussing the Benefits of using Cedar Shingles vs. other types of siding, including cedar shakes.
Cedar Shingle Reveal
What is cedar siding reveal? What length should my cedar shake reveal be?
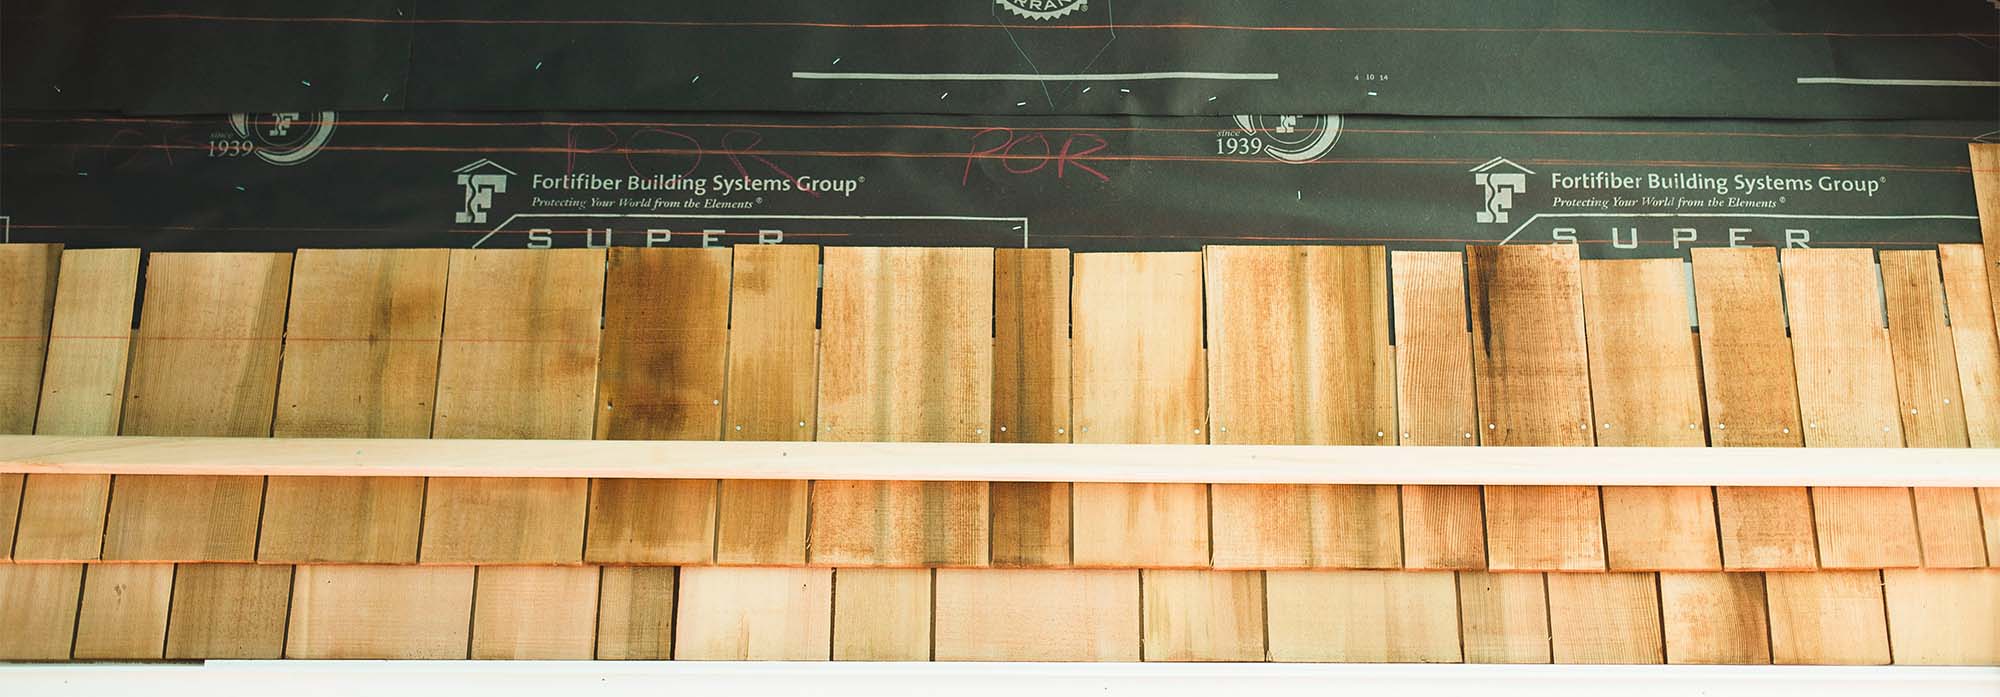
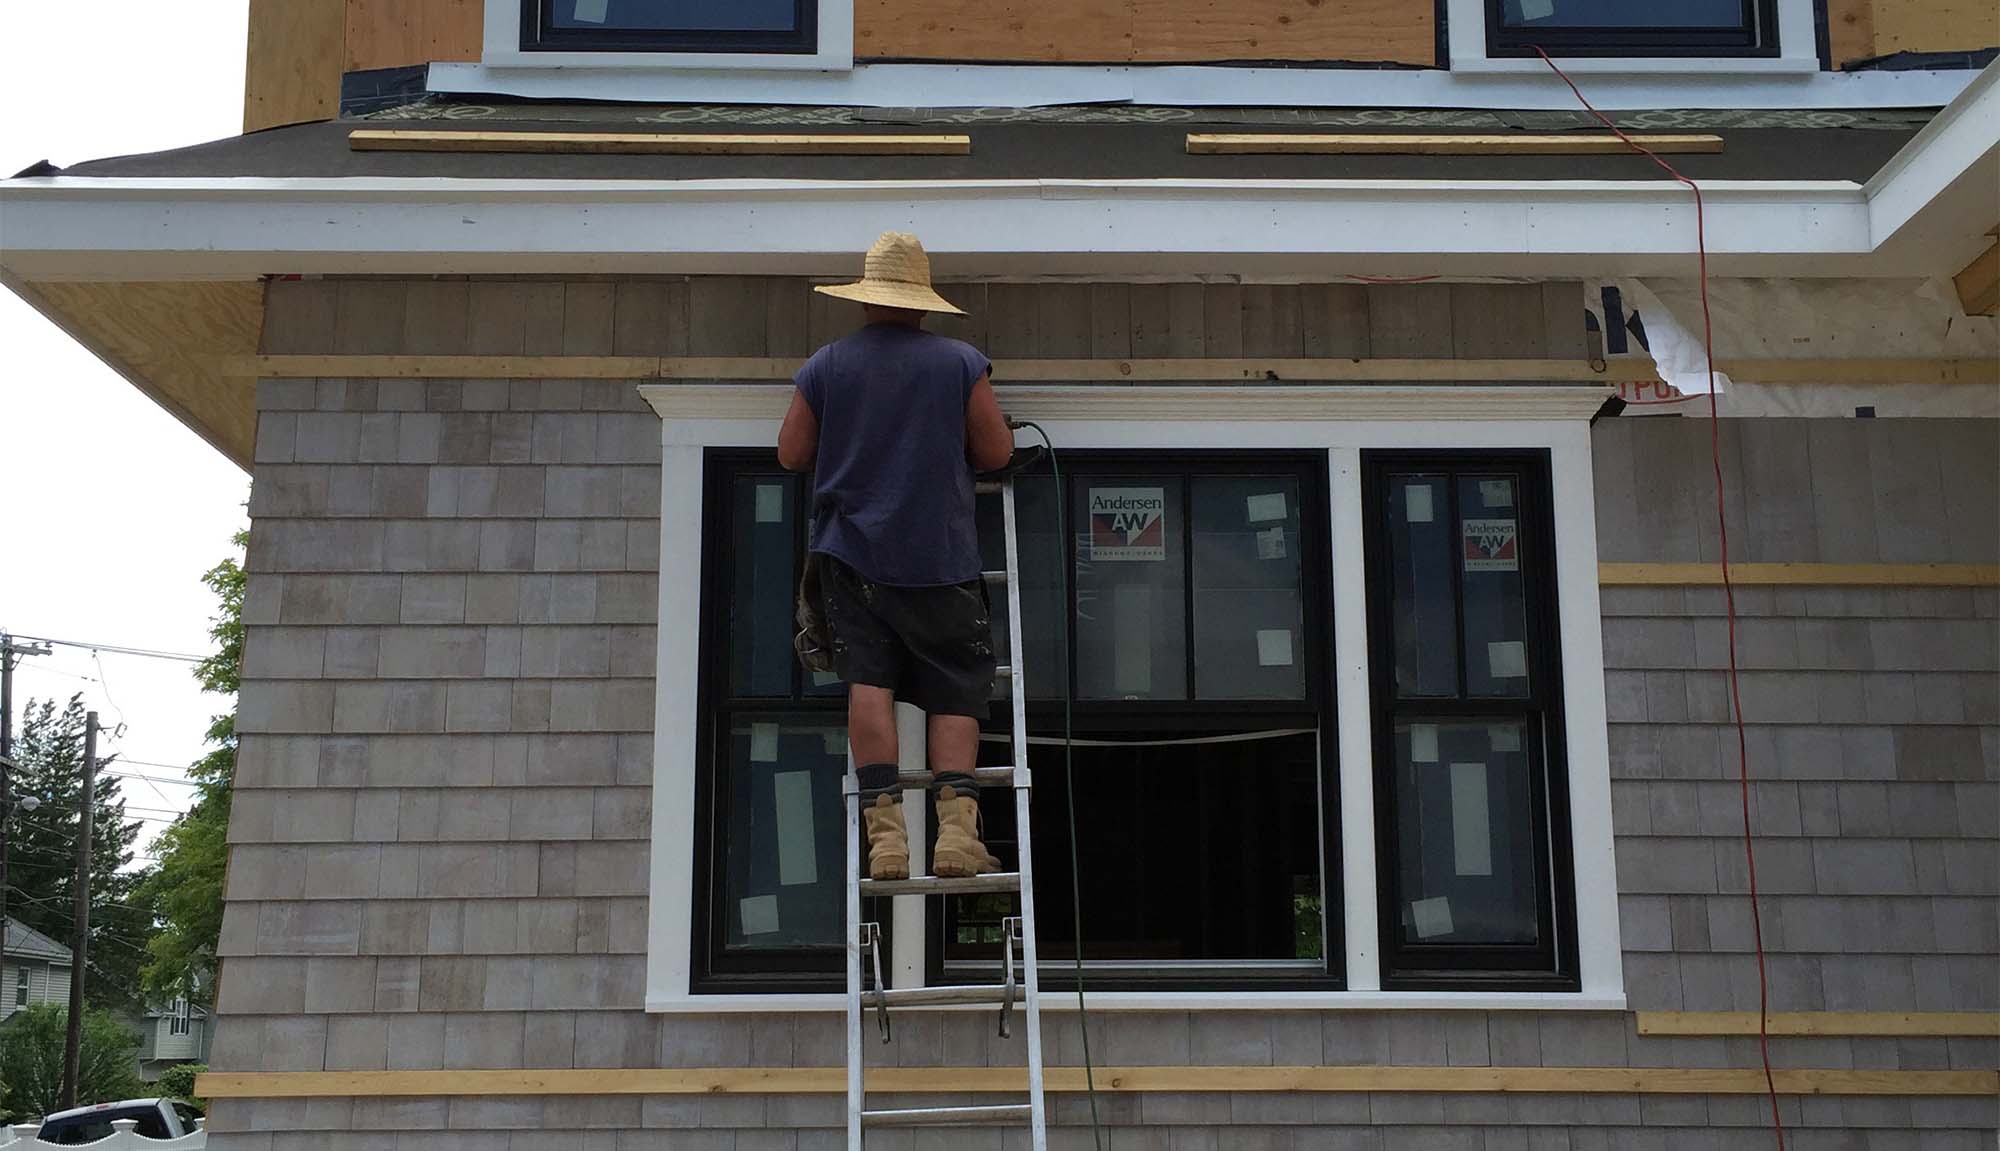
The installation of cedar shingles is more time consuming and difficult than vinyl or fiber cement siding. Because cedar shingles are smaller, irregular in shape, have to be installed with nails one by one and have to be laid out out by yourself, it’s a challenge. If you don’t align them properly both left to right or up and down, which is called the reveal, the finished product will look terrible.
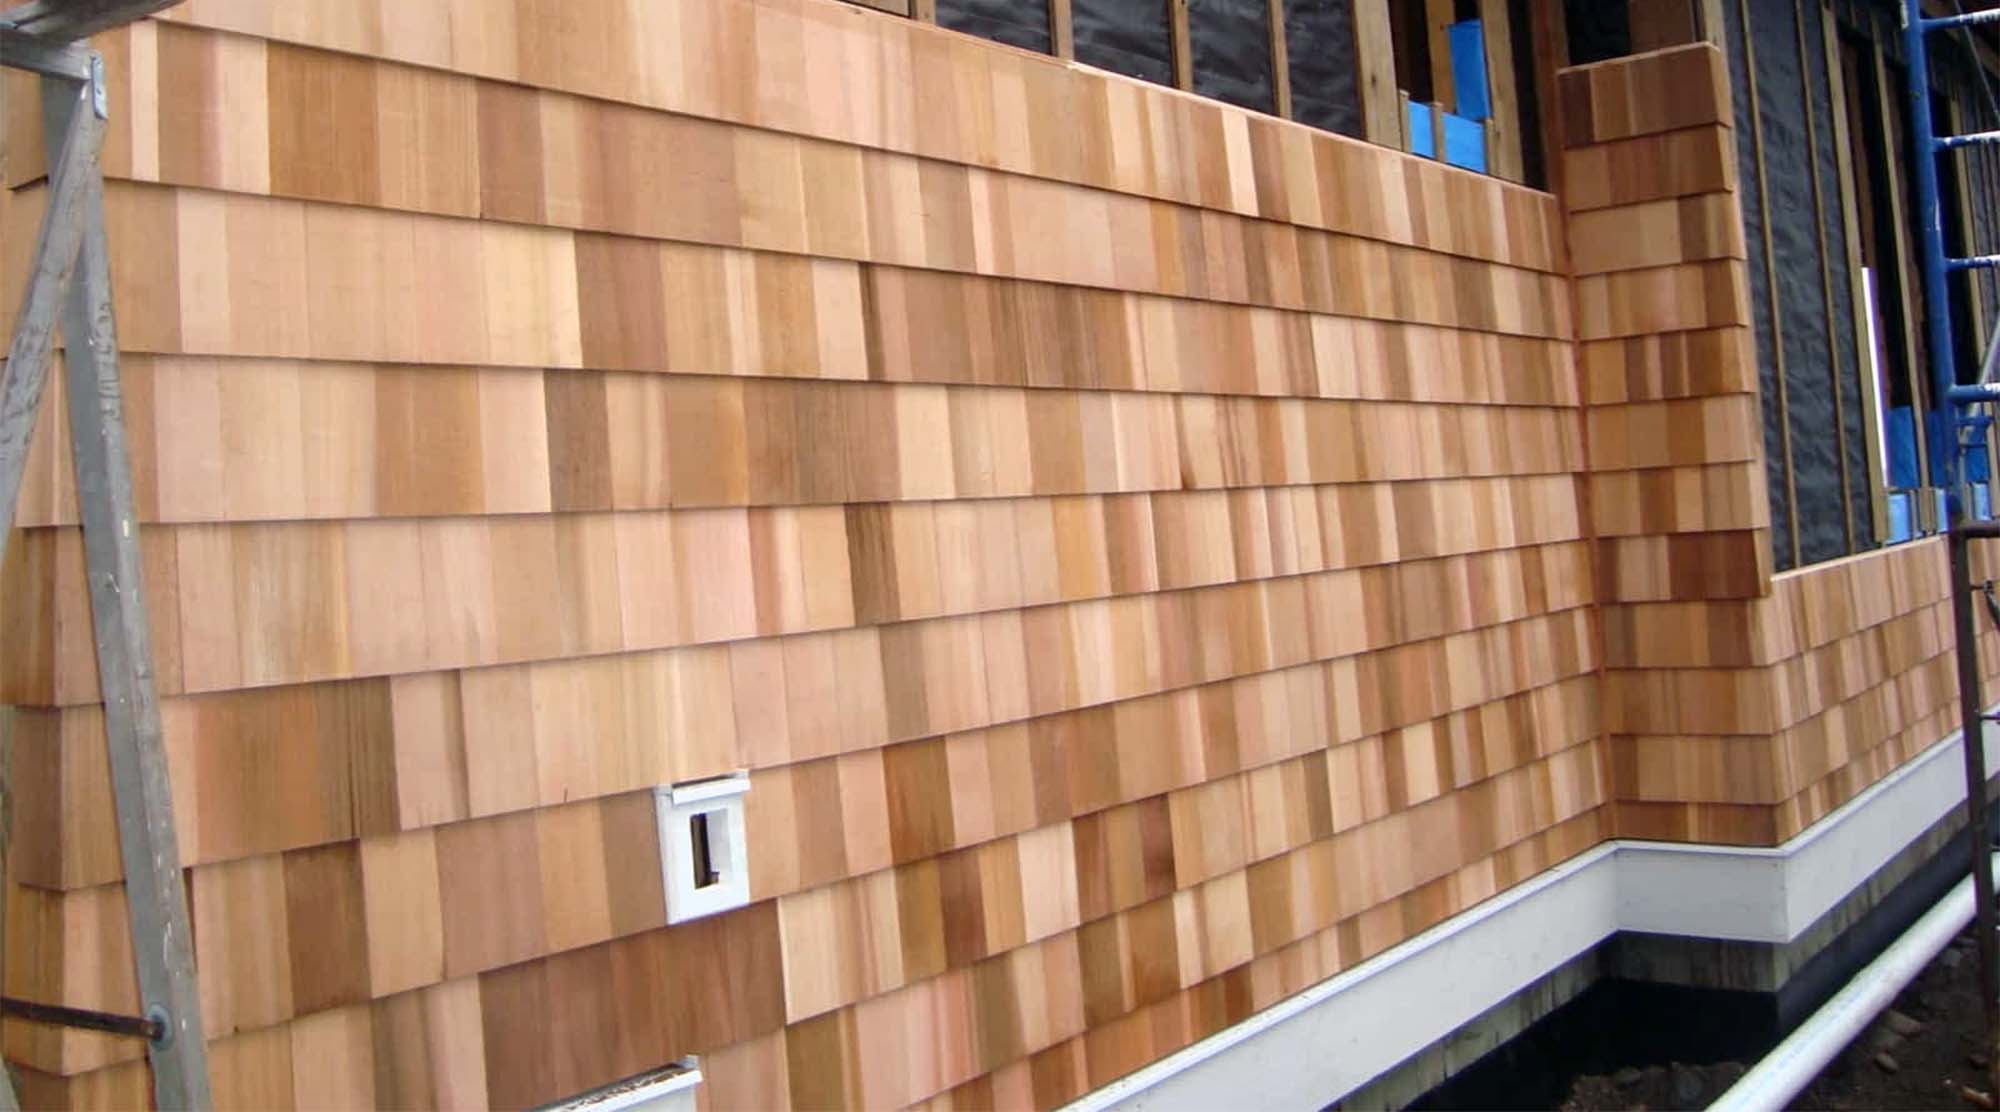
The shingle reveal is defined simply as the length of each cedar shingle course. Look at the pic above which is a 5″ reveal. All this means is each coarse of shingle is 5″.
Cedar Shingles come in varying widths so you need to lay them out yourself. It’s not like a composite material where everything’s done for you. Aim for a balanced layout. Spread the widths out evenly so that you don’t get a concentration of narrow shingles at one end and wide ones at the other.
As with siding, shingle joints are the areas of least resistance to weather. For this reason, the joints should be staggered so that no two courses have joints overlapping any closer than 1 1/2 inches. Try as best you can to have joints fall somewhere in the middle of the next shingle.
Pro Tip: We recommend keeping the reveal to between 5″ – 7″. You can install up to 9″ but generally the smaller reveals look better. All of the example pics on this page are a 5″ – 7″ reveal.
Caution: Installing cedar shingles is definitely not a DIY weekend project, even some experienced siding companies won’t install them. If you choose ceder shingles for your house it’s best to hire an experienced professional to install them.
Benefits Of Setting The Cedar Shingle Reveal
One of the biggest benefits of using cedar shingles is that you can set the reveal to whatever you want. Unlike vinyl, fiber cement or other manufactured siding products with a fixed size, cedar shake siding reveal can be set to almost any size.
Cedar siding can be set to fractions of an inch. With manufactured siding your stuck with whole numbers. 4″, 5″, 6″ 7″ Reveal, ETC. No one makes a 4 3/4″ reveal siding. But if that’s what you want, you can have it with cedar.
This versatility can help a lot when laying out your siding. You do won’t to end a siding course with a small piece but with fixed sizes sometimes you have no choice. With cedar you can adjust the reveal of the entire job to ensure your always ending with at least a 1/2 width shingle. This is especially important with courses that but up to the bottom or tops of windows and doors.
Cedar Siding Style
Cedar siding, also called shake, comes in a variety of stains and textures. It’s one of the warmest woods, offering a very natural look to your home that blends in well with the environment. It’s also eco friendly because most other siding products are made of plastic.
One of the benefits of cedar shingles is the wide variety of shapes, sizes and colors you can pick from. By far, more options are available to you with cedar than any other manufactured siding. The spectrum of patterns and styles in cedar siding is quite large and diverse. Including bevel, board and batten, channel, tongue and groove, and wavy edge bevel.
In its natural, unfinished, and unstained state, cedar shake is a textured grainy wood with a nice aroma. Stained, it retains the attractive perceptible grain, but can offer a wider variety of exterior home design options. And, of course, if you prefer to paint your cedar siding, that’s an option as well with almost unlimited color choices.
Re-squared and Re-butted (R&R) Shingles
Grade ‘’A’’ and grade ‘’B’’ shingles are available as R&R. They are distinguished by their perfectly straight butt, square shape with two fully parallel sides. As a result, R&R shingles ensure enhanced beauty and substantial savings in installation time and costs. High grade, premium shingles are cut to be as close to perfectly square as possible.
R&R shingles are kiln-dried and may be specified as having a “sanded” or “un-sanded” face. The length of the sanded face is greater than the maximum exposure which means the entire reveal of the shingle can be sanded. This helps a lot if your going for a smooth, painted finish.
These shingles are identical to No. 1 and No. 2 grades and must be specified as No. 1 or No. 2, or Grade “A” or “B”, and are machined to have parallel edges and smooth butt-ends. They are used for sidewall applications not roofs.
Kiln-Dried (KD) Shingles
A kiln dehumidifies the cedar shingles, drawing out moisture from deep inside the wood, creating a dryer shake with superior stability. When selected for the kiln, shingles are prepared to ensure uniform dryness (approx. 12% humidity) and to prevent cracking.
Weathering Stained Shingles
Weathering Stain is applied at the factory creating a grayish, ready-to-install shingle that doesn’t need weather staining later. Pre-stained shingles accelerate the wood’s natural weathering process while ensuring an attractive, uniform, low-maintenance finish. Each cedar shingle is individually dipped in the stain for maximum protection. The stain’s unique water-repellent formula provides improved wood stability and resistance to cracking, blistering and peeling.
Weathering stain applied at the factory coats the entire cedar shake rather than just the outside reveal resulting in a much better coating since both sides including all 4 edges are completely coated.
Color Stained Shingles
Cedar shingles can been factory-stained with a 100% acrylic coating. Available in an unlimited range of solid or semi-transparent colors, these shingles are suitable for virtually all climates. Factory coating ensures full coverage of all surfaces of the shingle, producing an attractive, even finish, and minimizing shrinking and cupping.
Factory-stained shingles offer the best of both worlds: the natural beauty of real wood and the durability of a pre-stained product.
Color stained shingles have the same level of protection as weather stained however a pigment is added to the stain.
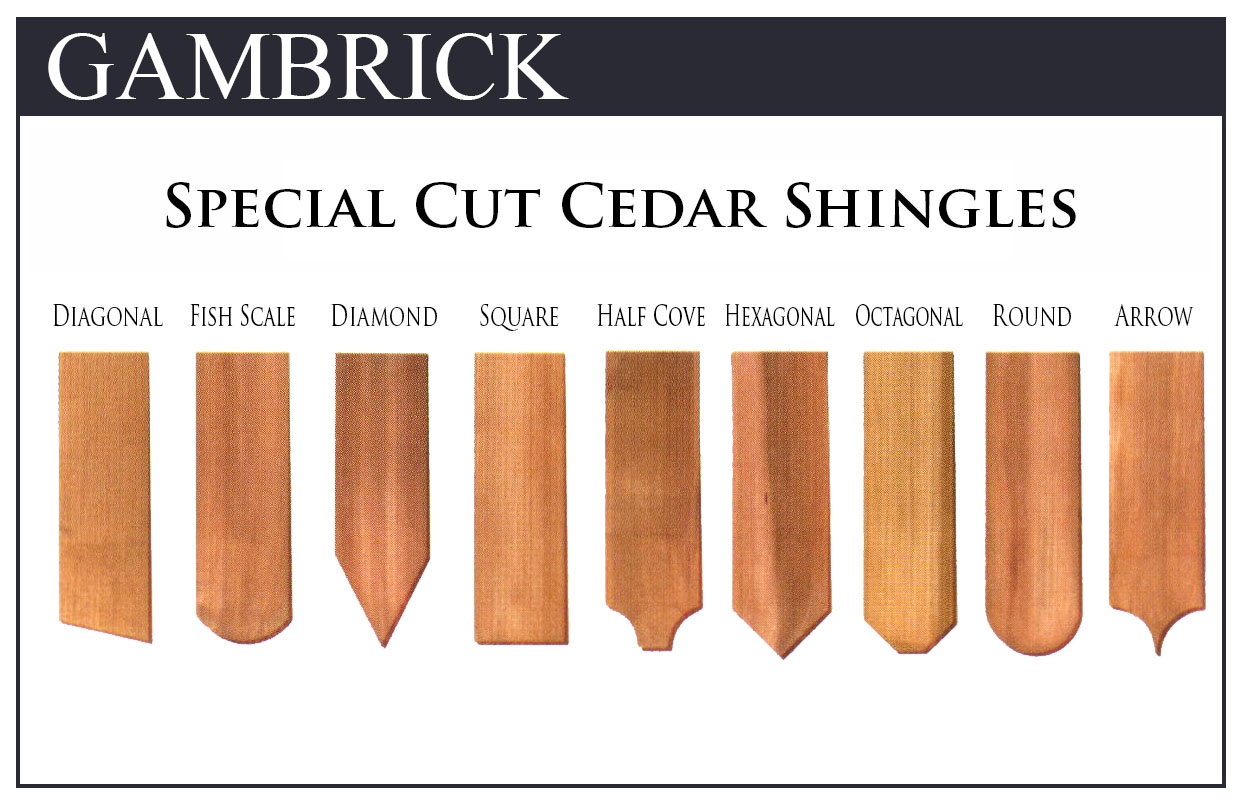
Special Cut Cedar Shingles
Would you like to add a distinctive touch to your project? You’ll find that special-cut shingles, either kiln-dried (natural) or factory-stained, are ideal. Special cut cedar shingles are available in many architectural shapes to fit almost any siding design.
Cedar Siding Grades
Cedar siding is available in clear and knotty grades which is generally numbered or lettered from grade A or #1 to grade D or #4. Clear cedar is considered premium cedar, so it’s more expensive and a good choice for siding on a custom home. Knotty cedar is more affordable and produces a more rustic look. Different grades and price points are another advantage of cedar shingles.
No. 1 grade shingles must be 100% clear, 100% heartwood, and 100% vertical grain. Shingles that contain only heart-wood are more resistant to decay than are shingles that contain sapwood. Lower grades may contain sapwood, flat grain, and knots. Vertical-grained shingles are less likely to warp and split than are flat-grained shingles. Narrow shingles are less likely than wide shingles, and thicker less likely than thinner shingles to warp and split. Thickness of shingles is described as the number of shingles per the total of butt-end thickness of a specific length of shingle.
No.1 graded shingles are consistently high quality and vary very little from shingle to shingle. This consistency is what makes them such a great siding product. You can be sure when siding an entire house that the very last shingle you install will match the first shingle you nailed on.
Because of the variety of price points cedar shingles are an affordable option for almost any home. This variety is another great benefit of using cedar shingles.
What is the difference between shingle grades?
No.1 Grade
The best grade, taken from the tree’s heartwood, 100% edge grain with no defects. Used for roofing and sidewalls.
- Cut square
- 100% clear, (no knots or defects)
- No Sapwood
- This is the highest grade possible
- Available pre-stained and colored
No. 2 Grade
Flat grain with limited sapwood allowed. Limited knots and defects allowed above the clear portion (the part that will show once it’s installed). Often used for re-roofing, walls and as a starter course.
- Mixed grain
- Knots and defects allowed in the top 1/3rd of the shingle
- Small quantity of sapwood is allowed
- A long lasting and very functional shingle when used correctly
No. 3 Grade
Can include sapwood and flat grain. Limited knots and defects allowed above the clear portion. Used for the under course in a two course application, garden sheds, walls of outbuildings, gazebos, etc.
- Mixed grain
- Knots and defects allowed in the top 2/3rds of the shingle
- Small quantity of sapwood allowed
- A budget minded grade that can be used very successfully – great value
No. 4 Grade
A utility grade for under coursing of double coursed sidewalls only. Not a roofing material and not to be used as a starter course for roofs.
- Unlimited knots and defects throughout the face of the shingle
- Can be used as a very rustic wall covering where water proofing is not important.
- Generally used as an under course material
- Also used as “builder shims”
A Word About Grain
Edge grain: Cut perpendicular to the tree rings. The highest quality and most stable cut, least likely to split or distort over time.
Flat grain: Cut parallel to the tree’s growth rings. Less stable than edge grain, but better than slash grain.
Slash grain: Cut perpendicular to the tree rings, but at an angle. Most likely to split or distort over time.
Clear Heart Cedar: The best of the best cedar shows few growth characteristics such as knots and receives this grade
A Clear Cedar: It provides a very fine appearance with slight growth characteristics such as visible rings but no large knots.
B through D Clear Cedar: As you’d expect, the appearance gets less clear from B to C to D, and the siding gets more affordable. Not all manufacturers use B, C and D grades.
Rustic Cedar: Milled with a rustic saw texture, this grade is typically used on the sides of homes rather than on the front exterior wall. It’s an affordable grade of cedar siding.
Select Knotty Cedar: This siding contains knots that are “sound and tight,” in the words of one producer. Your options are rough or dressed edges and smooth or saw-textured face.
Quality Knotty Cedar: This is a slightly inferior grade with more knots, open knots and/or streaks. It offers the most rustic look.
There are several grading agencies in the US and Canada, and each uses slightly different terminology.
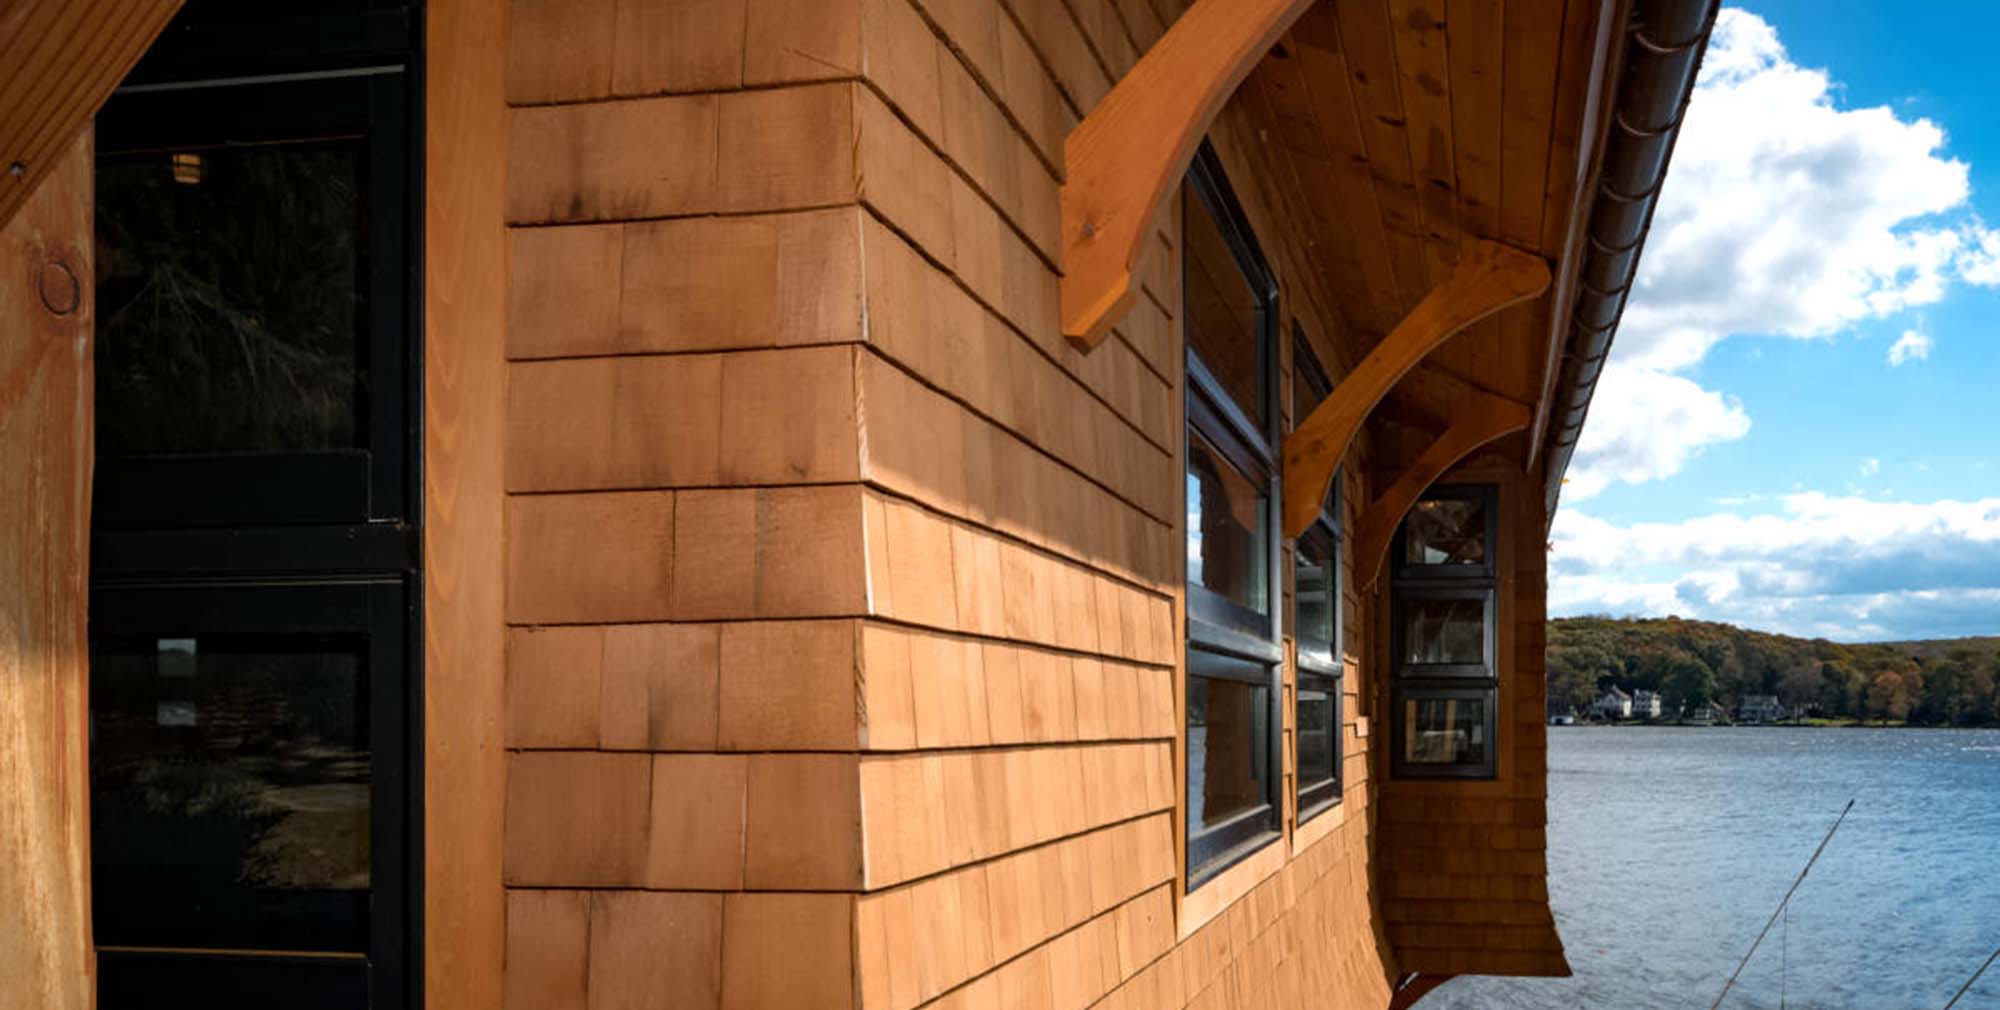
Cedar Shingle Corners
Another huge benefit of cedar shingle siding is the corners. Shingles can be individually cut and installed for a super clean look. This is typically called a “weaved” corner.
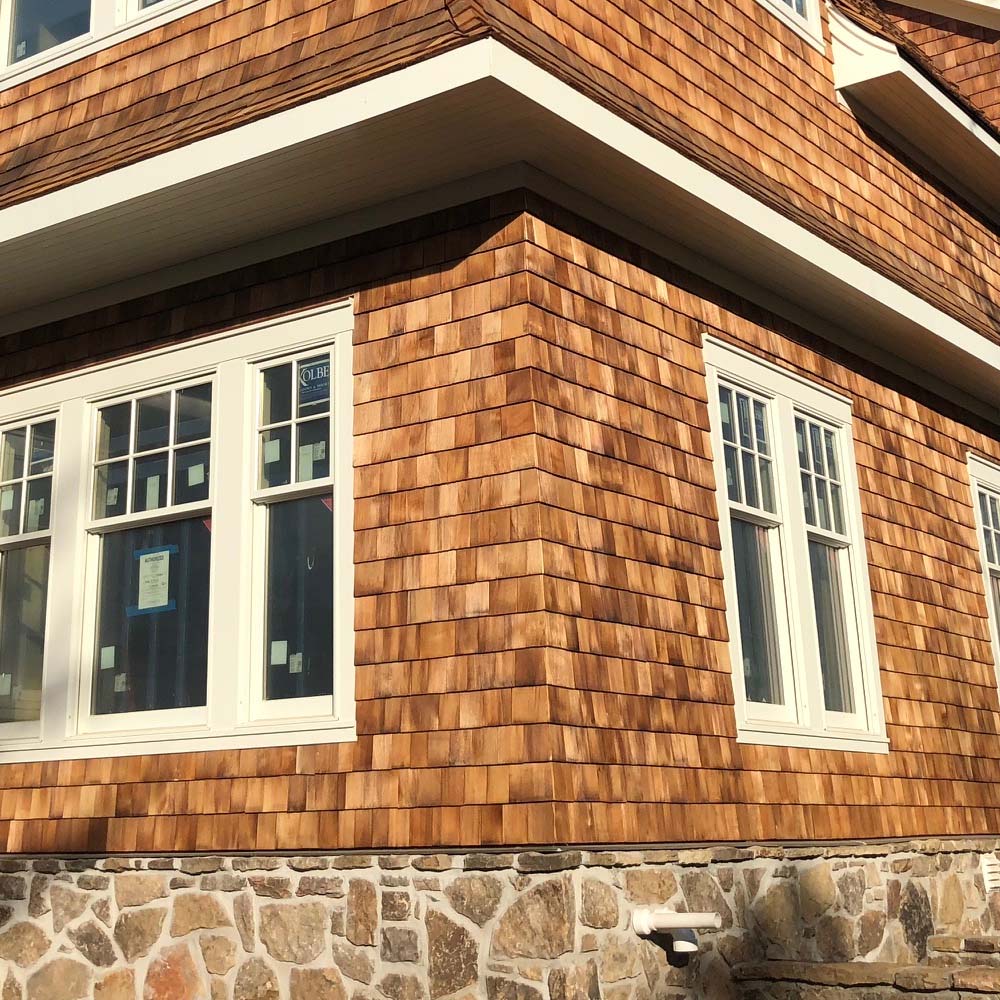
Pre-fabricated corners are available if you don’t want to weave them yourself. They have the same look of as a corner you weaved on site.
Trimmed corners made out of wood or Azek can also be made on site or bought pre-assembled.
Green Roofing: Cedar Shingle Benefits
Imagine a Green Roofing Material that not only doesn’t harm or deplete the planet, but actually helps it to function in a healthier way. Being a green building material is one of the biggest benefits of cedar shingles. Here are some facts you might not know about Cedar Shake and Green Roofing:
Sustainable
Today’s western Red Cedar Shakes and Shingles come from carefully managed forests in the Pacific Northwest, both in the U.S. and British Columbia, where thinning, strategically-planned harvesting and replanting are all part of the cycle of sustainability. 95% of each tree harvested is turned into useful products, while the remaining 5%, mostly branches, biodegrades into compost helpful for future trees.
Biodegradable
When a cedar roof is ready to be replaced, it’s completely recyclable. Often, it’s chipped into useful garden mulch. Other Green Roofing products, such as asphalt shingles, have been building up in landfills for decades. According to California’s Integrated Waste Management Board, over 11 million tons of used asphalt shingles end up in U.S. landfills each year. With rainfall, these shingles can leak harmful chemicals into local water supplies.
Oxygen-producing
The trees in a managed cedar forest are not just growing. They’re hard at work absorbing carbon dioxide and producing much-needed oxygen as a part of their normal cycle of photosynthesis. And young trees, such as those in well-managed commercial forests, do this much more efficiently than older trees. We challenge you to find another Green Roofing Material that’s hard at work benefiting the earth even before it’s used!
Fights climate change
As part of the photosynthesis process, trees take in carbon dioxide–the leading greenhouse gas. The C02 taken in is, in essence, captured and stored inside the wood, cleaning the air we breathe and keeping excess carbon dioxide out of the atmosphere. The American Forest and Paper Association notes that “each year managed forests sequester – or store – quantities of CO2 that are equivalent to the greenhouse gas emissions produced by approximately 173 million automobiles.”
Naturally energy-saving
Because of the “loose” structure of Green Roofing cedar cells, cedar is a great natural insulator. A natural cedar roof will help insulate your attic, keeping your home cooler in summer and warmer in winter. Consequently, you’ll need less energy (produced by less-clean processes) to heat and cool your home. And you’ll save money in the process.
Helps reduce your carbon footprint
In addition to producing oxygen, removing carbon dioxide from the air and reducing your need for fossil fuel-based heating, the process of making cedar trees into shingles is labor-intensive but not energy-intensive for Green Roofing. Other roofing choices require large expenditures of fossil fuels both to initially obtain them (mining of metals, extraction of oil) and to transform them from raw materials to final products. With cedar shingles, you greatly reduce the total energy expended to produce your roofing. It’s a Green Roofing choice you can feel good about.
Cedar Shake Maintenance
One of the biggest benefits of cedar shingles is low maintenance. Natural antibacterial and anti-fungal properties are two of the benefits of cedar shingles. This allows you to leave the wood untreated without worry of excess warping, rotting or cracking. It does weather somewhat changing to a grayish color over time. Offering a much more rugged look than stained cedar siding offers. However if you like this more natural look, cedar shingles are virtually maintenance free.
For those who prefer the stained look, cedar requires more maintenance. To preserve the style you’ll need to re-stain or re-paint as needed. The frequency depends on the type of cedar and the type of stain or paint used. This is something to consider when choosing cedar shingles vs. vinyl siding.
Cedar Siding Maintenance Breakdown
Genuine cedar siding is going to require washing and staining/sealing or painting on a regular basis. Your climate and landscape will determine how often these processes are required.
Power-wash every two to four years:
Dusty climates will require more frequent washing. A mild, non-phosphate detergent is recommended. Wet climates can produce mildew which must be cleaned away with a mild bleach solution using oxygen bleach.
Stain or paint as needed, usually every three to five years:
Walls that are exposed to sun and high heat will fade faster than those that are not, so they’ll require more frequent staining or painting to protect the wood from damage.
Iron stains caused by iron fasteners:
Cedar should be installed with hot-dipped galvanized, aluminum or stainless steel nails to avoid staining. However, if iron nails were used and rust stains occur, the staining can be removed with a commercial cleaner prior to staining or painting the siding.
Chalking:
This is a sign that the paint on the cedar is failing. The siding should be washed and repainted.
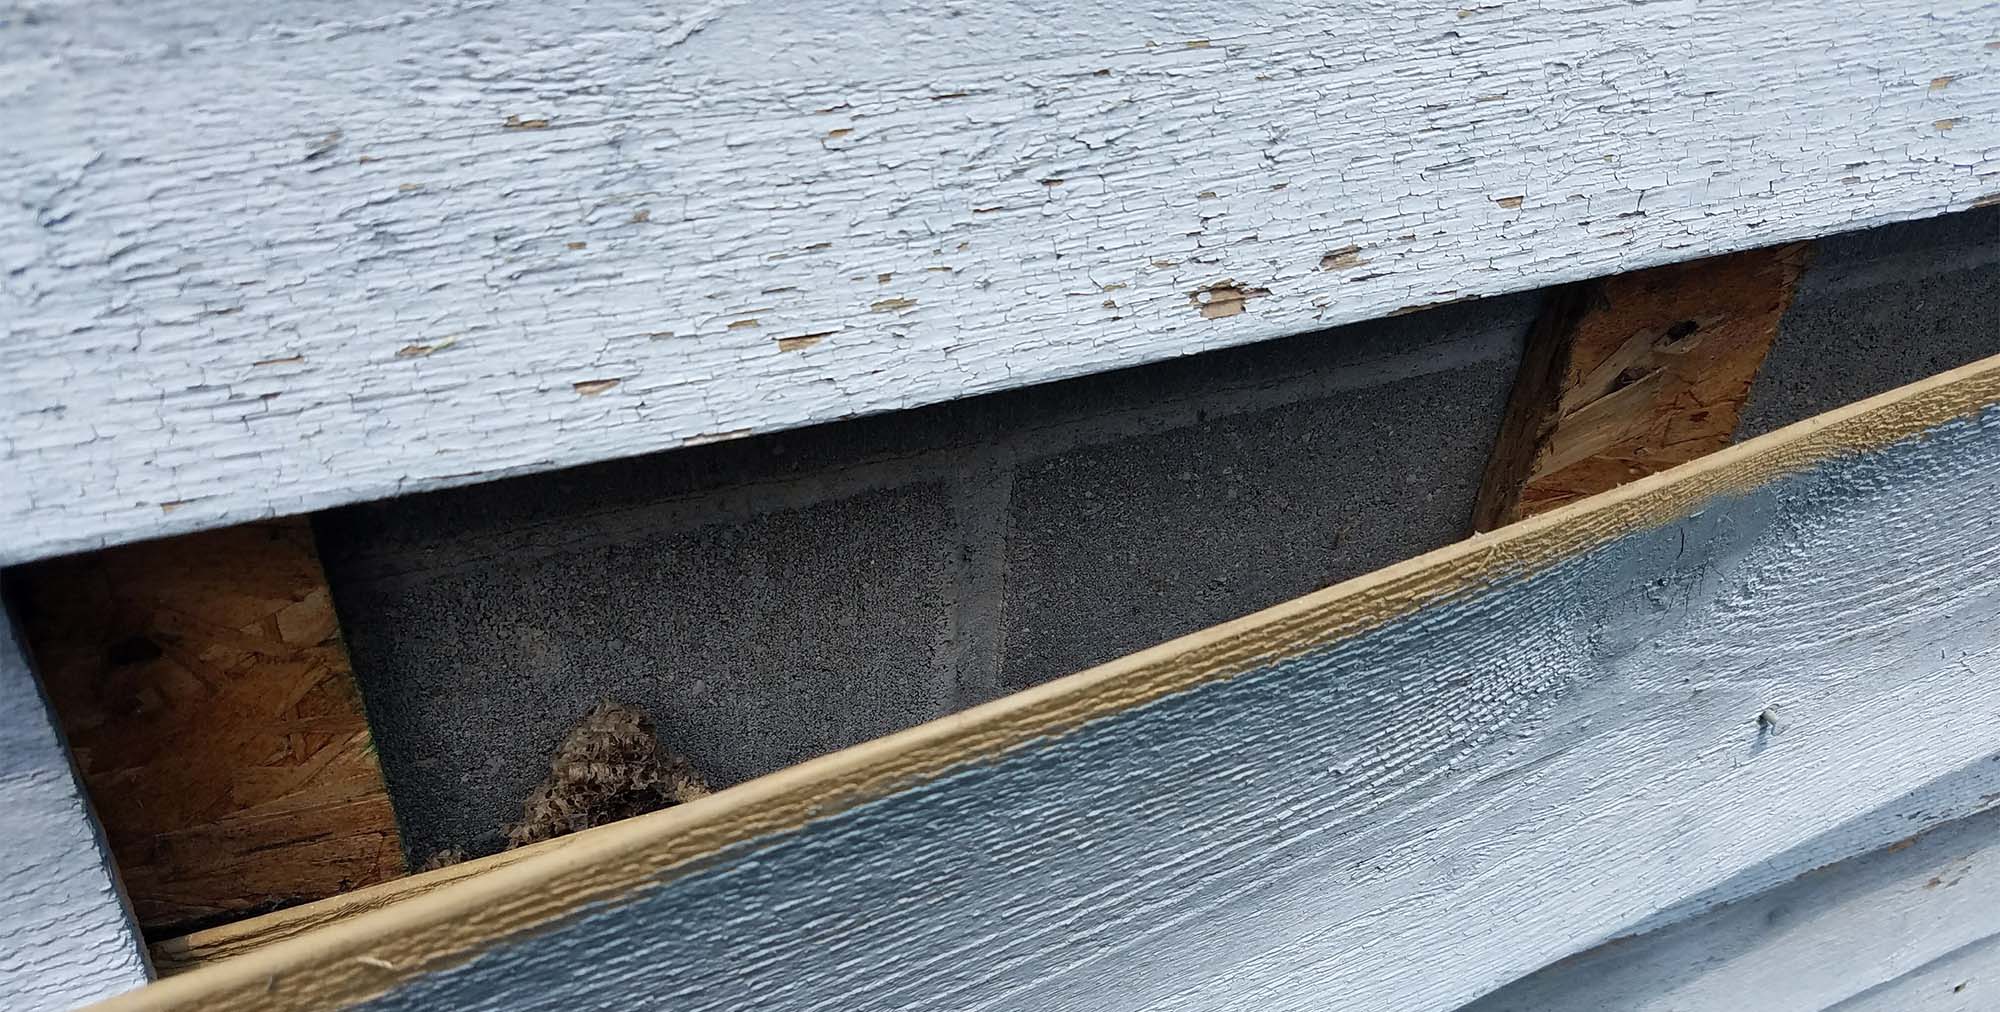
Peeling, flaking or blistering:
These issues are signs that the wood behind the paint is wet, causing the paint to lose adhesion. It is recommended that you contact a siding professional or home inspector to locate the source of the moisture so that it can be remedied before the siding is scraped and stained or painted.
Note: For natural beauty, cedar wood can’t be beat, but it comes at a price. There are so many benefits of cedar shingles but ongoing maintenance of your siding is essential to keep it looking its best. If caring and cleaning for cedar siding sounds like a drag then take a closer look at vinyl siding or fiber cement which both offer the look of wood with much less aftercare.
Cedar Siding Is Easy To Repair
One of the many benefits of cedar shingle is how easy it is to repair. No matter how well you install your siding or how good the product is, damage can still happen. This is true no matter what type of siding you choose. Potential siding damage is an even greater problem here in NJ as we deal with hurricanes and Nor’easter storms on a yearly basis. While damage of some kind is always possible, it’s nice to know repairs won’t be a big or expensive problem.
All types of siding can be repaired but sometimes repairs are hard to hide unless you redo the entire wall. That’s not the case with cedar. Typically all you’ll see with repaired cedar is the color difference, which isn’t a problem with stained or painted cedar.
If your repairing natural cedar you will see the color difference at first but in time the color will eventually match.
Simply demo the damaged siding, repair the sub layers as needed which may include as little as some Tyvek or as much as a rainscreen layer or new sheathing. Once the sub layer is repaired install cedar shingles as new until the job is completed.
With stained or painted cedar you can use factory finished shingles or finish them yourself before or after install. Cedar shingles are truly one of the most versatile siding products on the market.

Multiple Ways To Install Cedar Shake Siding
One of the many benefits of cedar shingle siding is it’s versatility which includes multiple installation methods. Let’s briefly talk about a few of those methods.
Variable Spacing
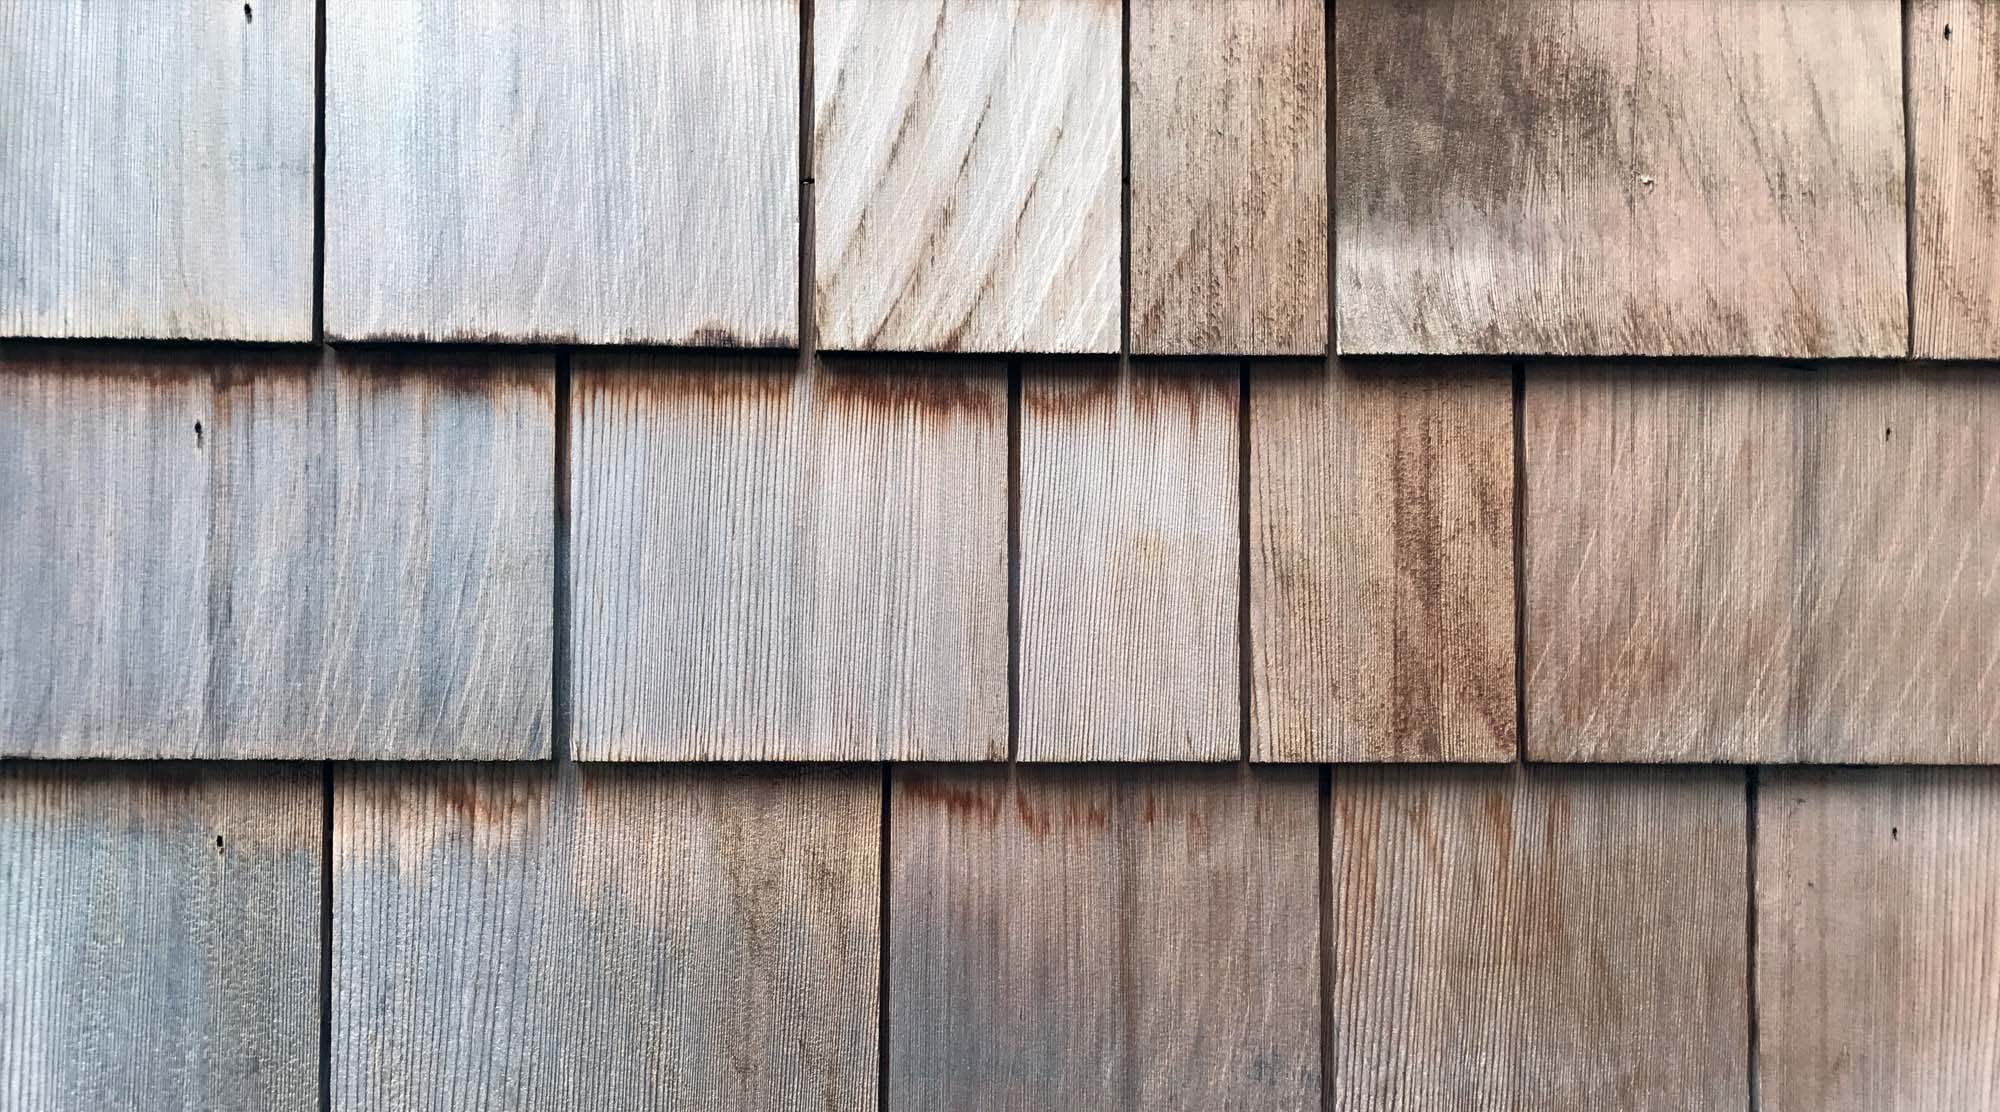
The spacing between shingles depends on the grain angle, width of the shingle, and moisture content at the time of installation. Always refer to the manufacturers installation specs prior to install. Even if your an experienced installer it’s still a good idea to check with the manufacturer because moisture content in the cedar can vary.
Setting your spacing isn’t all about looks. If you space them too close and the shakes expand they’ll buckle which looks terrible. If you space them far apart and they shrink the gap will look huge and again, the shakes will look terrible.
Completely kiln dried cedar shingles look best because they can be butted up close to one another. Since they’re totally dried at the factory of any internal moisture you don’t have to worry about buckling.
Proper spacing is an important factor to consider prior to installation.
Above is an example of properly spaced cedar shingles. The spacing is cosmetically a little far apart for my taste but the install was done right. This home won’t have problems with buckling shingles or excessively wide gaps. The gaps vary a little here and there which gives the cedar a nicer, more natural appearance.
Rain Screen Siding Installation
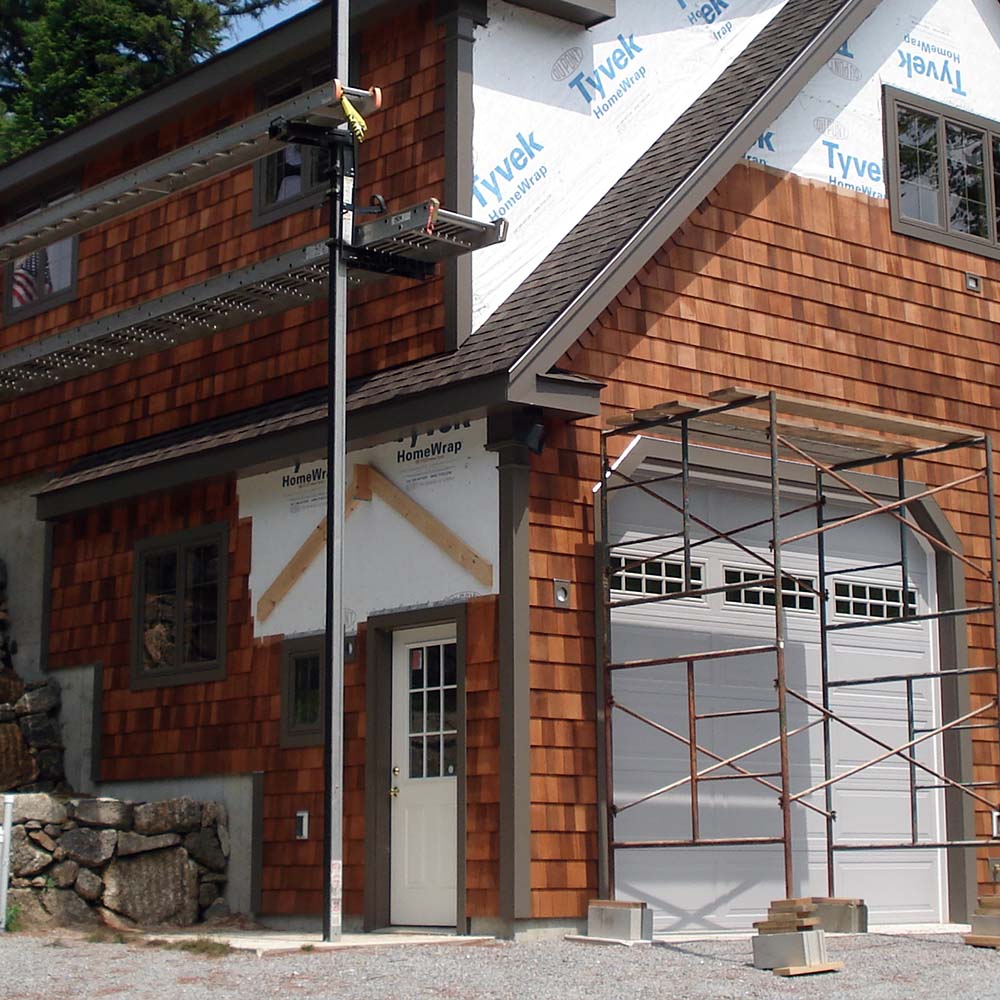
The rain screen method of cedar siding installation creates a secondary barrier and drainage plane for water. Sheathing is placed over the studs and a water-resistant barrier, typically Tyvek or other house warp, is stapled to the sheathing. This is the most common form of home building.
Furring strips, generally 1×2 pine, are nailed over the Tyvek into each wall stud. The thickness of the furring strips must be big enough to avoid having the siding nails penetrate the house wrap. Horizontal boards are then nailed to the furring strips, spaced to coincide with the exposed shake or shingle length. The horizontal strips create an open space between the backside of the shingles and the sheathing. The space is vented at the top and bottom and must be screened to keep out insects. The top may be vented directly into the soffit to connect the air-flow with the attic ventilation. Flashing must be installed around doors and windows just as with any siding system.
As you can see above the cedar is nailed to the horizontal strips. The horizontal strips are screwed into the vertical strips. The vertical strips are the only things screwed into the wall joists. The methods greatly reduces the penetrations through the Tyvek layer.
The rain screen methods essentially creates a channel behind the shingles where water can drain out keeping both the cedar and wall much dryer.
Pro Tip: Although the shakes and shingles are not nailed directly to the sheathing in rain-screen applications, we recommend using plywood sheathing. Plywood sheathing transmits moisture better than OSB; therefore, if it gets wet, it dries more quickly.
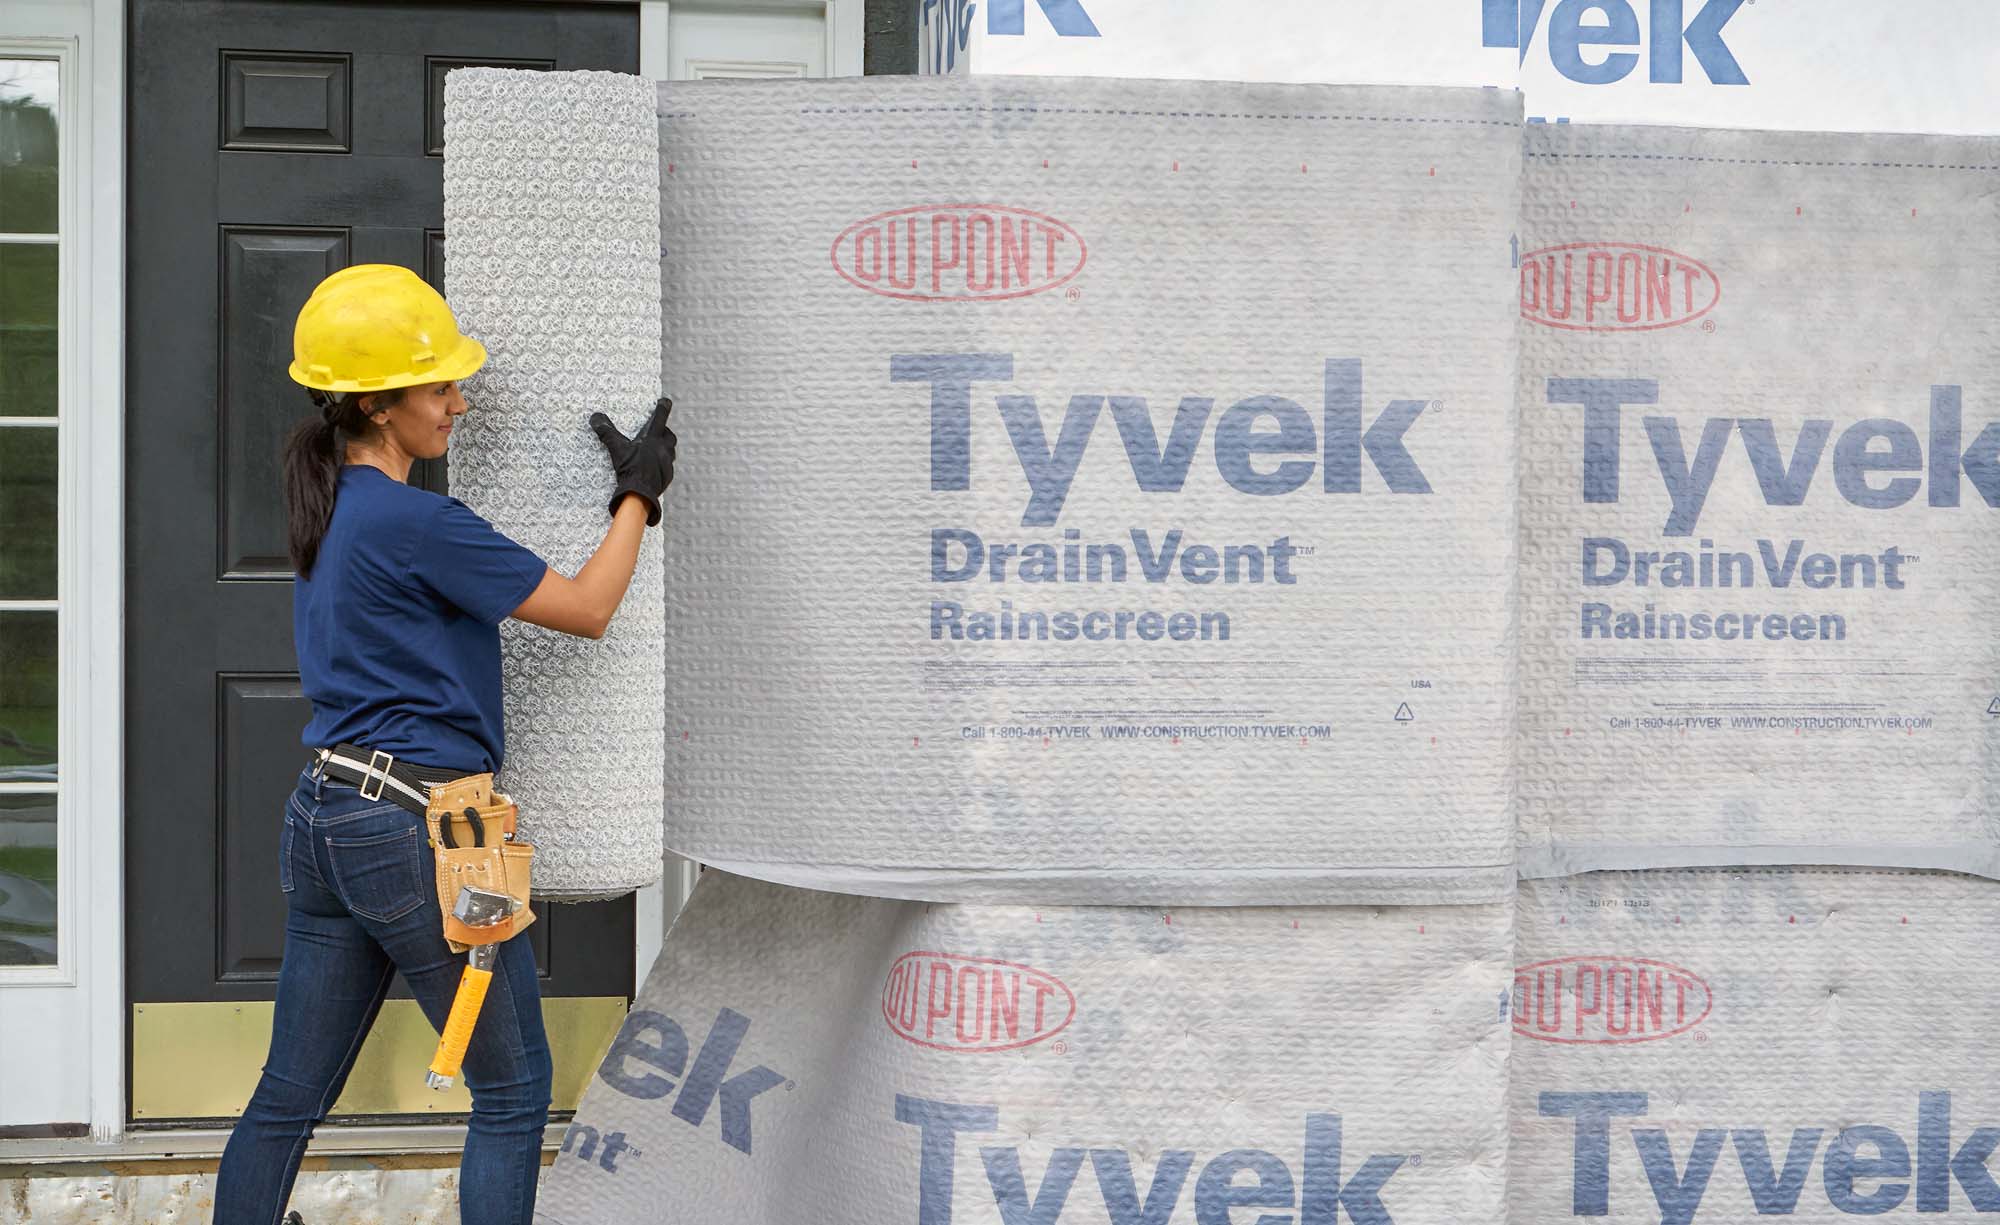
Rain Screen Membrane
Company’s such as Tyvek manufacture Rainscreen membrane’s that are installed in between the Tyvek house wrap layer and cedar shingles. Tyvek Drainvent is designed to prevent moisture damage in exterior walls by allowing water trapped behind the shingles to drain.
Tyvek DrainVent comes with a 10-year limited product warranty, which can include labor if installed properly with other DuPont Tyvek wrap and flashing products. It also features a Class “A” fire rating per ASTM E84.
There are quite a few similar rain screen membrane systems on the market which install and work in the same way.
Direct Cedar Shingle Installation
For a direct installation, shingles are nailed directly over properly installed and flashed house wrap as approved by local codes. Shingles may be single-coursed, stagger-coursed,or double coursed. The double course application permits the use of a lower grade for the first layer and a higher quality second, top layer of shingle.
This method is the most commonly used in construction for installing all types of siding.
First you install the sheathing layer nail into the wall studs. The the Tyvek layer is nailed to the sheathing along with any flashing required. Next, any starter strips or exterior trim is installed. Finally the siding is nailed directly to the studs or sheathing through the Tyvek layer.
The wood strips you see above that are nailed to the siding are guide strips. These are what keeps each new course of cedar shingle straight and level with the correct reveal. Once you set the guide you simply line up shingles and nail them in.
From our experience as a custom home builder, 90% or more of new siding installations are nailed directly to the wall like shown above. While not technically as good as a rain screen installation, a direct install is cheaper and works great.
A rain screen installation is technically better because if water gets behind the shingles it will run off instead of being absorbed into the shingles or sheathing, however, if you’ve done your work properly, water should never get behind the shingles in the first place.
Multiple installation methods is another example of the great benefits of cedar shingles.
Application Over Existing Siding Or Masonry
Shakes and shingles may be used to cover existing wood beveled siding, masonry, or stucco. Shingles can be applied directly over existing siding, however, a rain screen is necessary when installed over brick, stucco, or foam sheathing. Do not install siding directly onto masonry.
If applied directly over existing siding make sure to use nails long enough to penetrate to the underlying sheathing.
Make sure to pad out existing trim work to allow for the new siding thickness. Re-trimming windows and doors or re-wrapping with aluminum will be necessary.
Cedar Shingles Come In A Variety Of Finishes
Another fantastic benefit of cedar shingles is the wide variety of finishes available direct from the factory.
A wide selection of oil and latex based finishes are available for shingles. Oil-based finishes are solvent borne while latex-based are water borne. However, in recent years the solvent borne finishes often have co-solvents in them to make them water soluble. As with any other wood product, shingles can be finished with water repellent preservatives (clear and lightly pigmented), semitransparent stains, solid-color stains, or paints.
Water Repellent Preservatives
Water repellent preservative (WRP) is a generic term that describes a clear penetrating finish that traditionally was formulated with about 10% to 20% oil or alkyd binder, 1% to 3% wax or similar water repellent, a preservative, and an organic solvent such as mineral spirits or turpentine. The finish does not contain a pigment and gives a natural wood appearance. The low wax content in some of the traditional WRP formulations made it possible to use them as a treatment for wood prior to painting. They were also an excellent treatment for shingles prior to installation.
Bundles of shingles could be dipped. Most of the finish was absorbed into the end grain at the butt end of the shingle, giving years of protection by minimizing end grain water penetration. To meet stringent air quality requirements, solvent borne types of WRPs are no longer available. They’ve been largely replaced by waterborne formulations and formulations having low organic solvent content.
Many of these formulations are intended for use on wood decks, but they can also be used on siding. These finishes are often tinted with a small amount of pigments, UV stabilizers, and other additives to improve their service life. They repel water a bit and inhibit mold and algae growth on the lateral surfaces.
A Natural water repellent is another one of the benefits of cedar shingles.
Semitransparent Cedar Stains
Semitransparent penetrating oil based stains are similar to WRPs, but have considerably more pigment added in. As with WRPs, new semitransparent finishes are low in organic solvents and may not penetrate wood as well as traditional semitransparent stains however they are much better for the environment. Semitransparent stain provides a color without entirely concealing the natural color, grain, and texture of the wood. Stains with the highest pigment concentration will provide the longest service life and provide the most protection from weathering.
Some companies formulate stains especially for use on wood cedar shingles. Stains that contain a water repellent and wood preservative will provide additional protection and further extend the service life of your siding.
Oil based stains penetrate the wood and generally give longer service life than latex semitransparent stains do. Oil based formulations degrade by slow erosion of the pigment from the surface and it is seldom necessary to do extensive surface preparation prior to refinishing.
Latex semitransparent stains do not penetrate the wood but form a thin film on the surface. They tend to fail by flaking and may require extensive surface preparation prior to refinishing. Paint manufacturers and resin suppliers are making progress to overcome these limitations.
Solid Color Stains
Solid color stains (also called solid body stains or opaque stains) are available in oil and latex based formulations. They give more protection against UV radiation than semi-transparent stains. However, solid color stains do not penetrate wood, rather, they form a film just as paints do. To get good service life, they need to have sufficient film thickness to avoid failing by flaking and peeling.
Prior to application, it’s best to prime shingles with a stain blocking primer prior to applying a solid color stain. These stains perform best on textured or rough surfaces, but should not be used on a weathered surface.
Cedar Shingle Paint
Paint is a film forming opaque finish and provides the best surface protection against water and weathering. Good quality stain blocking primers applied to all surfaces prior to installation offer the best protection against future damage and is highly recommended whenever you paint anything wood.
Top coat with good quality acrylic latex based paint. As with solid color stains, paints will not adhere well to weathered surfaces.
Caution: The use of transparent film forming finishes such as urethane varnish, lacquer, conventional varnish, and shellac are not recommended for exterior use. Ultraviolet (UV) radiation can penetrate these types of finishes and degrade the wood. The finish will become brittle, then develop cracks and peel from the surface. Paint manufacturers continue to improve the UV radiation resistance of their products.
Cedar Siding FAQ
How long does a cedar shingle siding last?
One of the benefits of cedar shingles are their durability. When cedar shingles are installed correctly and maintained, they can last over 50 years.
Does white cedar last as long as red cedar?
The service life of properly installed and maintained shingles, both red and white, should be roughly the same. Both shingle types have natural resistance against decay and insects. Red cedar has a stronger reddish color; its tannin could potentially bleed and cause staining on the surface of the shingle. White cedar does not bleed as much, so it’s easier to stain. White cedar is used more for siding while red is used more for roofing.
What’s the difference between “regular” and “re-squared and re-butted” (R&R) cedar shingles?
Re-squared and re-butted (R&R) cedar shingles are top-of-the-line shingles. They are perfectly straight, with parallel sides. Cut one by one to improve the finish and natural beauty, which also reduces by up to 50% on installation time. This is also known as a grade A or #1 cedar shingle.
One of the benefits of cedar shingles is the grading system. With cedar, you can buy a cheaper #4 or #3 grade shingle as a starter or under course, a #1 premium grade for the siding and a #2 grade for the roof.
Is it possible to preserve the cedar’s natural color?
Left untouched, cedar shingles will change color and gradually become grey. This change of wood color comes from Mother Nature (sun, rain, wind…). It’s possible to preserve the cedar’s natural color with a clear oil coating, which will slow down weathering of wood by a few years or by staining or painting the siding.
If I decide to let my shingles weather naturally, how can I maintain a uniform color on the cedar shingles on all four sides of my house?
The color of naturally weathered shingles varies according to its exposure to moisture, sunlight and salt water. Those with greater exposure will loose their natural color faster than the ones that are less exposed. The only way to get a more uniform color for a longer period of time is to apply a Weathering Stain or Bleaching Oil. This is an option you can get directly form our facility.
If you decide to go this route by yourself, be sure to clean the shingles thoroughly first using a mix of water and laundry soap. Don’t forget that this treatment option will help maintain some sort of color uniformity to your shingles but there will always be some variations caused by mother nature. This is part of the beauty of real cedar shingles, they’re a natural material not a man made one, so without paint, the color will never be a 100% match between every shingle.
Should I stain my shingles or should I leave them natural?
The answer to this question is a personal choice depending on the look you want for your house. Naturally weathered cedar shingles will slowly become silver gray, a process that will only take a few years. For people who want to have a uniform color, staining or painting, is the perfect option.
If you want a stained or painted shingle then the factory finished shingles are best as the entire shingle is dipped and coated at the factory, not just the part you see like when you apply stain on the wall.
Multiple finish options is a great benefits of cedar shingles
If I want to stain my shingles, what is the best option?
As mentioned above the easiest and longest lasting option is to let the manufacturer stain the shingles for you. Buying factory stained shingles is the best decision you can make, because you will obtain maximum protection on all faces, a uniform stain thickness and a warranty on the finish.
Re-applications will be needed periodically but the first stain is always best if done at the factory.
What kind of stain is used on factory stained shingles?
Generally a latex coating that is 100% acrylic and water repellent is used. Check with the shingle manufacturer for complete details.
If I buy factory stained shingles, do I have to do some touch ups?
Yes, apply touch up on all cuts, planed edges, and on all exposed bare wood. Anywhere you see wood should be stained before install. You can buy stain with your shingle order to ensure the colors perfectly match.
Do cedar shingles need to be treated?
No, one of the biggest benefits of cedar shingles are the natural preservatives of cedar which protect shingles from the ravages of fungi, humidity, and insects. They’re often left completely natural and turn silver gray with time.
How do I clean my cedar shingles?
Another benefit of cedar shingles is how easy they are to clean. Simply wash down with a hose and a mild detergent. Avoid high powered pressure washing.
Cedar Siding | A Beautiful Siding Choice
Natural beauty is one of the main benefits of cedar shingles. Whether you stain your cedar or allow it to weather naturally it helps to do some basic maintenance as you would with any wood product. Like any other exterior you’ll get extra years out of your siding if you annually power wash. Your best bet is hiring a professional cleaning company because they’ll know how much pressure to use and what cleaning solution is safe. If you do it yourself make sure to use a mild solvent or soap and water with some bleach. And keep the pressure low.
Cedar siding is a terrific building material that is long lasting and attractive. One of the benefits of Cedar siding is it’s a classic look that’ll never go out of style. Its low density makes it a terrific insulator and the variety of color possibilities is almost endless. There is really no benefit to use composite shake impressions other than to avoid the semi annual maintenance.
Benefits of Cedar Shingles:
- It’s the genuine article with beautiful, warm aesthetics, feel and homey aroma that create an ambience unmatched by vinyl and fiber cement despite their good points
- A variety of siding styles and wood grains give you the opportunity to customize the look of your home
- Cedar takes stain very well, revealing rich texture
- Resists swelling, cupping and cracking better than pine and fir, though when not cared for, can have more issues than vinyl or fiber cement
- While there is more upkeep required, the long-term durability of cedar siding is excellent, especially when compared with vinyl siding
- Cedar shingles and shakes are available to complement cedar siding and produce a beautifully blended exterior for your home
- Installation and repair of cedar siding is relatively easy
- Total job cost for cedar siding is competitive with fiber cement and premium vinyl siding, though more costly than standard vinyl siding
- Renewable, reclaimable and biodegradable (if it hasn’t been treated with a preservative)
Disadvantages of Cedar Siding:
- Must be regularly stained and sealed, at significant expense, to protect it from moisture penetration and possible rot, mold and warping
- Cedar not properly cared for will become susceptible to insects, an issue not found with fiber cement and vinyl
- Woodpeckers occasionally bore into cedar siding
- Being wood, it has a lower fire rating than fiber cement
- If chemically treated for fire resistance, it becomes less environmentally friendly than untreated wood
Summary: The Benefits Of Cedar Shingles
Cedar shingles are a terrific siding material for your home’s exterior. It’s one of the most durable softwoods you can buy which makes it great for outdoor use. Cedar shingles offer excellent noise abatement, insulation, and are naturally water and rot resistant which means longevity. And it’s a beautiful look that ages really well. Take a ride along the Northeastern coast and you’ll find lots of homes sided with real cedar shingles. There are so many benefits of cedar shingles. Durability, weather and rot resistance, looks, versatility and longevity. But they’re are some drawbacks like cost and maintenance. Cedar shingles are one of the most expensive siding choices and require maintenance. Especially if you paint or stain them. However, if you do paint or stain, the color choices for your home are endless.
Cedar shake is far and away the most popular type of real wood siding for good reason. It’s been used for centuries and that’s not going to change. If you want a classic look for your house that also has great performance then definitely consider cedar.
If you have any questions or comments about cedar Email any time.