Can You Plaster Over Brick?
You can plaster onto brick, which is called “wet plastering”, to create a smooth and flat surface. To do it, apply wet plaster directly over clean brick with a mix ratio of 1:1 sand/cement for the base coat and 6:1:1 cement/sand/lime for the finish. Plaster is a masonry material made by mixing cement, lime, and sand with water in the proper ratios. Because brick and plaster are both masonry materials, they stick together fairly easily. However, it’s essential to thoroughly clean the brick before applying plaster, or it won’t adhere.
Once the bricks are cleaned of all dirt, debris, dust, oils, and grime, apply plaster directly over them without using a bonding agent. However, dampening the brick a little with clean water can help the plaster stick.
Mixing the correct type of plaster is very important when plastering brick. You can buy plaster premixed in bags or make your own. The ratio I use when plastering onto brick is 1 part cement / 4 part sand for the base coat. Then I mix 1 part cement / 6 part cement / 1 part lime mix for the top coat.
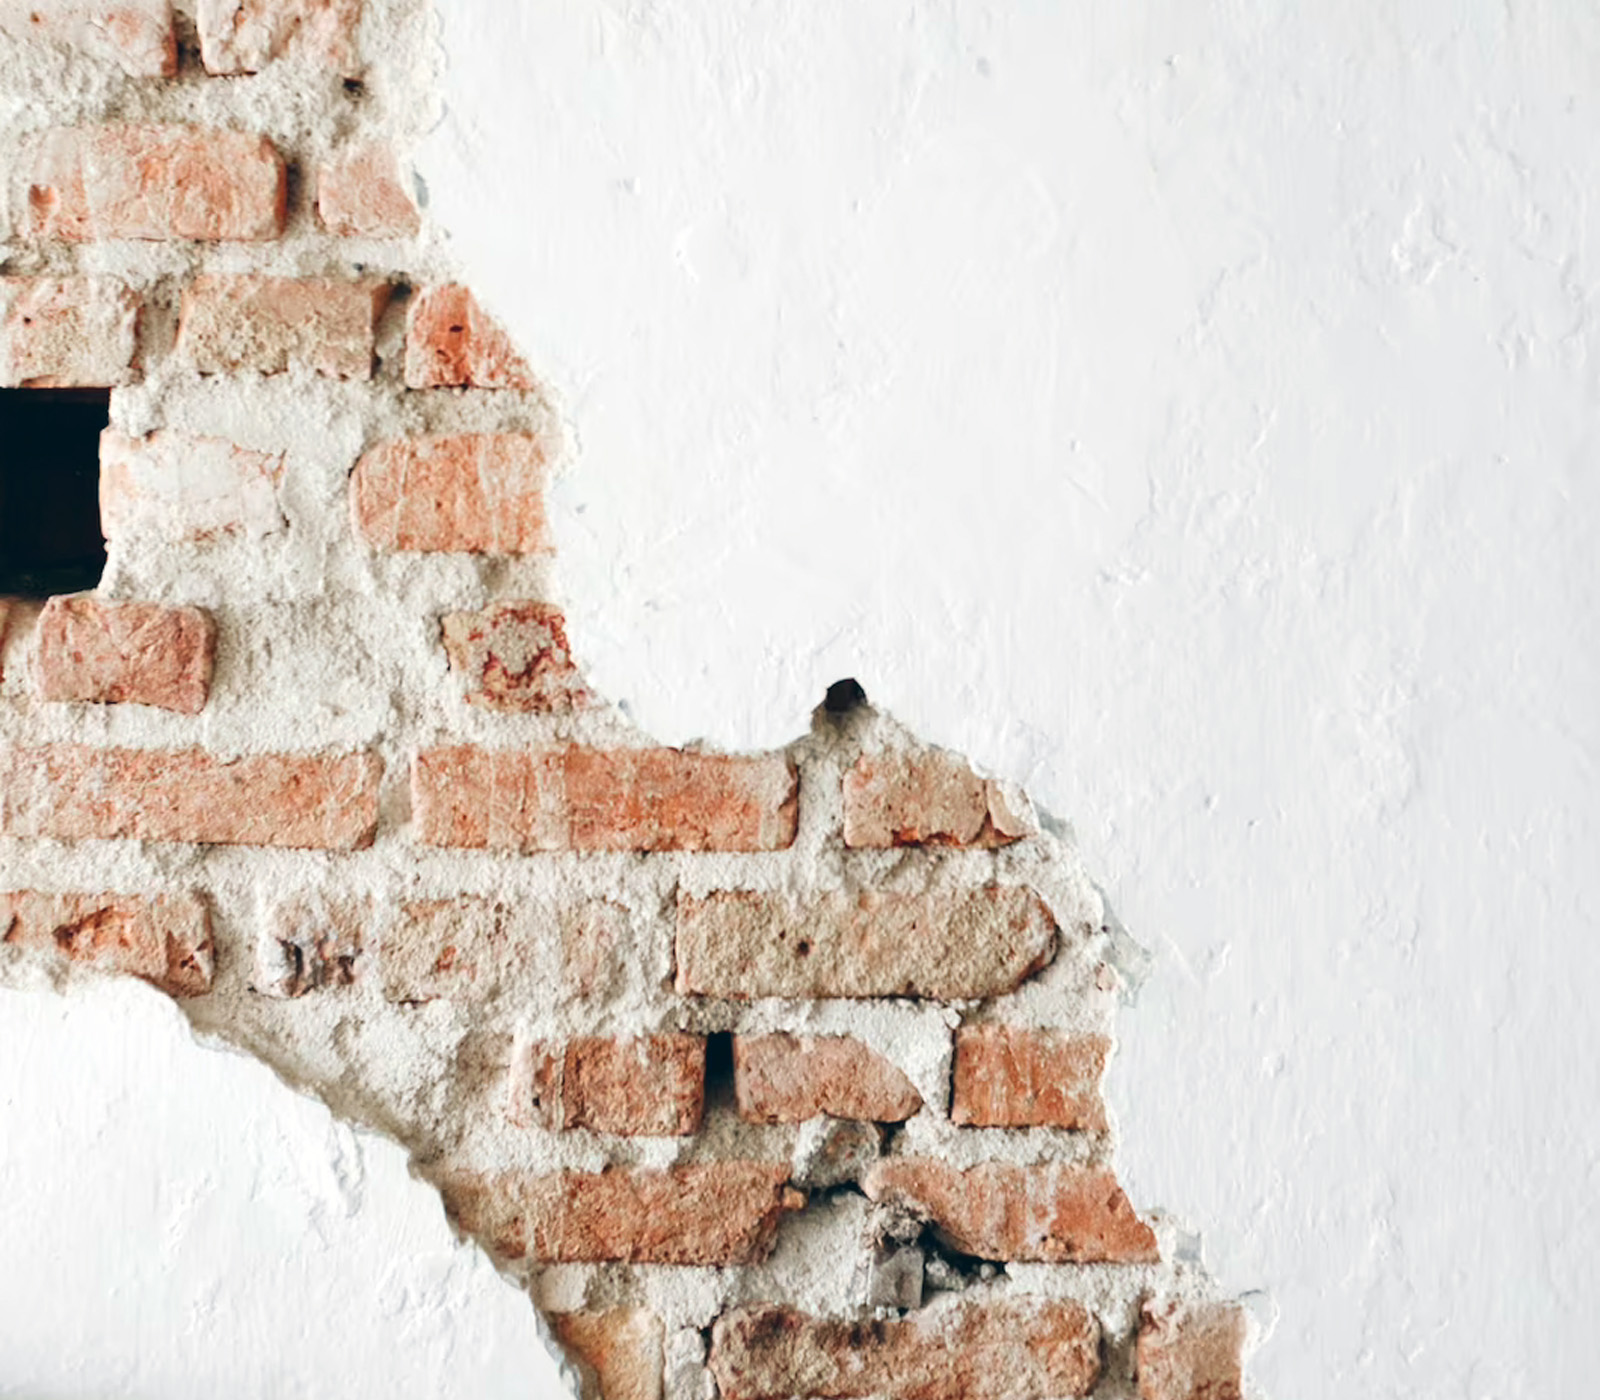
Plaster over brick has been used for centuries as a way to create a smooth, flat, and even wall surface. Historically, the exterior and interior walls of homes and buildings were built out of red brick and mortar. Plaster was then applied to both the exterior and interior surfaces as a finish material. The walls could then be painted, left their natural color, or pigment could be added to the plaster to add color. This is where white Venetian plaster comes from.
I’ve been plastering over brick for over 20 years, and in this article, I’m going to give you a step-by-step guide filled with tips, and some tricks, on how to do it like a pro.
How To Plaster Onto A Brick Wall
Plastering a brick wall is fairly easy once you get the hang of it. Both the plaster and brick are masonry materials, so they stick together without needing a bonding agent. However, you must clean the bricks before applying plaster to them, or it won’t adhere properly.
Once the bricks are cleaned, you must use the correct type of plaster. Buy it premixed in bags or make your own.
Plastering over brick requires at least two coats. You can use the same plaster mix for both coats, but I like to mix different batches for the first and second coats.
- For the base coat of plaster, I use a 1 part cement / 1 part sand mix.
- For the finish coat, I use 1 part cement / 6 parts sand / 1 part lime mix.
Additives can also be included in the mix to give the plaster special properties like more flexibility, strength, adherence, and color. The basic mix ratios I’ve outlined are usually good enough without needing additives, so I rarely use them, however, I do like using color. Adding some white pigment to the mixture will give you white Venetian plaster.
If you clean the bricks properly and mix the correct type of plaster, the job is fairly easy to complete.
In the next section, I’ll detail all the tools and ingredients you’ll need to do the job right.
Step 1. Clean The Wall
Brick is a porous material that collects dirt, oil, grime, debris, etc. This is a problem because any substance on the brick will prevent the plaster from adhering properly. Normally plaster will stick to brick without requiring a binding agent, but that’s only if the bricks are clean. So the first step in plastering a brick wall is thoroughly cleaning them.
- Use a paintbrush, broom, or masonry brush to remove any excess dust and dirt from the wall.
- Wipe the bricks or scrub them with a damp rag and some soapy water.
- Remove any loose areas of mortar.
- You can use a pressure washer to clean bricks if you’re plastering outside.
One of my favorite ways to clean bricks is to wipe them with a damp rag. Dust, pollen, and other substances will stick to the wet rag. I use a white rag because I can determine how dirty the bricks are based on how dark the rag gets when I wipe them.
Don’t use paper towels or cheap rags because they’ll get torn up by the bricks.
This is a very important step, so don’t rush. It’s very important for the bricks to be clean so that the plaster adheres properly. If you plaster over dirty brick, the bond could be weak, which may result in cracks, chips, flaking or entire sections of plaster falling off the wall.
Step 2. Mix Plaster
Mixing plaster may seem simple and straightforward at first, but it’s crucial to do it correctly. Plaster is made by mixing sand, cement, lime, and water in the correct ratios. If you use too much of any ingredient, the plaster could be too dry or too wet to apply, brittle, not sticky enough, and/or prone to cracking.
- For the base coat of plaster, I use a 1 part cement / 1 part sand mix.
- For the finish coat, I use 1 part cement / 6 parts cement / 1 part lime mix.
Water is an essential ingredient when mixing plaster because it affects its consistency. What you want is a consistency like creamy peanut butter that’s firm but not stiff. It should be wet and spreadable but not watery or dry.
- Don’t use too much water when mixing plaster. It will be brittle, weak, prone to cracks, and won’t adhere well to the bricks. If you add too much water by accident, add in more sand, lime, and cement.
- Don’t use too little water when mixing plaster. It will be too dry to spread onto the wall, won’t adhere and bond to the bricks, and will be prone to cracking, flaking, and falling off the wall. If your mix is too dry, add water slowly to the plaster as you mix.
I always add the water to my bucket first and then add my dry plaster mix to avoid getting dry powder around the sides and bottom edges of the bucket.
Mix until the plaster is firm and creamy but not lumpy.
Wet plaster should be able to hold its shape while being spreadable with the hawk and trowel.
Wear your dust mask, safety glasses, and protective gloves because cement can be caustic.
Step 3. Dampen The Wall
Brick is a porous material that absorbs water like a sponge. When you apply wet plaster to the brick, it sucks out the water, which can dry the plaster faster than it should. This can weaken the plaster, lower its adhesion to the wall and make it prone to cracks, flaking, and chipping.
- By dampening the brick before applying plaster, you prevent it from absorbing the plaster’s moisture. This allows it to dry in the correct amount of time.
- Not all brick benefits from getting wet before applying plaster. It works best on porous bricks because they absorb more water. If you have extremely dense brick, sometimes called firehouse brick, you normally don’t have to wet them before plastering.
- Wetting the brick before plastering helps in hot and dry climates, which can suck even more posture out of the material.
- Don’t soak the brick in water; just a small amount of water from a spray bottle or wet sponge will do. If water drips down the brick face, you applied too much.
Spraying a small amount of water on the bricks before plastering can help the plaster adhere better to the brick and slows down the curing process. This creates better adhesion and stronger plaster. But it’s not always necessary.
If your brick is extremely dense, the temperature is cool, and/or the air is humid, you don’t need to dampen the brick.
Step 4. Scoop The Plaster
In order to plaster a wall, you need to get scoop plaster out of the bucket and onto your hawk. It’s a little awkward at first, but once you get the hang of it it’s easy to do.
- Tilt the hawk and dip a corner into the plaster mix
- Use your trowel to push a mound of plaster onto the hawk
- Tilt the hawk back up until it’s level using your trowel to keep the plaster in place
You should hold your hawk above waist high with your arm bent at around a 90° angle. Try to keep the hawk level until you’re ready to apply it to the wall. If you mixed the plaster properly, it shouldn’t slide around the hawk or run off. It should stick and stay in place even if you tilt the hawk.
Step 5. Apply Plaster To The Brick
Apply plaster to the wall by tilting the hawk forward and touching the wall with its front edge. Use the trowel to push plaster off the hawk and onto the wall in a circular sweeping motion. As you apply plaster to the wall, apply some light to medium pressure to push plaster into the cracks and brick joints.
I use a 1 part cement / 4 parts cement mix for my base coat.
- If the trowel is in your right hand, sweep up and to the right.
- If the trowel is in your left hand, sweep up and to the left.
Work from the top of the wall to the bottom. You can work from right to left or left to right depending on what hand you hold the trowel in.
- Spread plaster across the wall in thin and even coats.
- Use the brick joints as a vertical and horizontal guide.
- Start spreading at the bottom of a brick and spread plaster upwards about two to three bricks per swipe.
- Continue applying plaster in small areas until you’ve covered the entire wall.
- Apply plaster in a 30 minute time-frame or less.
- Stop applying plaster after 30 minutes even if the entire wall isn’t done.
- If you apply plaster after 30 minutes, it may get too hard to smooth properly.
- Plaster may dry faster or slower depending on the temperature and humidity.
- Don’t worry if the plaster isn’t perfectly smooth on the first coat. You’ll be applying at least one more coat of plaster and smoothing the wall several times later.
Remember, the first base coat doesn’t have to be perfect. You’ll be applying at least one more coat of plaster and smoothing the wall later.
Step 6. Screed The Wall
Once the plaster is touch dry, drag your screed along the wall applying light pressure. As you pull the screed across the wall, excess plaster will be scraped off. This will change the texture of the wall which shows you where the low and uneven areas are. Keep screeding lightly to create as flat and level a surface as you can.
- The purpose of screeding is to level the wall by removing excess plaster.
- Start screeding on one side of the wall and work your way across.
- Keep your straight edge level and flat against the wall as you scrape.
- Work from left to right or right to left until you’ve scraped the entire wall.
- Do another pass working in the opposite direction.
- Once you’re done screeding horizontally, run it vertically from top to bottom or bottom to top.
- When you’re done screeding the wall, you’ll be able to see low and uneven areas of plaster.
Screeding the wall with a long straight edge levels the surface, makes it smoother and showcases low and uneven areas.
Take your time when screeding as this is a very important step. Try to keep the screed level and don’t apply too much pressure. Lightly pull it along the wall scraping excess plaster as you work. But don’t press hard or you’ll gauge the plaster and remove too much.
The purpose of screeding is to remove excess plaster and high spots, not to scrape out good plaster.
Step 7. Check The Plaster For Level
Hold a long level vertically against the wall to make sure the plaster is flat and plumb. If there’s too much plaster and the wall isn’t flat, rub the spirit level into the plaster until it’s level. This will create depth marks telling you how much excess plaster needs to be removed to create a level surface. Repeat this step at 6″ intervals along the wall making more depth marks.
Take your screed and run it along the wall, removing excess plaster between depth marks.
Once you’ve removed all the excess plaster and your depth marks are met, check the wall for level again. Make more marks if necessary and remove more plaster until the wall is level.
- It’s important to level the base coat before you apply a finish coat.
- The longer your level the easier it is to level the plaster. I recommend using at least a 6 foot framing level.
- If your brick wall isn’t perfectly level, you can correct it with plaster.
Creating a level plaster base coat will make the finished product flat and even. This makes applying the finish coat much easier to do because you’re not correctly an imperfect base coat.
Step 8. Apply A Finish Coat
Once the base coat is applied, leveled with a screed and completely dry, apply a thin finish coat. I like to use a different plaster mix for my final coat made with 1 part cement / 6 parts cement / 1 part lime mix. By adding some lime to the mixture, the finish coat dries harder, becomes more durable and looks smoother.
However, if you want to use the same 1 part cement / 4 parts cement mix for both the base and finish coat it’s fine.
The finish coat is applied in the same way as the base coat. Once the plaster is mixed, scoop it onto your hawk with the trowel and start applying it to the wall.
Once the finish coat dries, it’s screeded level and flat just like the base coat. However because you’ve already leveled the base coat, the finish coat should be very smooth and level without much need for patches or troweling.
Once you’re done screeding, you’ll likely see small areas that are low or uneven. These can be fixed in the next step.
Step 9. Cut The Corners
Run the side of your trowel along the four edges of the wall. Use a square edge trowel, not a pointed or rounded edge trowel. This ensures the plaster is square to the wall, ceiling and floor with a sharp edge.
Use the trowel to scrape and clean up any plaster that falls onto the floor.
Clean plaster that touches non-plastered connecting walls with a damp sponge.
Step 10. Finish Work
Once the finish coat is applied and leveled, you’ll likely see some small areas that are low, bumpy or uneven. To fix them, apply small amounts of plaster to the wall and smooth it with finish trowels.
When your done leveling all the small imperfections, let the wall rest until it’s touch dry. Then start troweling the entire wall using a variety of finish trowels.
- Use a variety of small finish trowels to smooth the plaster.
- Do your best to get the plaster as smooth and even as possible.
- Press your trowels lightly against the wall and move them in a circular motion.
- Troweling the finish coat makes it smoother and more level but the purpose is not the remove plaster.
- Trowel lightly.
Troweling the wall creates a smoother and more polished surface. It gets rid of bumps, low spots, unevenness and imperfections. This is also the time where you’d create texture on the surface if that’s the look you desire.
Step 11. Smooth The Plaster
As a finishing touch, use a damp sponge to get the plaster as smooth as possible.This creates the smoothest possible finish ad the most level surface. A damp sponge will even out bumps, lumps, low spots and even the tiniest imperfections.
- Dunk a mason or tile sponge into a bucket of clean water and squeeze it until the sponge is damp, not wet.
- Lightly press the sponge against the plaster.
- Move your hand in a circular motion as you pull the sponge along the wall.
- Use very light pressure.
- Don’t sponge finish plaster until it’s touch dry.
- Keep the sponge damp and clean.
A sponge finish removes tiny imperfections and grit from the wall. Keep the sponge damp as you work and change the water as it gets dirty.
If you’re doing repair work, use a damp sponge to feather the edges of new work into the old. This makes patches and repair over old brick appear seamless.
Tips And Tricks
Plastering a brick wall is a fairly simple and easy job once you get the hang of it. I’ve been doing it for over 20 years and can tell you the most important things to remember are cleaning the bricks and mixing the plaster correctly. Once you do those two things correctly, the plasterwork is forgiving. If you make a mistake, you can always screed some excess plaster off or add more coats if you need to.
Here are some tips to make the job a bit easier:
- Use drop cloths.
- Wear safety gear. Cement is caustic and can irritate your skin and eyes.
- If you’re working indoors, keep the area cool to prevent the plaster from drying too fast.
- Dampen the brick if it’s porous to prevent them from sucking water out of the plaster.
- The base coat doesn’t have to be perfect, so don’t spend too much time working on it.
- Use as long a screed and level as you can.
- Short levels and screeds make the wall harder to level.
- Add water to the mixing bucket first, the dry plaster. This prevents dry spots and clumping.
- It’s critical to get the consistency of your plaster right.
- Don’t over or under-water your plaster mix.
- Use light pressure. It’s easy to scrape too much plaster off the wall.
- Use more sand in your plaster mix if the bricks are old and brittle.
- Use more cement for the exterior or new brick.
- Add some lime to the mix for finish coats.
- Color can be added to the mixture instead of using paint or stain.
If this is your first time plastering brick, work slowly in small areas at first until you get the hang of it. You can then blend more areas of plaster into your first coats.
How Thick Should Plaster Over Brick Be?
Plastering over a brick wall requires at least two coats of plaster, a base coat, and a finish coat. You may also need small bits of plaster applied very thin to smooth out low and uneven spots, bumps, lumps, and tiny imperfections. Each coat of plaster requires a different thickness. The base coat should be about 1/2-inch, the finish coat around 5/8 to 1/4-inch and small patches 1/4-inch thick or less.
- Your base coat of plaster should be about 1/2-inch thick.
- The finish coat should be between 5/8 to 1/4-inch thick.
- Small patchwork should be 1/4-inch thick or less.
The first coat of plaster is the thickest because it’s what binds to the brick and keeps the wall strong. Bricks are uneven surfaces, so you need more plaster to create a flat and even surface. If the base coat is too thin, your plaster will be weak and prone to cracking.
The finish coat is thinner because it’s adhering to a thick base coat that’s more level than the brick. The finish coat levels out bumps, lumps, low spots, and imperfections in the base coat.
Small patchwork is the thinnest because the finish coat should already be very level and smooth. These coats are just to iron out small imperfections.
Tools
Plastering over brick requires special tools to spread the material onto the walls and smooth it out. You also need tools to mix the plaster and clean the brick before applying the plaster. And some basic safety equipment and tarps are always a good idea.
With the right tools, plastering brick walls is a fairly simple job. And luckily, the tools you need are very basic, cheap, and available at a Home Depot or masonry supply.
Plastering brick walls is done in 3 basic steps, cleaning the bricks, mixing the plaster, applying the plaster, and smoothing the wall. I’ve separated the tools based on what you’ll need to perform each step of the job.
Prepping The Brick
- Broom
- Medium bristle bush
- Hard bristle paint brush
Mixing The Plaster
- Two 5-gallon buckets or larger to mix in and deliver water
- Power drill with a mixing bit
- An extension cord isn’t always necessary, but I always bring one just in case
- Scoop
Spreading The Plaster
- Hawk trowel
Smoothing The Plaster
- Hand trowels of various sizes
- Screed
- Spirit level
- Masons sponge
Safety Equipment
- Rubber gloves
- Safety glasses
- Dust mask
Materials
You can’t plaster a brick wall without the right type of plaster. Mixing your plaster is an essential step if you want it to adhere properly and last for years without cracking, chipping, or flaking off the wall. The plaster must be smooth enough to spread easily but sticky enough to adhere to the brick.
If you mix the wrong consistency or use the incorrect mix, the plaster could be weak, brittle, prone to cracks, or hard to apply.
There are two basic ways to approach plaster for brick walls: it premixed in bags or make your own. For small jobs, a premixed bag can be a good option. But it’s generally best to mix your own plaster so you have more control over the material.
Here are the ingredients you need to plaster a brick wall:
- Cement
- Lime
- Sand
- Water
- Additives
- Premixed plaster
Basic plaster is made by mixing together sand and cement together with water in a specific ratio. This is called the plaster or mortar mix ratio. Lime and other additives can also be used to alter the mix.
The basic plaster mix ratio I use for base coats is 1:4, which is 1 part cement / 4 parts sand. For finish coats, I use 1:6:1, which is 1 part cement / 6 parts sand / 1 part lime.
Altering the ingredient ratios affects the properties of the plaster.
How To Mix Plaster For Brick
When you’re plastering over brick, it’s very important to mix the correct type of plaster. For small jobs and repair work, I like to use a premixed plaster that comes in bags because it’s easier. But for larger jobs, I mix my own.
Basic plaster is made from sand and cement mixed with water. The amount of sand to cement you use is called the mix ratio. The basic plaster mix I use for plastering over brick is 1 part cement / 4 parts sand. This is a really good all-around base coat.
For the finish coat, I use a mix ratio is 1 part cement / 6 parts sand / 1 part lime. Adding lime makes the plaster harder, more durable, and smoother.
- A 1:4 plaster mix ratio is a great all-around base coat.
- I then use 1 par cement / 6 parts sand / 1 part lime mix for my finish coat. Adding lime makes the plaster harder, more durable, and smoother.
- You can alter the mix ratio depending on where you’re working and the type of brick your plastering.
- Plaster and mortar mix ratios are listed as cement/sand/lime. For example, 1:5:1 is 1 part cement / 5 parts sand / 1 part lime.
Plaster ingredients are measured in equal parts. But how you gather your ingredients is up to you. Some masons use buckets, some shovels, and some scoops. As long as each ingredient is measured equally, it doesn’t matter. However, it’s best to use small measurements for small jobs and large measurements for larger projects.
For example, I use a small 1/2 gallon bucket to measure ingredients on small interior plaster jobs. But I use 5-gallon buckets for larger projects where I’m plastering huge areas of brick.
Plaster Mix Ratios
Below is a chart of all the plaster mix ratios I use and when I use them.
| Mix | Ingredient Ratio | Application |
| 1:3 |
1 part cement / 3 parts sand | A stronger mortar that’s good for repair work & filling in cracks. It’s not great for large areas because it’s harder to spread that 1:4. |
| 1:4 | 1 part cement / 4 parts sand | This is the best all-around plaster mix ratio. Great for interior and exterior work. Can be used for base and finish coats. |
| 1:5 | 1 part cement / 5 parts sand | For interior work only. Weaker than 1:4, which makes it better for aging brick and mortar. Softer than 1:4, which gives it an aged feel. |
| 1:6 | 1 part cement / 6 parts sand | For interior work only. Weaker than 1:5, which makes it ideal for older, brittle brick and mortar. It has an aged appearance and feels which makes it great for historical work and restorations. |
| 1:6:1 | 1 part cement / 6 parts sand / 1 part lime | A great all-around interior/exterior finish coat mix. Adding plaster to the base 1:4 makes it denser, harder, and smoother. |
Basic plaster mixes for brick contain just sand and cement. This is for exterior and interior brick and both base and finish coats. But adding some lime to your finish coat makes it denser, more durable, and smoother.
Summary: Can You Plaster Over Brick?
You can plaster over brick, called “wet plastering,” to create a smooth, flat surface with additional soundproofing. To do it, apply wet plaster directly onto clean brick with a mix ratio of 1:1 sand/cement for the base coat and 6:1:1 cement/sand/lime for the finish. Plaster is a masonry material made by mixing cement, lime, and sand with water in the proper ratios.
Because brick and plaster are both masonry materials, they stick together fairly easily. However, it’s essential to thoroughly clean the brick before applying plaster, or it won’t adhere properly.
You can plaster onto brick to create a smooth surface.
- Clean the brick thoroughly
- Apply wet plaster directly onto clean brick with a mix ratio of 1:1 sand/cement for the base coat.
- Apply a 1:6:1 cement/sand/lime wet mix for the finish coat.
- Smooth coats with a long screed once they’ve dried for 15-30 minutes.
- Use finish trowels to smooth the surface and create sharp edges.
- Wipe the walls with a damp sponge to create a super smooth surface.
Because brick and plaster are both masonry materials, they stick together fairly easily. However, it’s essential to thoroughly clean the brick before applying plaster, or it won’t adhere.
Once the bricks are clean, apply wet plaster directly onto them without using a bonding agent.
You can buy plaster premixed in bags or make your own. The ratio I use when plastering onto brick is 1 part cement / 4 part sand for the base coat. Then I mix 1 part cement / 6 part sand / 1 part lime mix for the top coat.
If you have any questions or comments about how to plaster onto brick, email any time.